Hello everybody, thought it about time I posted a thread now that progress is being made.

It's pretty long but I wanted to explain everything fully and demonstrate how I've actually thought about things and not just bought any shiny bits I could see at any given time.
As it's a long post I have copied it from another forum so you'll have to excuse me if there are references to things that aren't here.
Right then.
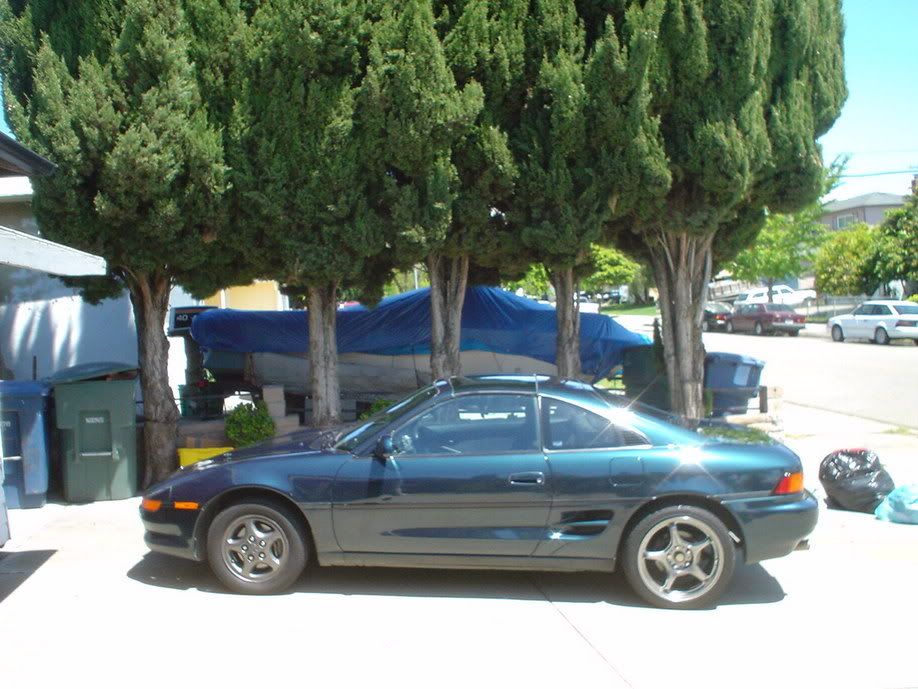
This time about two years ago I was staring at pictures of MR2s yearning to have another one day
(this was after I sold my first one, but before I bought the non-runner on the first page).
I was still in my mind trying to sort out my ideal spec list, and perusing pictures on forums trying to settle on what I liked the best.
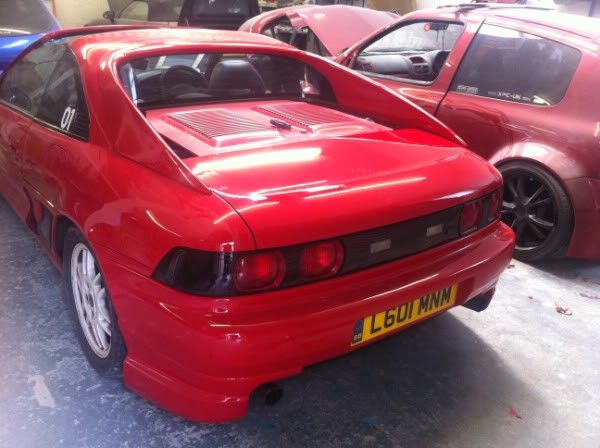
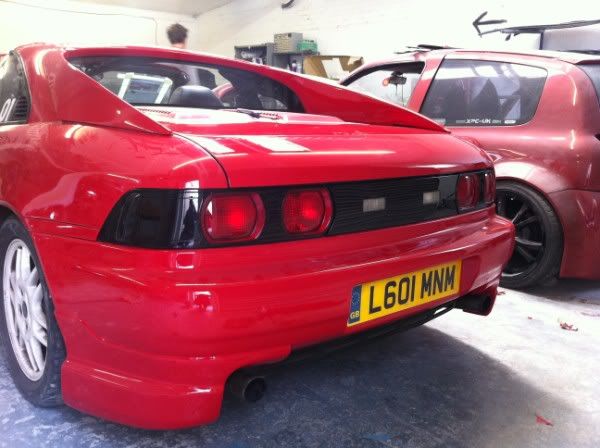
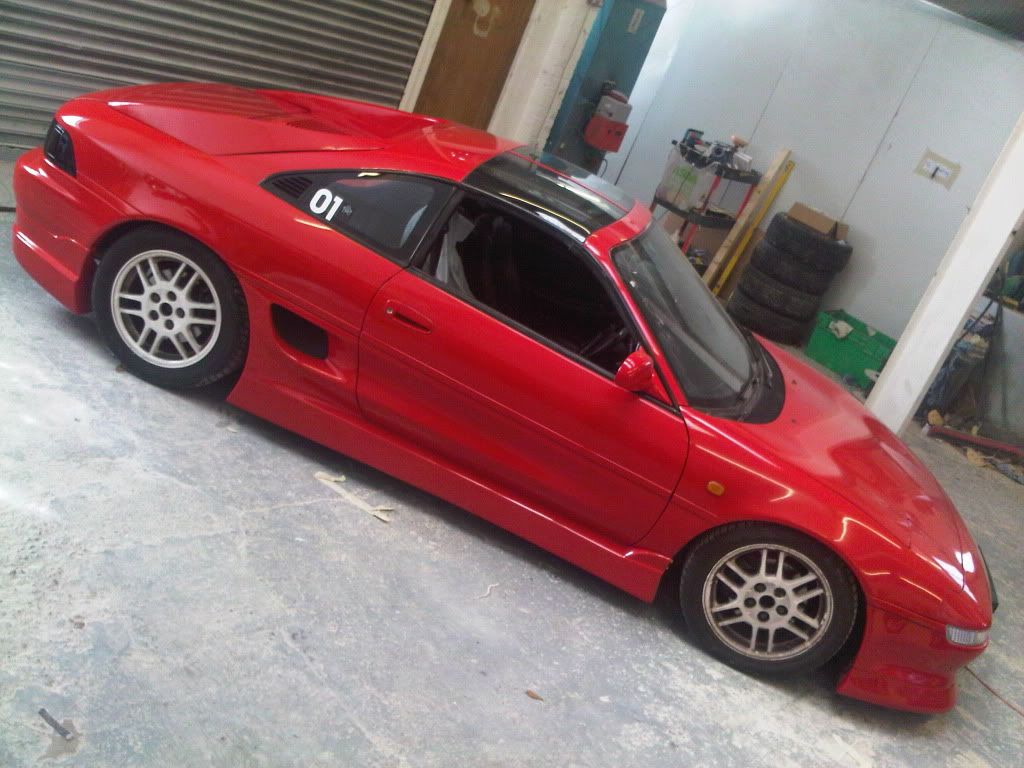
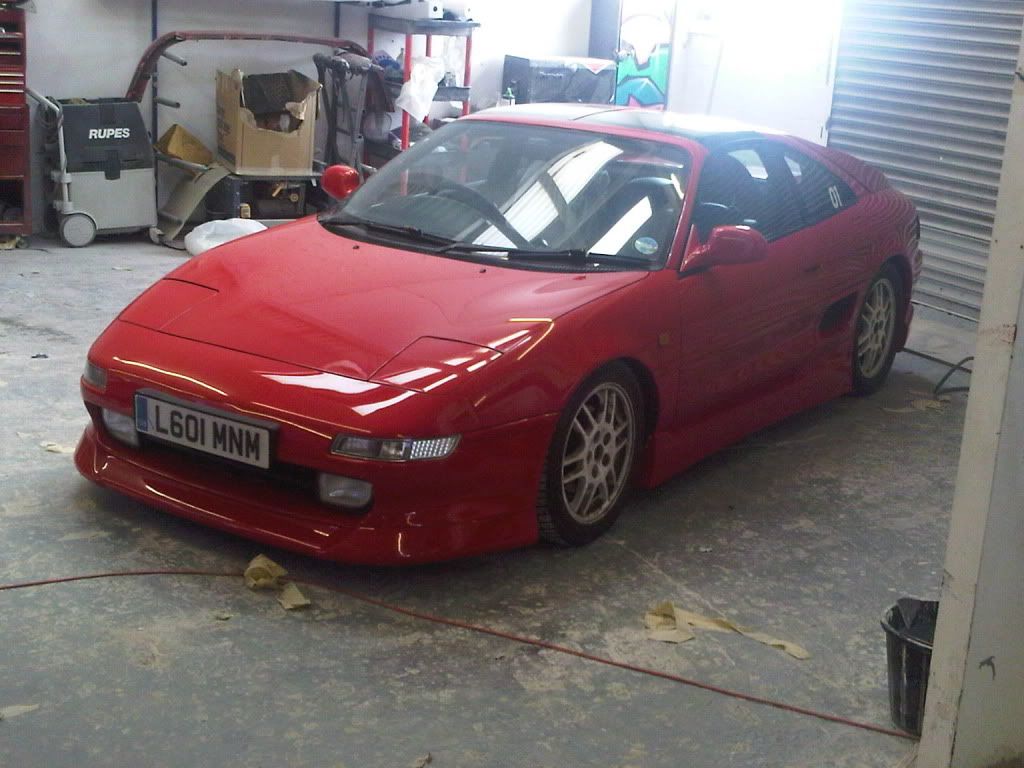
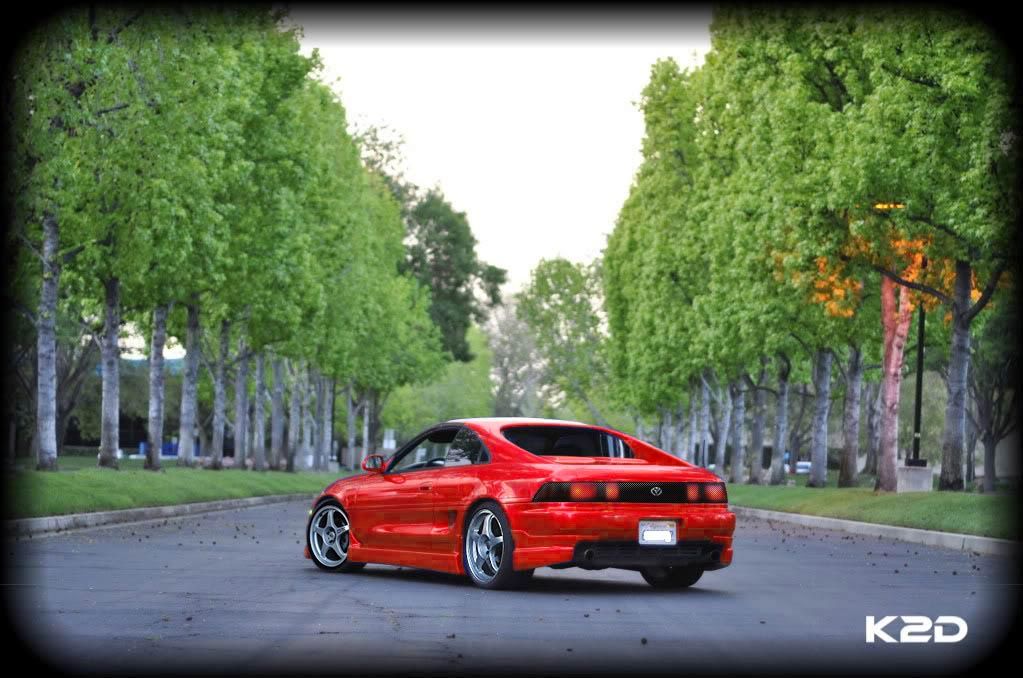
I was drawn to the cars that had been de-spoilered, but something about them didn't look quite right.
I always thought the spoiler looked a bit trying-too-hard, and I loved that removing the spoiler drew the eye so much more smoothly over the lines of the car, drawing attention to the recessed engine lid, concave rear window, and the buttresses; but it took me a while to work out what made it look a bit
"off" to my eyes
- its bum looks too big!


Notice how the C-pillar buttresses end halfway along the rear deck? With the spoiler removed, suddenly this feature becomes painfully obvious.
In profile the buttresses slope down to a natural termination point for a stubby short-overhang rear end, and then there's a huge whacking boot stuck on the back.
To me, this really
"humbles" the lines of the MR2.
It makes it look like any other sporty coupe of the time, and not the interesting midship RWD option that it is.
Its overall design ethos was obviously echoing the mid-engine supercars of the era, particularly the 348; but despite all the similarities this single feature downplays the rest of the car and automatically lets you know that despite its loose supercar-type styling, it's actually an affordable car
- though the average person on the street would be hard pressed to ever tell you
what makes it look more humble than the Italian design house projects that it takes inspiration from.
In the design process for the car, obviously a point must have been reached where Toyota decided to reign in the styling one notch back on the dial, making sure the car projects not only a baby supercar image, but also seems attainable rather than impossible
- so as not to alienate potential customers.
My goal is to undo that reigning-in and see what could have been!
I love the looks of the MR2, and I have no desire to make people think I drive anything exotic or expensive when I'm not.
There will be no Ferrari badges here and no replica anything-s.
The idea behind this project is just to emphasise and build on the standard MR2 styling, not try and transform it into something completely different.
Most of the parts will be off the shelf bodykit parts
(bear with me on those), but
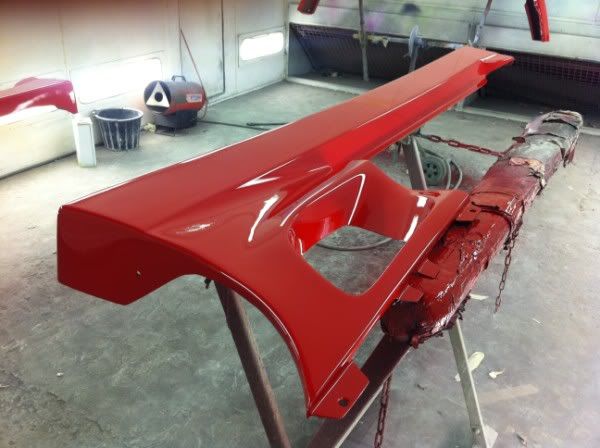
the interesting bit: I'm having the bodyshop custom fabricate extensions for the buttresses, to bring them right to the end of the bootlid.
The initial stage was extensive research.
Now I'd been part of MR2 communities for a year or two at the time and I had never heard of anything like this, apart from the standard 355 replica kits; though those for the most part consist of a new one-piece fibreglass skin for the entire rear roof section, buttresses and quarter panels.
I contemplated buying a damaged 355 replica rear panel, and cutting out the buttresses, but thought that for the expense incurred the buttresses
wouldn't actually fit anyway and would require loads of time in the bodyshop to get them to fit.
The only other car I'd seen it done on was built by some Europeans as part of a widebody kit they called the Evo-F; their buttresses were also part of a huge rear clam type part, which cost several thousand pounds
& despite much interest every time a picture surfaced on the forums, nobody had ever heard of one being bought or built apart from the demo car.
It looked, then, like I would be on my own.
Not even trawling obscure Japanese modifying sites and manufacturers turned up anything like it done before.
It actually staggered me that it hadn't been done by somebody else first
- these cars have been around since late 1989, and the design of the quarter panels means it could be fabricated as an almost completely bolt-on bolt-off part
- but it looked like I was blazing a new trail!
The first stage of development involved Photoshops, and lots of them
-
over 300, to be precise.
I edited almost any MR2 picture I came across; in the absence of anybody having done it before, I wanted to see what the longer buttresses would look like from every possible angle.
The edits were relatively simple once I figured out a technique and only took a few minutes for a basic version
(plus I've been using Photoshop for about 8 years, so pretty handy with it, so don't think I'm totally insane).
I combined it with every possible combination of bumpers, sideskirts, wheels etc to find what worked the best for me.

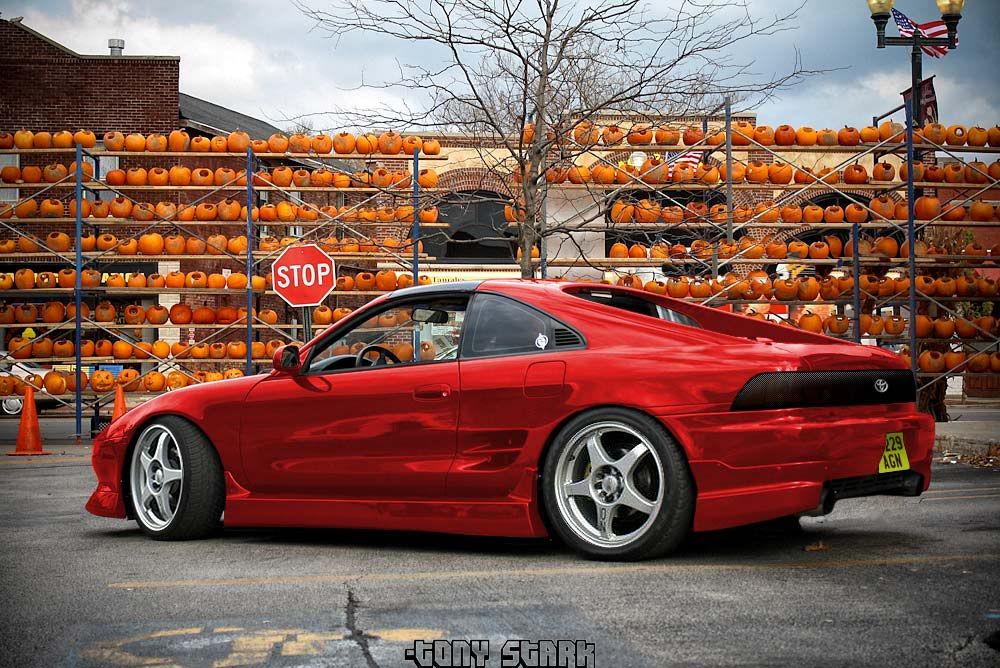
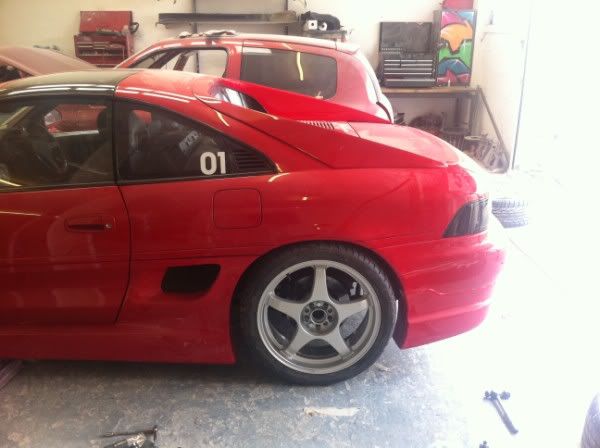
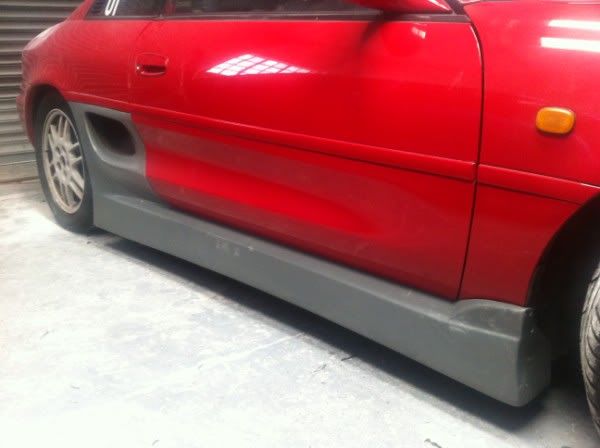
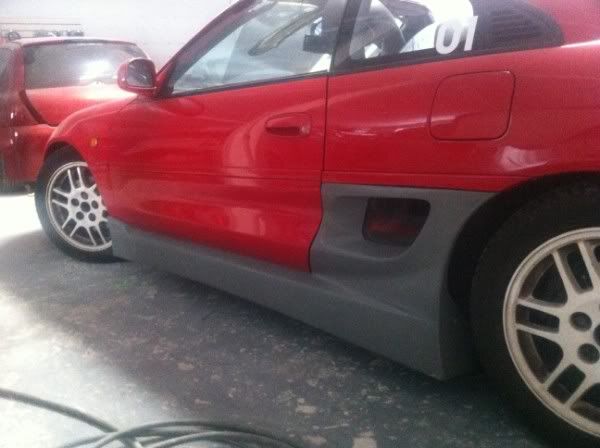
Ultimately the choice was an Aeroware front lip with Border sideskirts and rear spats.
The Aeroware front was chosen because it looks very similar to the standard lip but simply bigger and more aggressive.
It also visually bulks the front of the car out, and although it makes it look slighly less wide, its proportions are aesthetically pleasing and balance nicely with the height of the front grill/intake.
The Border sides and rears are not to everybody's taste, as they're rather slab-sided, but this is actually why I chose them: the standard MR2 body side curve apexes around doorhandle height and then curves back in under itself, which I find rather unappealing.
The Border sides are indeed chunky but sit at the same rough width as the door curve apex, and so to me, visually lengthen the side of the car and again solidify the car's presence somewhat.
It is a similar story with the rear pods.
With the idea set pretty firmly in my mind I started working out how I could make it reality.
Around this time, with the blessing of an understanding wife, I bought the non-running Rev 1 I discussed in my initial post.
I also read extensively about fibreglass and trawled forums dedicated to fabricating custom bodywork
(with foam sculpting, and so on).
Eventually I decided to brave it and just have a bash
- so I stocked up on some spray foam, masking materials, and a car cover
(I don't have a garage
- this may have been the project's downfall
:hehe:
).
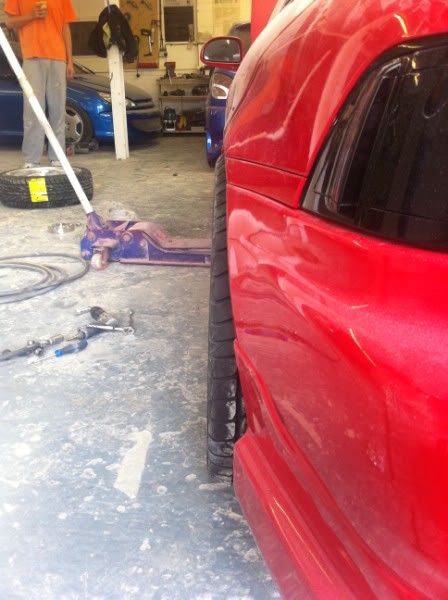
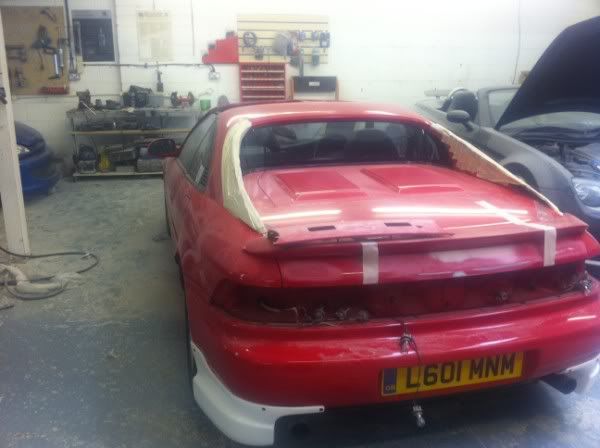
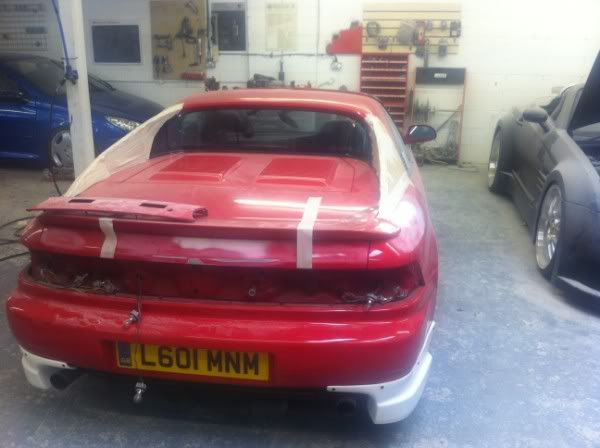
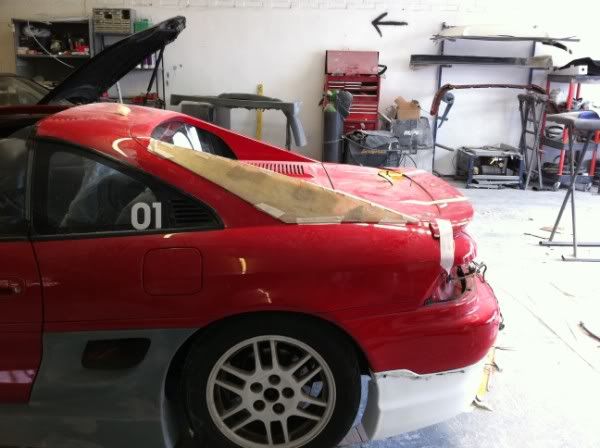
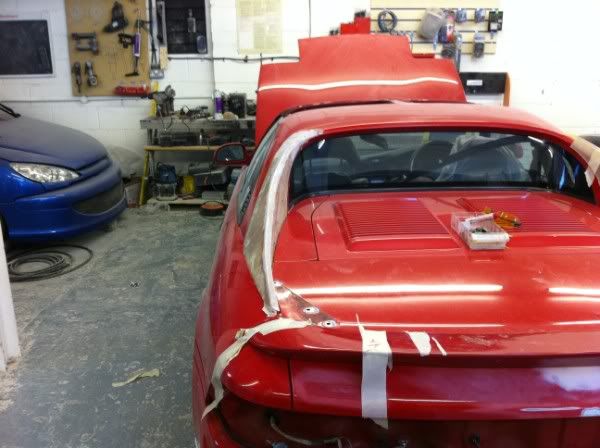
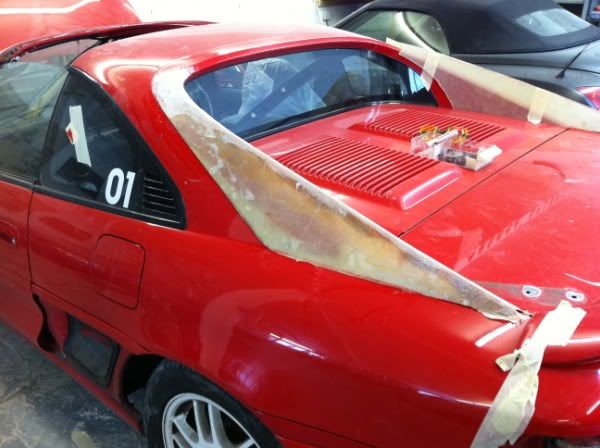
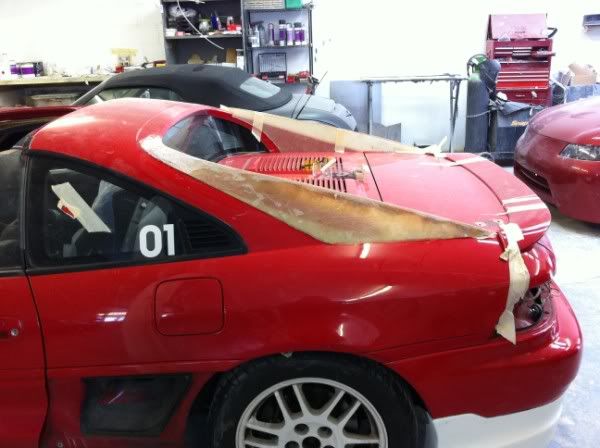
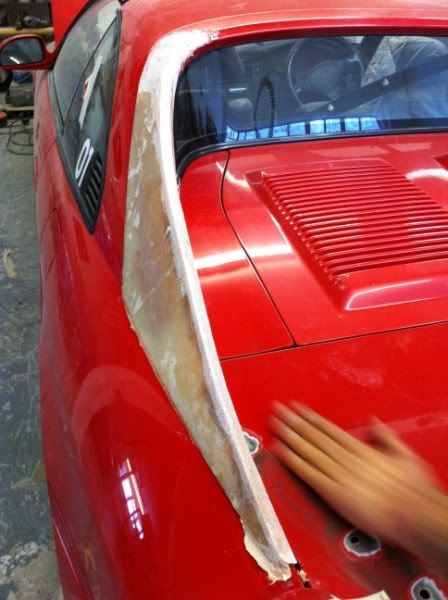
I removed the spoiler, and ripped apart a surprising amount of the interior to get to the bolts to release the buttress trim piece.
Then I masked up the shagged paint, and went mad with the foam.
The shape came up well, I put the car cover on for the night, and planned to start buying up fibreglass materials to start construction the next weekend.
Several months came and went and of course I never got round to it
:hehe: Small children and a busy work life kept my hands very much full and the MR2 lay neglected
- however, I hadn't forgotten about it; the basic foam buttress shape meant that with the car cover on, the car had that silhouette that I had fallen in love with, and I was inspired every time I looked out the window.
The neighbour's cat also very much enjoyed sitting on its roof.
Next stage was to visualise the car a bit better and work out some of the details in the concept.
In the absence of any time or money to do it for real, I built a computer model of the car with which to assess in greater detail how the new piece would flow with the car's bodylines, how it would fit onto the car, clearance for the boot to open, etc
- the less obvious details.
Critically I wanted to design it so that it could be a bolt-on part; I didn't want to permanently cut the quarter panel or require bonding onto paintwork if I could help it.
Some design revisions and slight changes were required that I won't go into, but ths stage was actually more useful than it may appear.

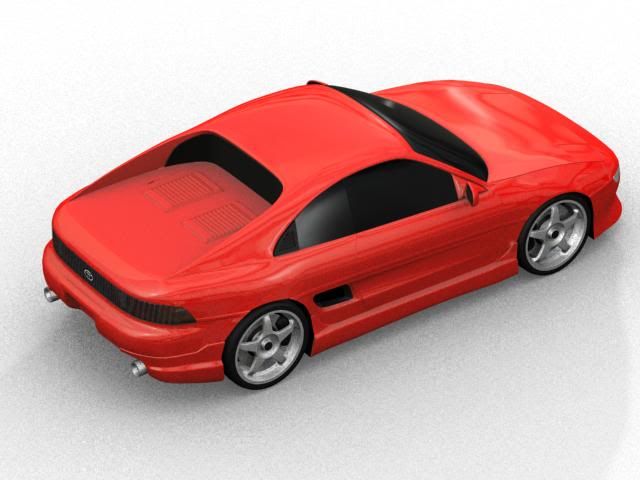
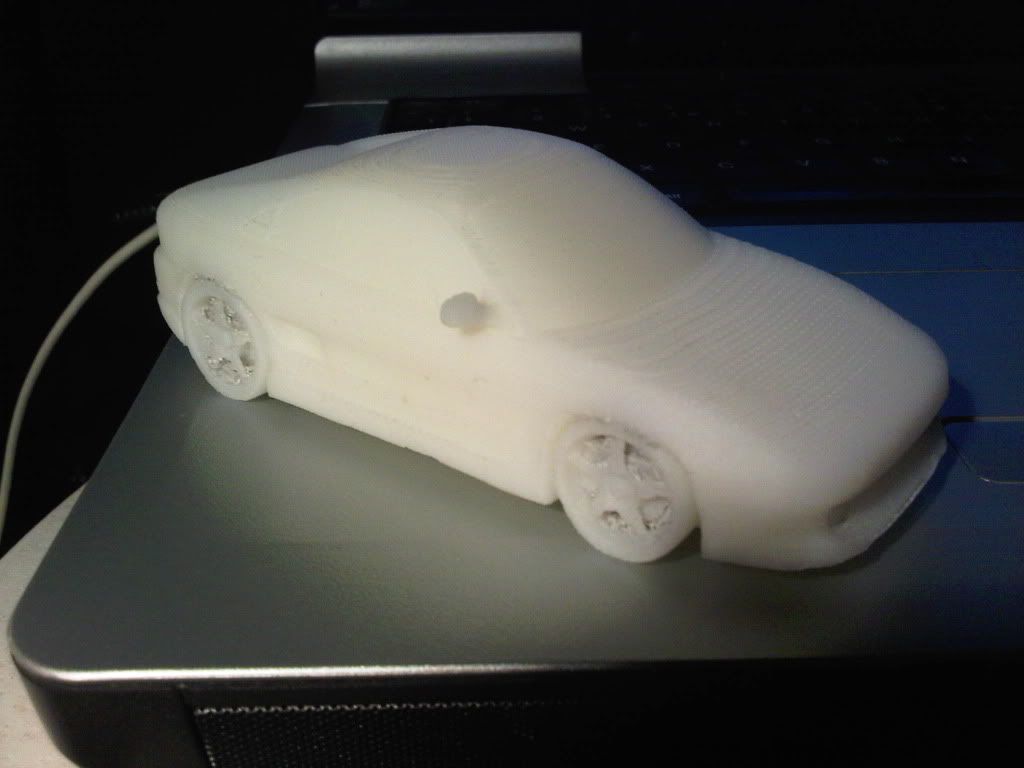
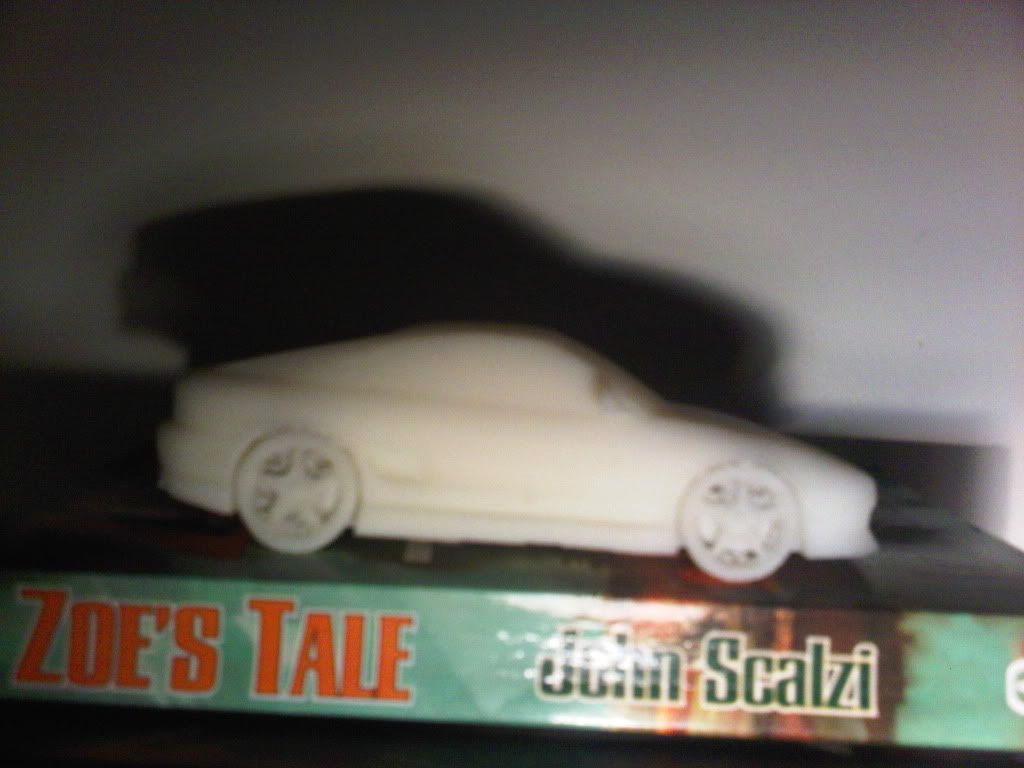
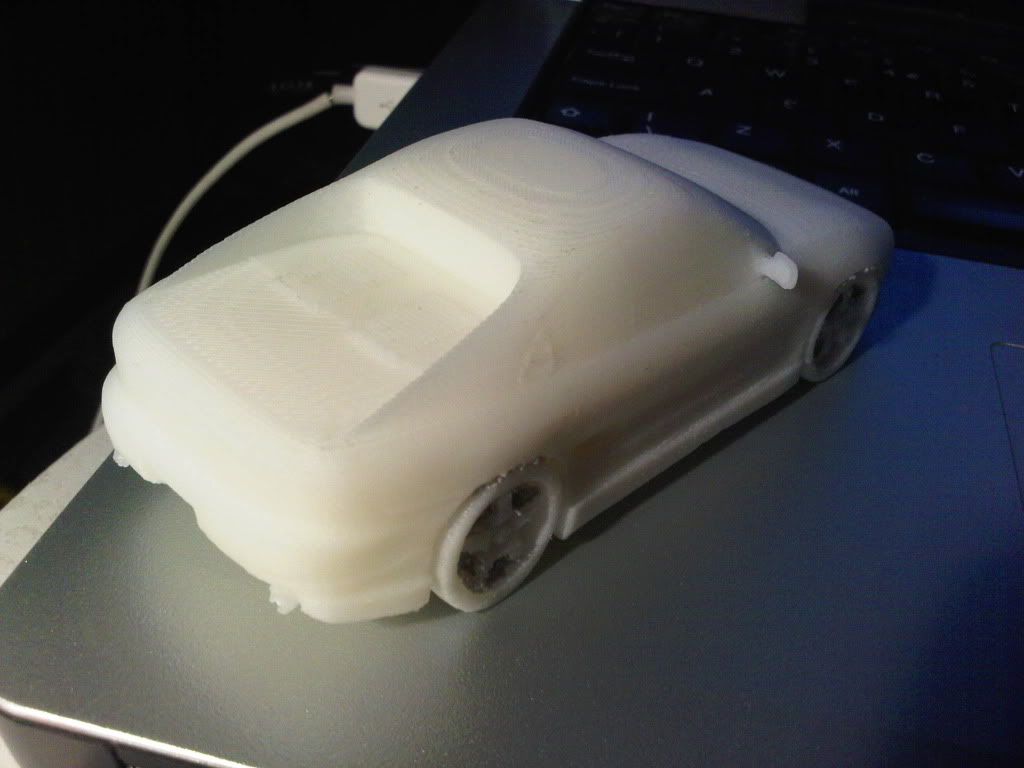
Ultimately, I managed to convince someone to let me use their 3D printer, and blagged a unique scale model of the concept

You can't beat seeing something in real life, being able to turn it over in your hands and look at it from any angle.
It confirmed even more for me that the look worked, and I should take it forward.
I was theorising at this stage that I could save some costs by using my model to produce a CAD part, thus saving paying somebody else doing all the detail and grunt work on it that I am capable of doing myself.
I could then have the CAD CNC milled in polystyrene to make a buck, and then send it off to a fibreglasser to produce a solid piece for me.
Ultimately though this fell through as the next stage kicked in.
.
.
Time passed and soon we had decided I would need to have a car to commute on my own with
- which may as well be the MR2.
I started researching plans and costs to have it fixed by a professional after finally accepting that I will never, ever get around to it on my own.
But, sensible woman that she is, after looking at some numbers Mrs K finally said
"rather than spending loads on getting it running and working properly, why don't you just buy one that works already?"
Utter genius
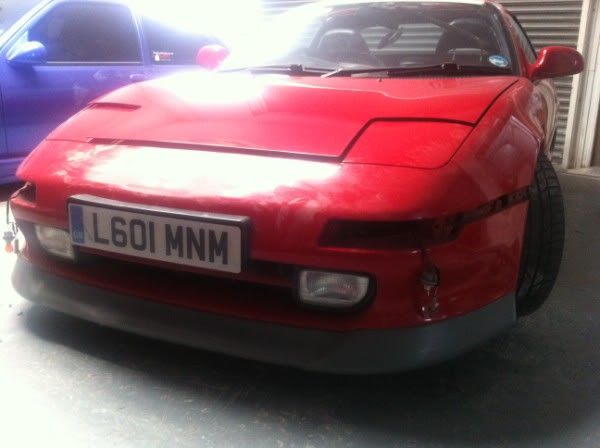
& much more sensible! So the rev1 was relegated to shed duty
(storing large parts like wheels that we've run out of loft space for) and we bought the brighter red Rev 3 that this thread is all about.
After all the events of the rest of this thread, and probably ongoing subconscious longing to see this concept realised but unable to really justify the money, not long ago my continuing-to-be-fantastic Mrs gave me a huge green light
(paraphrased)
-
"Your birthday's coming up, and as normal I know there's nothing you actually want apart from money to put towards that bloody car.
Go for it
- go and get it done
- but don't expect any birthday, Christmas or Father's day presents for the next 10 years"!
Probably sick of me moping, and who could blame her, but hooray! Carte blanche and spousal approval to get it done, and done by someone who knows what they're doing

A lot of research ensued into finding out who would be capable of making this piece at a reasonable price
& I ultimately settled on a bodyshop called Xquisite Automotive.
Their track record is a whole lot of chavvy cars and things that have been featured in Max Power, BUT what really sold me was their attitude.
Their frontman Kay was not at all phased by my idea and fabricating it
(unlike many other places that people recommended), and actually immediately launched into an intelligent discussion about aesthetics, body line flow, smoothness and even ensuring the angle of seam lines is visually pleasing with the lines already on the car.
In the automatic email signature was a note explaining that due to the nature of the builds undertaken by the business, any images were sent in complete confidence and may not be forwarded or published without the express permission of the car's owner.
I was sold- I had found my bodyshop!
I went to the workshop to discuss further and look at some of their work.
I imagine most Pistonheaders would have had a heart attack at the cars being worked on; but of course the customer is always right and Kay explained how they had spent many weeks on concept designs for each car and had actually convinced the owner to tone down their initial ideas
(which were often hideous) to the extreme but relatively tasteful state they were now at.
I'll admit I was actually rather drawn to some of the cars, which although I wouldn't have any of them myself, were indeed rather nice to look at
(once you let yourself go with the flow a bit); but most importantly, the worksmanship looked spectacular.
Xquisite had completely scratchbuilt widebody kits for several cars in the workshop, and the panelwork was indistinguishable from standard
(except the fact the arches were about a foot further out!), the panel gaps were phenomenal, and actually the fact that there were panel gaps at all is laudable
- despite huge custom made arches, they had still built it so the bumpers and wings were removable just like stock parts.
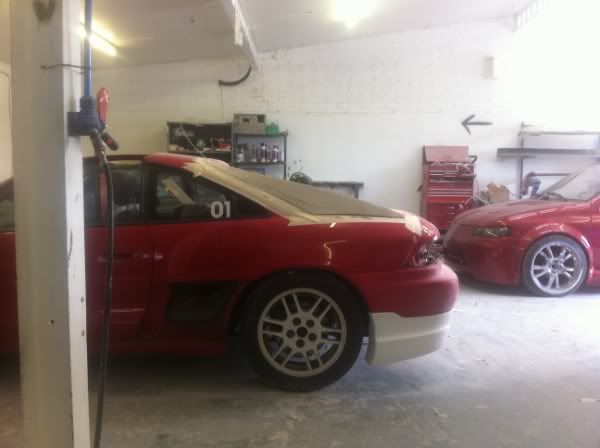
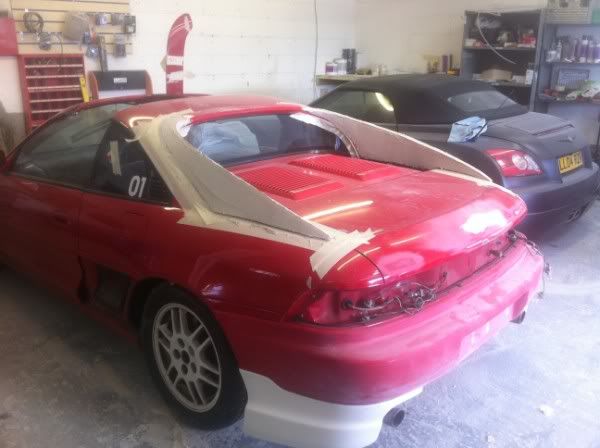
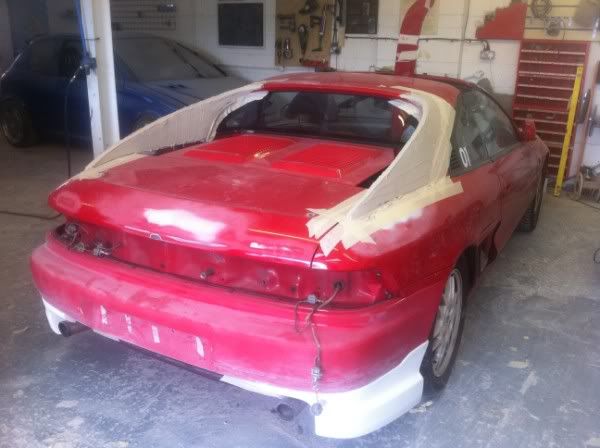
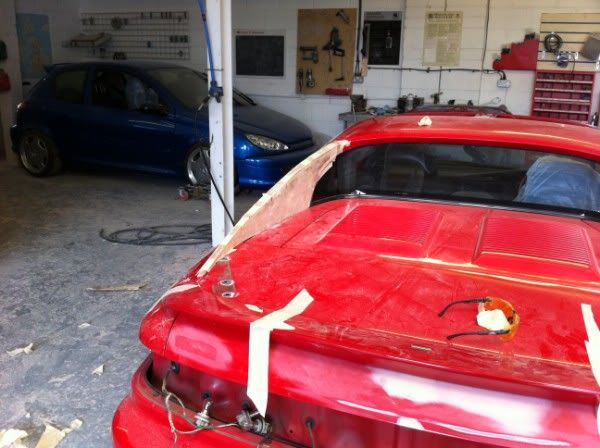
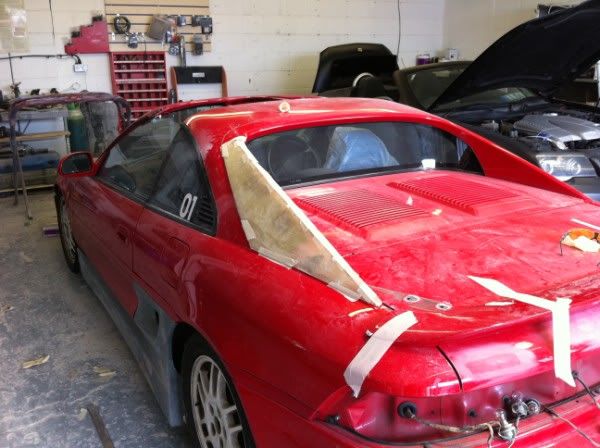
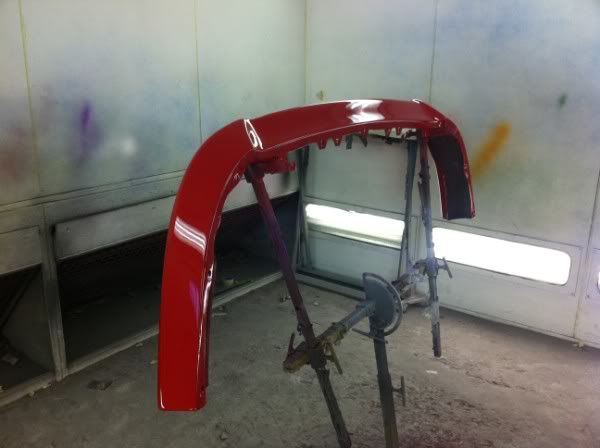
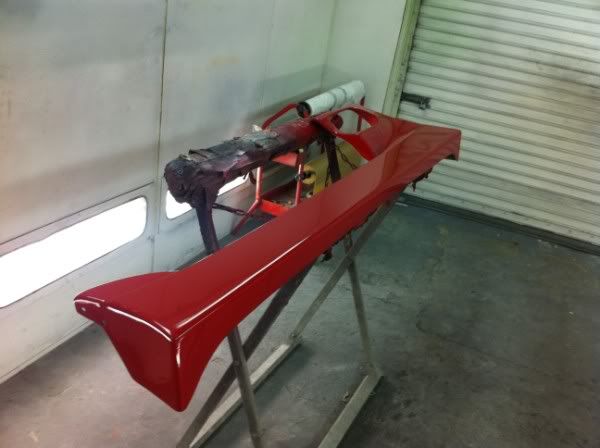
After amassing the parts I needed from the internet, the final trip to Xquisite was made and the car dropped off last Saturday.
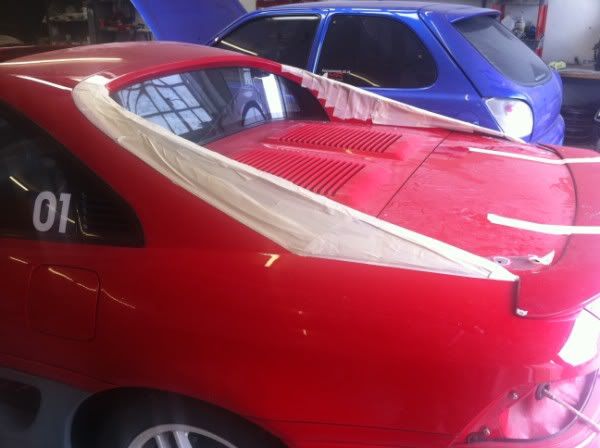
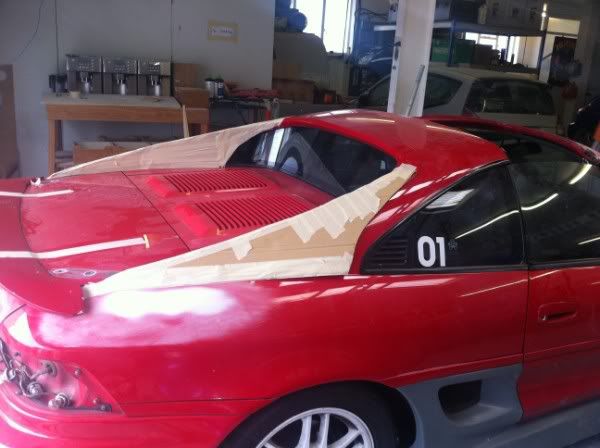
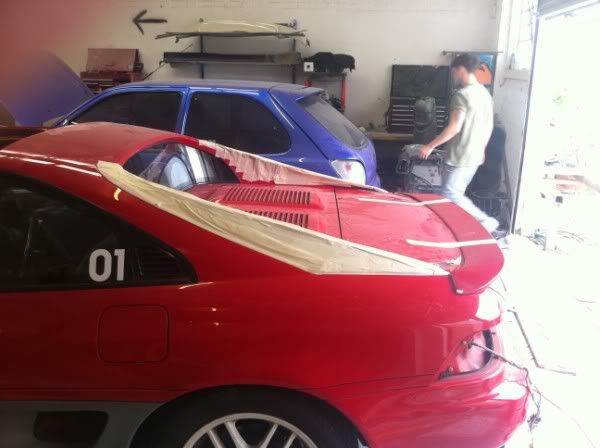
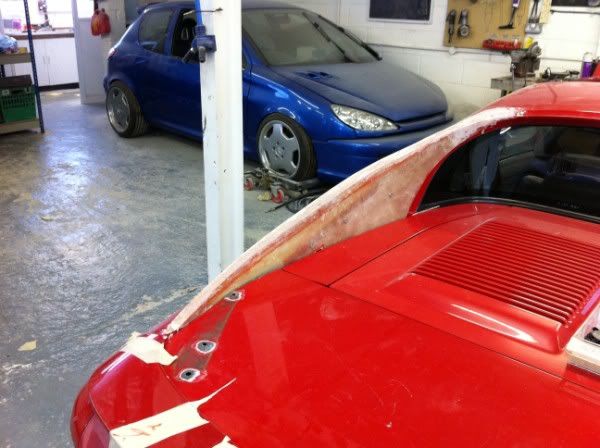
My faith in them continues to grow as I received an email with multiple pictures on Monday showing the dismantling of the car and the first of a series of cardboard mockups of the buttresses that they've made and wanted my opinion on some aspects of the shape before they take it further.
Great service.
I've had a number more updates since, and this now brings us up to date; I'll continue to post updates as I get them.

More updates as they come