Rear arches repair , the datsun method
Moderators: IMOC Moderators, IMOC Committee Members
-
PW@Woodsport
- Posts: 7642
- Joined: Tue Dec 14, 2004 6:40 pm
- Location: durham
- Contact:
Re: Rear arches repair , the datsun method
The beauty of my Cherry panel repair method is the cost, i think i was paying around  £15 per panel back in the day.

Re: Rear arches repair , the datsun method
Hi Paul,
Can you remember what year Cherry the panels are for or was there only one Datsun Cherry. Must check with my local motor factors to see if they are still available.
Tim
Can you remember what year Cherry the panels are for or was there only one Datsun Cherry.
Tim
-
stragenmitsuko
- Posts: 49
- Joined: Thu Feb 21, 2013 8:02 am
Re: Rear arches repair , the datsun method
http://www.carbodypanels4u.co.uk/nissan ... -1982-1986
These are the ones.
Prices went steep since I bought them .
With vat an delivery comes to abt£55 for one panel .
That is a 400% increase 
Apparantly Hadrian panels is now owned by another company .
At this price, you're better of buying the mr2 mk1 arches from ebay and making the end pieces yourself .
Remember, the datsun panel doesn't cover both ends .
If you want to repair a datsun cherry, they're still worth the money .
As far as I can tell, the quality is very good .
These are the ones
Prices went
With vat an delivery comes to abt
That is a 400% increase
Apparantly Hadrian panels is now owned
At this price
Remember
If you want to repair a datsun cherry
As far as I can tell
-
stragenmitsuko
- Posts: 49
- Joined: Thu Feb 21, 2013 8:02 am
Re: Rear arches repair , the datsun method
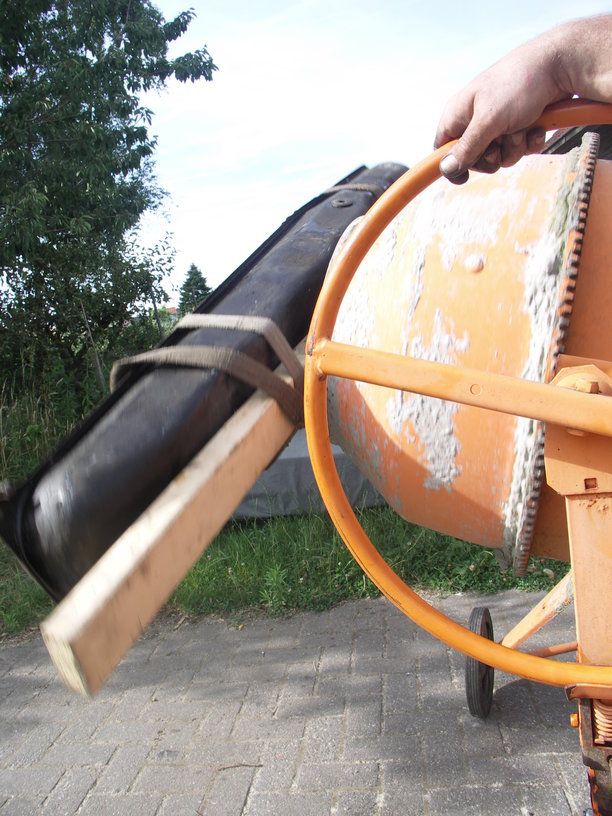
As an intermezzo , a few pictures of my advetures with the fuel tank .
Offcourse, after 16 years of storage , with half a tank of gas , the fuel pump had seized .
Took the tank out, then took the fuel pump out .
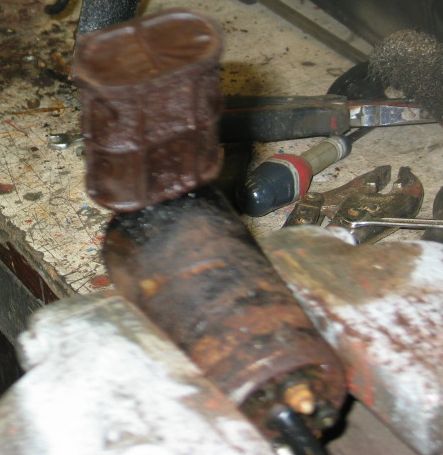
No way to unseize it. Penetrating oil , ultrasonic cleaning , soaking overnight ... nothing helped .
So I took it apart, and salvaged an impeller from a spare , also seized pump and combined both into a single working pump .
Bought a new filter at mr t's for 40 and all's good to go.
So I used the 16 year old fuel for the lawn mower and put in some new fuel . Put it all back together again and with some gentle tapping on the injectors , the car fired right up .
Wow great!
Offcourse
Took the tank out

No way to unseize it
So I took it apart

Bought a new filter at mr t's for 40 and all's good to go

So I used the 16 year old fuel for the lawn mower
Wow great
-
stragenmitsuko
- Posts: 49
- Joined: Thu Feb 21, 2013 8:02 am
Re: Rear arches repair , the datsun method
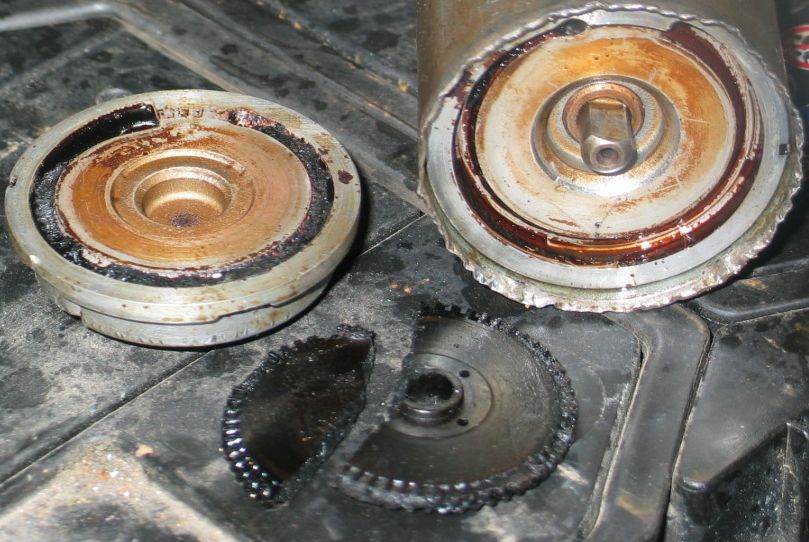
Sadly that lasted only a couple of months .
That pump, altough not seized this time , stopped working all together .
Electrical failure probably.
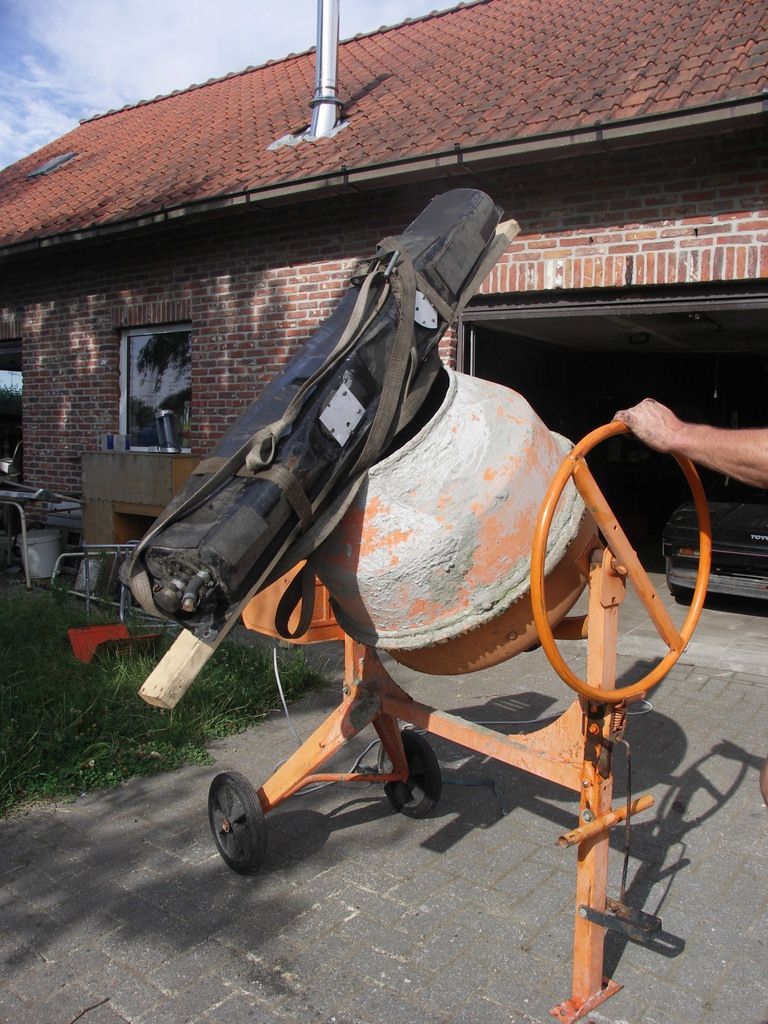
Took it apart again, and the brand new filter was all clogged and dirty once more . Time for some more drastic measures .
I bought 5000 dry wall screws and put them in the tank , poured in 20Liter of paint thinner closed it all up and put it on a cement mixer for half an hour .
You should have seen the disguisting stuff that came out.
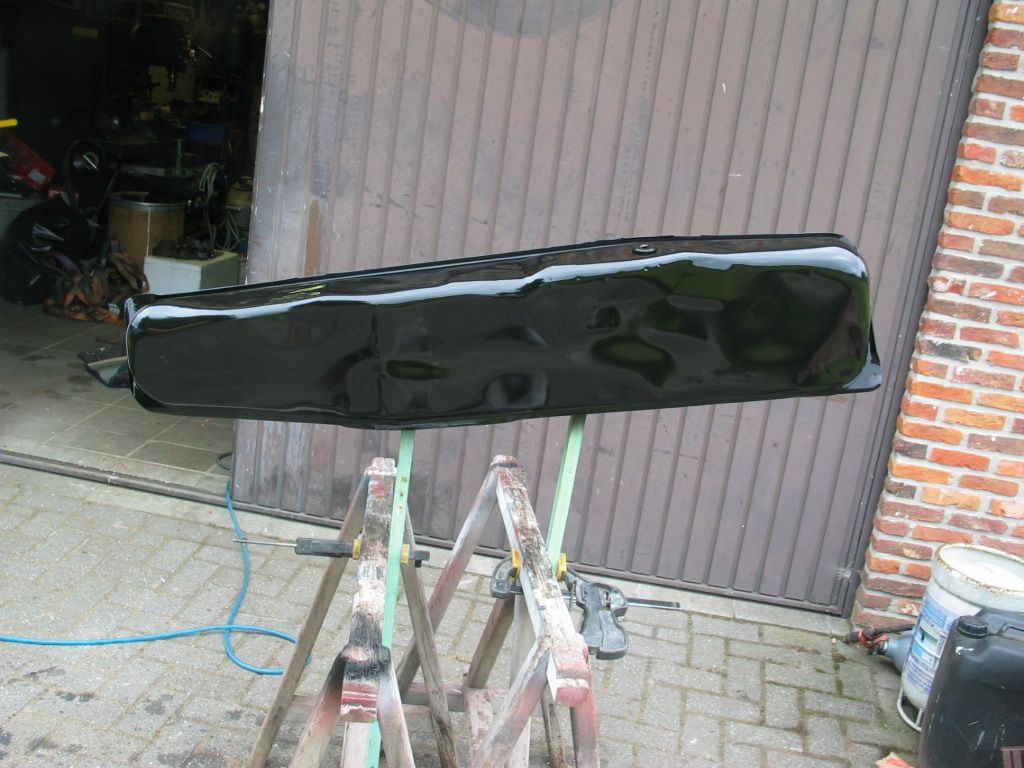
This is a MK1B tank btw, the mk1a doesn't have a drain plug .
Next, a layer of paint on the outside .
That pump
Electrical failure probably
Took it apart again
I bought 5000 dry wall screws and put them in the tank
You should have seen the disguisting stuff that came out


This is a MK1B tank btw
Next

-
stragenmitsuko
- Posts: 49
- Joined: Thu Feb 21, 2013 8:02 am
Re: Rear arches repair , the datsun method
To treat the tank internally I bought one of those tank reconditioning kits .
Usually I don't like those miracle products, but this one was recomended to me by a friend .
The first part is what they call a super degreaser.
You have to mix it with water and heat it.
Then put it in the tank for several hours.
The chemical used is clearly NaOH based.
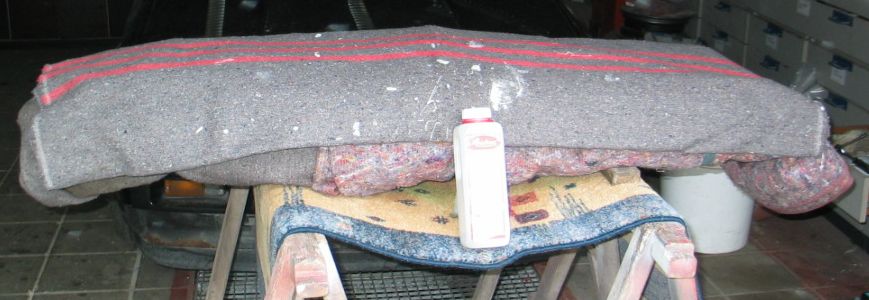
The tank was wrapped in some blankets to preserve the heat.
Next is the rust convertor.
Phosforic acid based, same treatment .
Pour it in and let it work overnight.
Third step is to rince with water several times, then clean and dry .
Then some aceton to take out the last drops of water.
Final step is the conditioning, wich is done with some kind or resin .
Two components are mixed together and poured in the tank.
Then you have to twist and turn it for over an hour and carefully look trough all openings to make sure every inch of sheetmetal is coated.
Not an easy task with an mr2 Mk1 tank.
The treatment stops when the product no longer flows.
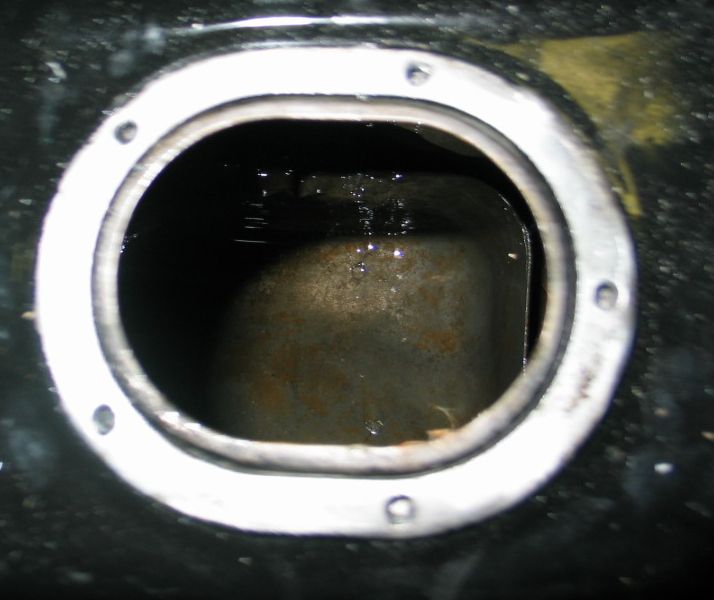
Worked out very wel, checked it with an endoscope and all's covereed with resin . Looks like a coating of glass inside .
I guess that tank will last longer then the car itself.
Usually I don't like those miracle products
The first part is what they call a super degreaser
You have to mix it with water and heat it
Then put it in the tank for several hours
The chemical used is clearly NaOH based
The tank was wrapped in some blankets to preserve the heat

Next is the rust convertor
Phosforic acid based
Pour it in and let it work overnight
Third step is to rince with water several times
Then some aceton to take out the last drops of water
Final step is the conditioning
Two components are mixed together and poured in the tank
Then you have to twist and turn it for over an hour and carefully look trough all openings to make sure every inch of sheetmetal is coated
Not an easy task with an mr2 Mk1 tank
The treatment stops when the product no longer flows
Worked out very wel, checked it with an endoscope and all's covereed
I guess that tank will last longer then the car itself

-
stragenmitsuko
- Posts: 49
- Joined: Thu Feb 21, 2013 8:02 am
Re: Rear arches repair , the datsun method
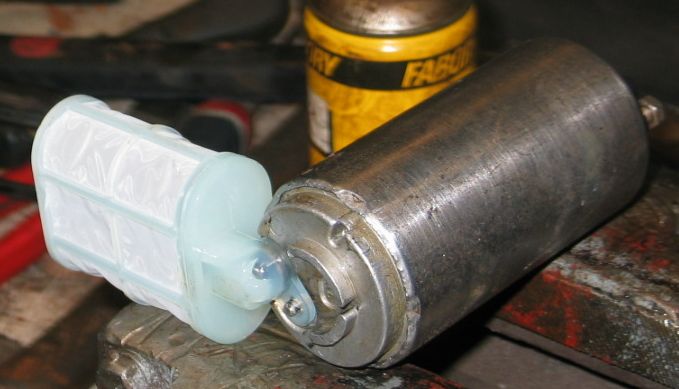
Then I took a chance and got me one of those cheap chinese fuelpumps off ebay .
It looked a lot like an mr pump.
Wel it was identical.
Fitted just like original .


This pump has cost me 30 s&h included.
And to my surprise it came with a brand new strainer.
Compare that to the 40 I paid at mr t's for just a strainer....
Anyway, sofar so good , the pump still works as it should .
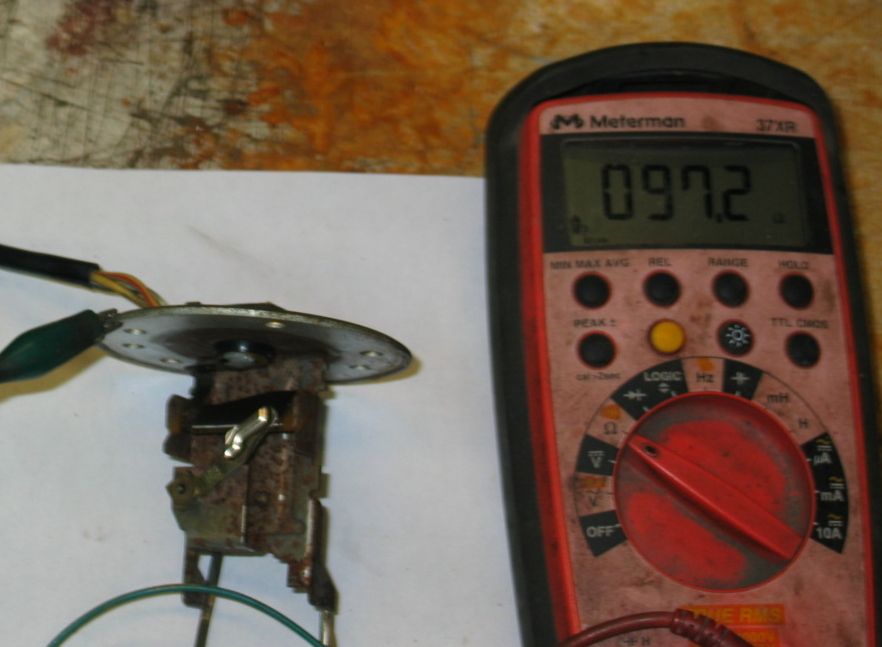
Tank gauge sender needed some cleaning to get it going again.
The empty light contact doesn't work.
Pity, but no big deal .
It looked a lot like an mr pump
Wel it was identical
Fitted just like


This pump has cost me 30 s&h included
And to my surprise it came with a brand new strainer
Compare that to the 40 I paid at mr t's for just a strainer
Anyway
Tank gauge sender needed some cleaning to get it going again
The empty light contact doesn't work
Pity

Last edited by stragenmitsuko on Fri Apr 08, 2016 6:50 pm, edited 1 time in total.
-
stragenmitsuko
- Posts: 49
- Joined: Thu Feb 21, 2013 8:02 am
Re: Rear arches repair , the datsun method
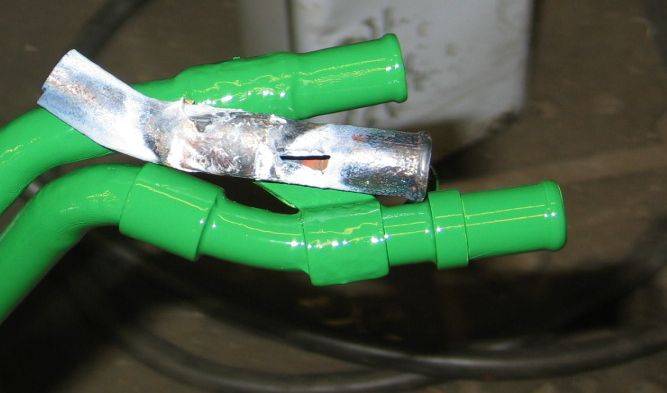
And while all those tank stuff was going one , I decided to take care of the rusted coolant pipes .
Easy acces with the tank removed, and I had to wait for the new pump to arrive anyway .
Cleaned them, sanded them , repaired a rusted section on the heater tubing , sprayed on a layer of epoxy primer , and a top coating of emerald green .
Why green???
Well, why not !


Easy acces with the tank removed
Cleaned them
Why green
Well


-
stragenmitsuko
- Posts: 49
- Joined: Thu Feb 21, 2013 8:02 am
Re: Rear arches repair , the datsun method
finally both sides are finished .
As to be expected, the other side was a mirror image of the
first one, as far as repairs are concerned .
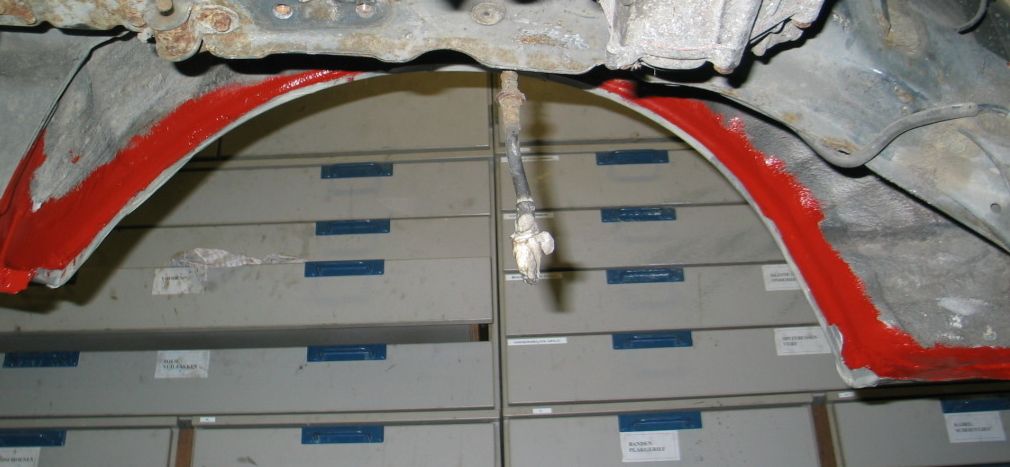
Then I took the struts out to be able to treat the inner rim .
It's been welded on, so part of the protection will certainly be gone .
In order to get an angle grinder with a brush in there, and my head 
to be able to see what I'm doing the entire rear suspension has to be removed .
And as it was removed anyway , time for some cleaning and painting .
Not really badly rusted, all these parts .
But yars of mud and dirt. And what was left of the original paint came off very easy .
All parts cleaned, degreased masked and ready to paint .
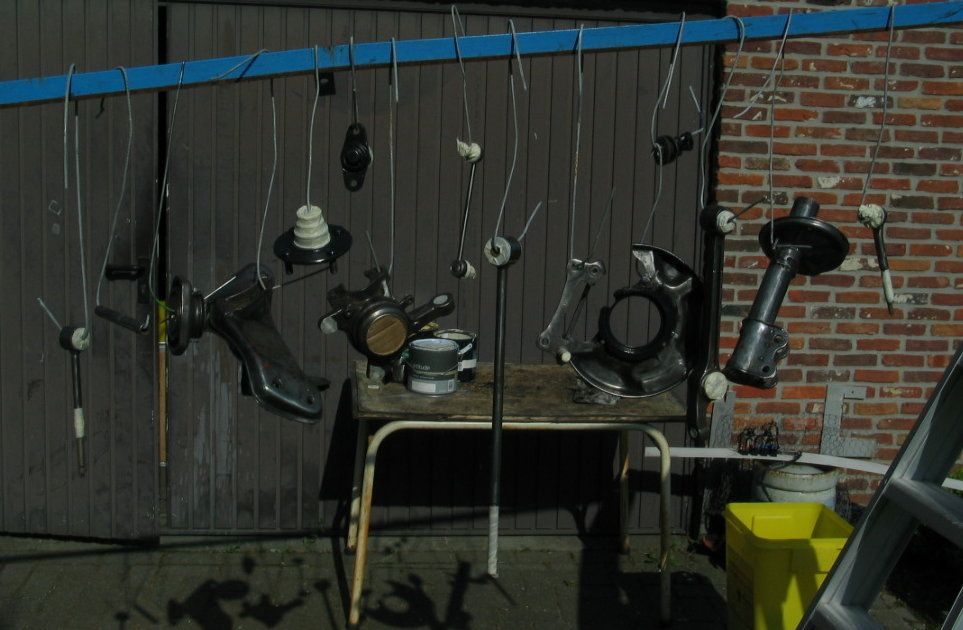
And hung up to dry.
 .
.
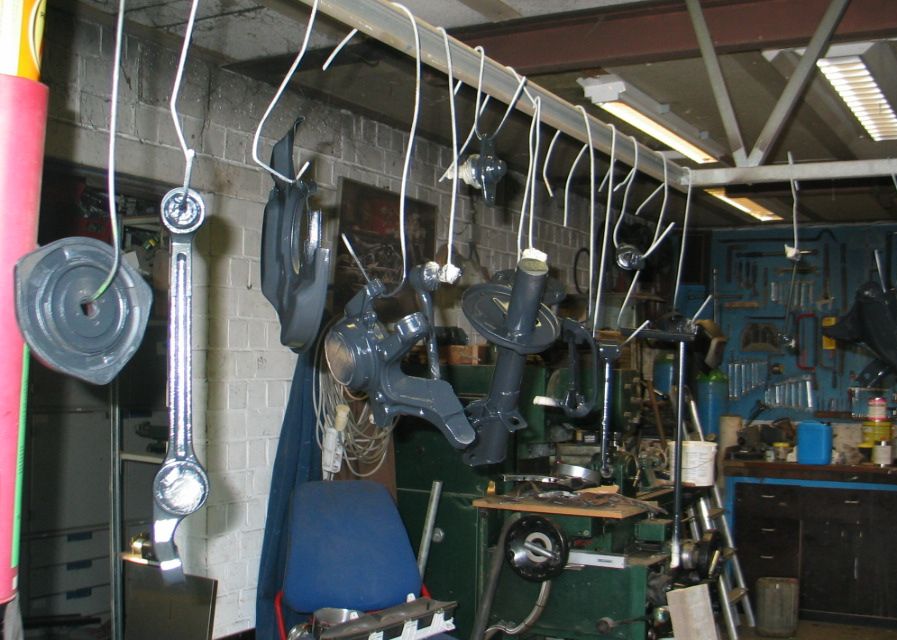
This was supposed to be black paint.
Apparantly I ordered antracite black, wich is more like a very
dark grey. Wasn't what I ordered but it doesn't look bad at all .
Not a high gloss this paint, but more like a satin .
As to be expected
first one
Then I took the struts out
It's been welded on
In order to get an angle grinder with a brush in there
to be able to see what I'm doing
And as it was removed
Not really badly rusted
But yars of mud and dirt
All parts cleaned

And hung up to dry

This was supposed to be black paint
Apparantly I ordered antracite black
dark grey
Not a high gloss this paint
-
stragenmitsuko
- Posts: 49
- Joined: Thu Feb 21, 2013 8:02 am
Re: Rear arches repair , the datsun method
Insides cleaned , degreased and a layer of primer .
Funny, on the left side of the car the factory pvc coating stopped at abt an inch from the edge . On the right side , the entire area was coated .
It didn't have any consequences though, both sides were in more or less thesame shape . Quite good actually , considering the shape of the outer skin .
Funny
It didn't have any consequences though

-
stragenmitsuko
- Posts: 49
- Joined: Thu Feb 21, 2013 8:02 am
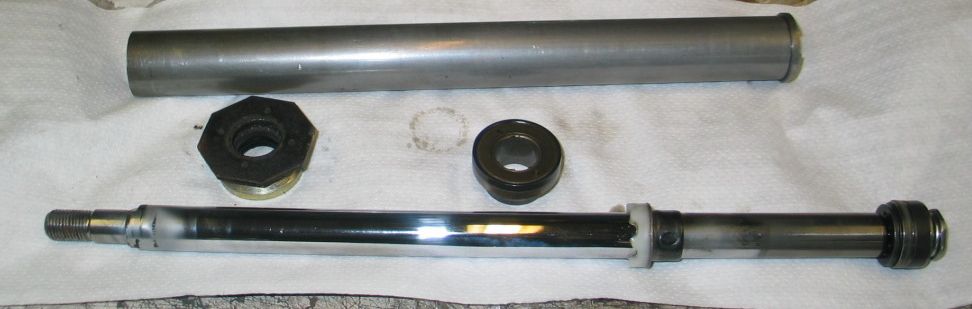
Re: Rear arches repair , the datsun method
the fun part
Re assembling all kinds of parts.
New grease, new seals , and an old bearing that has been thouroughly cleaned and dried .
The bearing was in good condition when I took it apart , so it should be good . when reassembled . Both sides were marked and assembled the
way the came apart.
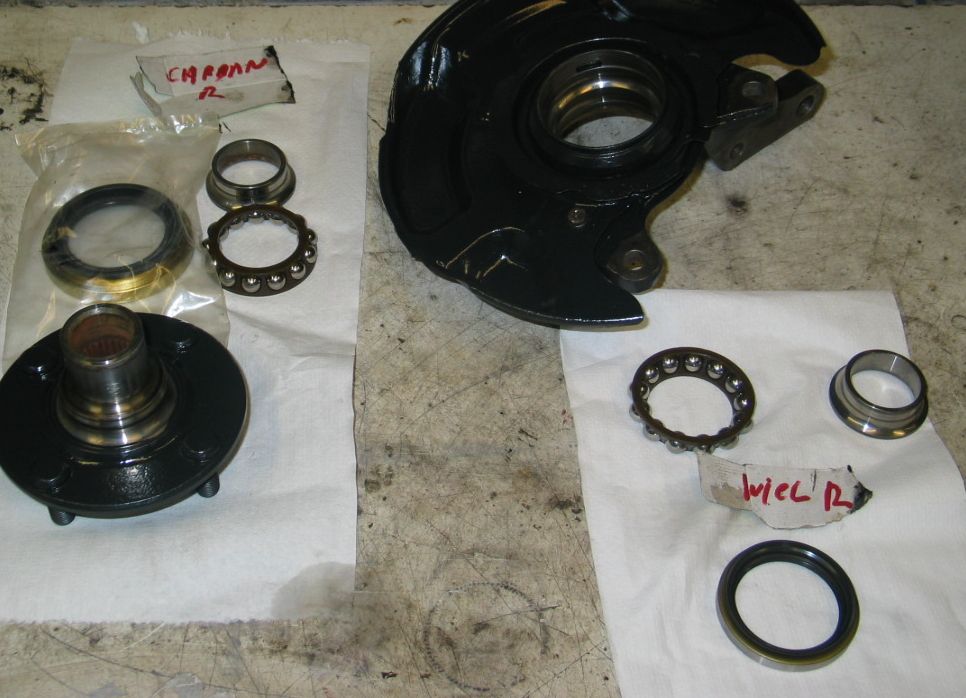
New seal wich seals the hub on the wheel side.
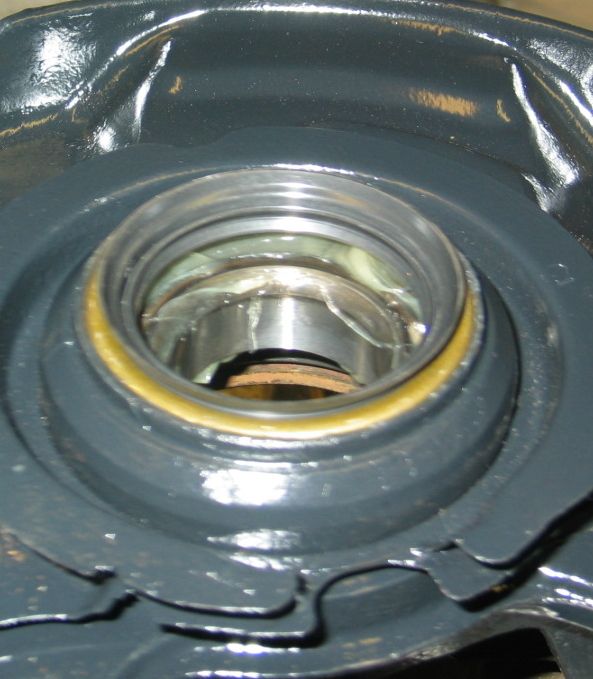
Pressing the hub in. Goes in fairly easy , but still I wouldn't like to try it without a press . Something I've learned years ago at SKF :
Never use a hammer when working with bearings.
Never allow the force of assembley to passs trough the bearing.
If you need to install a new bearing in it's housing, push on the outer race only .
If you need to press in a hub or a shaft, push and support the inner races only . A correctly installed bearing will last 3 times longer .
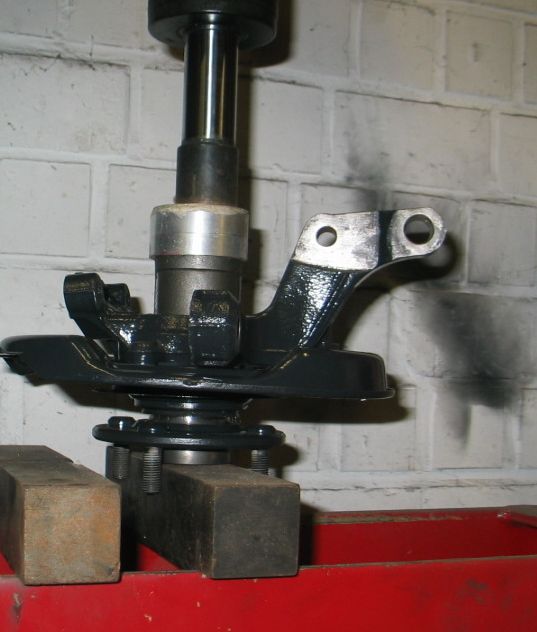
The car will be on its wheels again, but I'm not gonna install the driveshafts yet . Engine needs to be pulled .
But to keep the dirt out and the grease in, I 'made a dummy driveshaft .
This will also keep the inner race of the baering in place when the car is pushed or towed .
Re assembling all kinds of parts
New grease
The bearing was in
way the came apart

New seal wich seals the hub on the wheel side

Pressing the hub in
Never use a hammer when working with bearings
Never allow the force of assembley to passs trough the bearing
If you need to install a new bearing in it's housing
If you need to press in a hub or a shaft

The car will be on its wheels again
But to keep the dirt out and the grease in
This will also keep the inner race of the baering in place when

-
stragenmitsuko
- Posts: 49
- Joined: Thu Feb 21, 2013 8:02 am
Re: Rear arches repair , the datsun method
Shock absorbers .
When I took the struts apart, I was expecting a crtridge type shockabsorber So I didn't think and pulled it out . To my surprise half of the oil ended up on the floor .
These are oil filled, rebuildable shocks .
I carefully catched and measured the oil from the other side.
Turns out to be 198ml.
So I bought some motorcycle fork oil and replaced the usezd oil with new.
The new oil is grade 3, wich seems to be a bit more viscous then the original . I'm assuming ( hoping ) the 30 years old oil has lost some of it's viscosity .
Will it work or not?
I don't know. If it doesn't I'll have to take it apart again , and get some grade 2 or even grade 1.5 oil .

When I took the struts apart
These are oil filled
I carefully catched and measured the oil from the other side
Turns out to be 198ml
So I bought some motorcycle fork oil and replaced the usezd oil with new
The new oil is grade 3
Will it work or not
I don't know


-
stragenmitsuko
- Posts: 49
- Joined: Thu Feb 21, 2013 8:02 am
Re: Rear arches repair , the datsun method
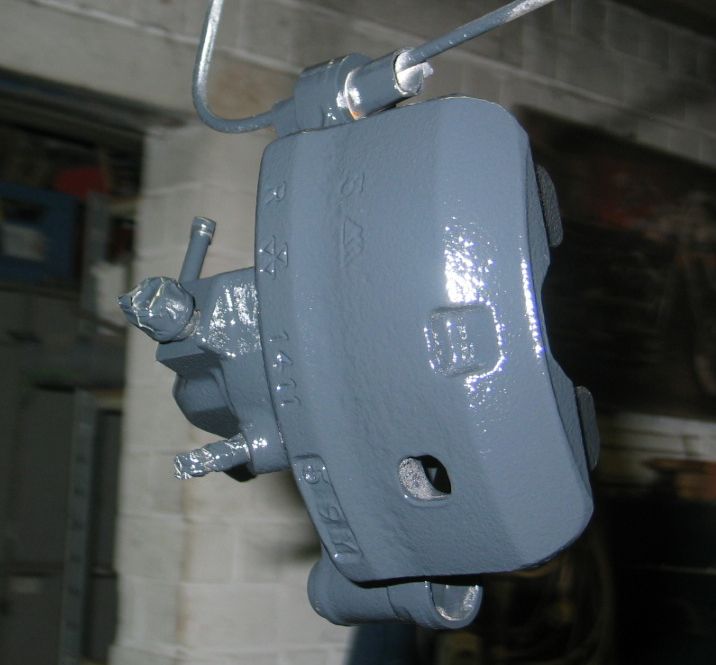
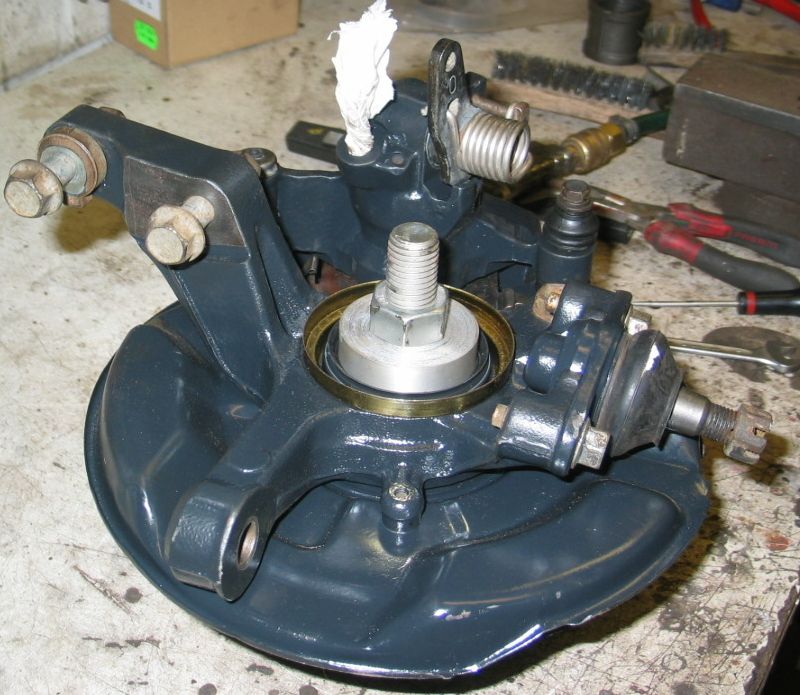
The brake calipers .
They were still working, no trouble there . Mr T did a very good job designing these ./ Fi audi uses a similar design , but their calipers will seize after a couple of years . Did my share of rebuilding on those .
Anyway, some of the dust seals were broken or in poor condition .
And offcourse they looked like 30 years old rusted calipers .
So an overhaul can't hurt.
Inernals cleaned and degreased
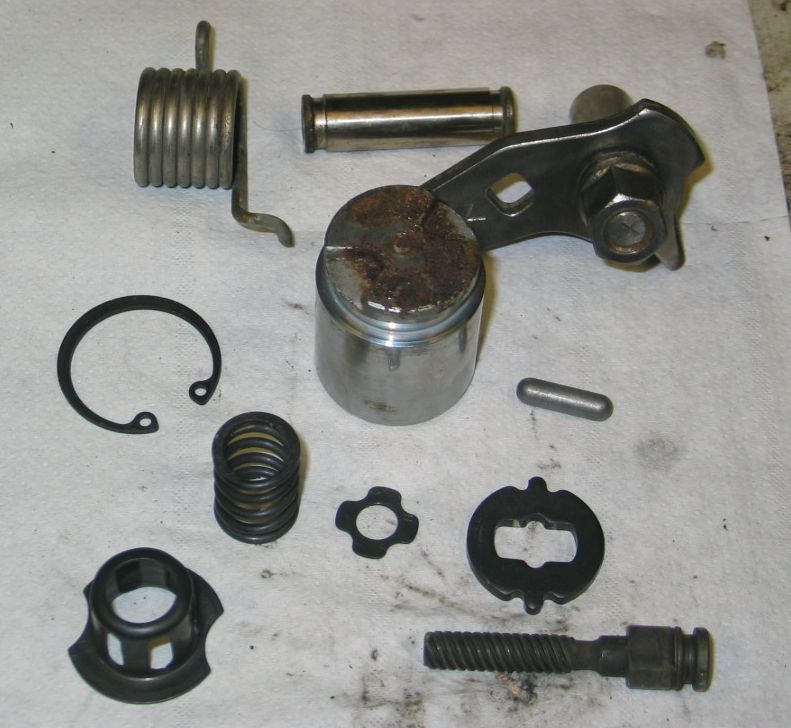
A nice set of seals, contains everything needed . This is aftermarket , 30 .
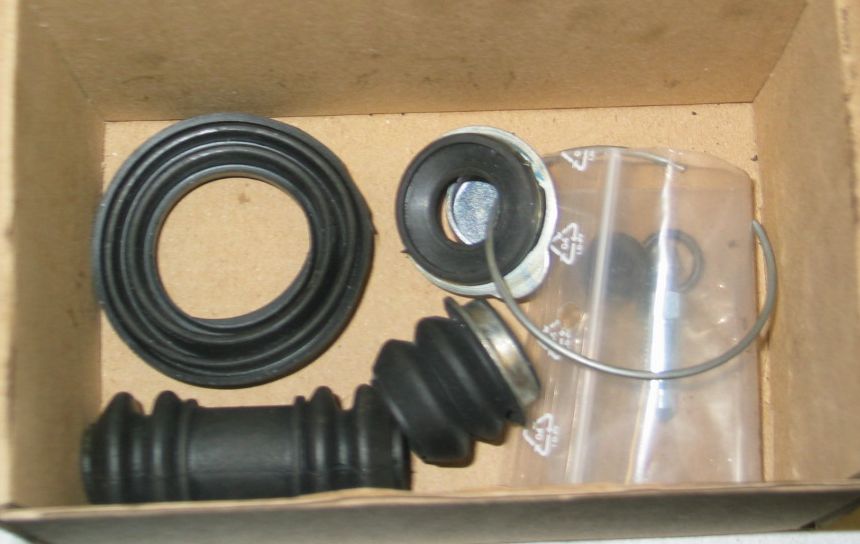
And a lick of paint makes them look brand new.
Paint looks grey ish, but that's the flash from the camera .it's much darker in reality .
They were still working
Anyway
And offcourse they
So an overhaul can't hurt
Inernals cleaned and degreased

A nice set of seals

And a lick of paint makes them look brand new
Paint looks grey ish

Re: Rear arches repair , the datsun method
Great work. My rear arches are in terrible condition. They need to be sorted pronto. I replaced one side a number of years ago with a m1 or mk2 Fiesta rear arch panel. It's pretty much a perfect shape fit. I think they're still available as well.
Unfortunately I rushed it as I had to take a girl out and didn't have a car, and it needs doing again.
A few years ago I bought rust free complete cut out sills that will go on as well. It's a pity because the rest of the car is fine.
Unfortunately I rushed it as I had to take a girl out and didn't have a car, and it needs doing again.
A few years ago I bought rust free complete cut out sills that will go on as well.
-
stragenmitsuko
- Posts: 49
- Joined: Thu Feb 21, 2013 8:02 am
Re: Rear arches repair , the datsun method
I think you mean fiesta MK3 1983-1989
or the escork MK4 1986-1990
Both these cars have very similar rear arches
to our beloved MR2's.
For the escort there are( or were ) also inner
arch repair pieces availble.
It's true, welding in new steel isn't sufficient .
It'll start rusting again in no time if not properly treated.
Quite often that treatment is more time consuming then the actual welding.
Pat
or the escork MK4 1986-1990
Both these cars have very similar rear arches
to our beloved MR2's
For the escort there are
arch repair pieces availble
It's true
It'll start rusting again in no time if not properly treated
Quite often that treatment is more time consuming then the actual welding
Pat
Re: Rear arches repair , the datsun method
Definitely mk2 as my mate gave me his when he scrapped the car!
Just had a proper look today and they aren't wide enough. Good as a stop gap.
Just had a proper look today and they aren't wide enough.
Re: Rear arches repair , the datsun method
Just checked on Hadrian website and they still have mk3/4 Escort 3-door rear arches in stock for £20 each. They look about as close to the MR2 arches as you can probably get.
-
stragenmitsuko
- Posts: 49
- Joined: Thu Feb 21, 2013 8:02 am
Re: Rear arches repair , the datsun method
Yes out of curiosity I checked a local supplier round here , vanwezel , and they also still have escort panels . Prices are about thesame 25 a piece . I've ordered a set , who knows maybe some day I'll find myself a t-roof mr2 .
They also have an inner skin repair panel, wich seems to cover about half the inner arch . Abt 40 -ish a piece
I think if I would have to start over, I'de buy both the inner and outer skins and adapt the mr2 body to math the repair panel .
I've used sections now, keeping the center part of the original arch
because the datsun panel was abt 1 inch to short .
This works, but I think using the entire arch from the repair panel
will make it easier to blend in.
And if the body is adapted, no one except a very experianced eye will notice the difference .
Pat
They also have an inner skin repair panel
I think if I would have to start over
I've used sections now
because the datsun panel was abt 1 inch to short
This works
will make it easier to blend in
And if the body is adapted
Pat
-
stragenmitsuko
- Posts: 49
- Joined: Thu Feb 21, 2013 8:02 am
Re: Rear arches repair , the datsun method
A word about shock absorber oil .
As I stated before, some of my oil ended up on the floor
and I bought grade 3 fork oil to replace it.
Didn't work out.
Grade 3( SAE 15 ) makes the suspension almost solid .
Feels like the shock absorber is non existent, as if it was welded shut .
Might be great for track use, but in Belgium with all its speed buimps
it will be a bad idea.
So I took out my din 4 paint viscosity gauge and started doing some test . Paint vicosity and oil viscosity have nothing in common .
But this will allow me to compare different grades with the original.
Grade 3( SAE 15 ) takes 52 sec's .
Original MR2( SAE ??) takes only 22 sec's .
Bough some grade 1( SAE 7.5 ) expecting it to be 26 secs .
No way, when checked it was 35 seconds .
Finally got me some grade 01( SAE 5 )
Lucky for me they accepted to take the grade 1 back  .
.
This one does the trick. 25 seconds .
I guess the originaloil must be SAE 4.8.
There's also a grade 02( SAE 3 ) wich would result in 19 secs .
That is to sthin, so the 25 seconds SAE 5 will have to do .
I haven't been able to take the car on the road, but at least the shocks
move again when I rock the car.
Only a road test will tell for sure, but it feels ok now .
Pat
As I stated before
and I bought grade 3 fork oil to replace it
Didn't work out
Grade 3
Feels like the shock absorber is non existent
Might be great for track use
it will be a bad idea
So I took out my din 4 paint viscosity
But this will allow me to compare different grades with the original

Grade 3
Original MR2
Bough some grade 1
No way
Finally got me some grade 01
Lucky for me they accepted to take the grade
This one does the trick
I guess the originaloil must be SAE 4.8
There's also a grade 02
That is to sthin
I haven't been able to take the car on the road
move again when I rock the car
Only a road test will tell for sure
Pat
-
stragenmitsuko
- Posts: 49
- Joined: Thu Feb 21, 2013 8:02 am
Re: Rear arches repair , the datsun method
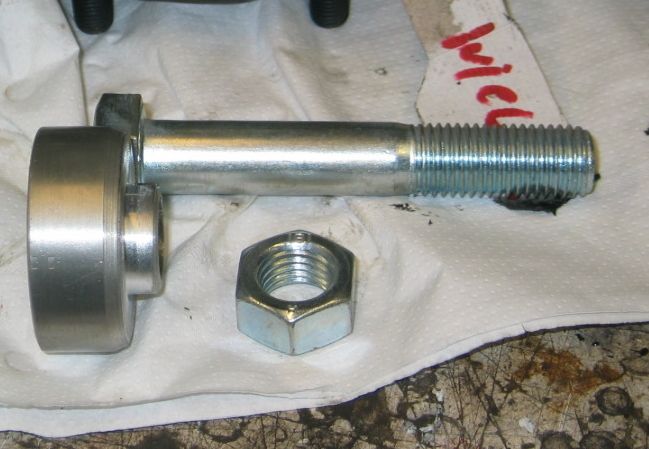
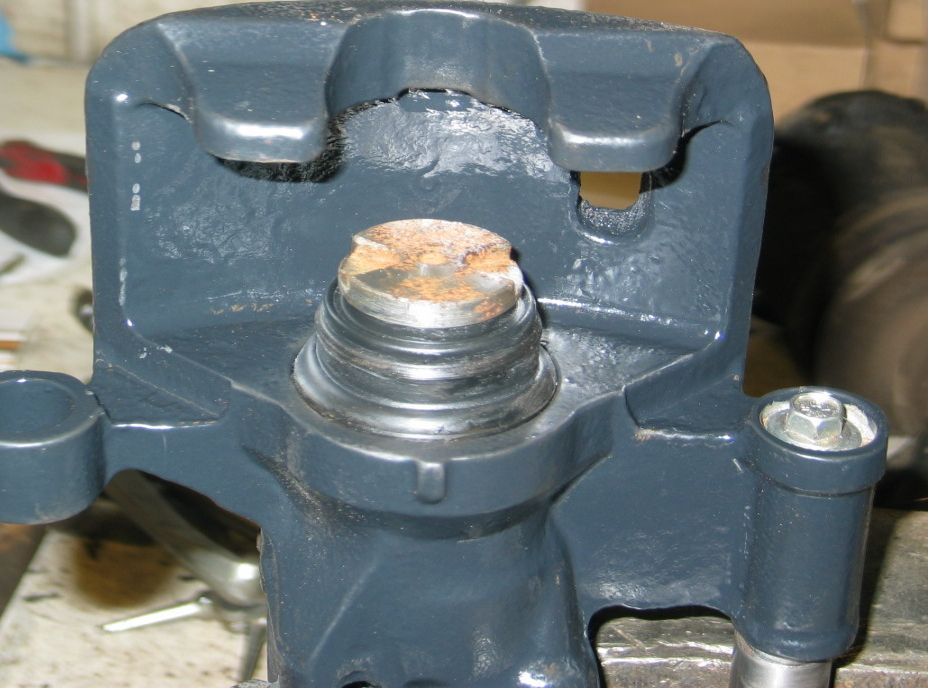
Break caliper reassembley .
The MrT workshop manual says you need a special tool to compress the internal spring in the caliper .
That tool is basicly a nut with an 8mm 4 entry 10mm pitch internal trapezium tread .
I could cut such a nut on the lathe, but that's not an easy task to do .
One could also salvage the internals from a broken caliper , but I didn't have one available .
So here's an alternative method .
This is what you need .
On the left is a holder or mounting piece.
It has no function but to be able to hold the calper in a vice without damaging the paint.
A gear puller and a machined piece of round to compress the spring.
And a long reach circlips pliers.
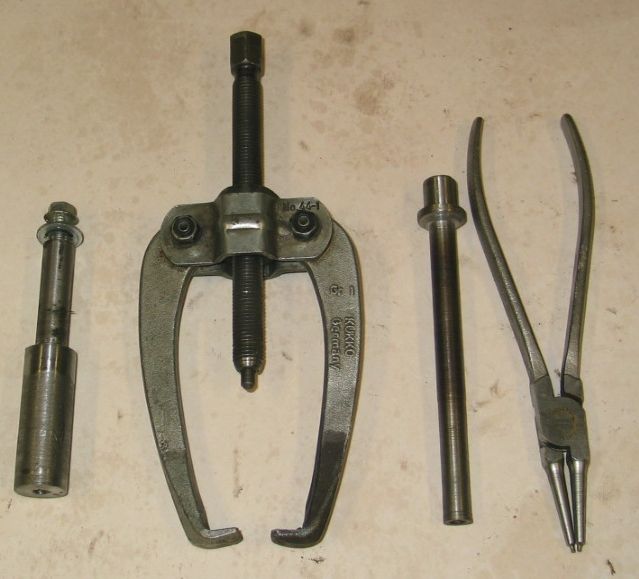
The machined piece centers the spring to the bolt and has a recess to make it pass . It has a drilled center on the other end . The gear puller is used as a pusher . And there's enough room to make the pliers pass .
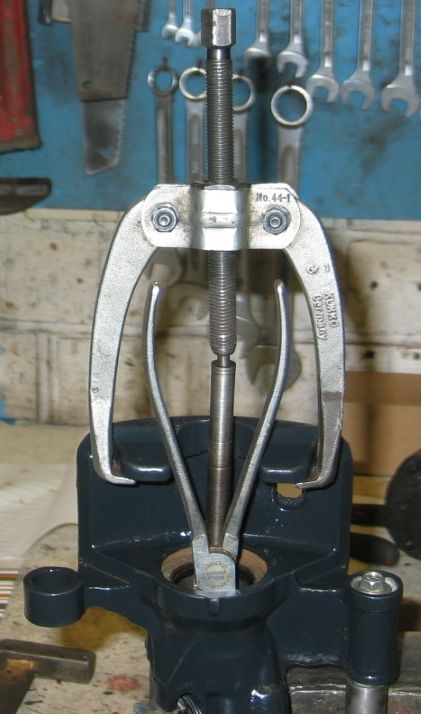
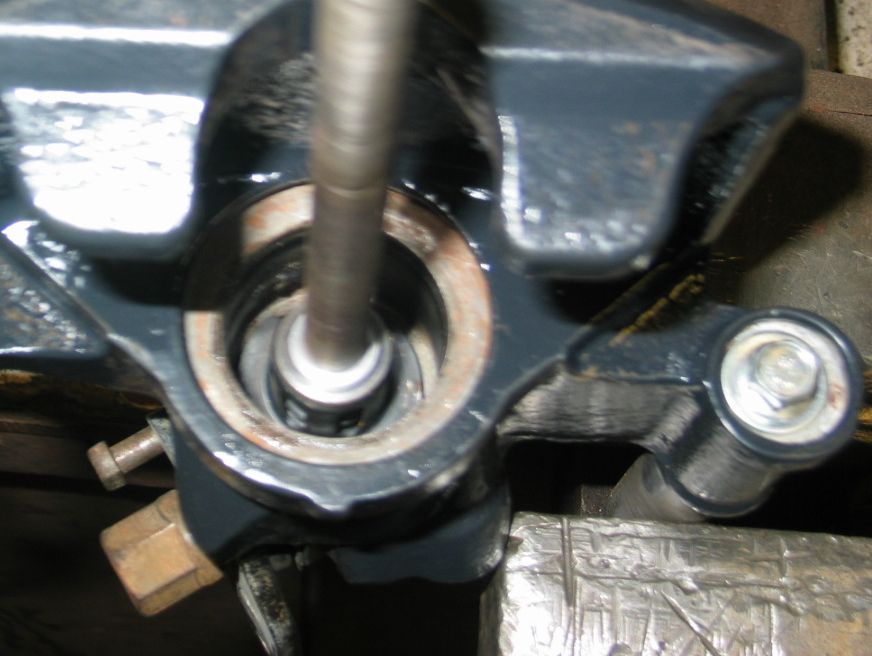
All set, ready to go
And it is so much easier to install the brake pads with all their springs on the bench instead of under the car .
The MrT
That tool is basicly a nut with an 8mm
I could cut such a nut on the lathe
One could also salvage the internals
So here
This is what
On the left is a holder or mounting piece
It has no function but to be able to hold the calper in a vice without damaging the paint
A gear puller and a machined piece of round to compress the spring
And a long reach circlips pliers

The machined piece centers the spring to the bolt and has a recess to make it


All set

And it is so much easier to install the brake pads with all their
