Restoration .....56k Beware NEW PICS

Discussion and technical advice for 84-89 AW10 & AW11 MR2. 3A-LU, 4A-GE, 4A-GZE.

Moderators: IMOC Moderators, IMOC Committee Members

coverco
Posts: 1489
Joined: Mon Mar 20, 2006 6:31 pm

Restoration .....56k Beware NEW PICS

Post by coverco »

I have had my car for a couple of years now, I bought it originally for for £550 with rusty rear arches and a rusty drivers wing. I did the front end last year, 2 new wings, 2 new valances and various other panels were replaced which were taken off my parts car which I paid £100 for. I did not photograph this bit but here is a picture of the finished job

Image

Last year I picked up 2 brand new Toyota rear repair panels for the princely sun of £370 off Ebay, these are superb pieces of kit but are quite large. :D

Image

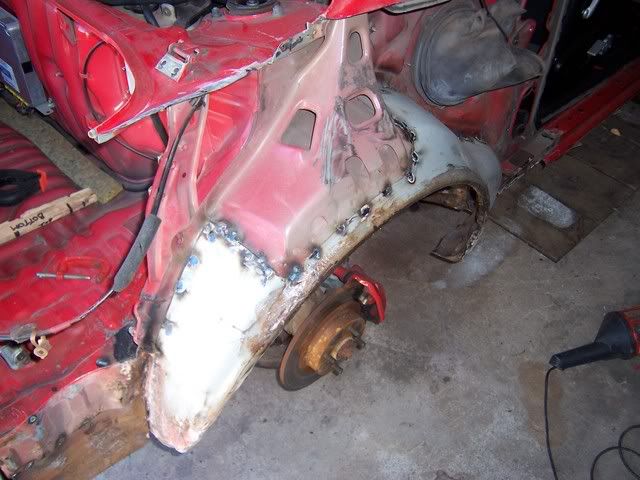
In January I decided to start removing the rear panels, so with a combination of spot weld cutter and drills I set about my car, passenger side first. :shock:

Image
Image

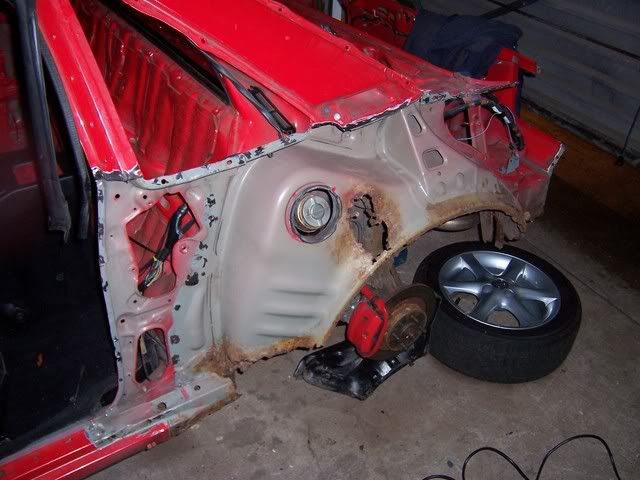
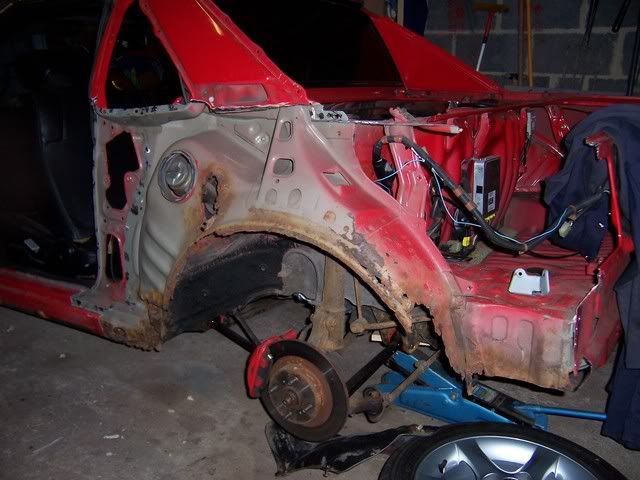
The rot was worse than I thought so had to replace the inner arches as well, Toyota no longer do them but MK3 Fiesta inner arches from Beevers were quite close, but still require some cutting.
Image
Image
Image
Image

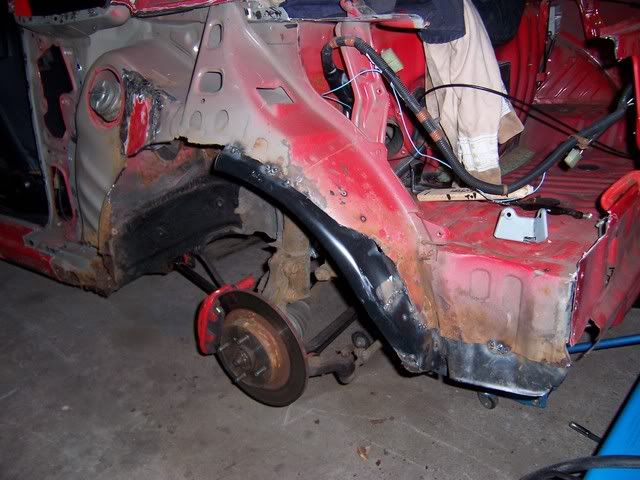
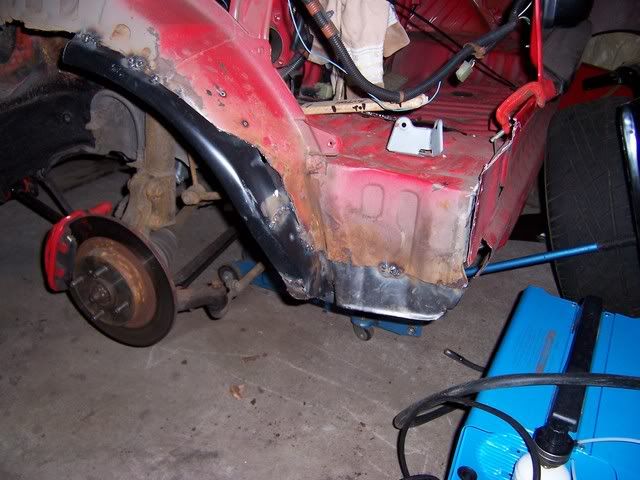
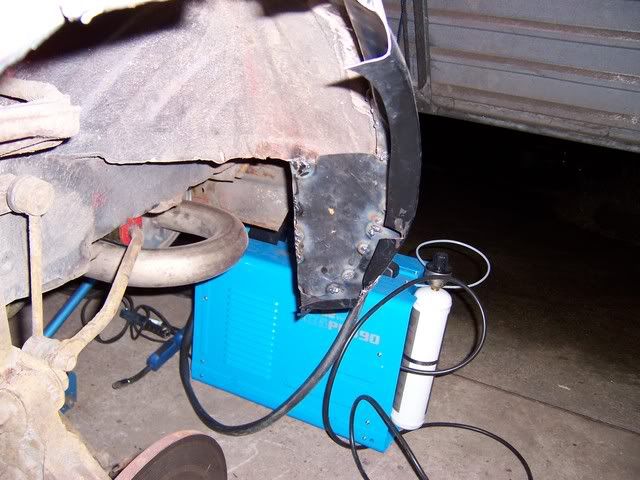
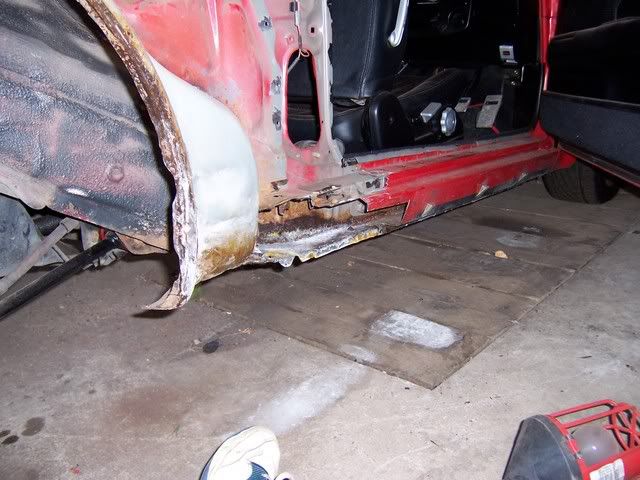
Next I had to repair the rear of the sill, and then fit the new panels. I decided not to put the whole panel on as it runs into the top of the roofline so I cut the panels to fit behind the rear quarter light vent.
Image
Image
Image

After much spot welding and sealing it was done. Next to the passenger side, I was lucky that the inner wing on my parts car was OK so I cut it out and welded it in :thumleft:

Image

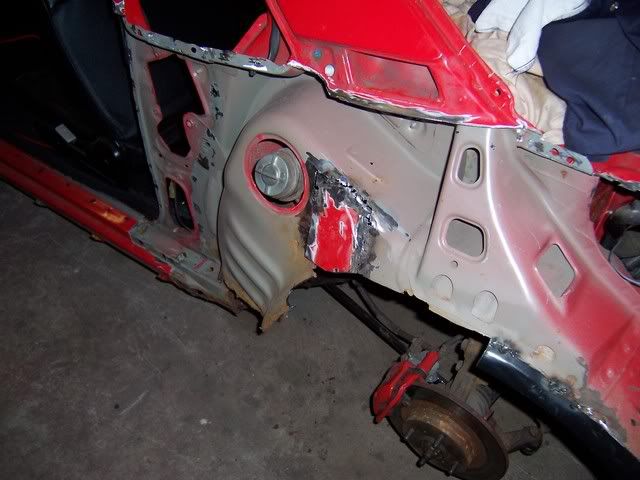
The rear of the sill on this side was worse but fixable
Image

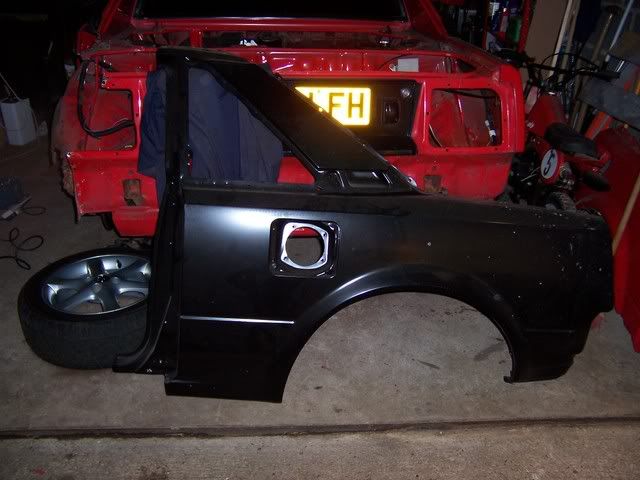
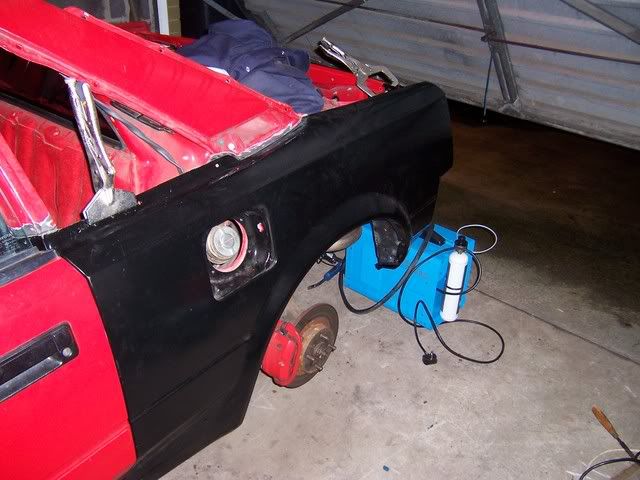
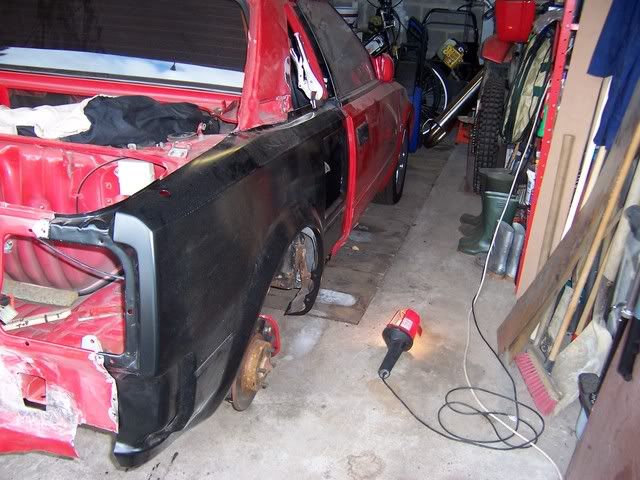
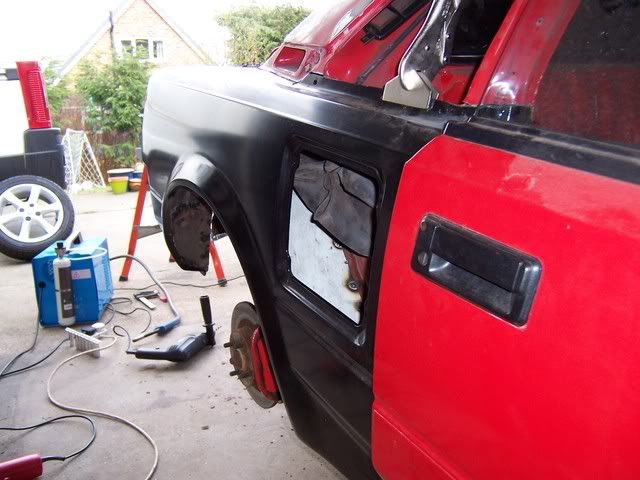
Then the new panel was fitted
Image
Image

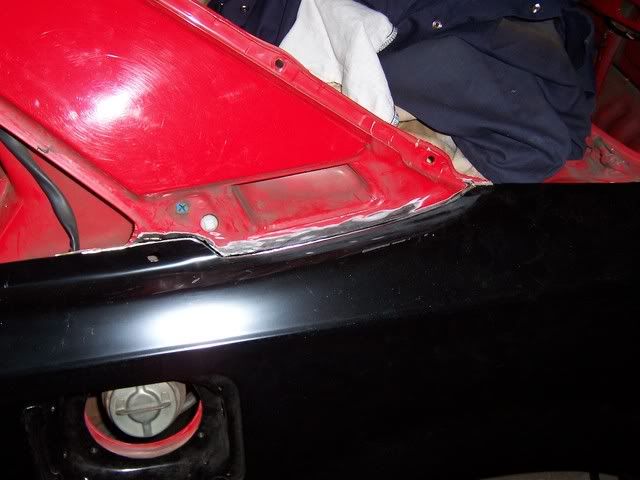
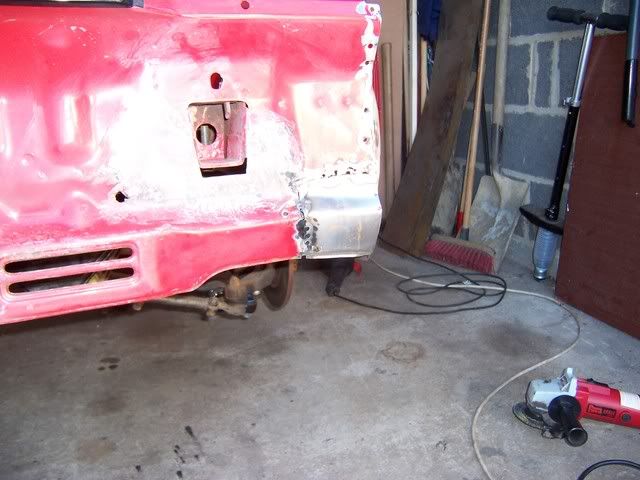
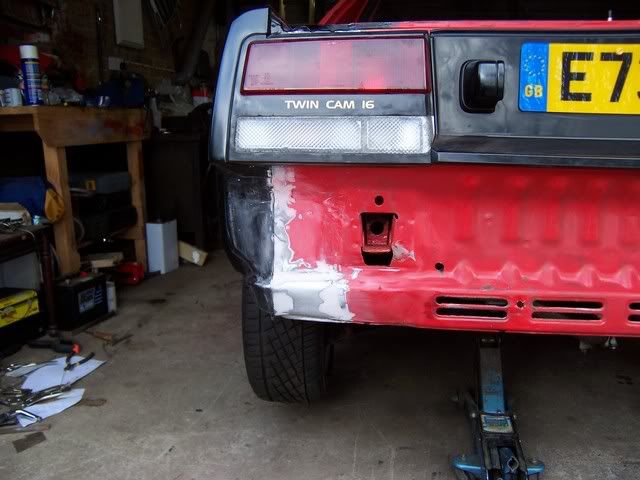
The bottom corners of the rear valance both had to be replaced with new metal...
Image
Image
Image

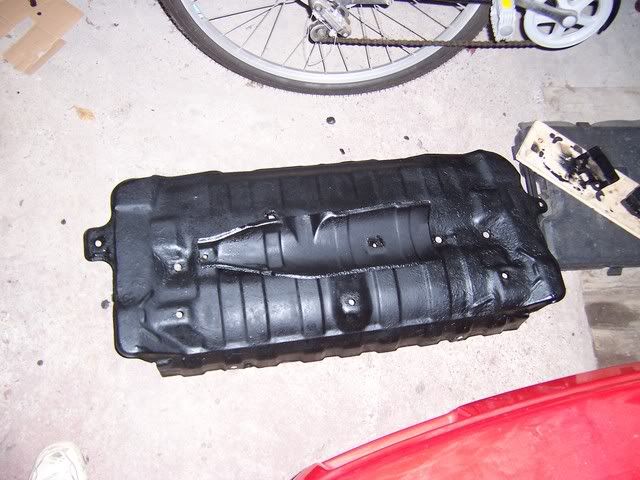
And then the guard under the rear floor was removed and POR15ed and tidied up in general
Image
Image
Image

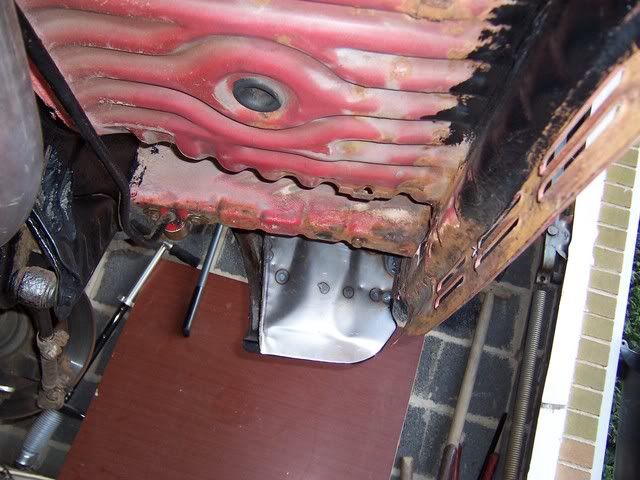
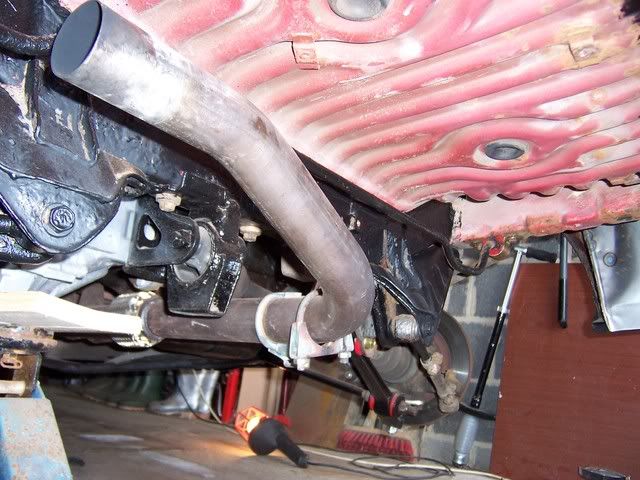
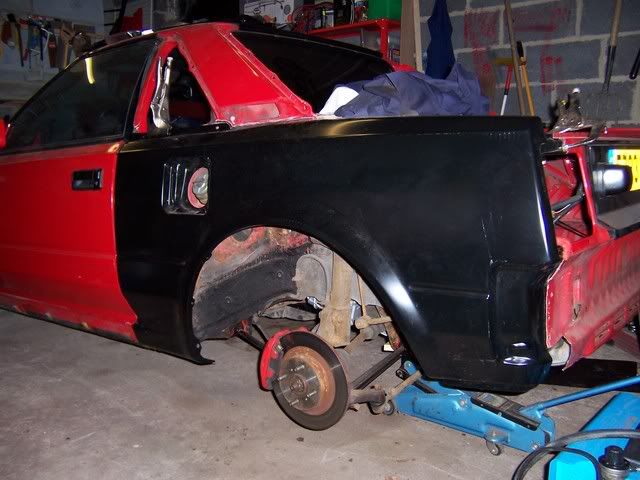
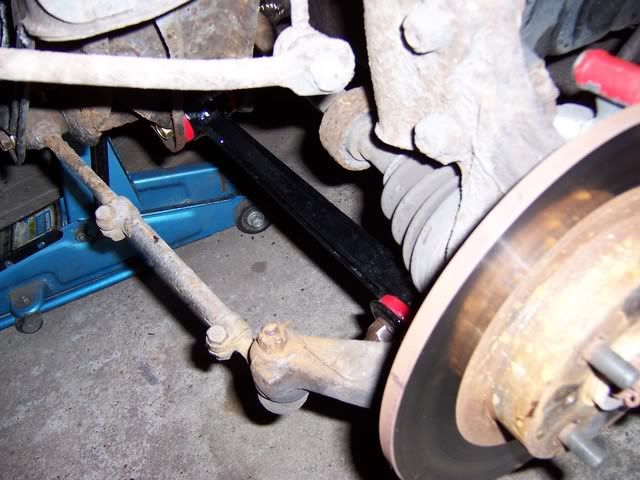
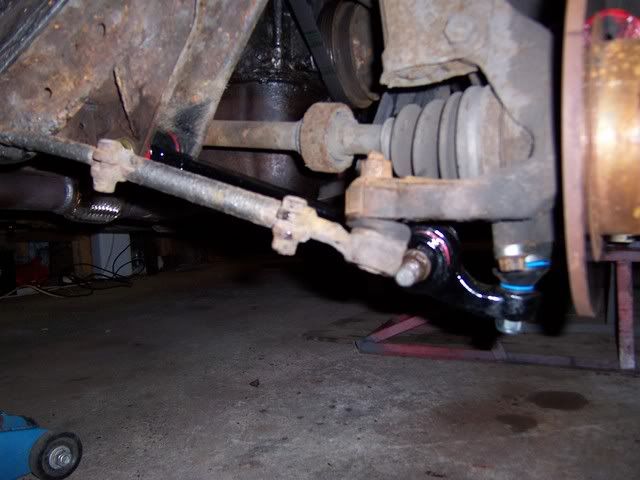
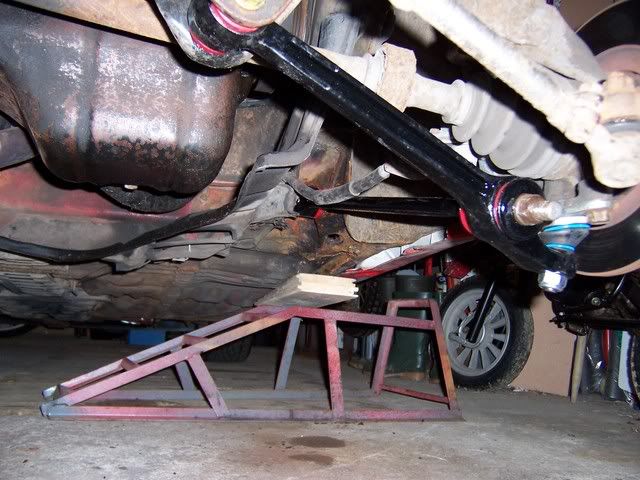
While I was down there I replaced the suspension bushes with poly and had the arms powder coated
Image
Image
Image

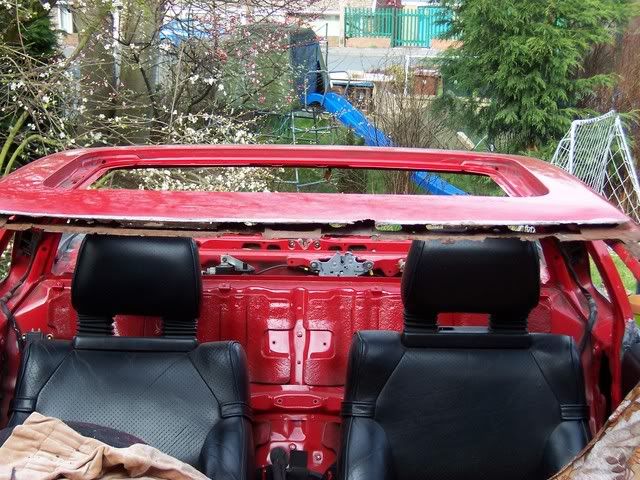
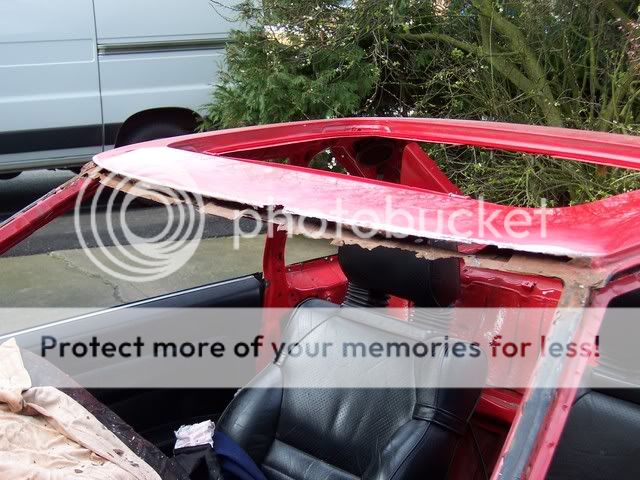
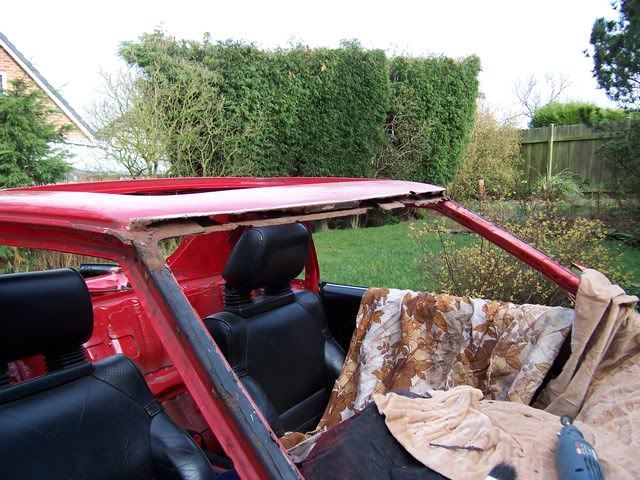
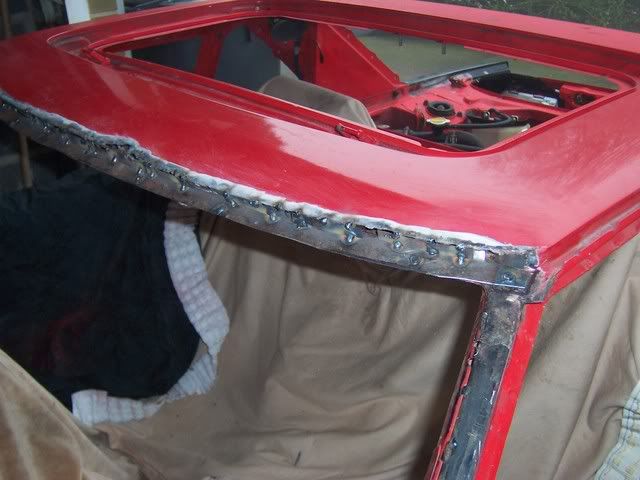
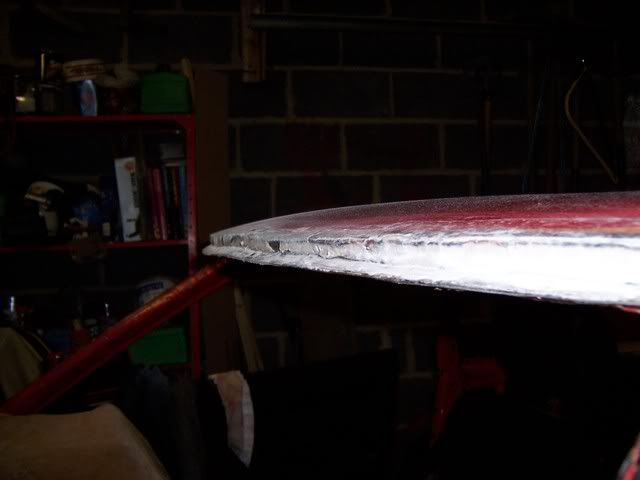
Next big problem was the top of the windscreen, I had the glass removed (came out in one piece) and discovered why I had a leak :shock:
I had no metal left.
Image
Image

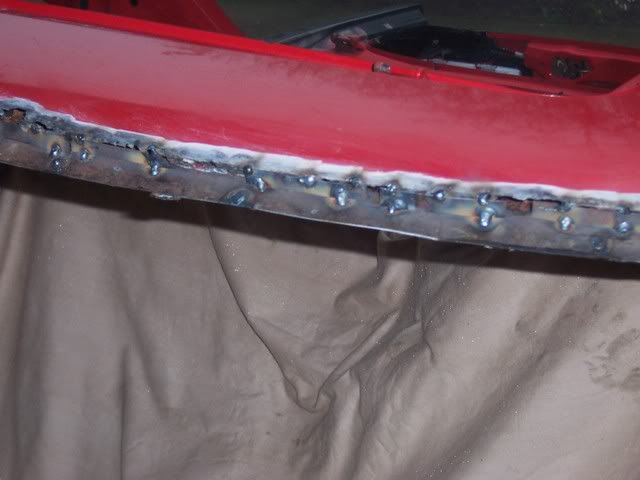
After some more welding and filling and some POR15 ....

Image
Image
Image
Image
Image

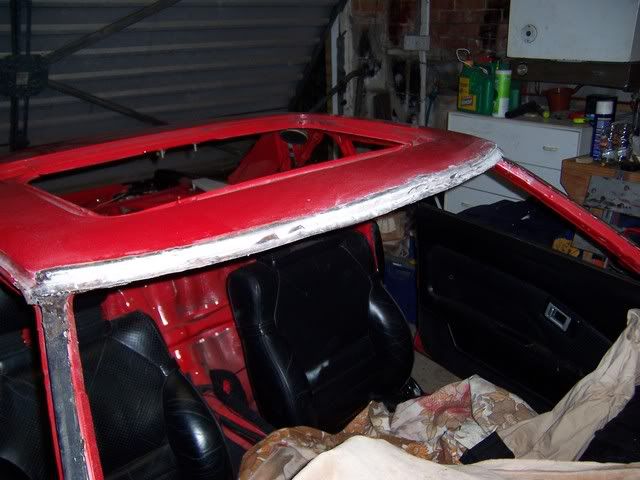
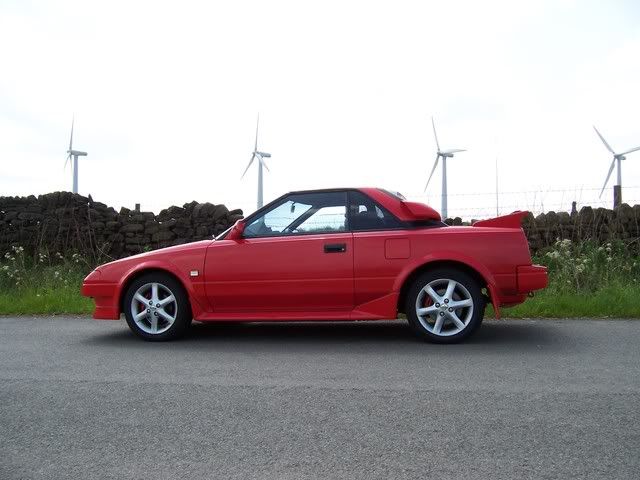
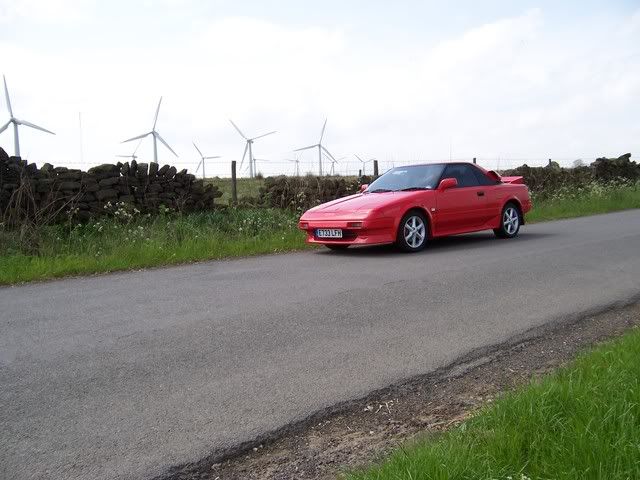
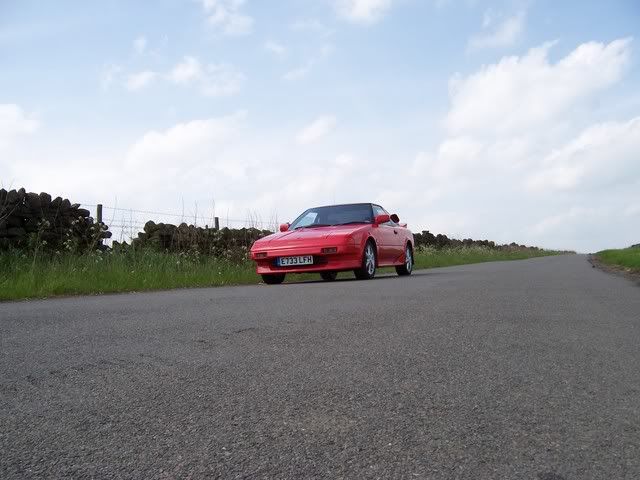
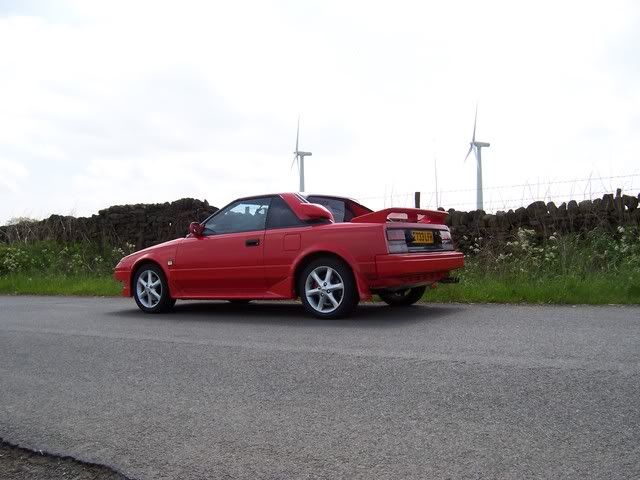
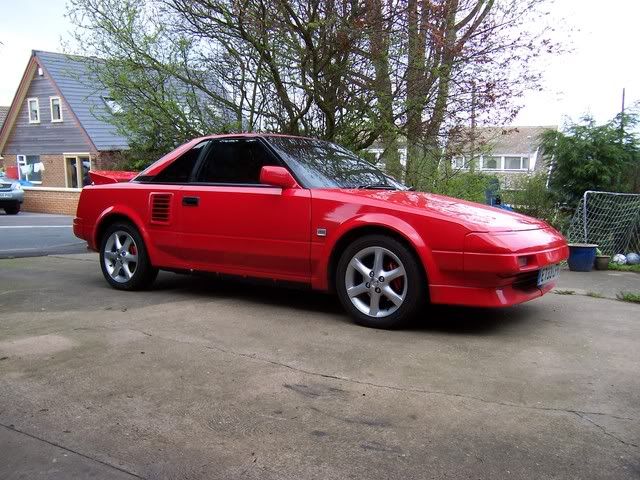
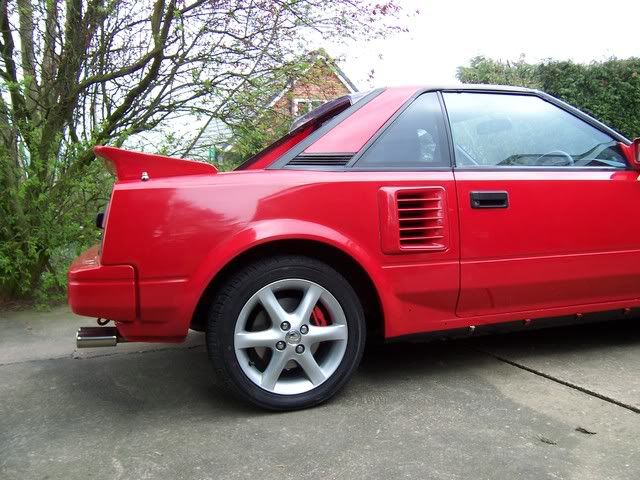
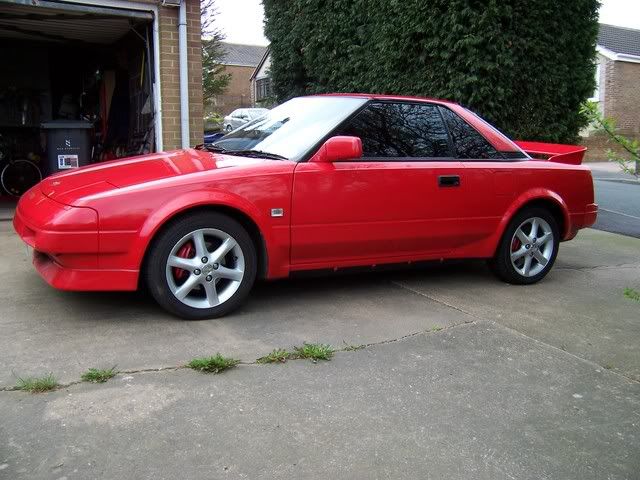
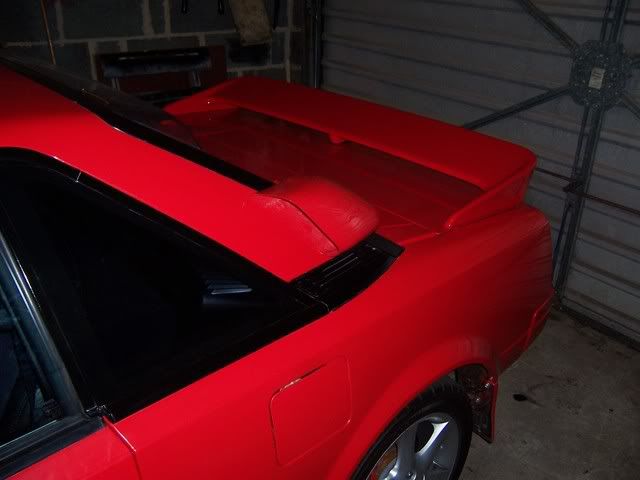
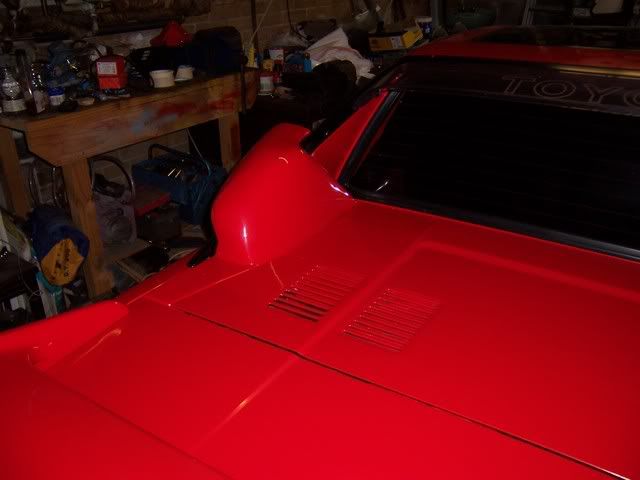
Then it was off for a respray
Image

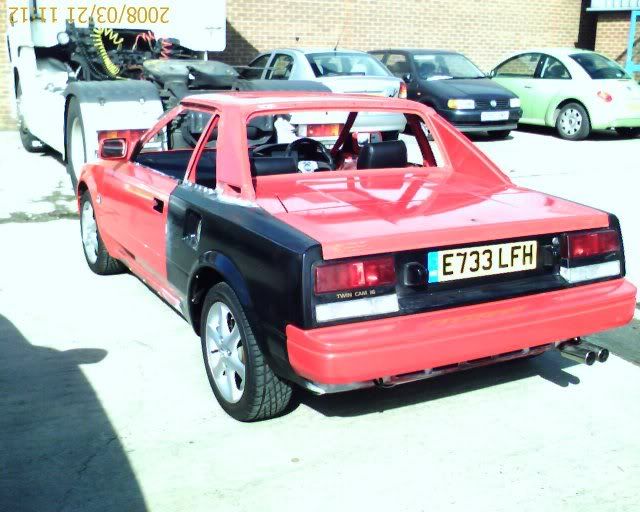
Here are some of it when I got it back (skirts are back on now), still needs a really good polish but am going to run it for a while and let the paint harden :thumleft:

Image
Image
Image
Image

And finally a bit of Marmite, I am not sure whether I love it or hate it
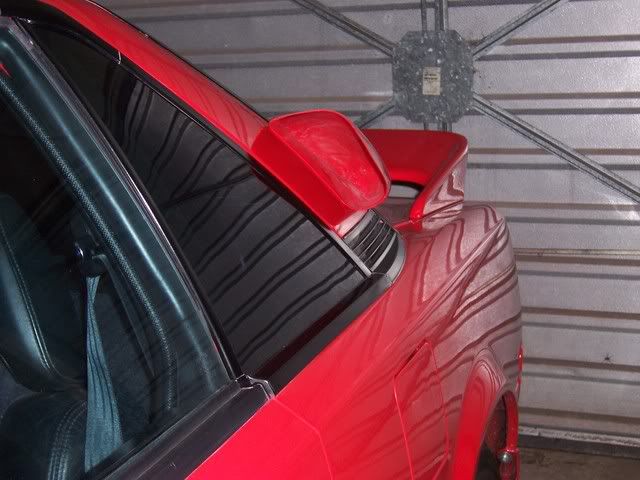
 :-k

Image
Image
Image

You decide :lol:
Last edited by coverco on Thu May 29, 2008 2:33 pm, edited 1 time in total.
un1eash
Posts: 4453
Joined: Fri May 13, 2005 8:25 pm
Location: Leicester

Re: Restoration .....56k Beware NEW PICS

Post by un1eash »

Looks very good, makes me want to get mine fully resprayed.
EarL
Posts: 6049
Joined: Sat Dec 18, 2004 12:18 am

Re: Restoration .....56k Beware NEW PICS

Post by EarL »

Looks absolutely superb mate. Well done. :thumleft:
Charged
IMOC Committee
Posts: 8897
Joined: Fri Sep 02, 2005 8:09 pm
Location: Herts

Re: Restoration .....56k Beware NEW PICS

Post by Charged »

Fantastic 8)
If you can't see the angle, you're in trouble.
coverco
Posts: 1489
Joined: Mon Mar 20, 2006 6:31 pm

Re: Restoration .....56k Beware NEW PICS

Post by coverco »

Thanks for the nice comments :thumleft:

One thing I forgot to say, before I started this in January I had never used a MIG welder before (I had used arc welders), looking at the welds this will not surprise some people, but I would just like to reassure people that it is not impossible to learn welding skills so give it a go, my Clarke welder cost £140 and IMO has payed for itself :lol:
monkeymax
Posts: 4595
Joined: Thu May 04, 2006 12:41 am
Location: Portsmouth

Re: Restoration .....56k Beware NEW PICS

Post by monkeymax »

After you dropping hints of your progress here and there with photos in threads, it's fantastic to see this series of photos from start to finish... and you've done a great job...

Well done...! :clap:

A lot of effort put into saving that car, but look at the result! :D


Just one thing though, you say you had the suspension arms powder coated, did you do anything with the subframe thing that the arms bolt in to at the rear? Yours look to be messier than mine, and I've gone to the length of applying POR-15 to these as well... Just wondering whether you thought it necessary to do these as well, or if you figured doing this would be overkill? (as that may help me decide to draw a line in the work I'm doing too!!! :) )
coverco
Posts: 1489
Joined: Mon Mar 20, 2006 6:31 pm

Re: Restoration .....56k Beware NEW PICS

Post by coverco »

monkeymax wrote:After you dropping hints of your progress here and there with photos in threads, it's fantastic to see this series of photos from start to finish... and you've done a great job...

Well done...! :clap:

A lot of effort put into saving that car, but look at the result! :D


Just one thing though, you say you had the suspension arms powder coated, did you do anything with the subframe thing that the arms bolt in to at the rear? Yours look to be messier than mine, and I've gone to the length of applying POR-15 to these as well... Just wondering whether you thought it necessary to do these as well, or if you figured doing this would be overkill? (as that may help me decide to draw a line in the work I'm doing too!!! :) )


They look worse in the picture than they are.I wire brushed them and put a bit of POR15 round them, the rust was superficial on them so rather than risk shearing off the bolts and having to drill and tap them I left it :D

I think the ones on the 1a's are more prone to rust, my car is always garaged and does not go out in the rain so they should last me for years :lol:
User avatar
Lauren
IMOC Committee
Posts: 38632
Joined: Mon Dec 13, 2004 5:37 pm
Location: Greater Manchester
Contact:

Re: Restoration .....56k Beware NEW PICS

Post by Lauren »

Great job. :+:

Not sure about the marmite though. :tongue:
2020 GR Yaris - Circuit Pack :lover:
coverco
Posts: 1489
Joined: Mon Mar 20, 2006 6:31 pm

Re: Restoration .....56k Beware NEW PICS

Post by coverco »

Lauren wrote:Great job. :+:

Not sure about the marmite though. :tongue:


Neither am I :oops:

I have the original panel, so I just tried it, it is growing on me and I still think it must put some extra air near my K&N, will leave it for a while and see what happens :thumleft:
HT
Posts: 2296
Joined: Sun Mar 26, 2006 12:17 am

Re: Restoration .....56k Beware NEW PICS

Post by HT »

Must say top job - your efforts are going to reward you with a genuinely rotfree mk1 for years to come :thumleft:
Tiger Tim
Posts: 220
Joined: Tue May 22, 2007 11:18 am
Location: Ireland

Re: Restoration .....56k Beware NEW PICS

Post by Tiger Tim »

Well done. It looks fabulous. Like you, I can arc weld but have never had much luck with the Mig. Will have to learn as I need to do a good bit of welding next winter.

One question - how did you join the inner & outer arch - did you spot weld it?

T.
coverco
Posts: 1489
Joined: Mon Mar 20, 2006 6:31 pm

Re: Restoration .....56k Beware NEW PICS

Post by coverco »

Tiger Tim wrote:Well done. It looks fabulous. Like you, I can arc weld but have never had much luck with the Mig. Will have to learn as I need to do a good bit of welding next winter.

One question - how did you join the inner & outer arch - did you spot weld it?

T.


The inner and outer arch is not joined on the original, it looks to be stuck on with double sided foam :shock: I did tack it in the centre and then used some fibreglass resin and filled it with seam sealer. So far so good :thumleft:
bburn13
Posts: 434
Joined: Mon Jul 16, 2007 7:37 pm
Location: Bolton Gr Manchester UK

Re: Restoration .....56k Beware NEW PICS

Post by bburn13 »

:thumleft:
Great work Tommy.
Just to add
Pics dont do it justice
It looks even better in the flesh

Any chance you could bring it along to Tatton this weekend?
I think there are a couple of spare tickets
http://www.imoc.co.uk/forums/viewtopic. ... 4&start=40


Dave
89 SC - Beauty.
89 Track n/ail - The Red Dwarf
84 Blue 1.5 Tin Top Rummy, 54 RX8 -Rex
coverco
Posts: 1489
Joined: Mon Mar 20, 2006 6:31 pm

Re: Restoration .....56k Beware NEW PICS

Post by coverco »

bburn13 wrote::thumleft:
Great work Tommy.
Just to add
Pics dont do it justice
It looks even better in the flesh

Any chance you could bring it along to Tatton this weekend?
I think there are a couple of spare tickets
http://www.imoc.co.uk/forums/viewtopic. ... 4&start=40


Dave


Thanks Dave, I would love to go to tatton but unfortunately my wife has decided I have to go to a wedding in York on Saturday, I have tried to wriggle out of it but to no avail :(

Will give you a PM soon about track days (not in my car) but my son fancies it :thumleft:
The Griffin

Re: Restoration .....56k Beware NEW PICS

Post by The Griffin »

Looks fantastic, the top of my screen looked a bit like that when i had it replaced, woundered why i had a leak!!
Gad
Posts: 201
Joined: Tue Oct 02, 2007 11:08 pm
Location: Castle Donington, home of fast cars and strange festivals...

Re: Restoration .....56k Beware NEW PICS

Post by Gad »

Seeing as I have a slight leak I'm a little worried now! :neutral:
coverco
Posts: 1489
Joined: Mon Mar 20, 2006 6:31 pm

Re: Restoration .....56k Beware NEW PICS

Post by coverco »

Here are a few of the car, today. It was nice and I came over all arty :lol:

Image

Image

Image

Image


And new seats

Image
Mr_Spanners
Posts: 121
Joined: Tue Apr 08, 2008 8:15 pm
Location: Ashton-Under-Lyne

Re: Restoration .....56k Beware NEW PICS

Post by Mr_Spanners »

WOW That's one seriously thorough restoration - you must be very happy with the results (if the pics are anything to go by you must be over the moon!)

Maybe you'll be able to bring the car to Tatton in August to show us all???
superbad
Posts: 186
Joined: Tue Jan 17, 2006 9:12 pm
Location: East Lancs

Re: Restoration .....56k Beware NEW PICS

Post by superbad »

Looks a top job - excellently documented too!

Do you have the door windows tinted? They look great against the black trim.

Are you planning on replacing the rubbing strips from the doors etc? I'll be respraying mine soon and wondered what it would look like without them as mine had been sprayed over (badly) in the past - I'm favouring sans-strips after seeing those pics of yours. :)
coverco
Posts: 1489
Joined: Mon Mar 20, 2006 6:31 pm

Re: Restoration .....56k Beware NEW PICS

Post by coverco »

superbad wrote:Looks a top job - excellently documented too!

Do you have the door windows tinted? They look great against the black trim.

Are you planning on replacing the rubbing strips from the doors etc? I'll be respraying mine soon and wondered what it would look like without them as mine had been sprayed over (badly) in the past - I'm favouring sans-strips after seeing those pics of yours. :)


Rear quarters and rear screen are tinted, side windows are not, I am not going to replace the rubbing strips, I don't think it needs it, but that is just my opinion :lol:
Post Reply

Return to “MR2 MK1 1984-1989 NA & SC”