DIY Cam Belt Change Walkthrough

===============================
I see a lot of posts on here about who to get to do this job, but I've never seen a walkthrough, and to be honest, it's not that bad.
Under good conditions it's only a couple of hours work.
So, to illustrate my point I thought I'd writeup a quick howto:
My car is a bit of a hybrid of rev 1
& 3, as it's not on it's orignal engine.
For this reason some of your brackets may look a little different, but they should be pretty similar.
You Will Need
=============
2 Jacks
-1 to lift the engine, 1 to lift the car.
A trolly jack and the Toyota jack from the car are fine.
A new belt
Common set of hand tools, socket set, breaker bar, screwdrivers.
A two legged puller for removing the crank pully.
A crayon.
(no, really)
1.
Open the engine cover, loosen the lock bolt, then the tensioner bolt on the alternator, and slacken off until the belt hangs loose.
2.
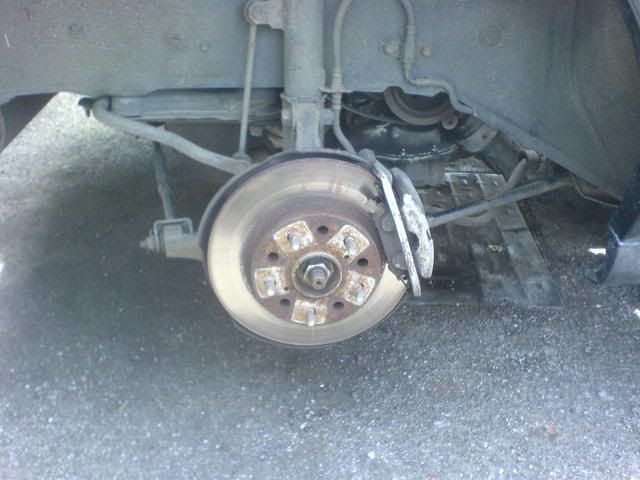
Losen the wheelnuts on the drivers side, chock the remaining wheels, and then jack the car up at the rear drivers side.
Remove the wheel.
3.
Remove the 2 screws holding the side engine cover on, and the bolt holding the earth wire.
Remove the panel.
Remove the 14mm bolts and strut top nuts that secure the cross brace
(if you have one) and remove that too.
4.
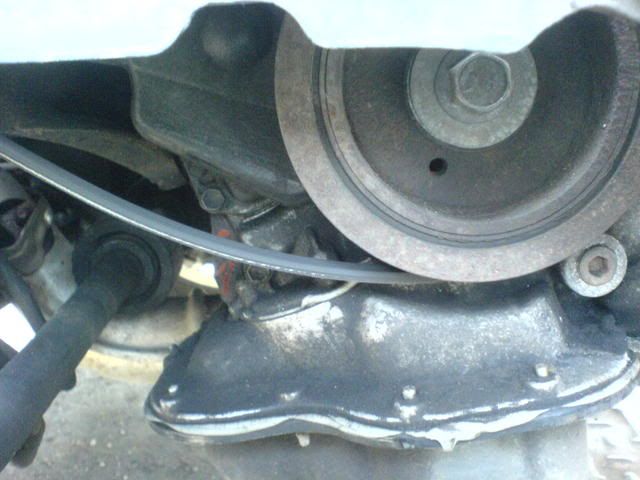
Remove the alternator and ac drive belts.
I find this easier from under the car.
5.
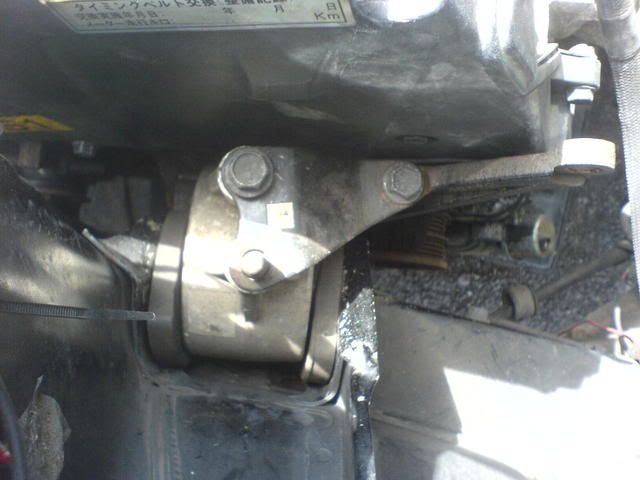
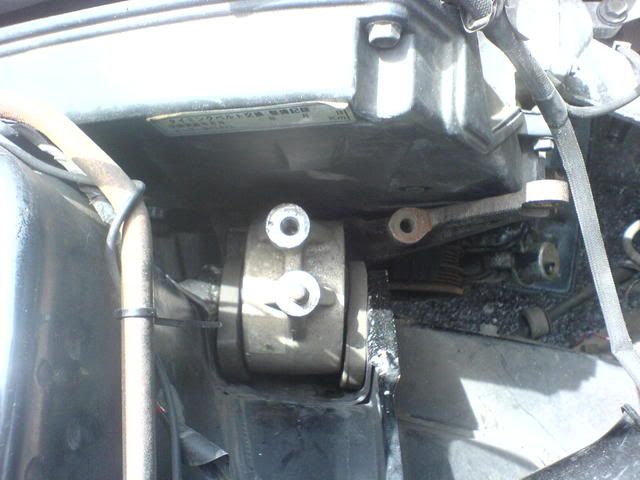
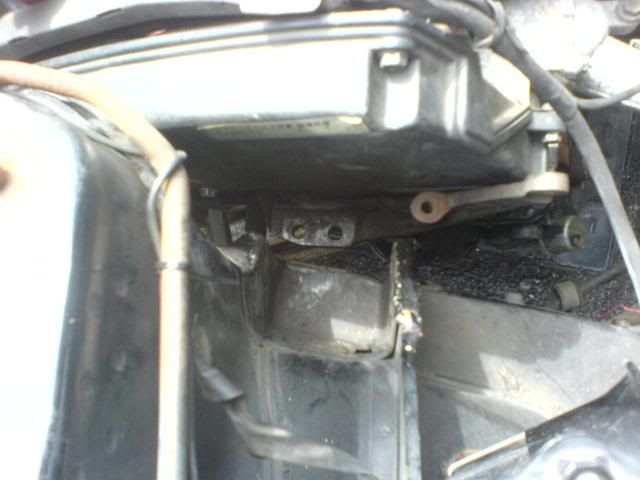
Remove the 2 bolts and 1 nut which secure the top load spreading plate on the RHS engine mount.
6.
Place the trolly jack under the corner of the sump, and raise the jack until it's supporting the engine.
Several people have said never to jack under the sump, but you're only supporting the weight of the
engine, not lifting the car.
It's plenty strong enough for that.
Don't jack to the point you're lifting the car!!

7.
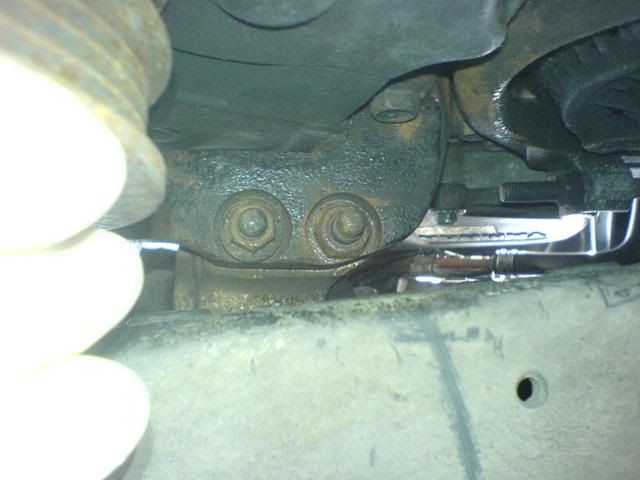
With the engine supported, you can remove the 2 lower nuts on the RHS engine mount.
They're accesible from underneath using an extension bar.
8.
With the nuts removed, you can lower the jack and the engine down.
The engine will lower but be held by the remaining 3 mounts.
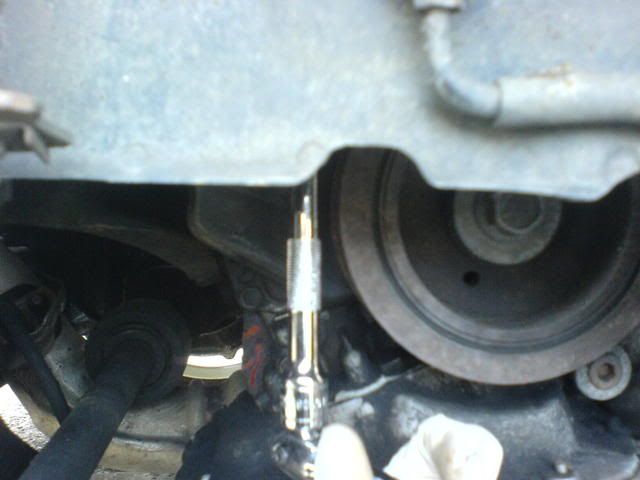
You should now have quite good access to the crank pully.
Put the car in gear, and use a 19mm socket on a breaker bar to undo the crank pully bolt.
I find that if you lie behind the car, you can get your leg on the bar to undo the bolt, but be careful not to slip.
9.
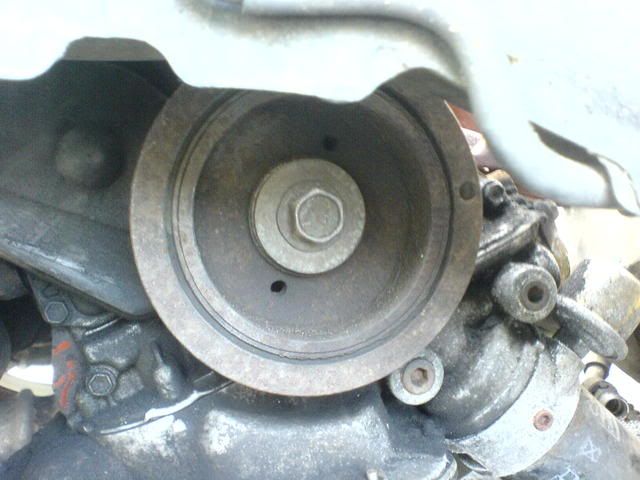
With the bolt removed, use a pully puller to remove the pully.
Mine had been off recently and simply pulled off with my hands.
When using a puller:
1.
Put the bolt back in a turn or 2
2.
Leave all the bolts in the puller loose, let them take tension from the central bolt
3.
Tighten by hand to the point where it holds itself in place
4.
Carefully turn the bolt with a socket as the pully frees.
Be careful not to pull right against the bolt or you'll damage the pully.
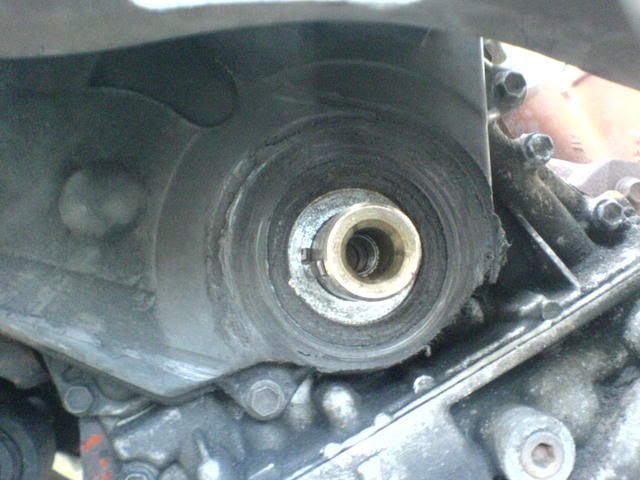
10.
With the pully removed, the next step is to get the remaining engine mount out of the way.
Undo the main bolt that runs through the engine mount, and remove it upwards.
11.
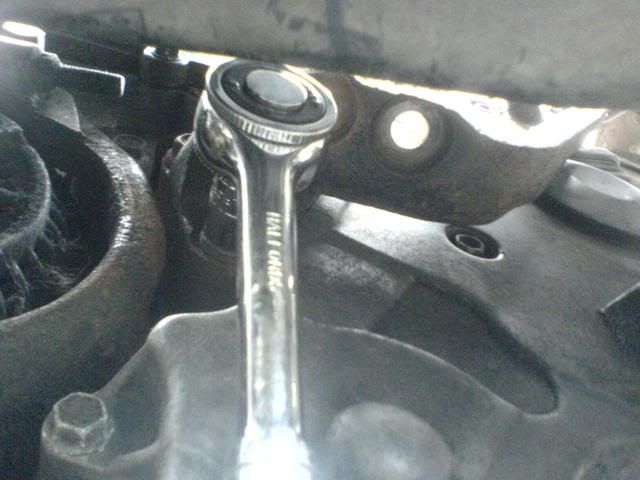
With that clear, undo the 3 bolts which secure the engine hanger to the end of the engine block.
You won't be able to free it yet, just remove the bolts.
2 are above, 1 below.
These are slightly fiddly but you should be able to get a socket on them.
It may help to raise the engine a little with the jack for the top 2.
This is the lower one.
Here it is free but stuck

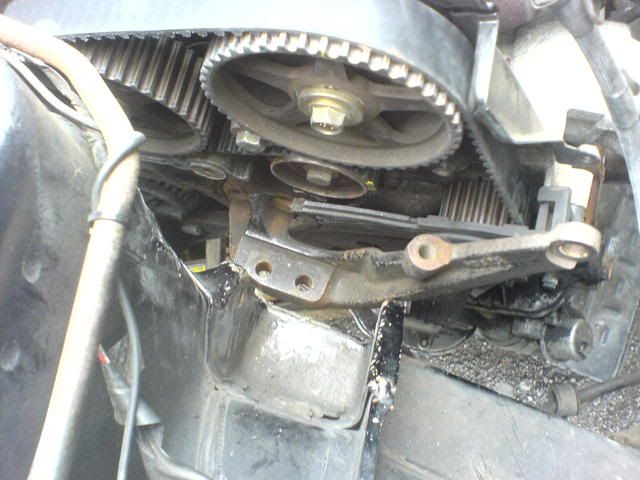
12.
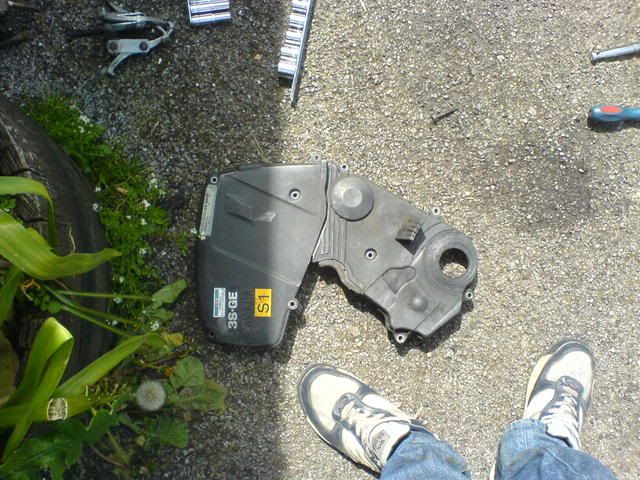
Raise the engine as far aS you can with the jack, and remove the top half of the timing cover.
See below for a picture detailing where all the bolts are.
With the top cover removed, you should be able to pull the hanger free.
Be carefull not to force it and damage anything, it will come but is awkward.
13.Remove the lower half of the timing cover and you're almost ready to start work on the belt.
Don't pull the belt off yet!!
14.
Stand back for a minute and take a tea break.
15.
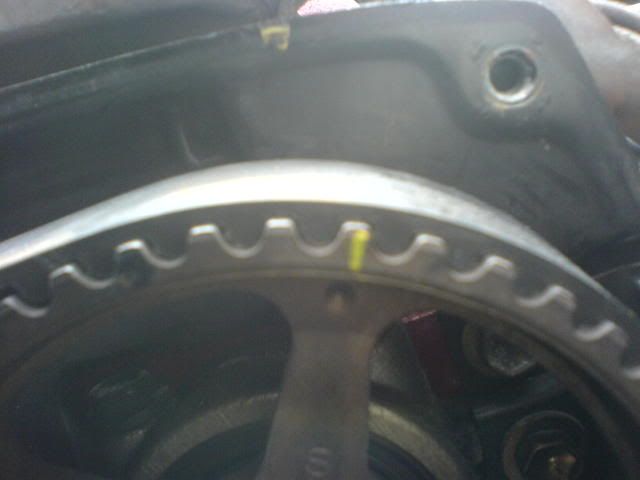
Take the car out of gear, put the bolt back in the crankshaft, and gently
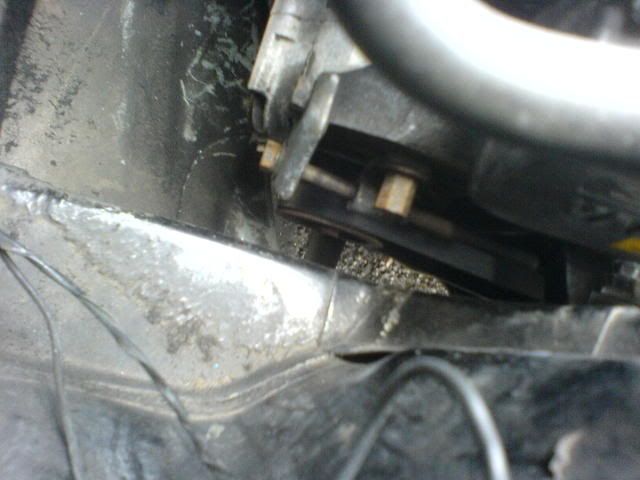
"bar" the engine over
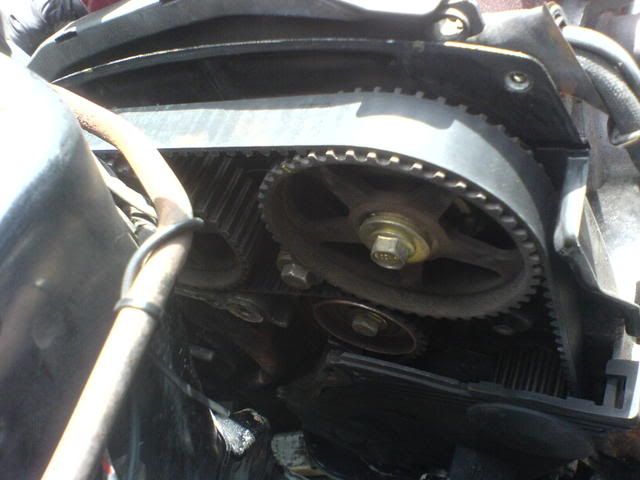
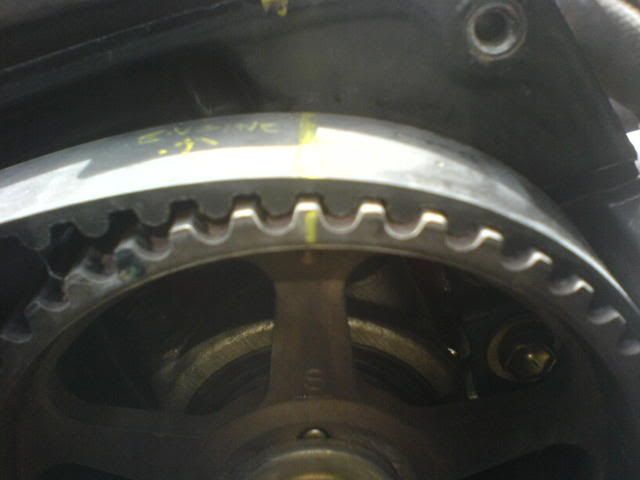
clockwise until the tiny timing mark on the crank lines up with the gap in the oilpump casing, as shown below:
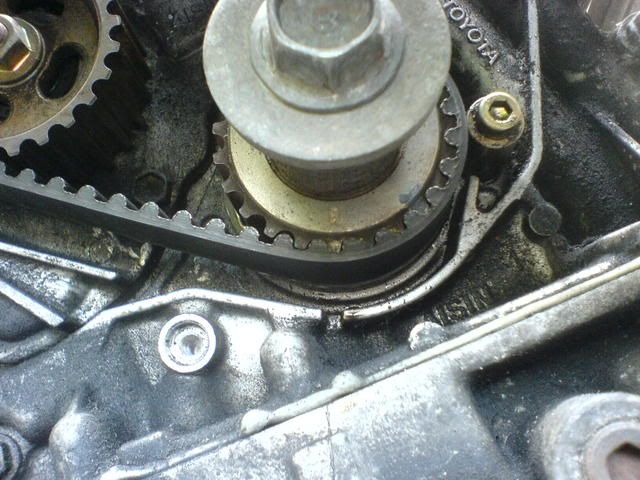
16.
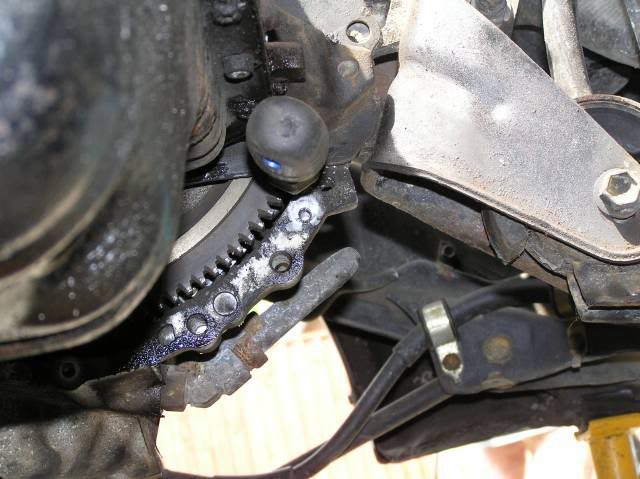
If you now look at the cams, you should see a small
"s" symbol on one of the sprocket spokes, and a dot.
This tooth should line up with the mark on the backing plate.
It's difficult to see as you can't get your head in line.
In the pic below you can see that I actually got it 1 tooth out last time, which is why I'm doing this job again:
17.
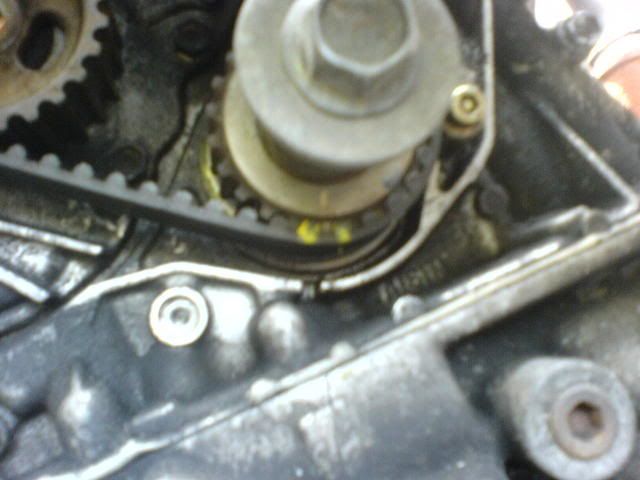
Next I use a crayon to mark the tooth on the sprocket so it's easier to see.
I also draw a line on the belt where that tooth should be located.
Not that I've drawn the line where the tooth on the sprocket
should be, not where it is.

18.
I do the same thing on the crank:
19.
I was refitting the same belt, as it was new.
For a new belt, I would transfer the lines at the correct number of teeth to the new belt.
Most manufacturers print these lines to help you, but for some reason Toyota don't seem to bother.
20.
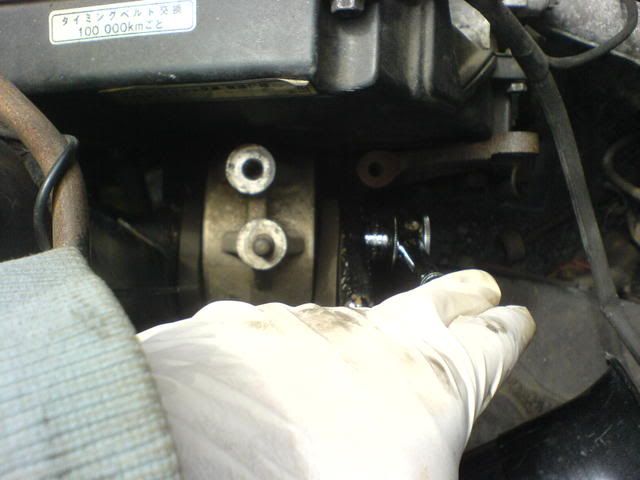
Ok, you can now unbolt the cam tensioner
(2 bolts).
Rev 1 engines have a different arrangement with a spring.
It's easier to release.
21.
With the tension removed, you can remove the belt and put the new one on.
Make sure all your lines align with the correct teeth on the sprockets.
22.
Compress the tensioner with a vice, and place a pin
(allen key) in the hole to retain it.
Notice that the spring is pretty strong, and the allen key you use will be mullered
-so use an old one, not one from your best set!
23.
Refit the tensioner, being carefull not to move the belt off the correct teeth.
24.
To release the tensioner pin, you may have to pry between the plunger and the tensioner pully with a screwdriver.
It helps to have 2 people for this step, as one can pull the pin with pliars while the other prys the plunger from underneath.
25.
With the belt tensioned, ensure all the marks are still aligned.
If they're not, take the belt off and repeat.
Otherwise your car will run like crap.
26.
Once you're happy with it, refit the funny washer which sits on the crank, and the lower cover.
The short bolts go around the edge, with the exception of the lower left corner, which has a long bolt.
27.
With the lower cover in place, raise the engine as far as you can, and replace the engine hanger.
Don't bolt it on yet
28.
Refit the top cover, same rule applies
-short bolts round the edge.
29.
Bolt the hanger back in place.
30.
Lower the engine down, refit the engine mount with the long bolt through it.
This wants to be pretty tight.
31.
Refit the crank pully.
Put the car in gear to tighten the bolt.
Again, this wants to be pretty tight too.
As tight as you can.
32.
Raise the engine slowley, and it should relocate onto the engine mount.
Refit the 2 lower nuts, tighten securely.
33.
You can now remove the jack from under the engine.
Refit the load spreading plate at the top of the mount.
34.
Refit: The cross brace, the engine cover panel, the ac and alternator drive belts and finally, the wheel.
35.
Lower the car down, and then do a final tightenting on the wheel nuts.
Relax and be happy that you've saved
£200 odd.
Hopefully this will be useful to someone.
If I've missed anything just shout!
Cheers,
Jim.