Mk1 roof repair guide

Discussion and technical advice for 84-89 AW10 & AW11 MR2. 3A-LU, 4A-GE, 4A-GZE.

Moderators: IMOC Moderators, IMOC Committee Members

Post Reply
PW@Woodsport
Posts: 7642
Joined: Tue Dec 14, 2004 6:40 pm
Location: durham
Contact:

Mk1 roof repair guide

Post by PW@Woodsport »

Thought some might find this useful, this is also going to appear in one of the classic car mags as a "how to" as the car is owned by a mag journo.

Anyway i feel that rot is the number one killer of our cars, this more than anything is going to despatch them in their hundreds as solid repair sections run out. So finding a cheap and sustainable repair method is vital.

Aside from the usual rear arches, sills and chassis members (all well known areas) , i am seeing more and more Mk1s with terminal roof rot, so bad around the top windscreen edge that it makes the car uneconomical to repair, in fact i've seen 3 cars this year scrapped for this very reason that would otherwise survive another day.

The car in question i am repairing is an average Mk1, with good arches, sills and not too bad everywhere else, but with a totally rotten top screen/roof section. I tried for months to find a good roof from a breaker to "simply" weld that part in, but after contacting all the usual sources i just simply couldn't get a good roof edge. That concerns me, it means the death of many a Mk1. If untreated this area allows lots of water ingress that not only delaminates the windscreen but compounds the rot issues further by taking out the door pillars and floor pans..... really not good.

So i've repaired Mk1 roof sections this way a number of times in the past, but thought now would be a good time to document it so that others know what they are up against and hopefully save a few cars in the process.

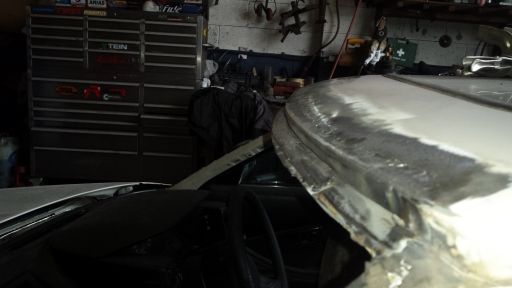
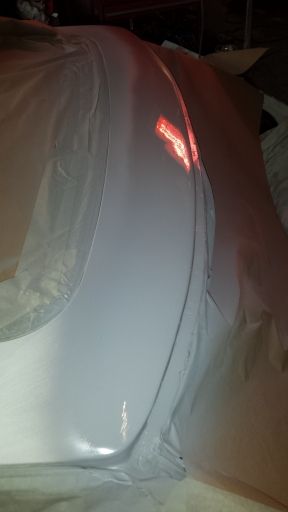
This is the section of roof in question, the screen has already been professionally removed and the rotten section of roof cut out.... you can see how rotten the inside edge was, simply filling that with bodge or fibreglass is not an option.

Image

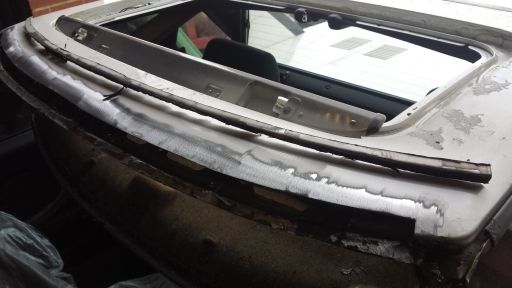
You can see we at least have a solid bottom edge, for the purpose of this guide i am going to assume everyone at least has this, if this is rotten too then it really is time to assess the whole car as a viable project.

Image

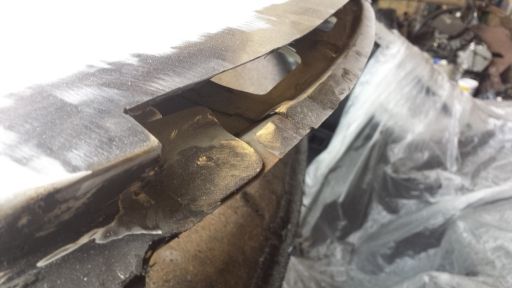
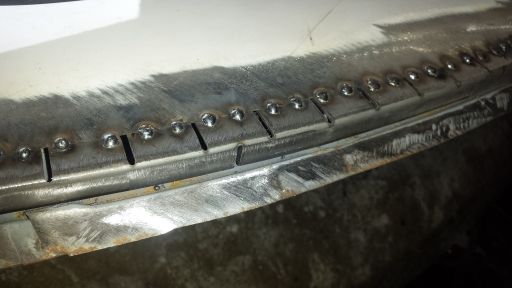
The first step is to buy some 20mm angle 1.2mm thick and make slices in one edge every 20mm or so, this will let you contour the top edge around the roof. The second problem is the roof not only contours in this direction, it also has a left to right rise, so 4 or 5 vertical slices are needed in the front face to allow the repair section to bend both ways.

Careful tacking needed while keeping the outer edge in line with the lower panel to ensure the roof edge is not lost. Do not seam weld any of this, it will distort the roof so badly you will need to use a ton of filler to get it right, we will only be using the filler as a cosmetic final layer.

Image

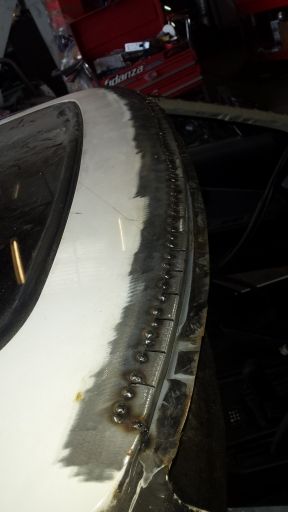
As you can see this has only been tacked to the upper edge, not the lower, we will be making another repair section for the lower half.

Image

Here you can see the nice sweeping radius of the roof is back to how it should be.

Image

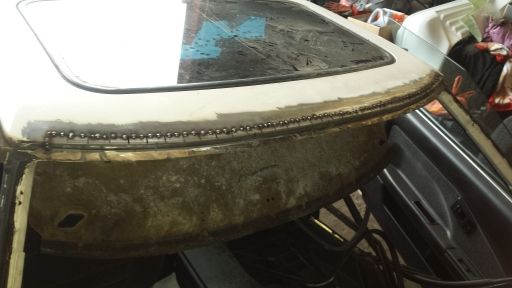
The next stage is to make a lower repair section, using 10mm angle, 1.2mm thick, this is again sliced along one edge and given intermediate slices on the other edge, then drilled for spot welding. This will tuck behind the vertical edge of the section we just welded in.

Image

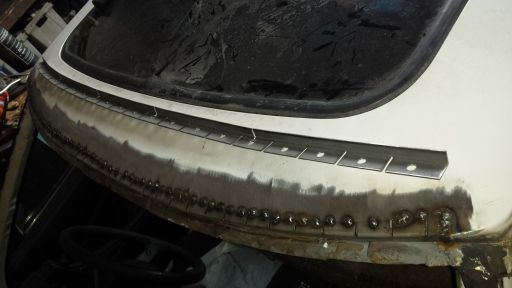
With this lower section welded in, the upper slices are welded through to the lower repair and all welds ground flat, i use a 40 grit flappy disc for this as it has much more control than a grinding disc.

Image

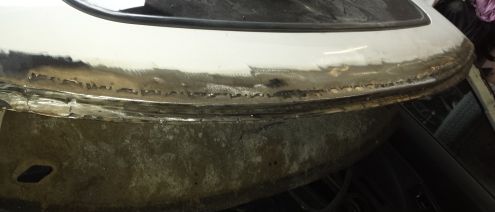
That is the structural side taken care of, the roof is now 100% solid, and probably stronger than it was originally as the vertical face is now double skinned.

Image

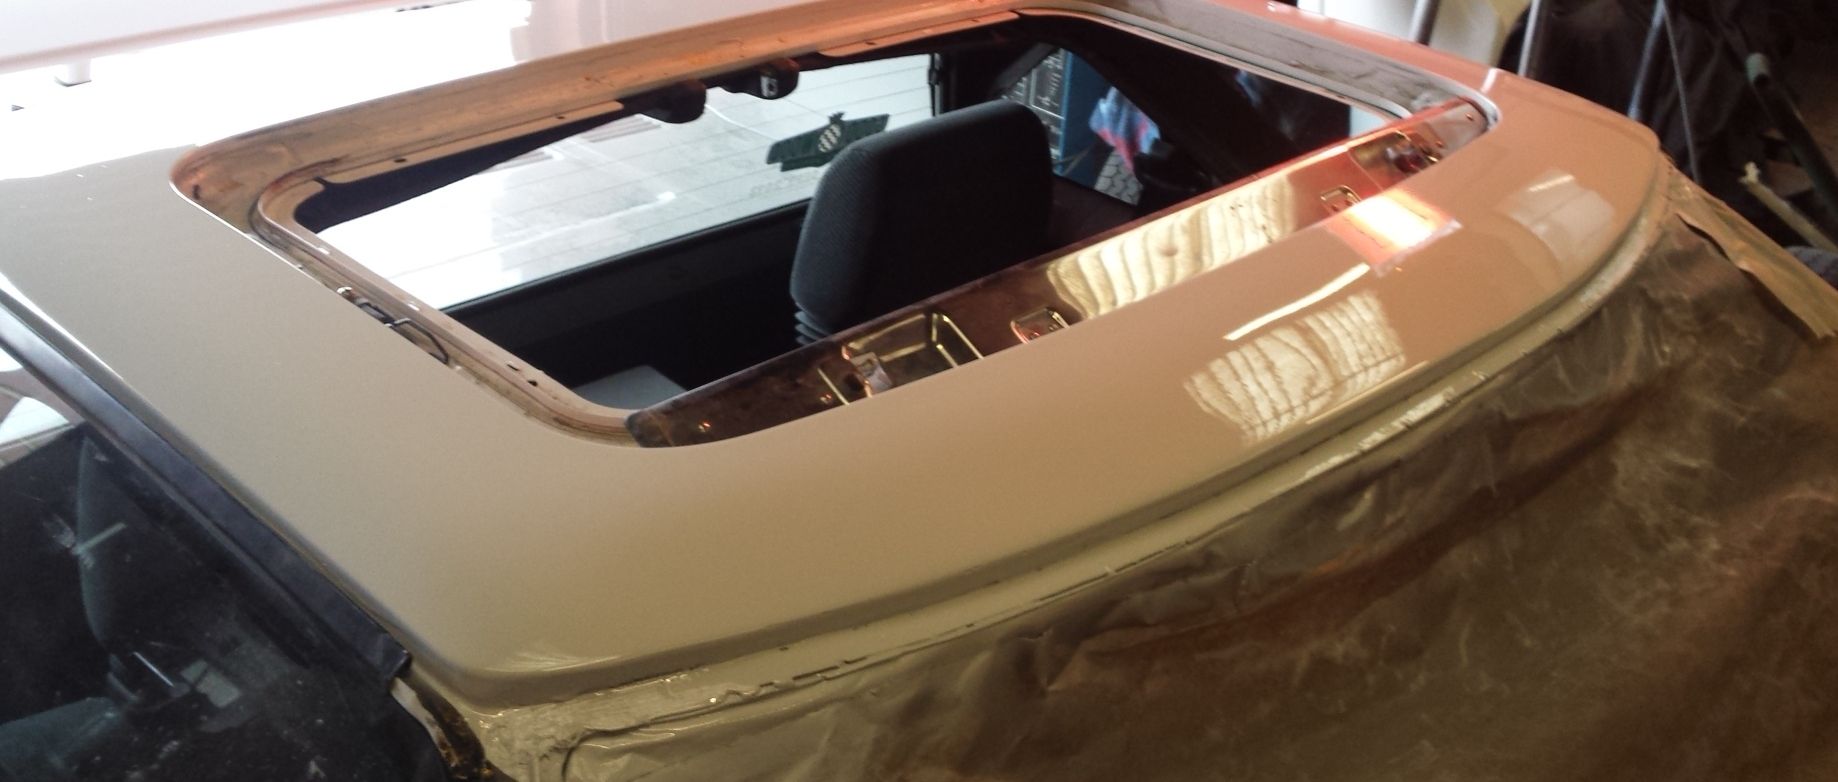
Now to make it cosmetically right, if you've taken time with the welding it should only require the bare minimum of filler.

My first skim, probably only 1 or 2mm thick.

Image

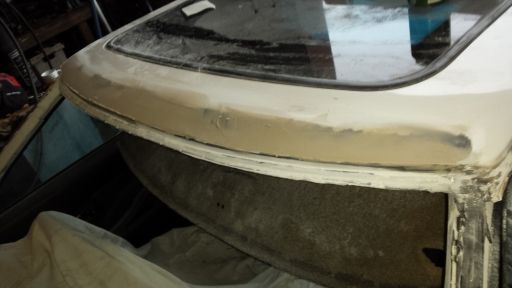
This is sanded back with a bodyfile and 80 grit to reveal any high or low spots...

Image

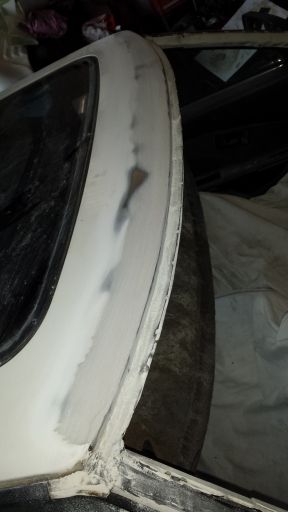
A second skim then takes care of any remaining problem areas, now it may take you 3 or 4 skims to get it right, i've been doing this all my working life, so i'm awesome :)

Image

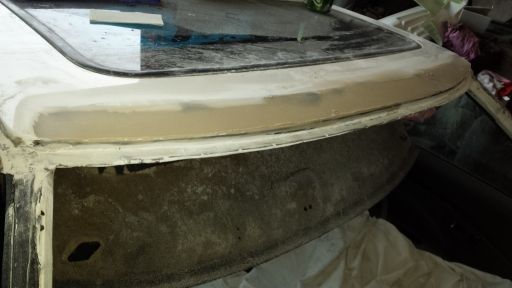
After final sanding, you don't need to use finer grades, if you use a 4+1 high build primer (must be gun applied, aerosols are no good for a repair like this) it will take out all of the 80 grit scratches with 2 or 3 coats, it really is fantastic stuff.

Image

One totally repaired roof, and it cost £20 in steel and a days work.

Image

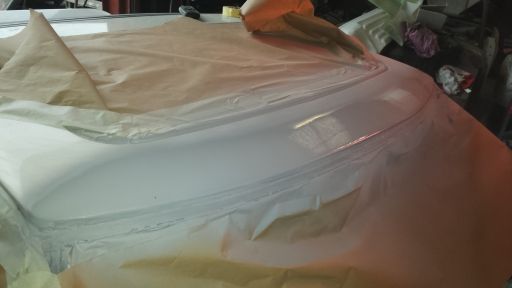
This just requires wet flatting with 240 then 800, then 1500 grade before painting, it is also a good idea to waxoyl the inside of the repair from the cabin to prevent the welded repairs causing a future problem.

Hopefully someone will use this guide to save their Mk1.
Image
cabbydave1
Posts: 249
Joined: Sat Feb 20, 2010 6:53 pm
Location: Stockport nr Manchester

Re: Mk1 roof repair guide

Post by cabbydave1 »

Nice write up But I tend to use lead before the first coat of filler and etch primer the bare metal surfaces after the filler has been sanded. You cannot beat spray on filler but you have to make sure its cured well so it doesn't sink into the scratches left by sanding. Nice job though Paul. Wher I worked once a beater made a panel to go into a roof where a sunroof had been fitted on a old E type Jag, it took ages on the wheeling machine to get the shape right before he braised it in a real craftsman he was not many left these days.
PW@Woodsport
Posts: 7642
Joined: Tue Dec 14, 2004 6:40 pm
Location: durham
Contact:

Re: Mk1 roof repair guide

Post by PW@Woodsport »

I'll be honest, wasn't expecting criticism for doing a helpful guide, perhaps others should follow my example and write guides showing how it should be done.

Been rescuing mk1 roofs this way for over a decade without a problem, but your comments are taken on board.
Image
cabbydave1
Posts: 249
Joined: Sat Feb 20, 2010 6:53 pm
Location: Stockport nr Manchester

Re: Mk1 roof repair guide

Post by cabbydave1 »

I didn't mean it like thar Paul anyone saving a mk1 with steel is a good guy in my book but it's not a cheap job to do when you think of the man hours and the chance of screens breaking etc
FrankBelgium
Posts: 52
Joined: Mon Jan 16, 2006 8:11 pm
Location: Willebroek Belgium

Re: Mk1 roof repair guide

Post by FrankBelgium »

Hey Paul,

Thanks for the guide, it will be saved on a Belgian computer without any critics!
:thumleft:
It is surely not needed for the moment on my car but could certainly become very handy one day!

Cheers,
Frank
PW@Woodsport
Posts: 7642
Joined: Tue Dec 14, 2004 6:40 pm
Location: durham
Contact:

Re: Mk1 roof repair guide

Post by PW@Woodsport »

You're welcome Frank :thumleft:
Image
LimeyMk1
IMOC Committee
Posts: 11200
Joined: Thu Oct 04, 2007 9:28 am
Location: Gosport

Re: Mk1 roof repair guide

Post by LimeyMk1 »

You must need to be pretty accurate with the cut into the roof Paul, how do you get that marked up to retain the curvature of the front edge?
PW@Woodsport
Posts: 7642
Joined: Tue Dec 14, 2004 6:40 pm
Location: durham
Contact:

Re: Mk1 roof repair guide

Post by PW@Woodsport »

Yes that cut does need to be accurate, if you take a marker pen and use the existing roof edge as a guide, you can rest your hand on the edge and scribe the whole way along.

A more accurate way would be to use a block of wood, drill it so the marker fits through and align the back edge with the roof edge.

Either of the above or simply measure back from the roof edge in a dozen places and join them all up.
Image
PW@Woodsport
Posts: 7642
Joined: Tue Dec 14, 2004 6:40 pm
Location: durham
Contact:

Re: Mk1 roof repair guide

Post by PW@Woodsport »

The finished repair...

Image

Image

This is my out of the gun finish which is better than factory paint finish but will still get flattened back and polished.
Image
LimeyMk1
IMOC Committee
Posts: 11200
Joined: Thu Oct 04, 2007 9:28 am
Location: Gosport

Re: Mk1 roof repair guide

Post by LimeyMk1 »

Damn fine finish there Paul. :thumleft:

I was lucky with mine and found a T-bar with a good roof I could chop out.
PW@Woodsport
Posts: 7642
Joined: Tue Dec 14, 2004 6:40 pm
Location: durham
Contact:

Re: Mk1 roof repair guide

Post by PW@Woodsport »

Lucky indeed Chris, i hunted for weeks to try and find a repair section, everything has rot of some sort, extremely hard now to find.
Image
Post Reply

Return to “MR2 MK1 1984-1989 NA & SC”