Hello, all.
After a few years of debate (didn't want yet another rusty project) I finally took the plunge and acquired an AW11.
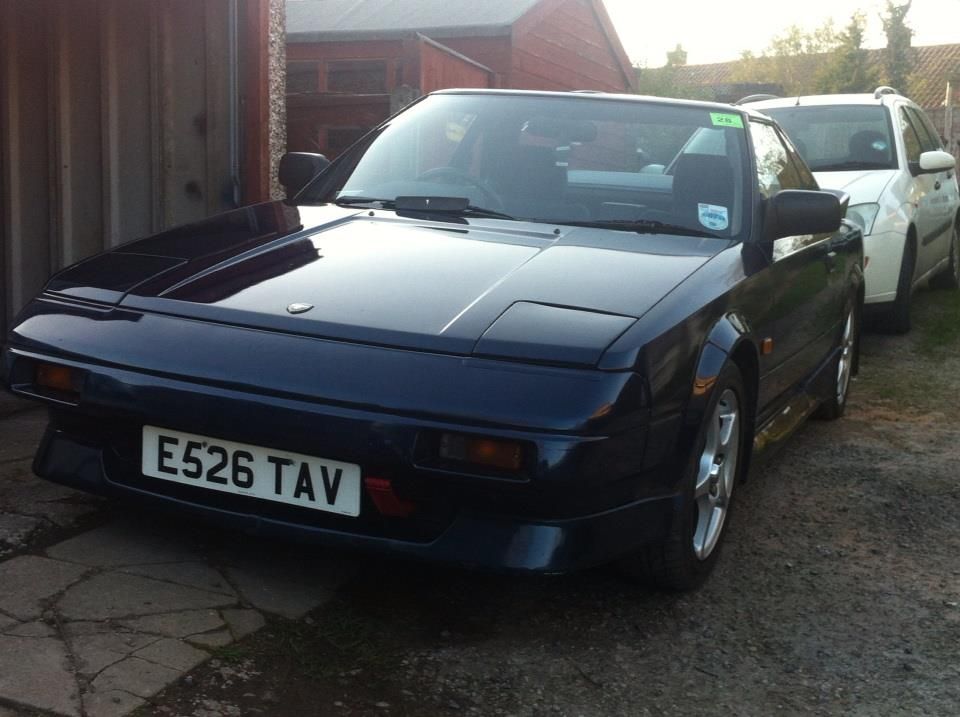
No doubt some of you will recognise it. I bought it from Steve Horrocks and it was previously in the hands of Lee H and is #19 Woodsport conversion.
It had basically stood, unused for a year and after some initial flat battery delays, drove the car the 140 miles or so home, without issue.
I will keep this brief and copy most of the thread over from another forum, until I am caught up.
The car is currently running itro of 225 bhp with a Rev 1 engine, but I will be converting it to Rev 3 parts, new exhaust and charge cooler/pump etc as well as a full respray in Ferrari Rosso Corsa, new wheels and interior and whatever else I come across.
Say hello to project OutRun.
An awesome game, I am sure we can all agree. I used to love hoying in 20p pieces in the arcade at the front of Dickens DIY in Washington.
So now that I have a car that looks just* like the Testarossa, the plan is coming together (I hope the blonde seat cover isn't far behind).
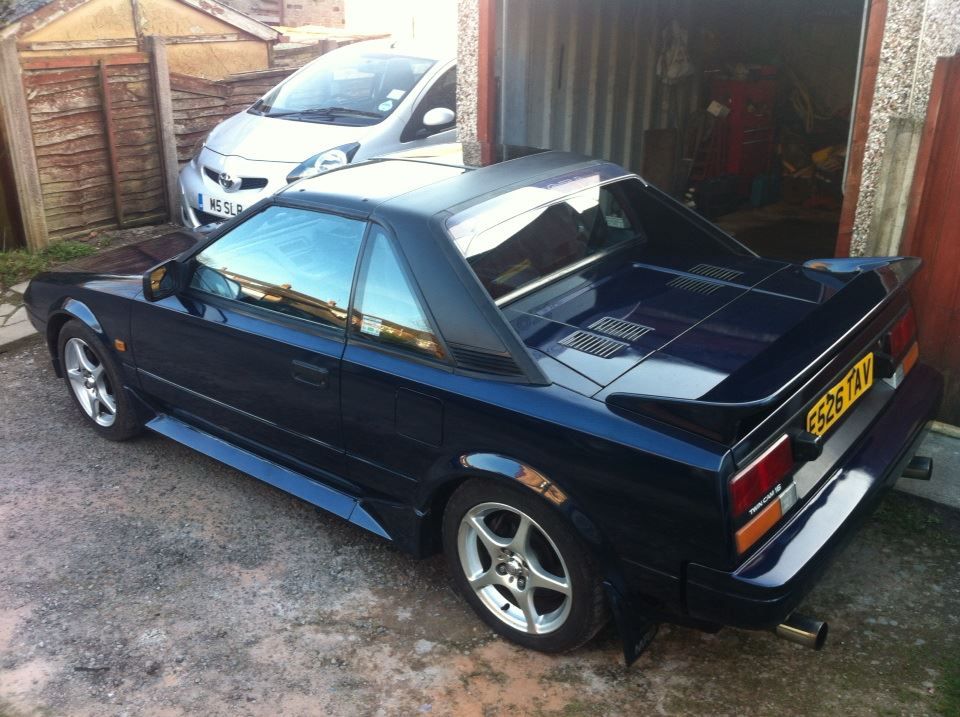
I had initially planned to source a good mk1 t-bar and convert it myself, but, IMO this is a fairly involved conversion and after I put some feelers out, Lee H told me about this one and it seemed to fit the bill.
Shame about the xxxx Mica blue paint it is festooned with!
It already has the CT20 turbo and metal head gasket from a Rev 3, Celical ST185 GT4 charge cooler and MASSIVE pump, but I plan to run around 300 bhp, so will be upgrading.
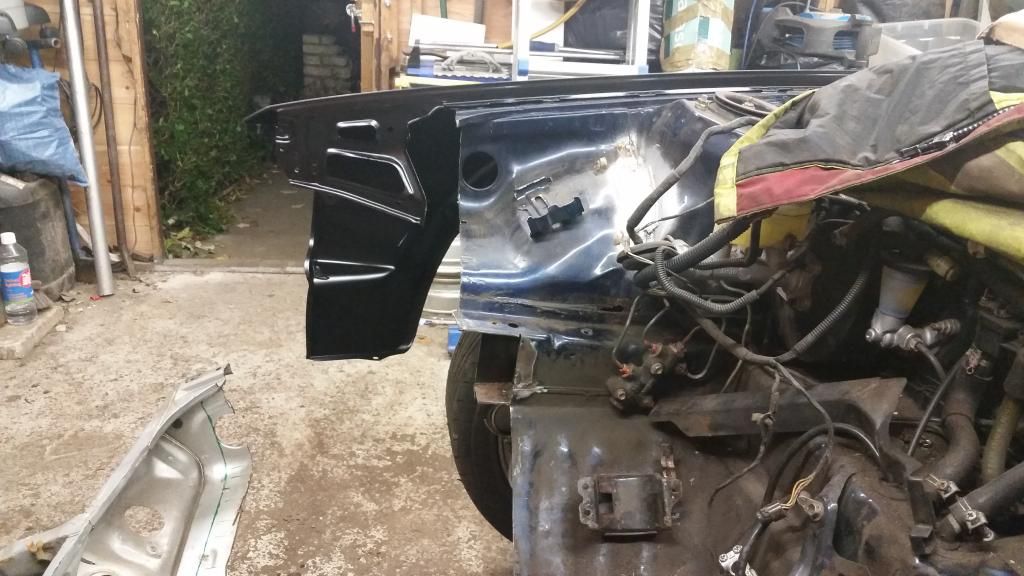
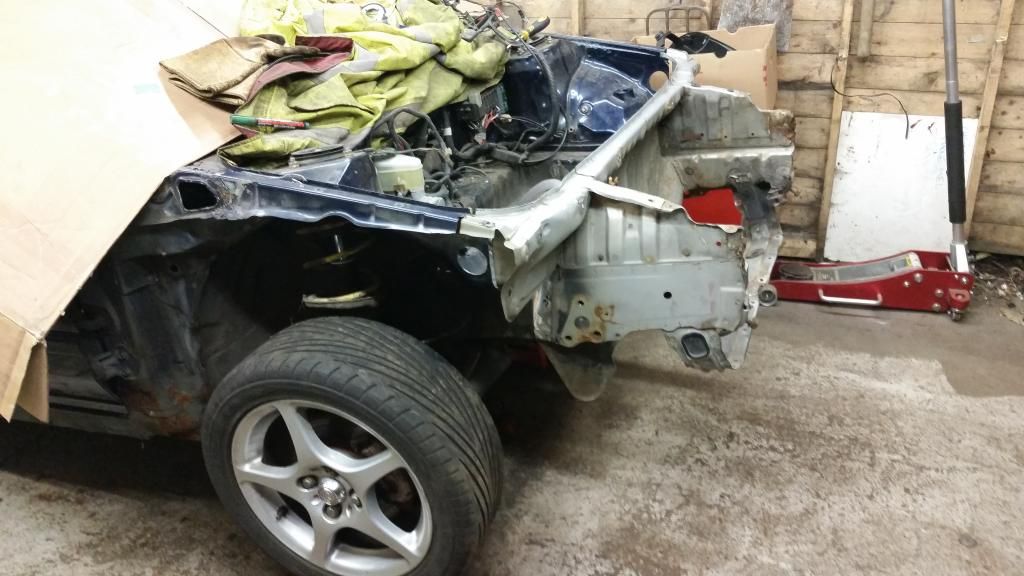
For now though, it's bodywork time. Luckily, I am not doing it...
I took a spin up the body shop, to get a quote - before I started to pull the car apart, as I may have decided against it - for the welding repairs it needs and a full colour change.
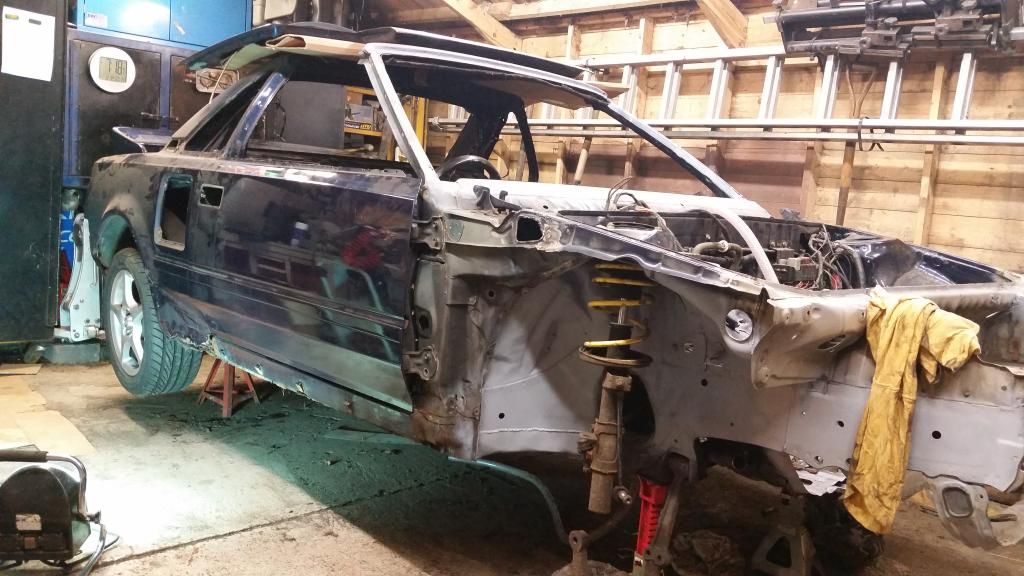
I was quoted a price I am happy with, so I have started to strip the car down.
I prefer this is many ways, yes it is a lot more work, but it ensures no bodges (unless done by me!) and gives me a chance to apply cavity wax and underseal etc.
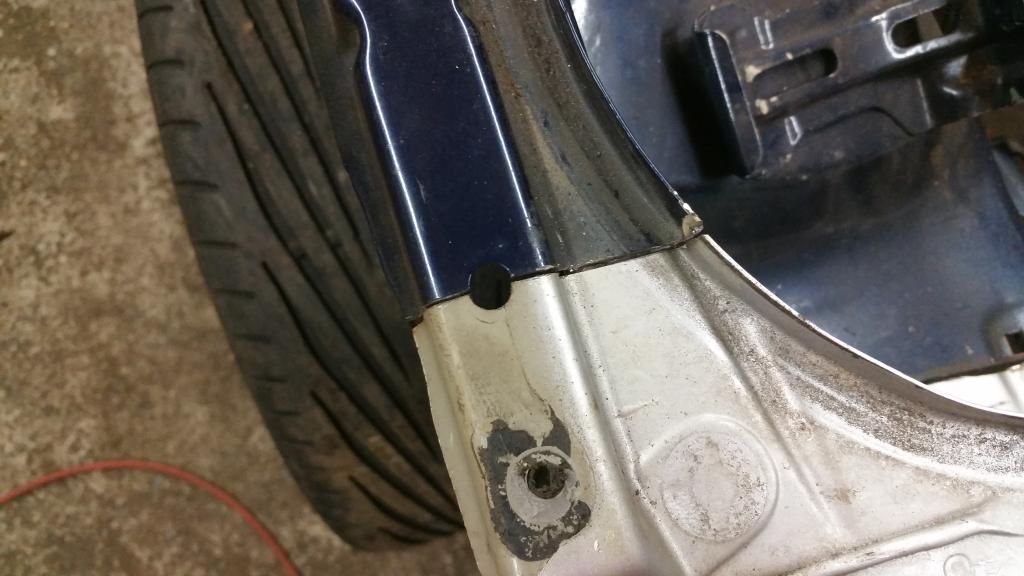
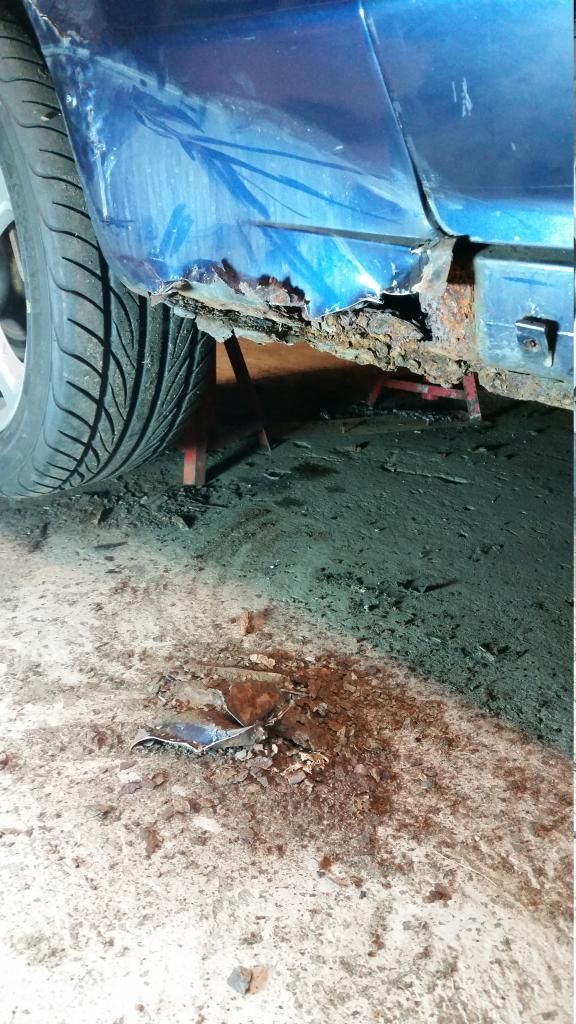
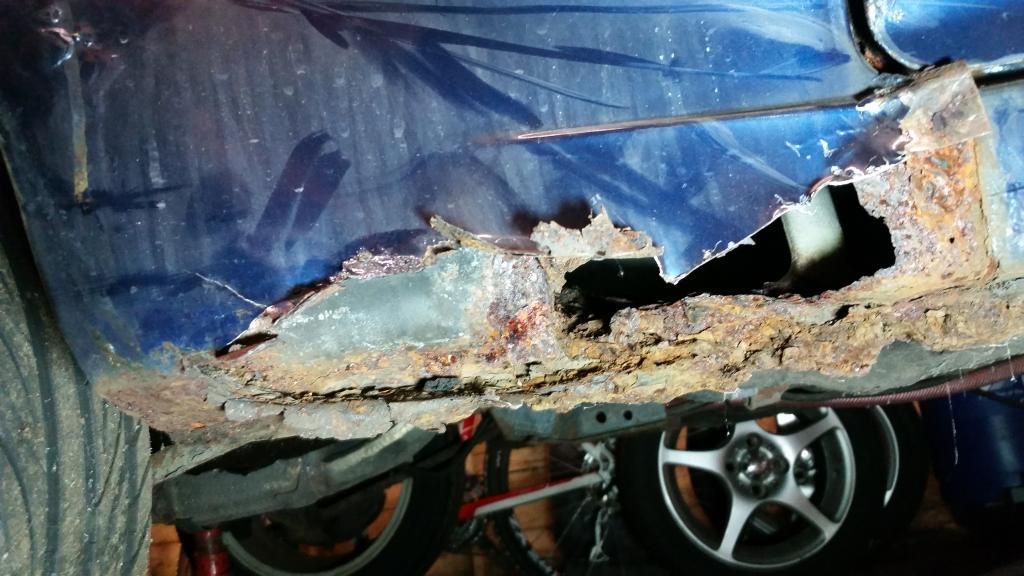
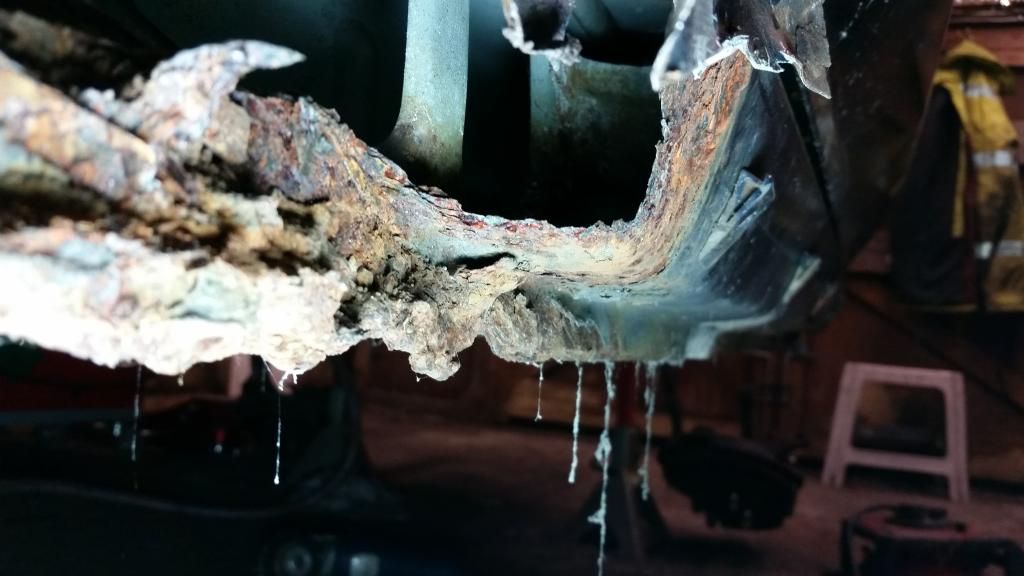
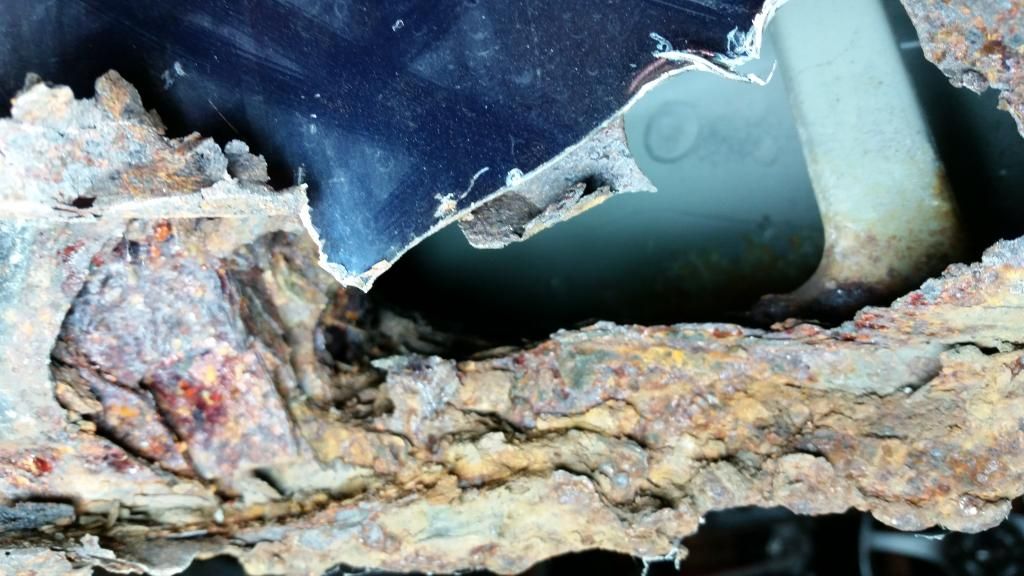
Skirts off and the bad arch/lower rear quarter attacked with tools
This was the only fastener that gave me any issues.
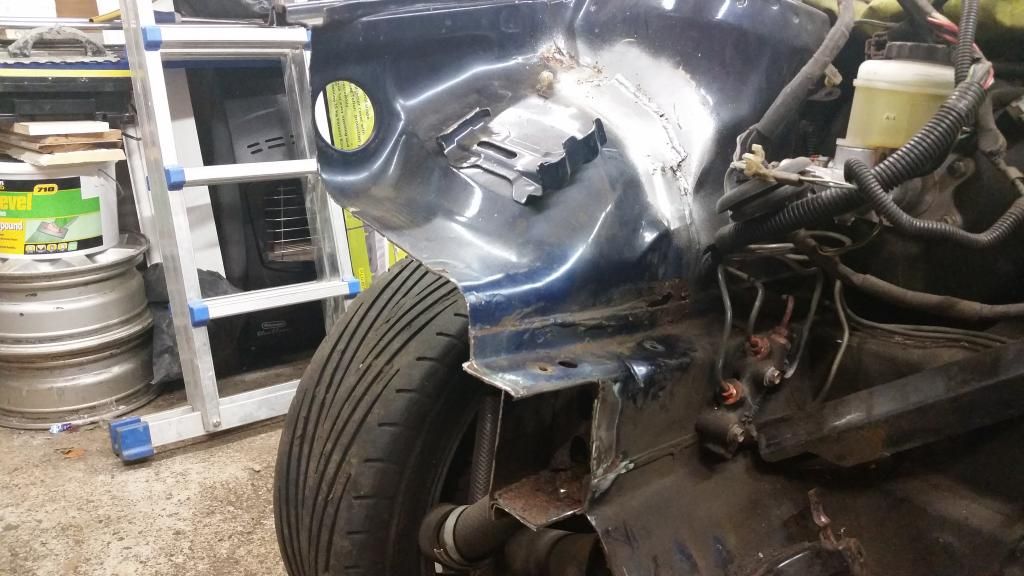
Crusty door switch area. I already knew about this.
Just managed to turn a blister into a small hole on this side.
There's more rust on the jack, than the car, in this pic.
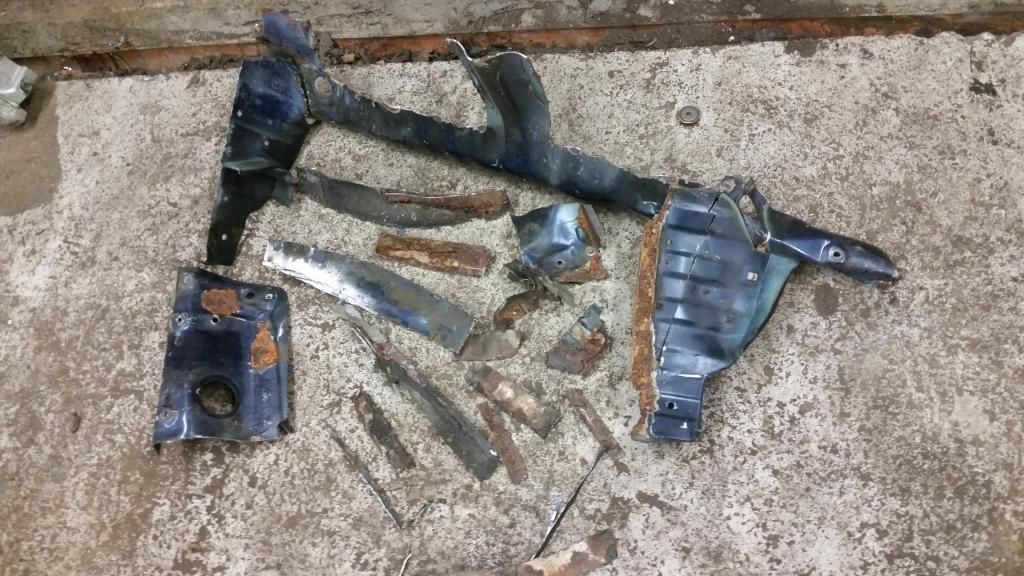
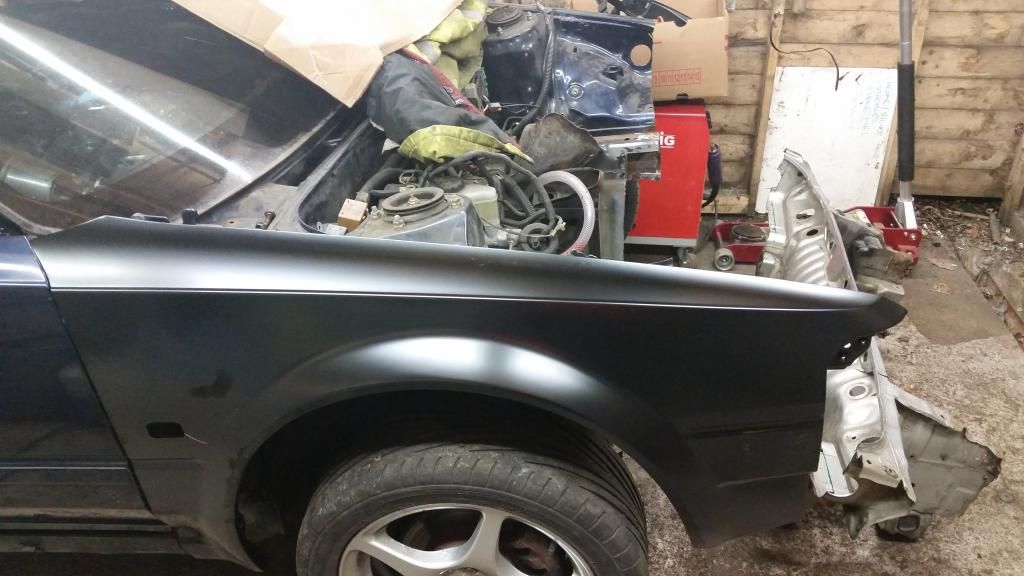
Spare parts.
It came with a couple of nicely made repair panels.
Luckily, the company also make rear arch sections and sills. I shall be ordering enough panels to renew both rear arches, lower rear quarters - both side of arch and the sills. The current sills aren't too bad, neither is the N/S/R arch, but I would rather catch it and cut it out at this stage.
I tried to remove the rear bumper and was swiftly defeated.
I'm gonna borrow nails bolt grips. Hopefully they will stop the grinder coming out.
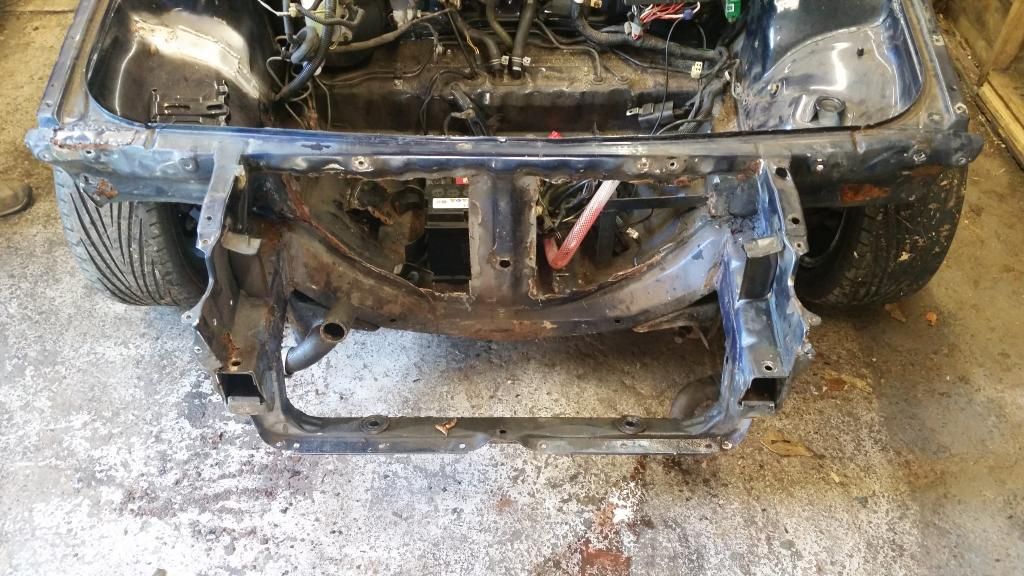
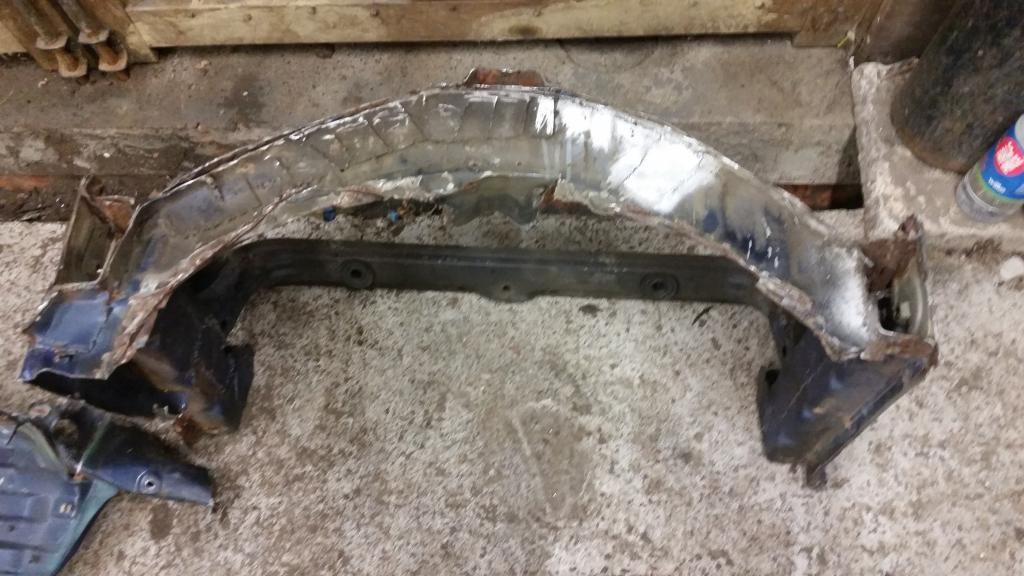
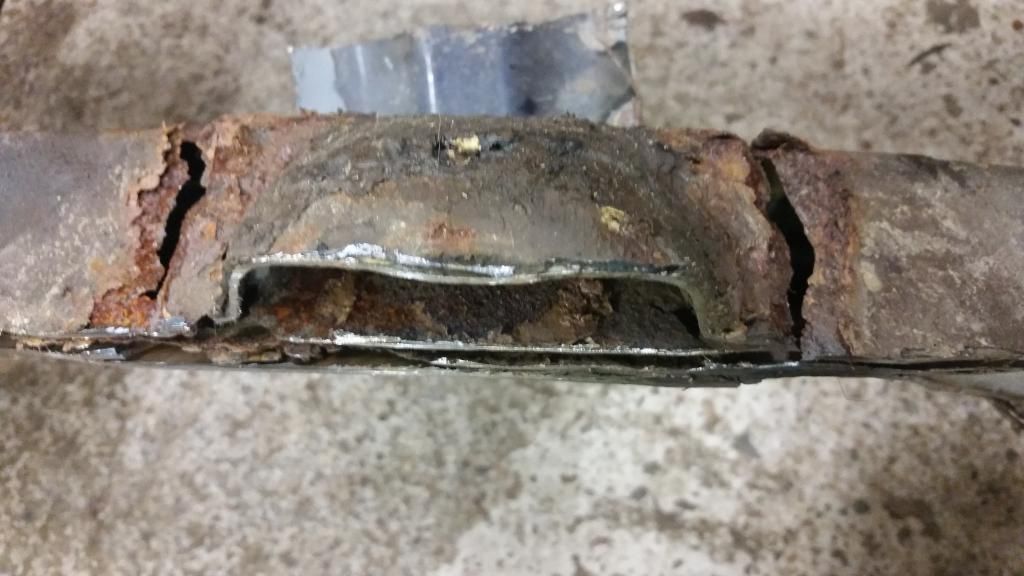
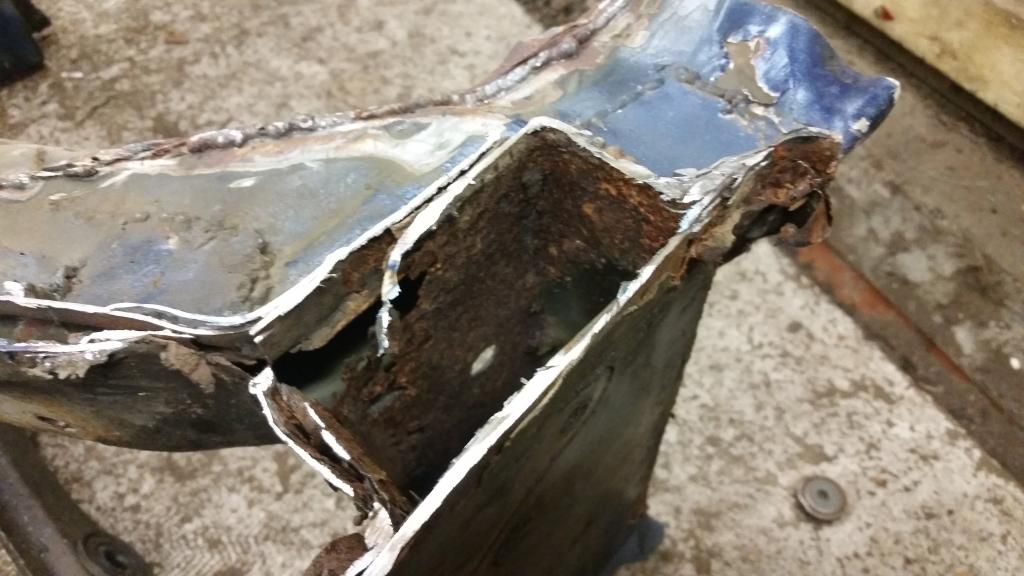
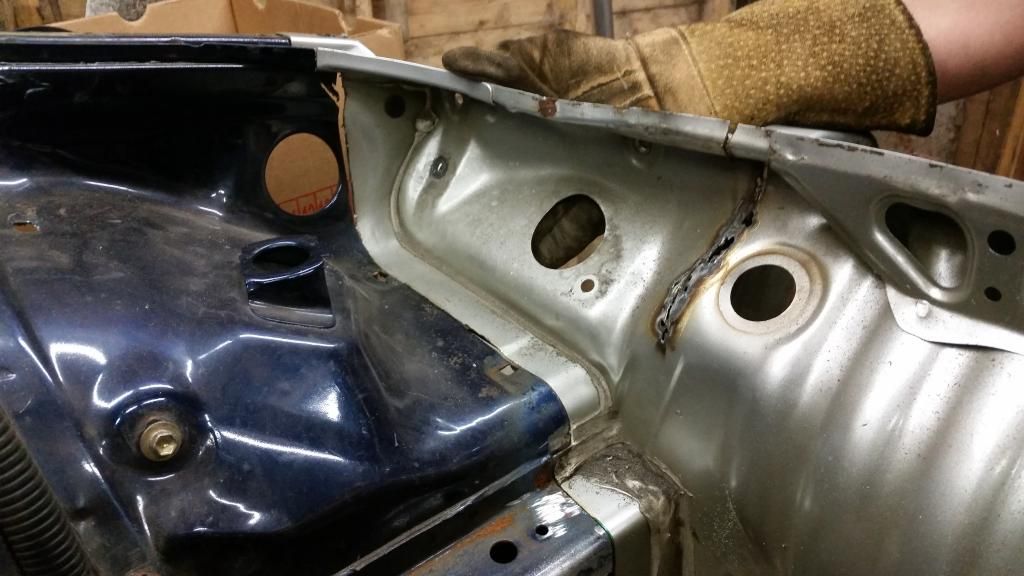
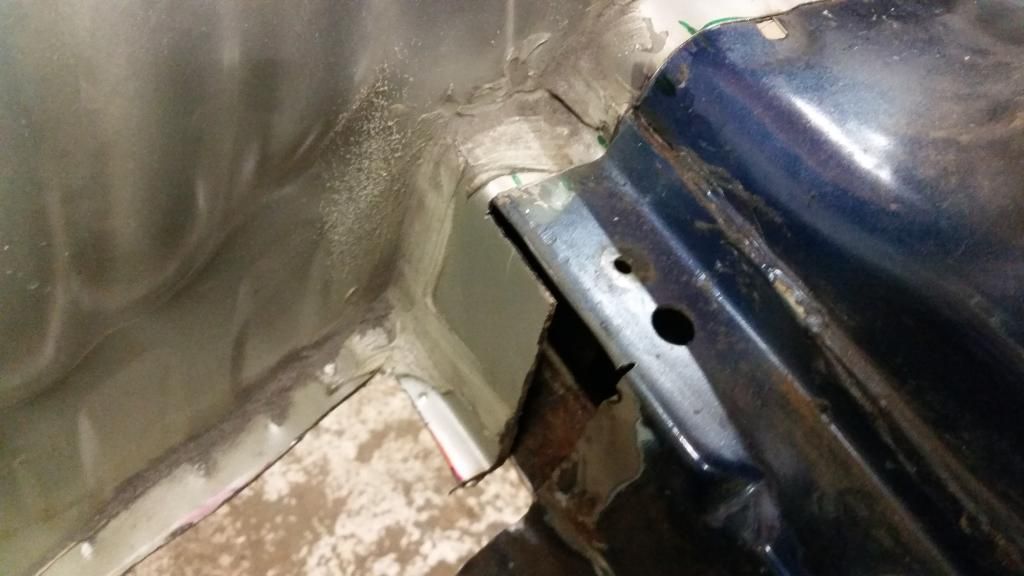
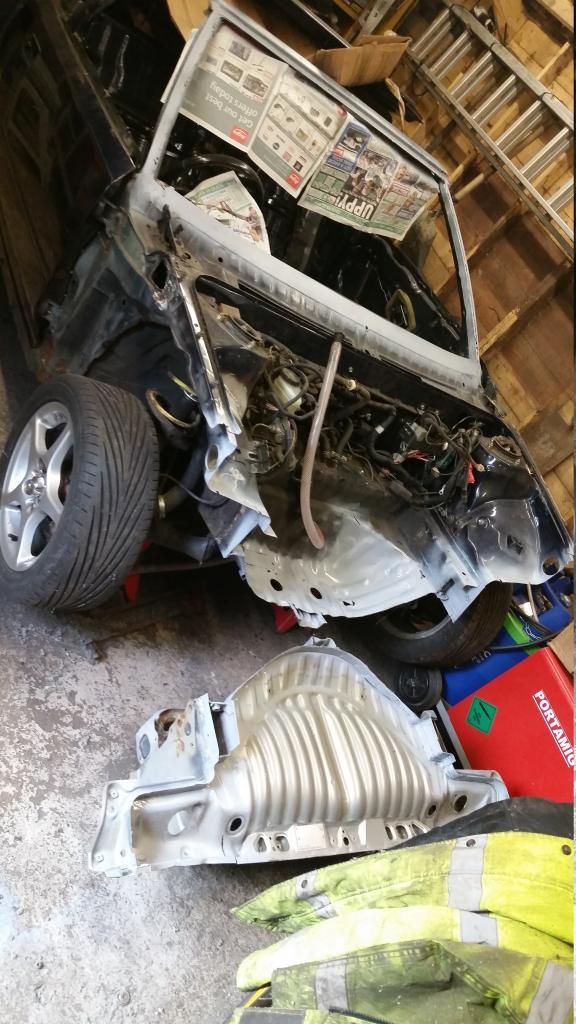
Front valance after splitter removal;
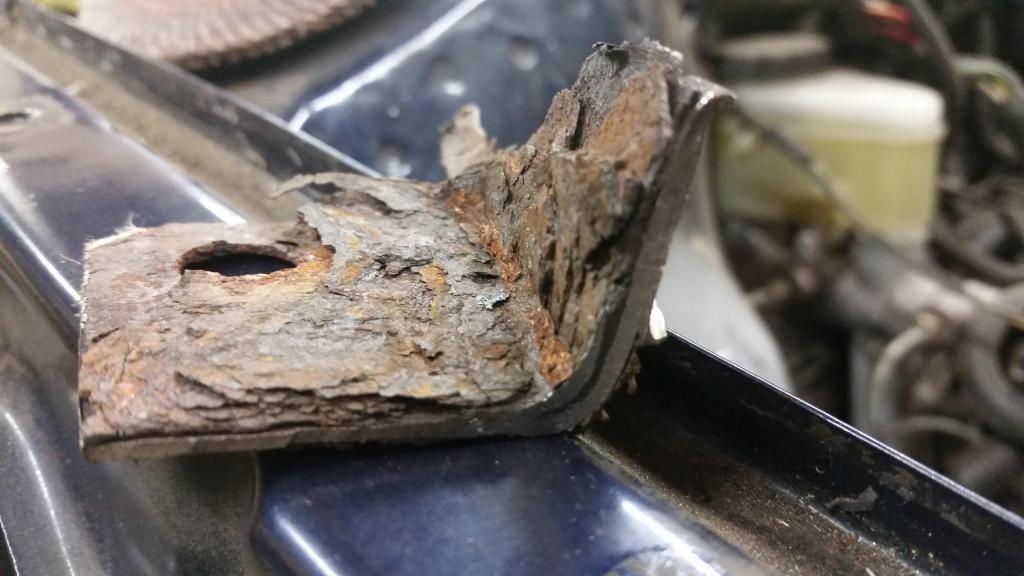
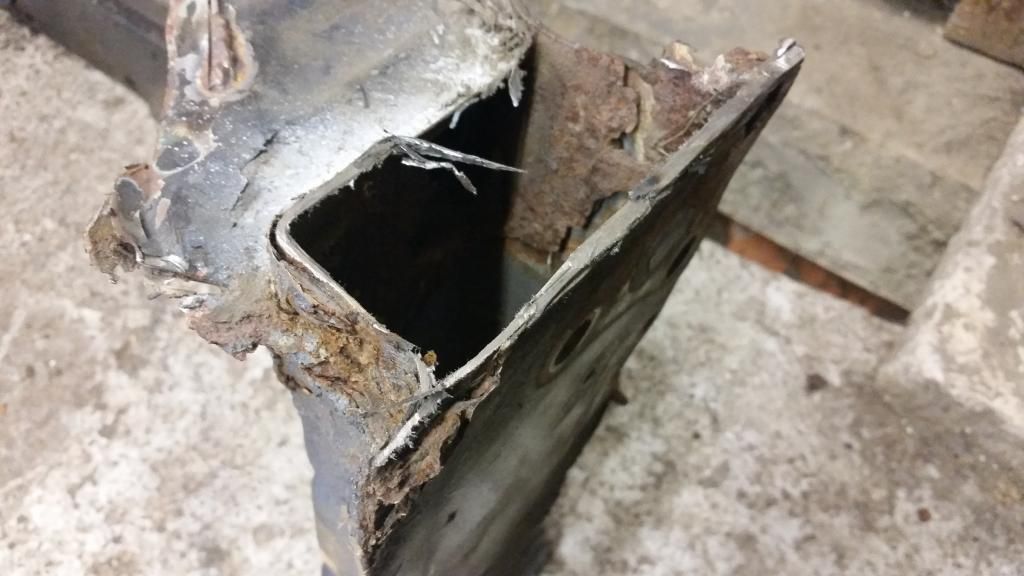
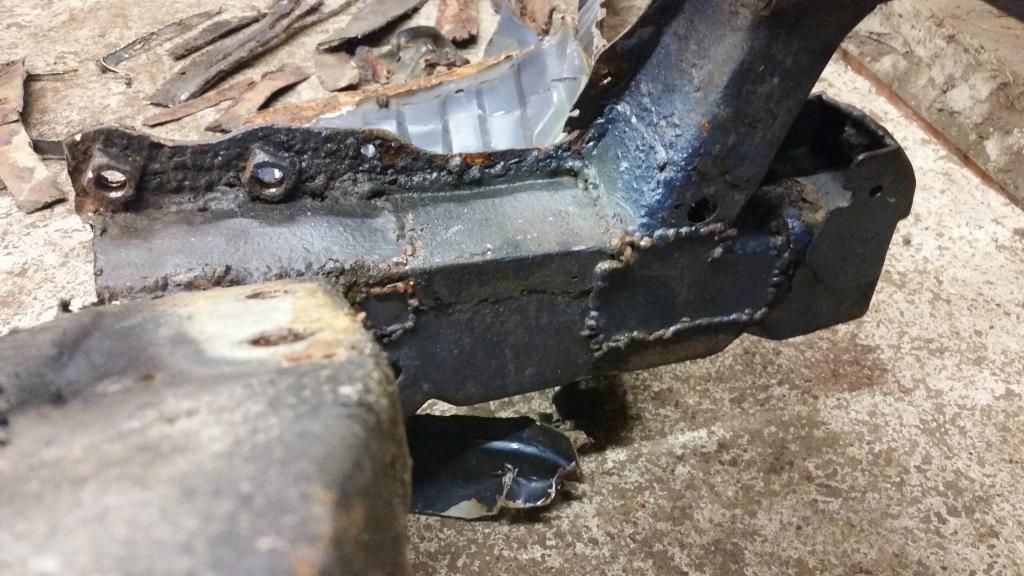
O/S is going to need plating
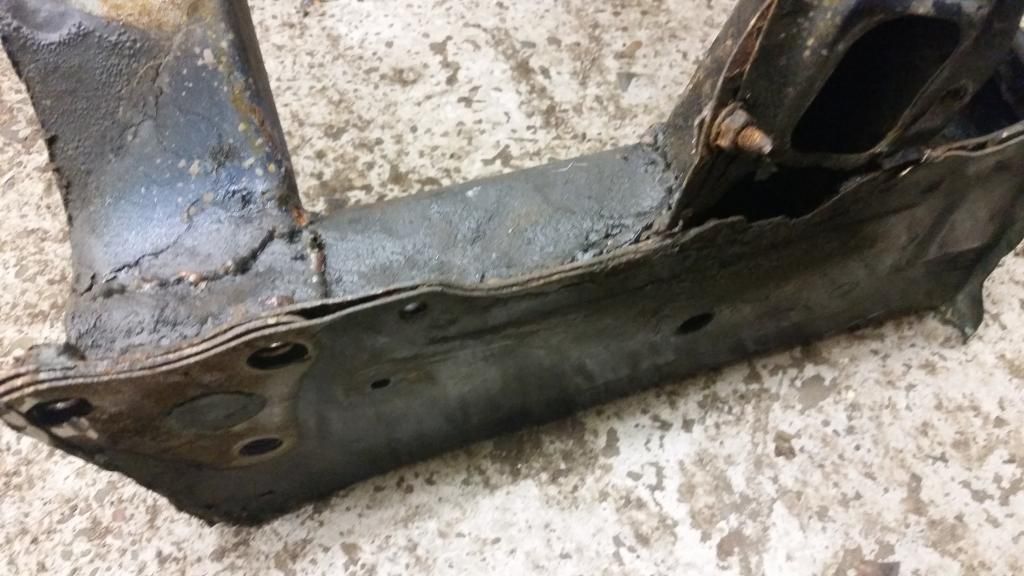
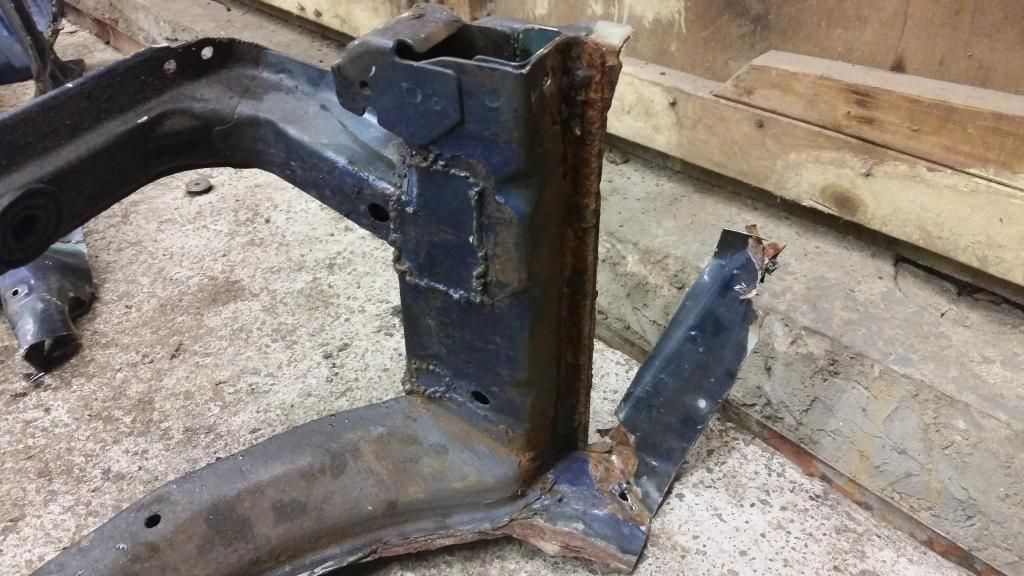
N/S is better news.
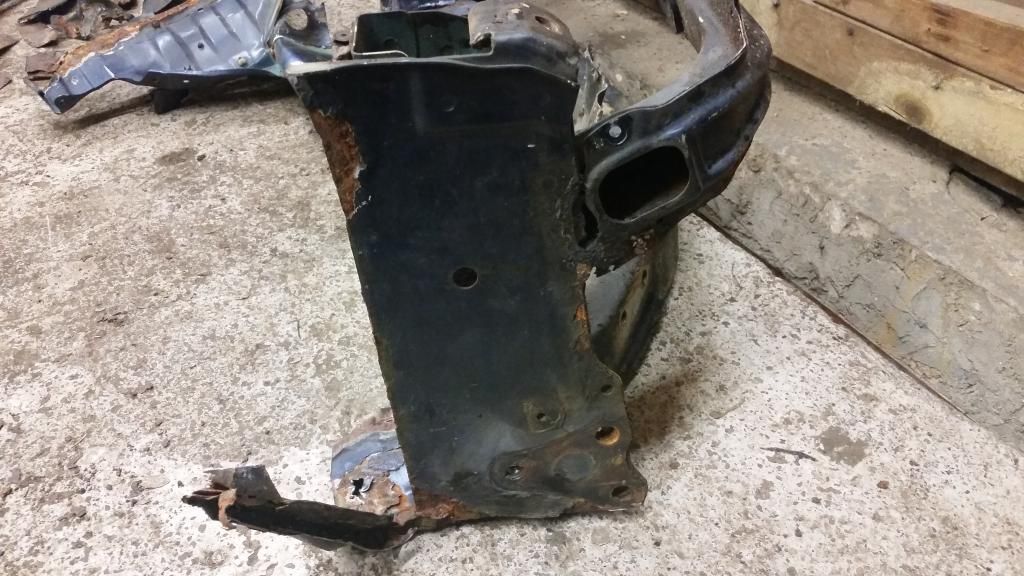
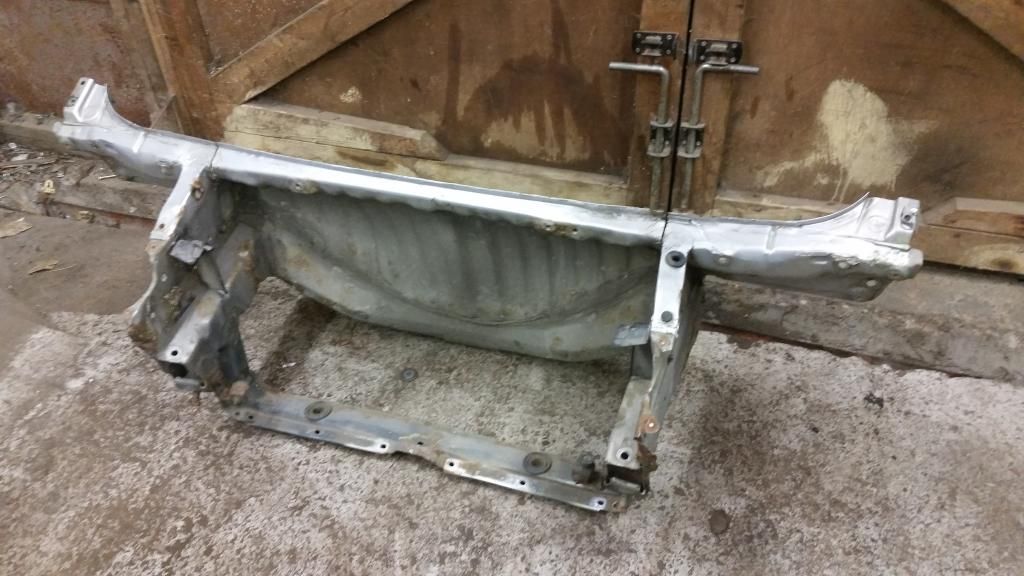
Ignore the wings, they will be replaced.
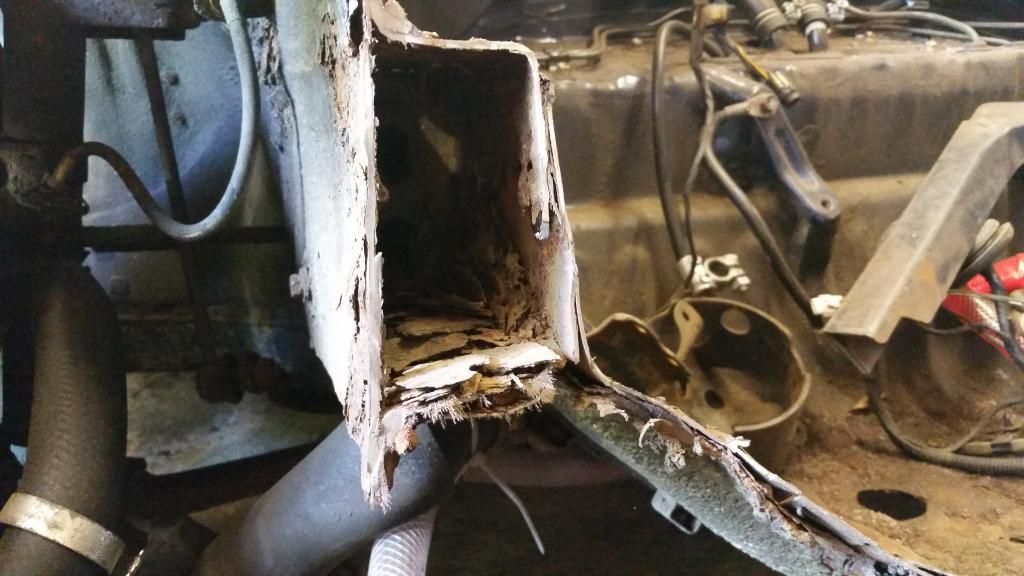
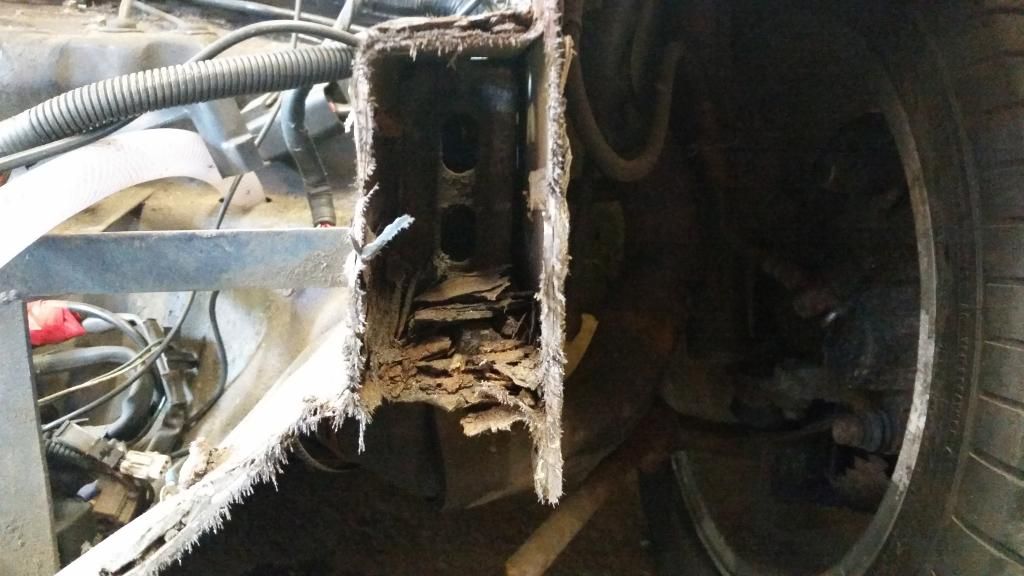
There is a lot of bracketery to be remade and parts to replace etc.
Sail panel trims with broken fastenings.
These things.
Splitter hardware.
I am happy with the state of it, so far. It is as I had hoped/assumed, from the brief look before I bought it.
KILLA TUNEZ
I also started stripping the interior out, trims, plastics, weather strips etc.
It's always a good sign when your car comes with a complimentary bottle of this;
BECAUSE RACECAR - This thing has actually been a track car in a past life and some of the 'that'll do' attitude is evident in the fitment of certain things.
It won't be rebuilt in the same way.
Right, time to make a shopping list.
Just realised I don't have an engine shot, either.
It is a turbo. Honest, mister!
Mk1.5 resto
Moderators: IMOC Moderators, IMOC Committee Members
Mk1.5 resto
Last edited by outrun on Wed Oct 08, 2014 10:16 am, edited 4 times in total.
Re: Mk1.5 resto
Here's the business end
And the 'functional' rear boot
Removable bulkhead allows inlet maninfol to be took off via the boot
50% IMPORT
Reckon that is genuine JDM bird xxxx?
Been stripping more off it. This will be the theme for a (hopefully short) while, as I get it ready for bodywork and paint.
Side air intake, ducting and now redundant fan
Tight squeeze
Then I remebered an MR2 party piece. The removable side panels
Happy enough with condition in here. The only xxxxx bit is the sill and that is being replaced.
ST165 GT-4 brakes. Supposedly up to the job.
N/S/F inner arch
Bit disappointed with the state of it in here, once I removed the plastic xxxx guards. This is going to need a fair bit of work
Thankfully - and as expected, due to the rest of the car, the N/S/F is much better
Just the one hole to contend with and it had already been (badly) patched from inside the boot
Rear end
Front lights out, wings and bumper off
Nice
'Pretty' tight
Front bumper reinforcer is serviceable, at least
What a xxxx on. I have snapped bolts everywhere and as you can see, I had to mangle the crusty wings, to access knackered fasteners.
Gutted the trims and carpets etc from the inside. The T-Bar seals didn't wanna really budge, though.
I am going to need to find some new ones, I reckon
All good in here, too. Just a very small hole in passenger footwell and a bit of separation on the drivers side, where it meets the sill, so something that will be sorted when replacing the sills.
What is it with MR2's and stupidly tight/rounded mirror screws?! IRWINBOLTGRIPSLOANREQDNAYLORPLZ
Looks like the interior mirror will come out easily.
Bought this plate for it, too.
Last edited by outrun on Sun Oct 05, 2014 9:35 pm, edited 1 time in total.
Re: Mk1.5 resto
I have been stripping more parts from this, since the last update. Shock horror, eh?
Hard to tell, but I have put hours in, stripping out the interior and frunk, removing pi$$y rubber seals, windows, bits of trim etc.
Plus, I CBA with hods of pix. Getting there, though.
Missed this live wire dangling about, when driving the car home.
Original* battery tray, evicted.
poo, right hand jockey steering wheel and equivalent boss. The boss is stuck fast atm and as jikovron suggests, a pusher of some description will have to be made. Nice to see that the one rounded allen bolt wasn't actually doing anything, though.
Half-ar$ed pipework. For the [strikeout]win[/strikeout] bin. Same for the ridiculous GT4 pump and RX7 rad.
I will keep the Cinquecento rad, for charge cooler purposes - although I may renew it.
The log book isn't back yet, but I reckon these lads names have been on it, at some stage.
Finally, a job my 1/4" drive bolt grips can manage. Yes, MR2 mirrors are that awkward to remove.
More holes. At least these ones haven't been caused by the Big C. They are about as welcome, though.
Might need that Kurust.
I never* abuse my tools and yet, even with the right stuff, used in the right way, these bolts still wouldn't undo.
The hammer must be out of shot.
The plan for the rear bumper reinforcer is to sling the middle section and reattach it to the car with just the main anchorage points - after a tickle with the welder.
IN RUST WE TRUST (Any spotty little herbert that has that stuck to their car, has never experienced the stuff)
Re: Mk1.5 resto
Time to update this.
A few parcels have arrived.
A pair of NOS Toyota front wings and another, equally useful part. Which also came with a mystery envelope.
It contained this;
A door switch. Not quite the part I wanted, but one that is on my wanted list, anyway.
And these;
A pair of sills, rear arches, sill return and lower rear quarter repair panels. The same, superb quality handmade panels as the other sill return and lower rear quarter section that came with the car.
Now here is the worst bit of the car;
Some of this was already apparent to me, but once I removed the wings/bumper/headlights and rads etc it started to look a bit more knackered than the few dodgy patches initially suggested. These issues, along with the hatchet job on the front bulkhead, for the downforce bonnet mod, meant it had to go.
After consulting with my mate filthyjohn, he agreed to work his magic for me and we set to work.
Thankfully, only the front end seems to be shagged out.
Observe;
Thankfully, John is capable of repairing the legs (cos it is way out of my league) and most of that cancerous, crumbling xxxx originates forward from where we cut. The parts of the legs that don't, have been cut out and will be replaced.
The bodge artist who patched up the front end, should just stay away from cars.
xxxx, gasless repairs - on top of the rotten steel - which could be pulled off by hand.
EG;
And the removed section in all of it's glory*;
Luckily, one MR2 breaker I spoke to had a clean, low mileage US import and had agreed to chop the front end off for me. Mystery parcel explained.
By fitting this whole section, it removes the dangerous, rotten parts, replaces the headlight panels (one of mine was a bit iffy) and reinstates the bulkhead behind the radiator.
John is a very good welder and will glue this on nice and strongly, besides, it only really holds the lights, bumper and rads.
Measurements and angles were recorded and sik skillz were pressed into action to enable straight cuts.
Initial, rough cuts;
The car is currently about 4' shorter than when I got it, a fortnight ago.
Getting there...
It's a good job that the man is like a surgeon, with a 1mm cutting disc;
One of the ways we have chosen to ensure it goes back on squarely, is to bolt it up to the tie rod brackets.
Which is how it is held on, here;
I am currently awaiting a delivery of Bilthamber Etchweld and seam sealer, then I will clean up the mating surfaces and John can wield his metal glue magic and fuse the two together.
Naylor also came over last night and showed me how to persuade the remaining T-bar seals out and we also sussed out the seemingly impossible to remove (lol) mirrors and stripped a few other bits.
Much appreciation to all, as ever.
Re: Mk1.5 resto
Yesterday I bought some 50lb fishing line, to remove the recent windscreen.
xxxxxx.
Oh well, it's no massive loss, as it was already a bit pitted from someone grinding near it.
Out with the MIG wire, scraper, hammer and feet. Plus the hoover;
I doubt I would have been able to access all of the bonding, anyway.
With the screen out, I could finally see the condition of the surround.
I am happy to report that aside from a couple of small holes at the top, due to water ingress and the rain gutter on one side, it I is in decent condition.
A little surface rust starting in this seam.
After a blitz with the knot wheel;
Unfortunately, without replacing the whole section, this area will never be totally rust free, so I will just have to treat and protect it as best as I can.
Removed the old charge cooler bracket and battery tray/frame;
I'm gonna need the Dremmel and not the angle grinder, to free the rear bumper from the reinforcer. As you can see, I am just making a mess;
Even the unstoppable Irwin bolt grips were defeated;
I split the front bumper slam panel and skin from the "looks alright" bumper reinforcer;
Should clean up.
Ah.
The indicator/side light units are stuck, too. The studs inside them are just spinning.
Luckily, I knew where there was a NOS front bumper reinforcer.
I thought I never needed it, but I am glad it was still available. As, like the wings, these things just don't come up for sale.
Last edited by outrun on Sun Oct 05, 2014 10:31 pm, edited 1 time in total.
Re: Mk1.5 resto
Great project and looming forward to the rebuilding/finished article.
Re: Mk1.5 resto
Nails wrote:Great project and looming forward to the rebuilding/finished article.
You know where to find me lol
Just say when you want tea.
Re: Mk1.5 resto
Fair play, big jobs!
How are the front ARB mounts?
If you can't see the angle, you're in trouble.
Re: Mk1.5 resto
Ollie@PacificWorks wrote:Fair play, big jobs!
How are the front ARB mounts?
They have already been plated, luckily(?).
One thing that is defnitley good, is that repair has not been done with the same 'welder' as the frunk patching.
-
- Posts: 7172
- Joined: Thu Dec 16, 2004 6:39 pm
- Location: Oldham
Re: Mk1.5 resto
Bloody hell, you've got stuck in!
Told you there was some suspect "welding" in there, looks to be more rot than we knew about in areas but less in others!
The ARB mount areas I had done whilst I had the car. Beardy did all that, so it should be ok! Think whoever had it before just had a big soldering iron!
Looking good pal.
Told you there was some suspect "welding" in there, looks to be more rot than we knew about in areas but less in others!
The ARB mount areas I had done whilst I had the car. Beardy did all that, so it should be ok! Think whoever had it before just had a big soldering iron!
Looking good pal.
476bhp & 415ft lb @ 1.9bar Magic by Ryan!
Gone, but never forgotten
Now with a mk1.5 & a NHB EP3
Gone, but never forgotten
Now with a mk1.5 & a NHB EP3
Re: Mk1.5 resto
Steve Horrocks wrote:Bloody hell, you've got stuck in!
Told you there was some suspect "welding" in there, looks to be more rot than we knew about in areas but less in others!
The ARB mount areas I had done whilst I had the car. Beardy did all that, so it should be ok! Think whoever had it before just had a big soldering iron!
Looking good pal.
Alright, Steve. Aye, you did say about the shitty patches. I found more than expected, but don't you always?
Forgot that you had the ARB mounts done.
I agree that in some places it is worse than expected, but better in others.
These cars can hide a lot. Lol.
-
- Posts: 4789
- Joined: Thu Nov 24, 2011 1:01 pm
Re: Mk1.5 resto
Great project. Watching with interest
Re: Mk1.5 resto
Wow, you are getting stuck in fast!
Looks like plenty to be getting on with!
Good Luck!
Looks like plenty to be getting on with!
Good Luck!
Re: Mk1.5 resto
Cheers lads. Bit more progress to report.
The Etchweld arrived, so I prepped the mating surfaces etc for welding.
Didn't know another comedy patch was hiding. Along with previous holes for charge cooler pump bracket and battery stay.
Only done the harder to access areas of this. Will revisit it.
Also attacked the screen surround and scuttle area again with the knot wheel.
Etch primed.
I am happy enough with this. There's a couple of little holes to weld up at the top, but nothing major.
Then the MIG Stig arrived.
We took our measurements and angles and he fired up his magic metal glue machine and made the car about 3 feet longer.
Almost looks like a car, again.
We should get a better crack at it, tomorrow and make some progress.
-
- Posts: 7068
- Joined: Mon Feb 11, 2008 5:47 pm
Re: Mk1.5 resto
top work there buddy..
MR2 Sprint zombie outbreak response vehicle
https://www.facebook.com/pages/Zombie-S ... 0272127049
https://www.youtube.com/channel/UCNBrEd ... s-qbox0FwQ
https://www.facebook.com/pages/Zombie-S ... 0272127049
https://www.youtube.com/channel/UCNBrEd ... s-qbox0FwQ
Re: Mk1.5 resto
Cheers, Pete.
More John means more welding.
Jacking point hammered and dollied to meet up squarely.
Welded inside the legs etc and now the front end is one with the car. Inner wings, drip rails, legs etc.
Next up, some big-ass patches to connect the frunk floor to the front bulkhead and complete the chassis legs.
Re: Mk1.5 resto
Had a coupe of hours with the grinder, in that window going from it being just annoying, to plain anti-social, so I stripped the OSF arch.
Luckily, this one, like the rest of the car, is the worst side.
Underside of the massive patch and hole, visible from inside the frunk.
Previous (looks to be good) plating and not so good A pillar rot. Seemingly caused by leaves etc being held between inner and outer wings.
After knot wheeling.
This only opened up a little, below the seam sealer.
A new hole. This is why I always like to remove old underseal.
No surprises, in the already suspect areas. Nice to see that the corner is solid.
These parts I can do without.
See the wire in my sock?
I hate having those strands propelled at/into me.
Re: Mk1.5 resto
Looks good mate. Cleaned up well.
Re: Mk1.5 resto
Looks like a fun project , roll on next spring
You're doing the car justice, that's for sure, well done
Re: Mk1.5 resto
Here's a catch up from the last couple of days.
I cleaned up the other front arch.
Obviously I uncovered more holes.
I'm not convinced by these patches.
Removed the remains of the frunk floor, from the donor front section, so we can tie the cars frunk floor to the front panel, better.
As ever, there was no sign of the silent killer, lurking between the spot welds.
It's not until you de-panel a section, that you find it.
This trusty (ex) wood chisel, along with a flat spot weld drill is my weapon of choice.
I hate those hole saw type spot weld drills.
My NOS front bumper reinforcer bar and body kit seals arrived.
You can see why these rot out, with the unprotected stitch welds.
The studs for the indicator and side light units are spinning inside and there is no access to their heads. Any ideas, before I hack the lights up?
I would prefer to reuse the lights. At least for now.
This section of the chassis leg was rotten and it contains a captive nut (which are xxxx in themselves) for the tie bar brackets. So we had to make a new one.
John and his welder strike again.
Almost a complete leg, again!
The bulkhead needed welding up here, as the donor section had been sliced into with a plasma cutter.
Charge cooler bracket holes in frunk floor.
It would be nice to replace this whole panel, if it was available.
Today, I made some patches.
Another captive nut not fit for purpose.
It is annoying that this car is going to contain so many patches, but I suppose as long as they aren't in your face and are done well, it is alright.
nails came over and helped me lift the car up nice and high, on all four corners.
Always a sketchy process lol.
Then he poked a massive hole in the bottom of the O/S sill return panel with his finger and basically pulled that panel off, by hand.
Damn, these things can rust.
Seems alright, inside.
Will probably leave this for the body shop.
I attacked the floor pans for half an hour and found the drivers part to be worse than expected.
Somehow, it still surprised me.
For those that don't know/agree, this is why you remove old, factory underseal.
It seemed fine, until A tickle from the grinder.
Safe to say, this car is not in the condition I and everyone else assumed!
At least we found the cup holder.