Mk1b restoration... its alive..and painted!!
Moderators: IMOC Moderators, IMOC Committee Members
-
boondougal
- Posts: 520
- Joined: Sun Jul 10, 2005 9:48 am
- Location: Shavington (near Crewe)
Re: Mk1b restoration... its alive..and painted!!
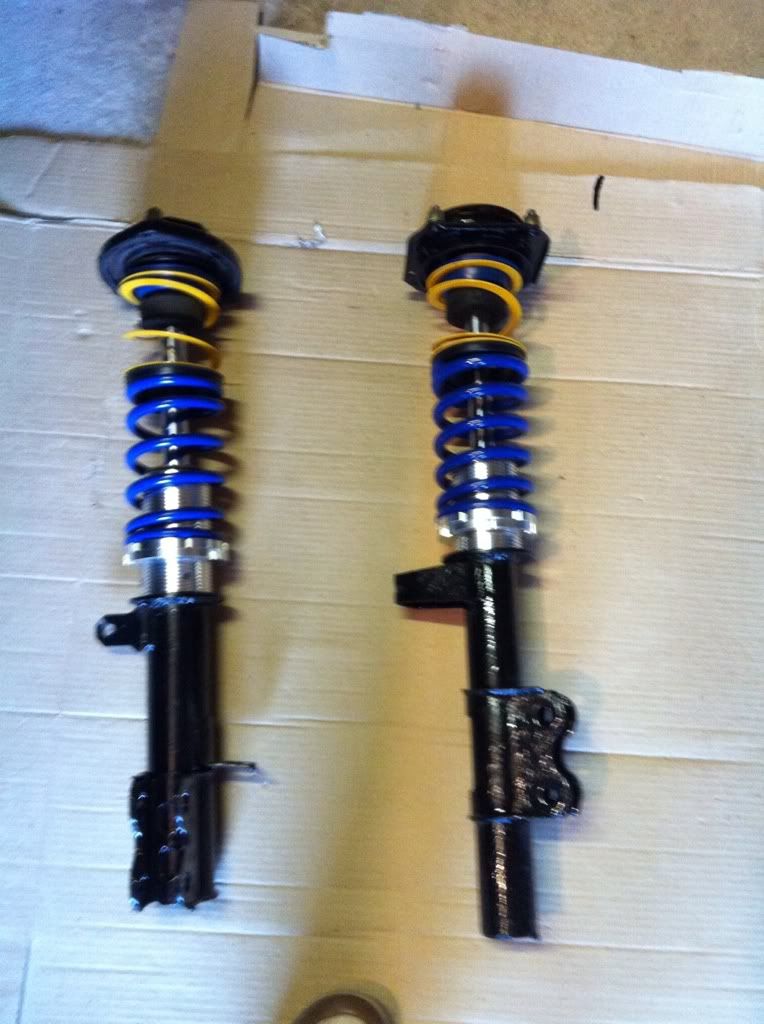
Today saw the new bearing picked up and pressed into the hub. . Then I built up the suspension as I had the other side
Re: Mk1b restoration... its alive..and painted!!
boondougal wrote:Today saw the new bearing picked up and pressed into the hub.
Those look very pretty Boondougal
Bet they function better than my Jamex
-
PW@Woodsport
- Posts: 7642
- Joined: Tue Dec 14, 2004 6:40 pm
- Location: durham
- Contact:
Re: Mk1b restoration... its alive..and painted!!
They're my design actually Peter, i built a set of these years ago, it's a budget way of putting together your own coilover setup without it costing the earth, Mx5 springs, tow hitch washers and spring helpers with whatever shocks you fancy.
Oh and Curly Wurlys are better than Jamex 
Oh and Curly Wurlys are better than Jamex

-
boondougal
- Posts: 520
- Joined: Sun Jul 10, 2005 9:48 am
- Location: Shavington (near Crewe)
Re: Mk1b restoration... its alive..and painted!!
Defo nothing original on my build, all proudly stolen from the various communities to do with the mr2!
-
cartledge_uk
- Posts: 7608
- Joined: Sun Nov 13, 2005 6:28 pm
- Location: Newbury
Re: Mk1b restoration... its alive..and painted!!
boondougal wrote:Defo nothing original on my build, all proudly stolen from the various communities to do with the mr2!
Nought wrong with that
-
boondougal
- Posts: 520
- Joined: Sun Jul 10, 2005 9:48 am
- Location: Shavington (near Crewe)
Re: Mk1b restoration... its alive..and painted!!
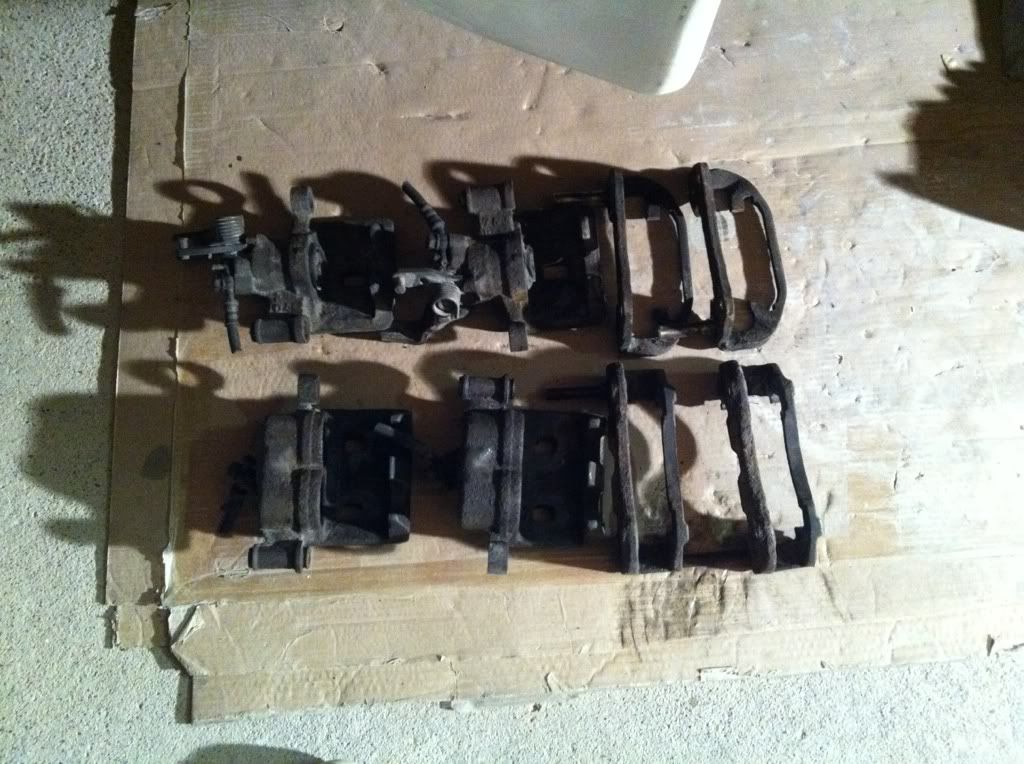
Spent a bit more time on the 2 today... Stripped all my calipers, twin pot st165 and mr2mk2 rears. Ordered the refurb kit for them from big red as well
I spent most of the day sanding, I decided I wanted to clean up the lines by removing the indent that runs around the middle of the body.... Tbh it's a pig of a job and I am almost wishing I hadn't bothered!!!
I also started to fit the bumpers.... Rear bumper offered up, centre section cut out and exhaust placed for effect!
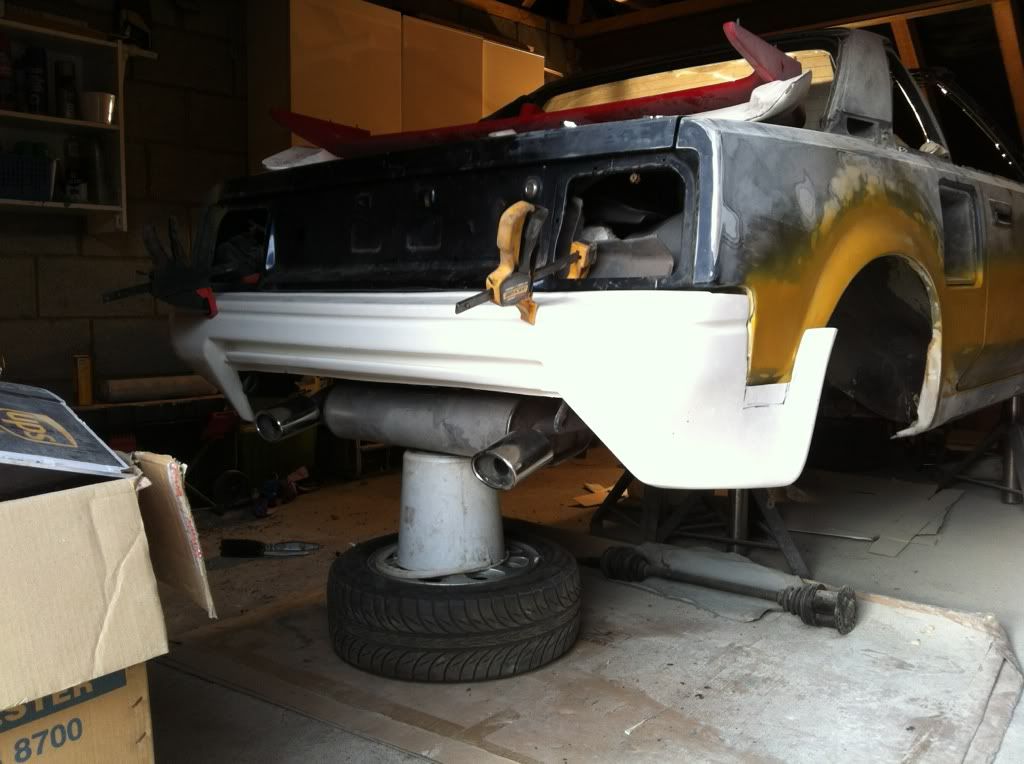
I then positioned the front bumper...

I did a few cuts to help it sit better but it's just to really start to figure out how I will mount it.
I spent most of the day sanding, I decided I wanted to clean up the lines by removing the indent that runs around the middle of the body.
I also started to fit the bumpers.
I then positioned the front bumper.
I did a few cuts to help it sit better but it's just to really start to figure out how I will mount it.
-
SuperRedMR2
- Posts: 5494
- Joined: Mon May 16, 2005 8:40 pm
- Location: Wickford, Essex
Re: Mk1b restoration... its alive..and painted!!
PW@Woodsport wrote:
Oh and Curly Wurlys are better than Jamex
-
boondougal
- Posts: 520
- Joined: Sun Jul 10, 2005 9:48 am
- Location: Shavington (near Crewe)
Re: Mk1b restoration... its alive..and painted!!
Quick update,
My wheels have come back from being powder coated so they will be going to be wrapped in rubber tomorrow, i thought i would give them more time to harden as they were still warm when i picked them up!
My brake refurb kits arrived from Bigg red so i have stripped the callipers and had them shot blasted
They are st165 fronts and Mk2 rears.
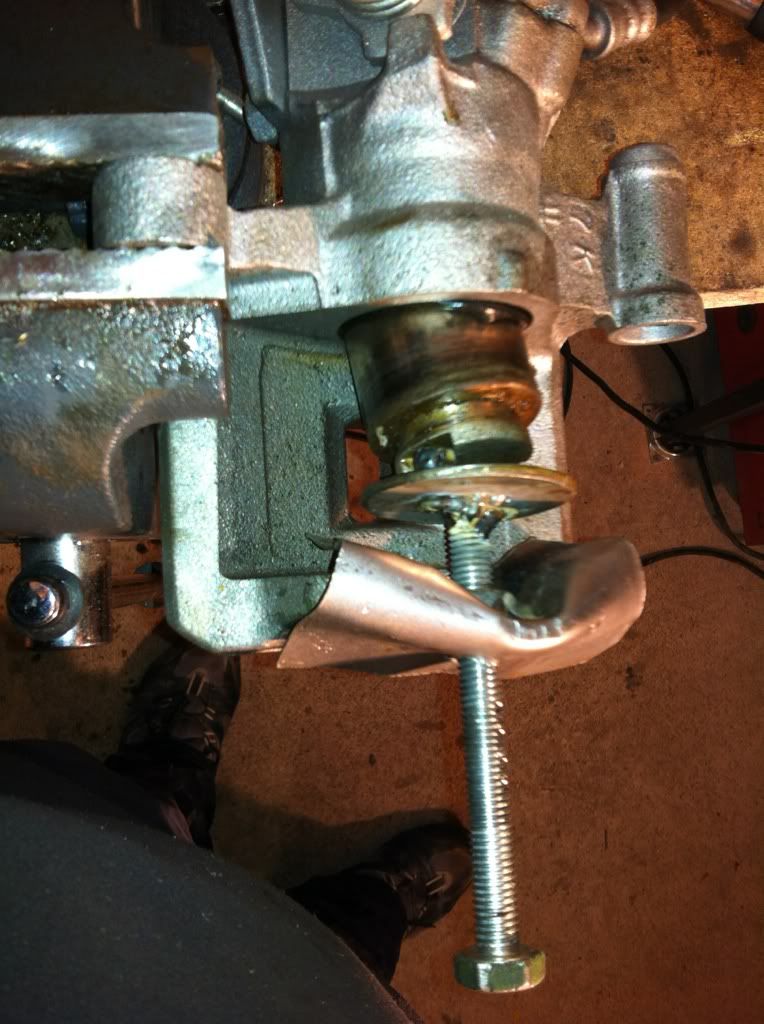
I then went about taking out the rear pistons... i didn't want to spend 30 quid on a tool from halfrauds or an other tool shop so i knocked up a v crude but effective tool
I had used the airline to blow out the pistons in the front... boy the come out with a pop once they finally go.
i then cleaned out the recesses in all of the callipers with my Dremel
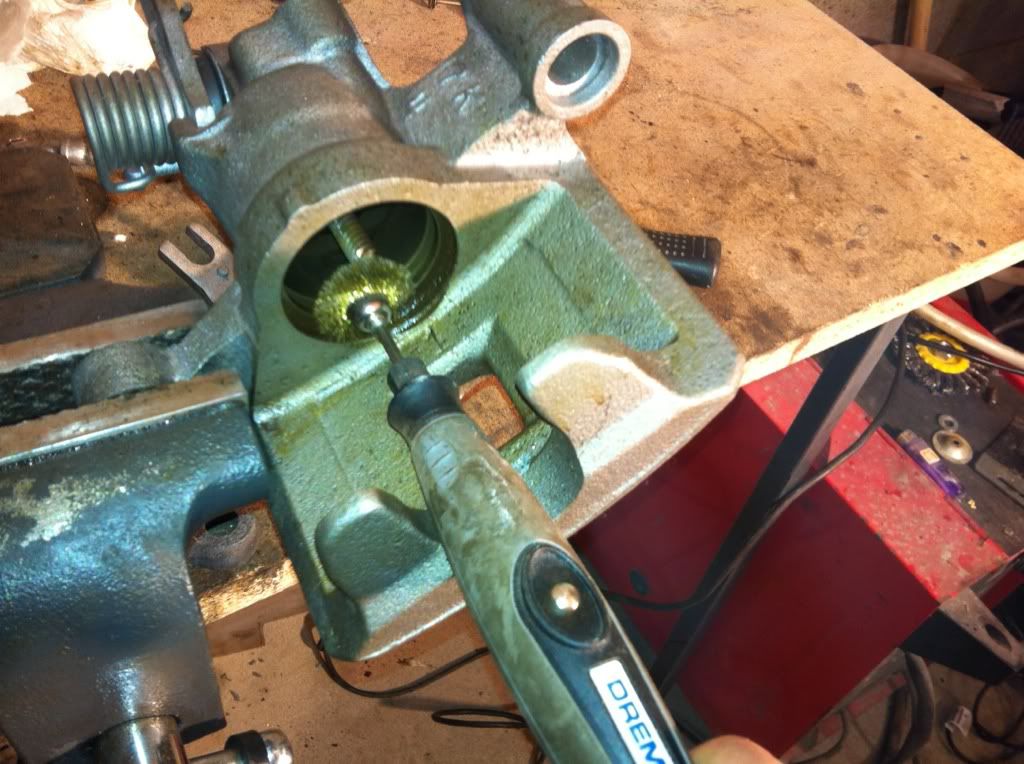
I made sure i blew them out with the airline and i will probably flush them through with some old brake fluid as well
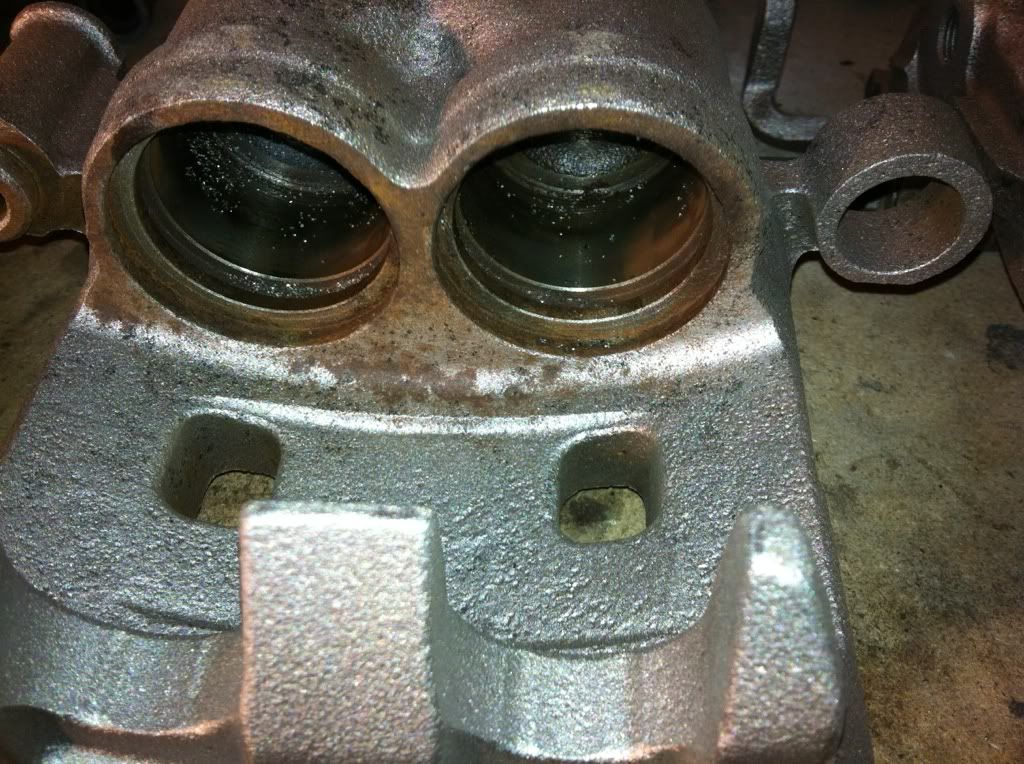
One thing i couldn't figure out is how to remove the handbrake plate that sits behind the big h/b spring. My kit come with a rubber replacement for behind it but it didn't seem to want to come out. Do i need to take out the internal thread in the piston chamber first?
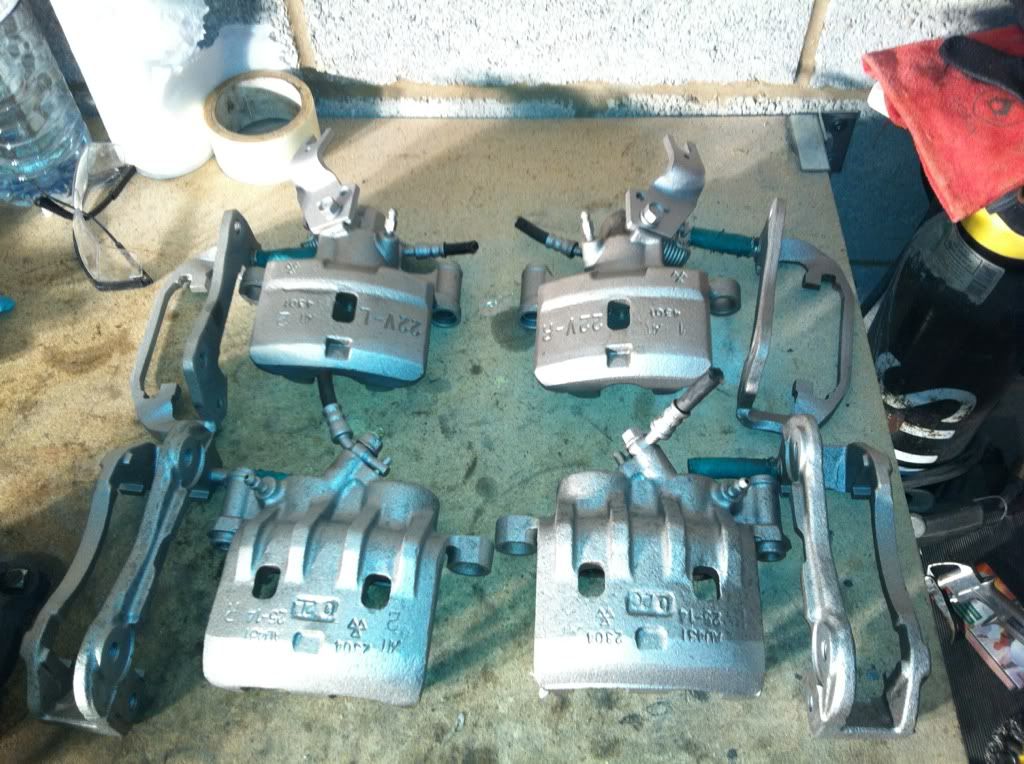
In the mean time the castings were starting to oxydize so i hung them up and have given them 2 coats of paint.... probably do another 2 tomorrow night as well just to get good coverage... I update the pics tomorrow.
My wheels have come back from being powder coated so they will be going to be wrapped in rubber tomorrow, i thought i would give them more time to harden as they were still warm when i picked them up!
My brake refurb kits arrived from Bigg red so i have stripped the callipers and had them shot blasted
They are st165 fronts and Mk2 rears.
I then went about taking out the rear pistons.
I had used the airline to blow out the pistons in the front.
i then cleaned out the recesses in all of the callipers with my Dremel
I made sure i blew them out with the airline and i will probably flush them through with some old brake fluid as well
One thing i couldn't figure out is how to remove the handbrake plate that sits behind the big h/b spring.
In the mean time the castings were starting to oxydize so i hung them up and have given them 2 coats of paint.
-
boondougal
- Posts: 520
- Joined: Sun Jul 10, 2005 9:48 am
- Location: Shavington (near Crewe)
Re: Mk1b restoration... its alive..and painted!!
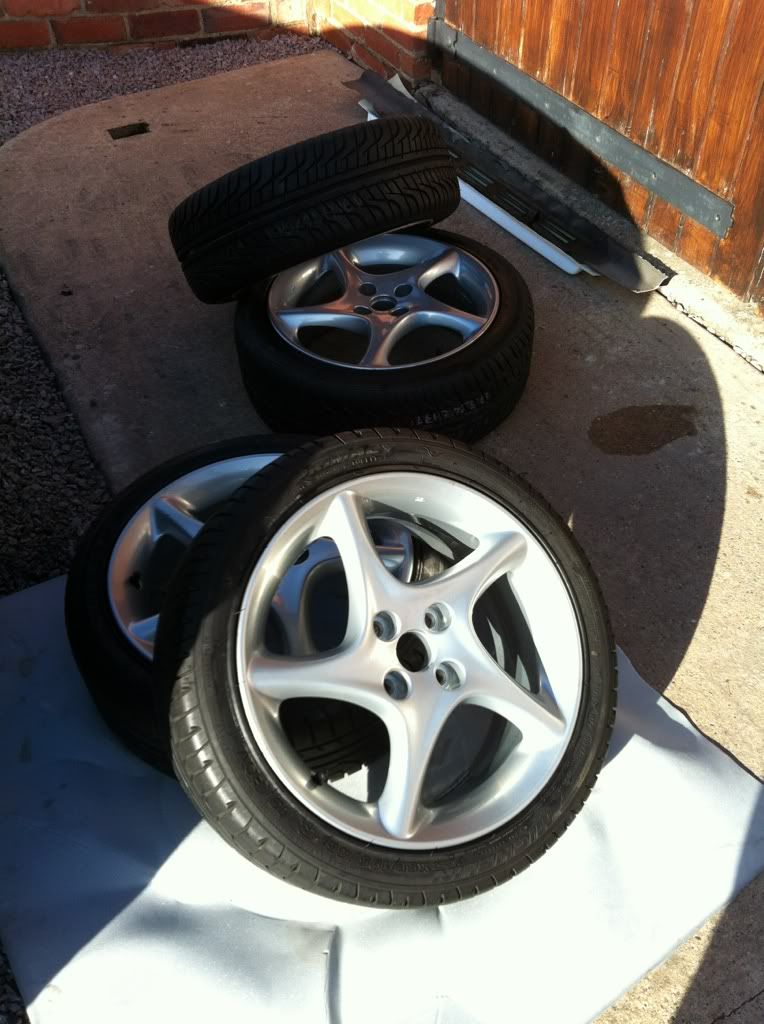
wheels back home with rubber on them.
Re: Mk1b restoration... its alive..and painted!!
I like the wheels but wonder if they may look a bit skinny with those tyres
As Charged suggested in the other thread 
Peter
As Charged suggested in the other thread
Peter
-
Lauren

- IMOC Committee
- Posts: 38632
- Joined: Mon Dec 13, 2004 5:37 pm
- Location: Greater Manchester
- Contact:
Re: Mk1b restoration... its alive..and painted!!
205s would have been absolutely horrible and tramlined everywhere. Also would make the car over-tyred especially on an NA.
2020 GR Yaris - Circuit Pack 
Re: Mk1b restoration... its alive..and painted!!
Lauren wrote:205s would have been absolutely horrible and tramlined everywhere.
Wheel spacers perhaps
Peter
-
boondougal
- Posts: 520
- Joined: Sun Jul 10, 2005 9:48 am
- Location: Shavington (near Crewe)
Re: Mk1b restoration... its alive..and painted!!
offered them up tonight, i think they look good.
Oh well more to worry about before"do my wheels look big on this" is the height of my issues
Oh well more to worry about before
-
boondougal
- Posts: 520
- Joined: Sun Jul 10, 2005 9:48 am
- Location: Shavington (near Crewe)
Re: Mk1b restoration... its alive..and painted!!
Finished refurbishment my front callipers and bolted up the passenger saide only to find it is interfering with the disk....
Worried it is bent...
looks good though
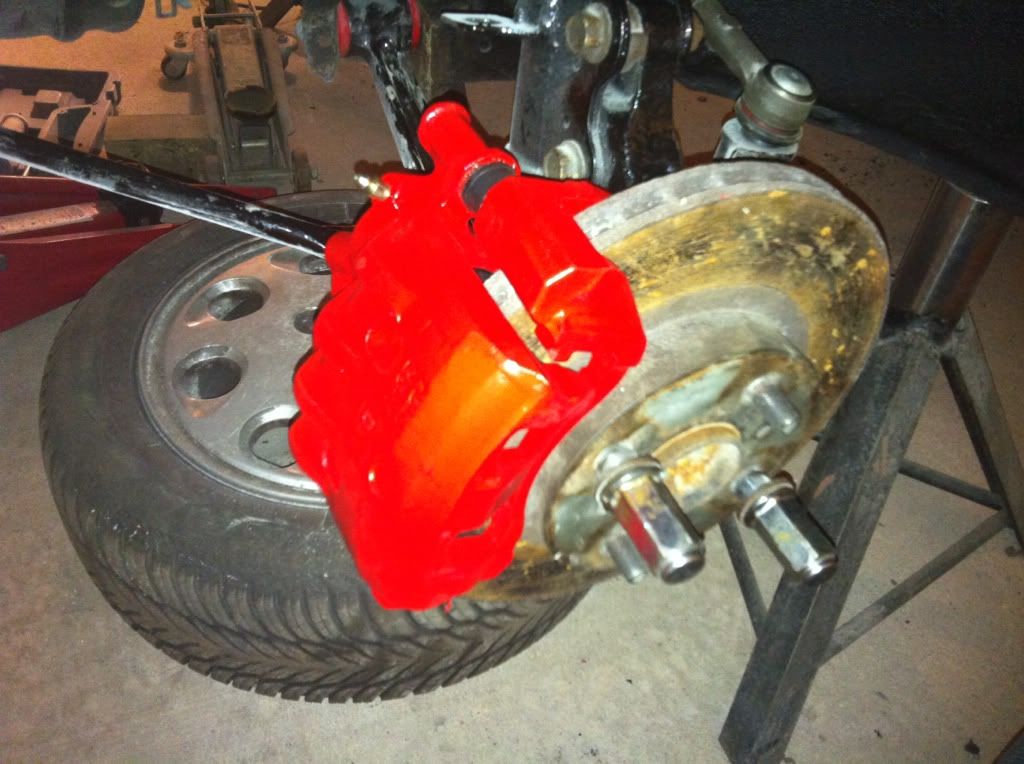
if not a little over exposed!
Can someone please verify that i have the correct calliper on the passenger side.... i am prone to stupid things like that.
Worried it is bent.
looks good though
if not a little over exposed!
Can someone please verify that i have the correct calliper on the passenger side.
-
cartledge_uk
- Posts: 7608
- Joined: Sun Nov 13, 2005 6:28 pm
- Location: Newbury
Re: Mk1b restoration... its alive..and painted!!
The wheels hold the discs in place, bolt a wheel on to the correct torque and then try it
-
boondougal
- Posts: 520
- Joined: Sun Jul 10, 2005 9:48 am
- Location: Shavington (near Crewe)
Re: Mk1b restoration... its alive..and painted!!
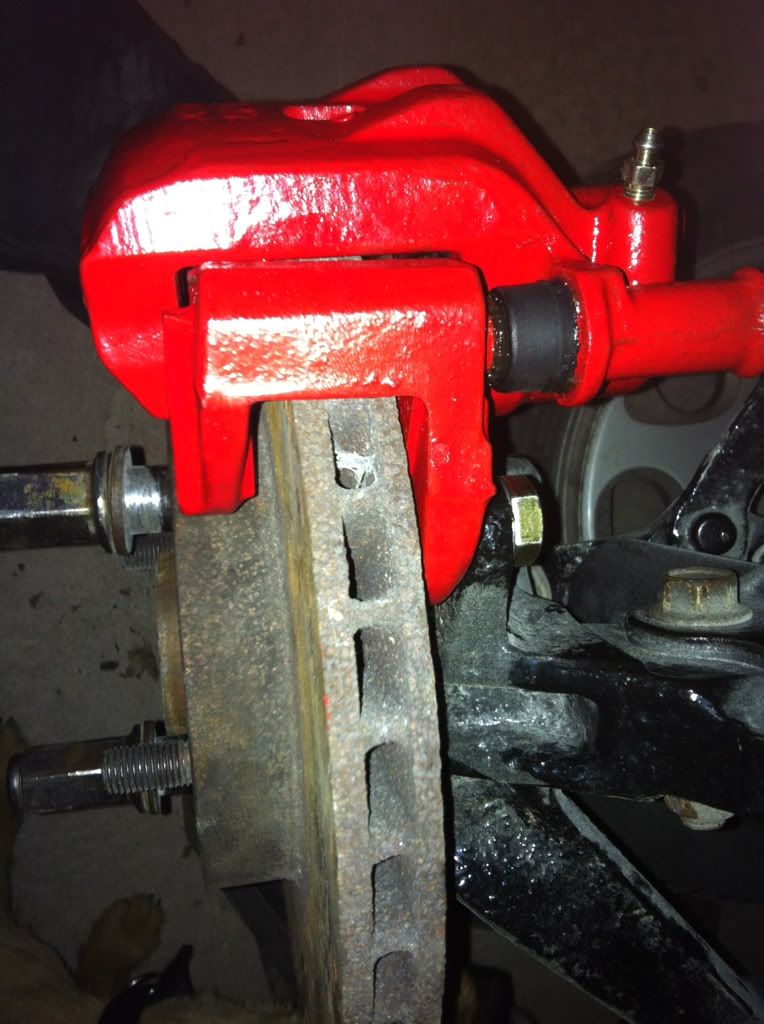
Hi cartledge, yeah i appreciate the wheel point but the disk is catching on the inside face of the carrier....
hmm
hmm
Re: Mk1b restoration... its alive..and painted!!
It looks more like the disk isn't sitting straight to me. 
Re: Mk1b restoration... its alive..and painted!!
If you put the other two nuts on, does that pull the disc straight BD 
Peter
Peter
-
boondougal
- Posts: 520
- Joined: Sun Jul 10, 2005 9:48 am
- Location: Shavington (near Crewe)
Re: Mk1b restoration... its alive..and painted!!
Small update..
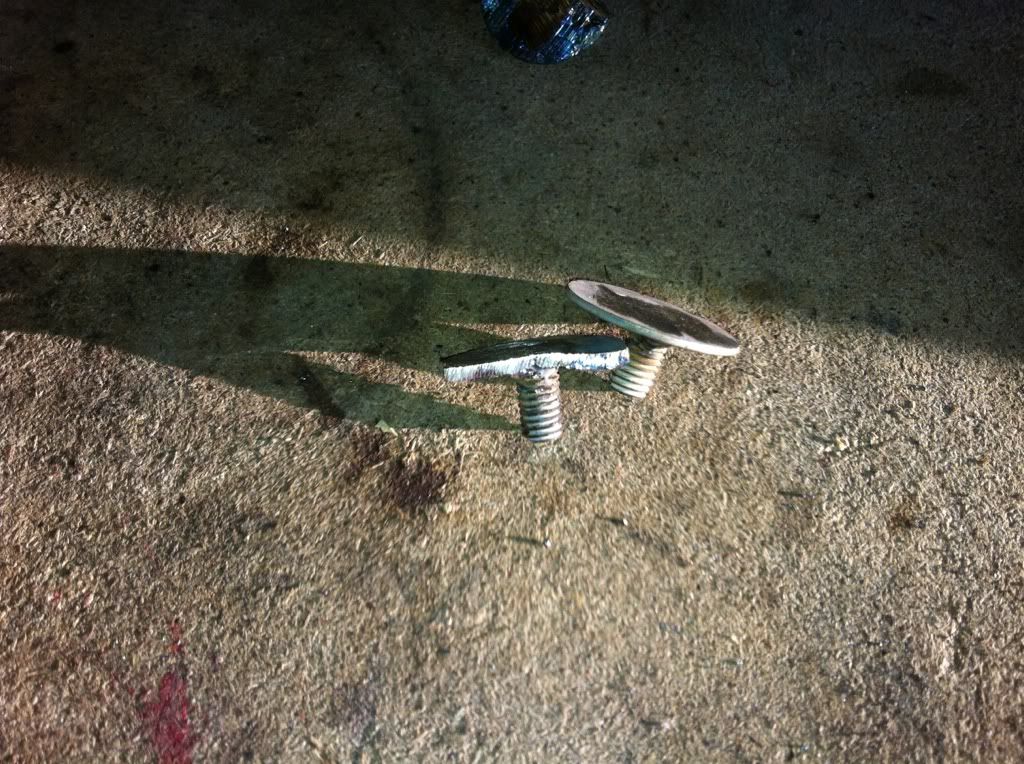
I got to the bottom of the caliper catching, it was catching on the back side of the slider...
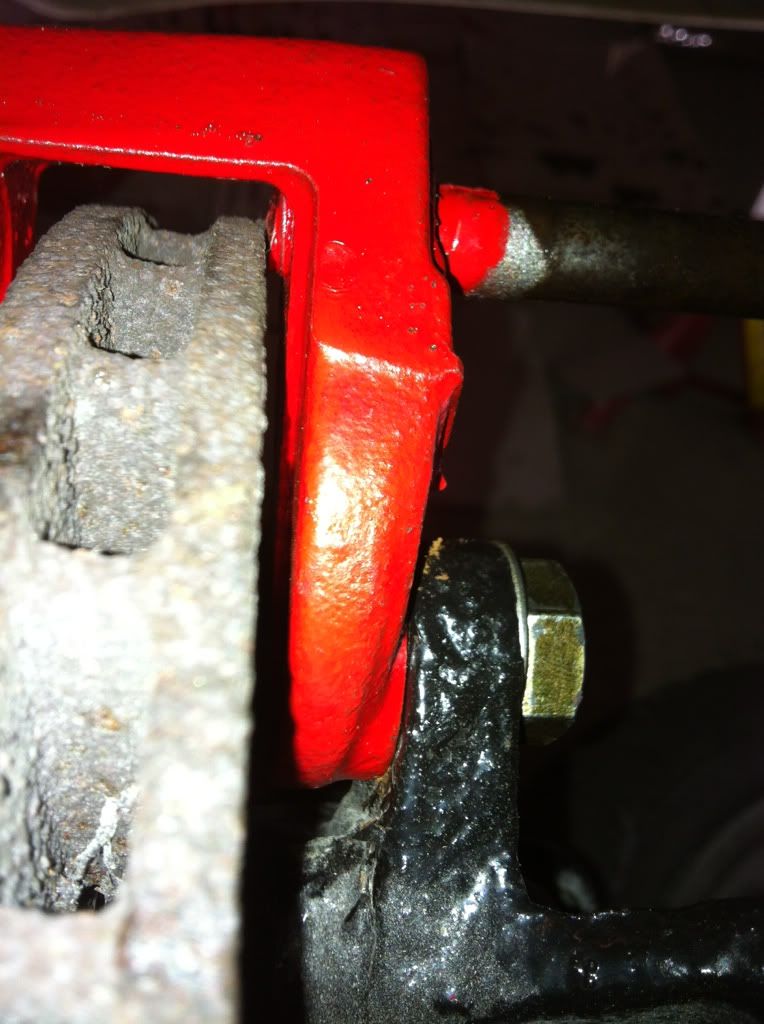
so after a bit of dremmel work problem solved:

I then couldn't resist seeing what the alloy would look like in the arch...
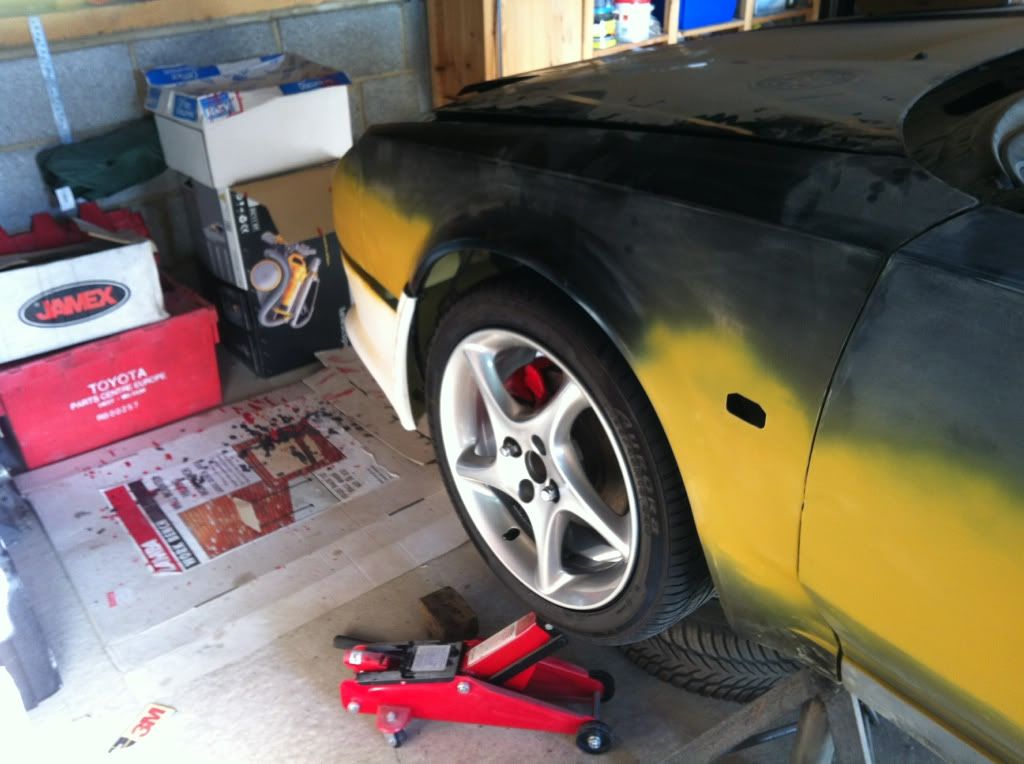
i think it looks good.
I also worked on fitting the back bumper, i used the original fixing strip and secured it in place with fibrel and glass fibre
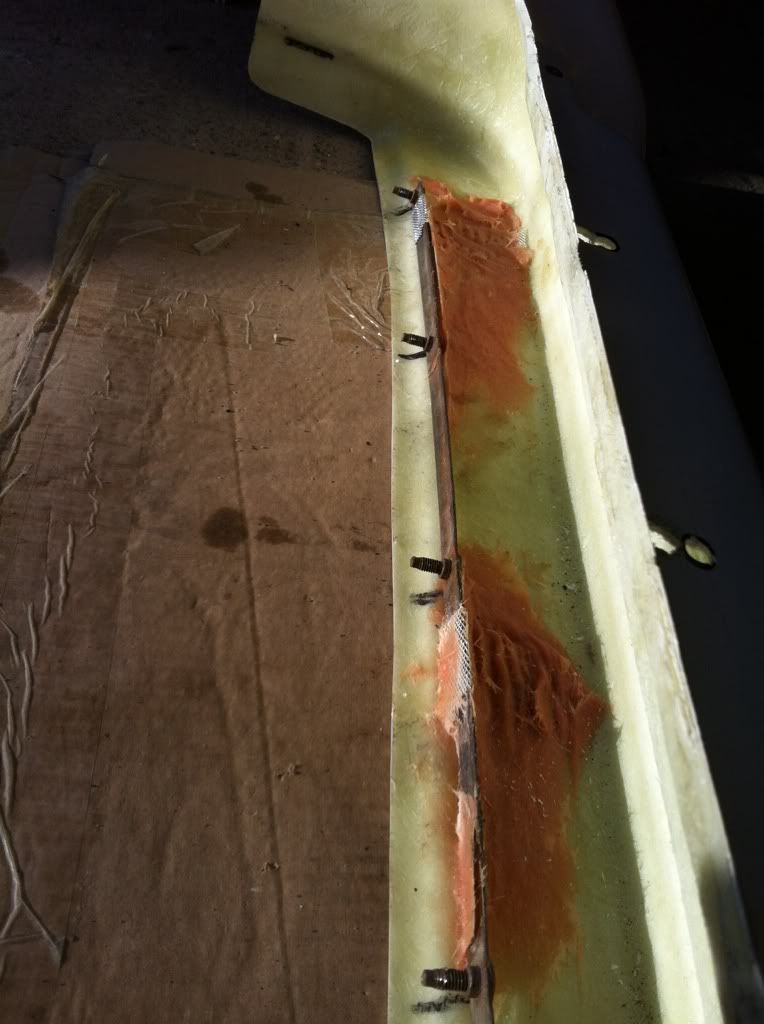
this was an initial test fitting but i added to the reinforcing and also fabricated some fixings for the ends which i glass fibreed to the inside of the bumper.
I also finished refurbing the rears as much as i can... a very generous member from another site is sending me the SST to remove the caliper thread so i'll finih that when it comes next week.
i think tomorrow might be the start of the engine rebuild...
I got to the bottom of the caliper catching, it was catching on the back side of the slider.
so after a bit of dremmel work problem solved:
I then couldn't resist seeing what the alloy would look like in the arch.
i think it looks good.
I also worked on fitting the back bumper, i used the original fixing strip and secured it in place with fibrel and glass fibre
this was an initial test fitting but i added to the reinforcing and also fabricated some fixings for the ends which i glass fibreed to the inside of the bumper.
I also finished refurbing the rears as much as i can.
i think tomorrow might be the start of the engine rebuild.
-
cartledge_uk
- Posts: 7608
- Joined: Sun Nov 13, 2005 6:28 pm
- Location: Newbury
Re: Mk1b restoration... its alive..and painted!!
boondougal wrote:
I then couldn't resist seeing what the alloy would look like in the arch.
i think it looks good.
So do I