You should be very proud
Project MRX350
Moderators: IMOC Moderators, IMOC Committee Members
Re: Project MRX350
Wow, Paul I'm speechless, the level of workman ship is out of this world.
You should be very proud

You should be very proud
-
PW@Woodsport
- Posts: 7642
- Joined: Tue Dec 14, 2004 6:40 pm
- Location: durham
- Contact:
Re: Project MRX350
Thanks Donna, i'm dead pleased with it, the performance is just on another level.

Re: Project MRX350
Nice to see my seats in there too
-
PW@Woodsport
- Posts: 7642
- Joined: Tue Dec 14, 2004 6:40 pm
- Location: durham
- Contact:
Re: Project MRX350
Yes they look amazing Donna, well chuffed with them
Some interesting comparison data to give you an idea of the performance levels this now offers.
I now have the same power to weight ratio as the following factory spec cars....
1996- TVR Cerbera 4.2
2011- Chevrolet Camaro ZL1 6.2L V8
1998- Aston-Martin Vantage 600
2012- Aston-Martin Vantage V12 Zagato
1993- Lamborghini Diablo VT 5.7 V12
1993- TVR Chimaera 5.0
1993- TVR Griffith 500
2001- TVR Chimaera 500 5.0L V8
2012- Mercedes SL Class 63
2007- Aston-Martin DBS V12 2d
1985- Lamborghini Countach LP5000S QV
2009- Audi R8 Spyder 5.2L V10
2006- Porsche 911 Turbo 997
1971- Lamborghini Miura P4000 SV
2006- Porsche 911 GT3 RS 997
1998- Porsche 911 Turbo S 993
2000- Morgan Aero 8 4.4 V8
1996- Dodge Viper GTS
2002- Ferrari 575 M Fiorano
2012- Jaguar F Type 5.0L V8 S Cabriolet
2007- Chevrolet Corvette 6.2 V8 2d
2006- BMW Alpina B5 V8 Switchtronic E60
1966- Chevrolet Corvette C2 Stingray 427 425hp
2004- Ferrari 612 Scaglietti F1
Some interesting comparison data to give you an idea of the performance levels this now offers.
I now have the same power to weight ratio as the following factory spec cars.
1996
2011
1998
2012
1993
1993
1993
2001
2012
2007
1985
2009
2006
1971
2006
1998
2000
1996
2002
2012
2007
2006
1966
2004
-
PW@Woodsport
- Posts: 7642
- Joined: Tue Dec 14, 2004 6:40 pm
- Location: durham
- Contact:
Re: Project MRX350
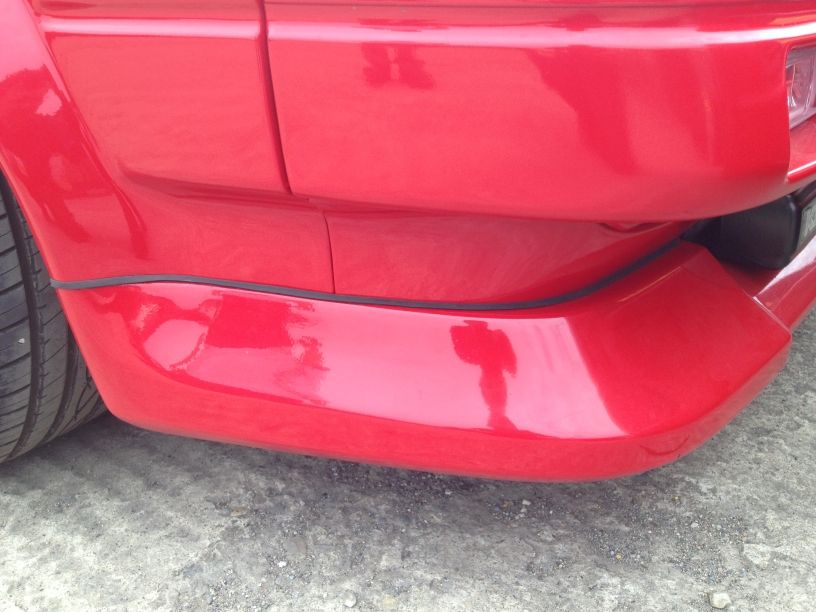
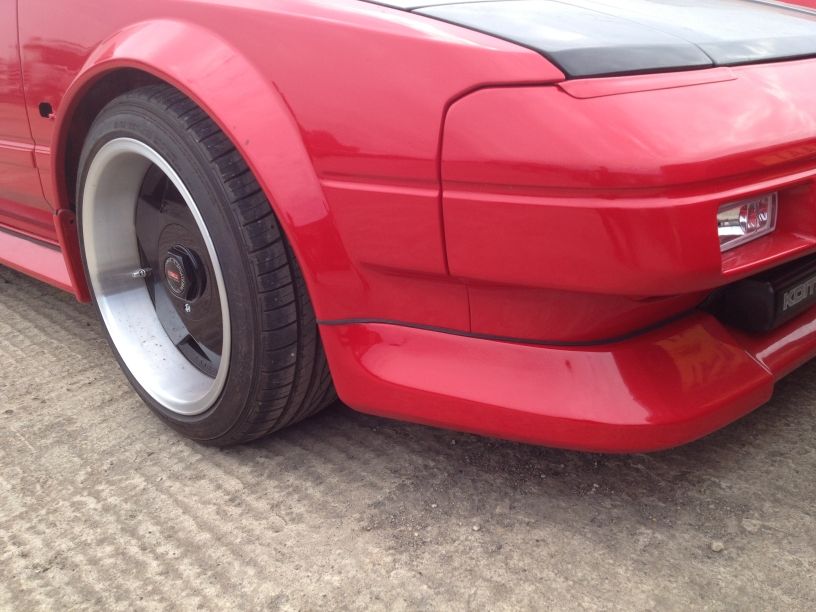
Coming to near the end of this project now, i made a seal/trim for the BC rep front end, looks much more OEM now....
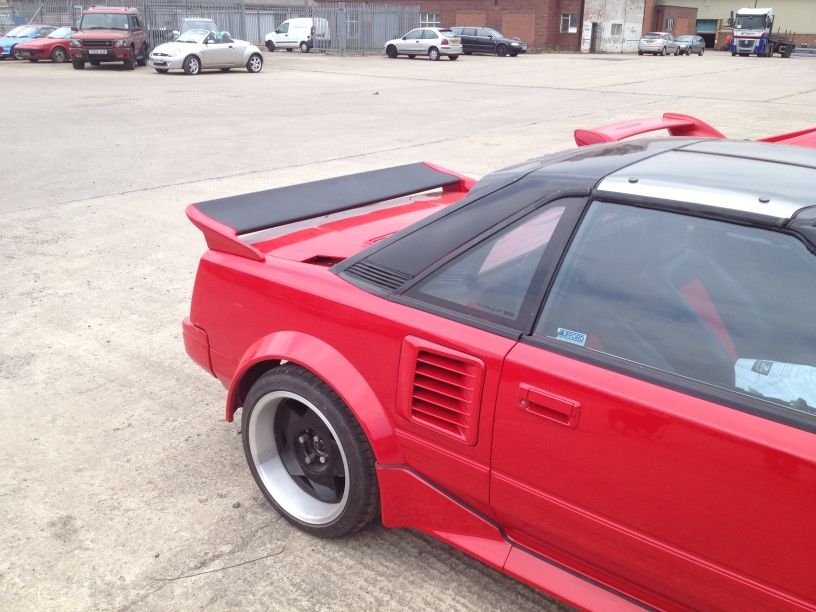
The rear wing assembly is now finished, i made this last year out of a Noble M12 blade and cut the"winglets" off a Mk1 spoiler, moved the winglets outboard onto the rear quarters, made support struts for the blade that are part of the bootlid and then Plumley'd the whole thing for good effect.... what i think i have ended up with is a more aggressive but still unmistakably Mk1'esque rear spoiler that ties in very well with the rest of the styling.
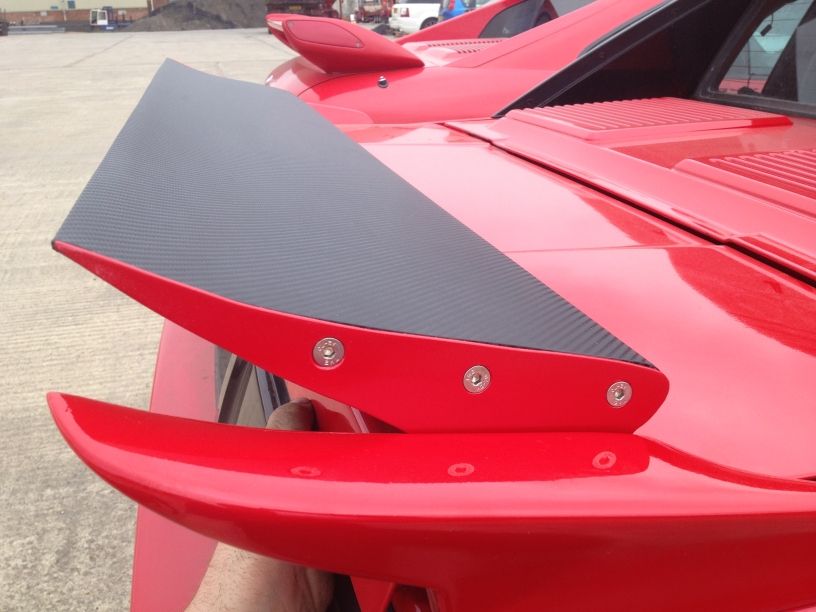
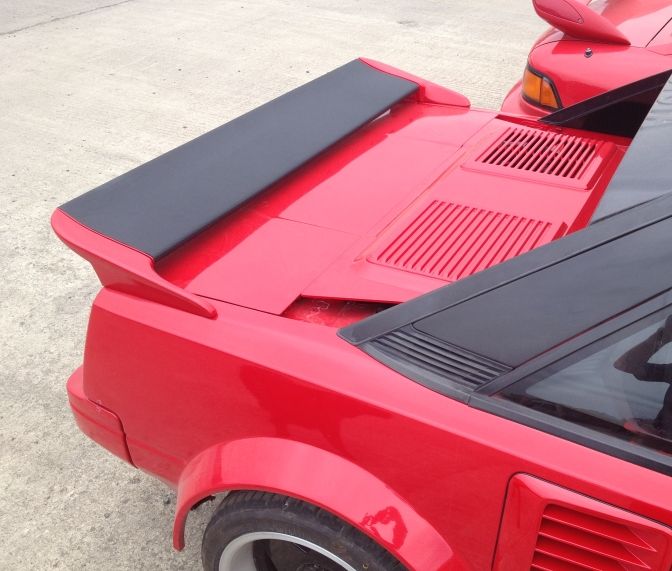
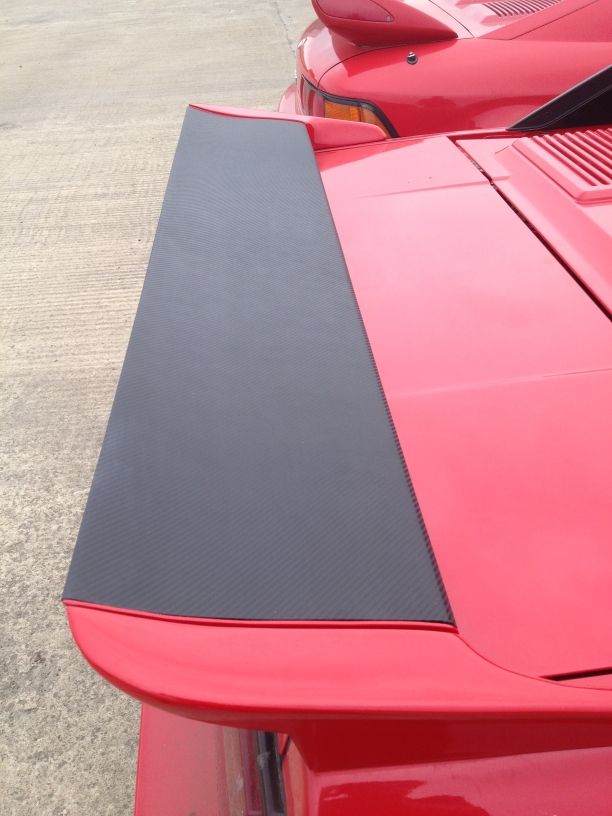
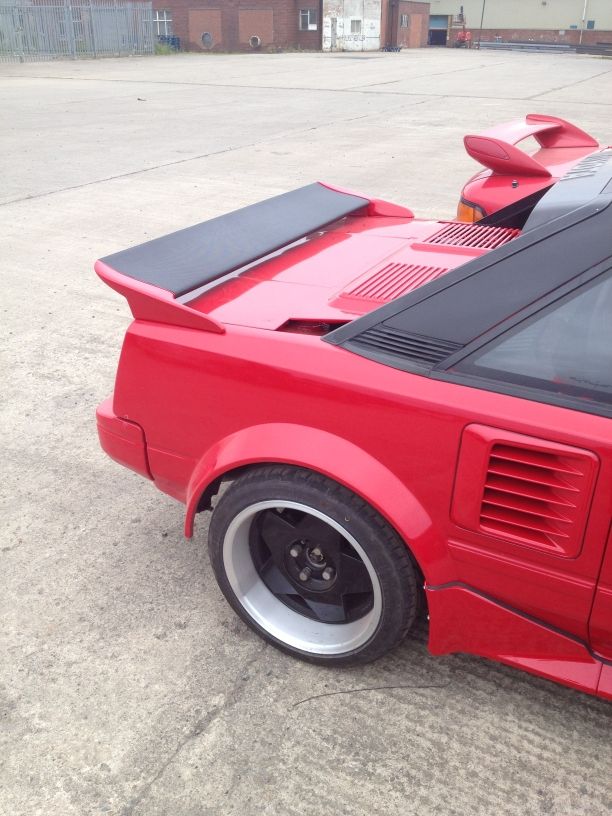
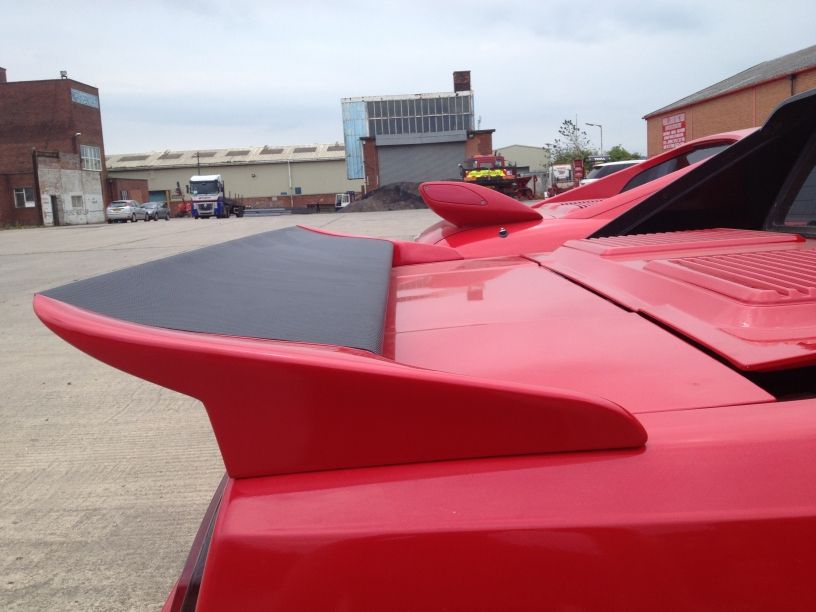
I'm very happy with how this rear wing turned out, i went through 5 or 6 different designs before chosing this and making it happen, it totally works for me and my favourite part of the car.
The rear wing assembly is now finished, i made this last year out of a Noble M12 blade and cut the
I'm very happy with how this rear wing turned out, i went through 5 or 6 different designs before chosing this and making it happen, it totally works for me and my favourite part of the car.
-
synXero
- Posts: 3781
- Joined: Fri May 28, 2010 12:04 pm
- Location: London, Edinburgh, or the Highlands!
Re: Project MRX350
That bumper seal works perfectly.
The spoiler looks great too, maybe the legs are just a touch too fragile/slender looking for me, also photo 1 of the wing makes me think you should fit actuators to it and deploy that b1tch at SPEEEEED
The spoiler looks great too, maybe the legs are just a touch too fragile/slender looking for me, also photo 1 of the wing makes me think you should fit actuators to it and deploy that b1tch at SPEEEEED
-
PW@Woodsport
- Posts: 7642
- Joined: Tue Dec 14, 2004 6:40 pm
- Location: durham
- Contact:
Re: Project MRX350
The legs are regular Mk1 spoiler ones, not thinner, just cut straight from a Mk1 spoiler and mounted on the quarter panels, or do you mean the blade supports?
I did think about actuating the rear wing at speed, but it was a little too complex getting the wing to work independantly of the bootlid.
I did think about actuating the rear wing at speed, but it was a little too complex getting the wing to work independantly of the bootlid.
Re: Project MRX350
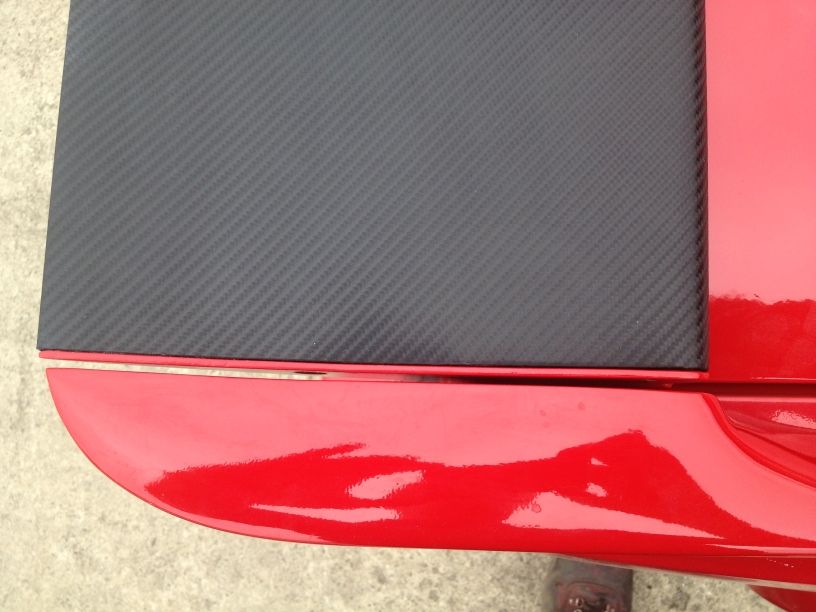
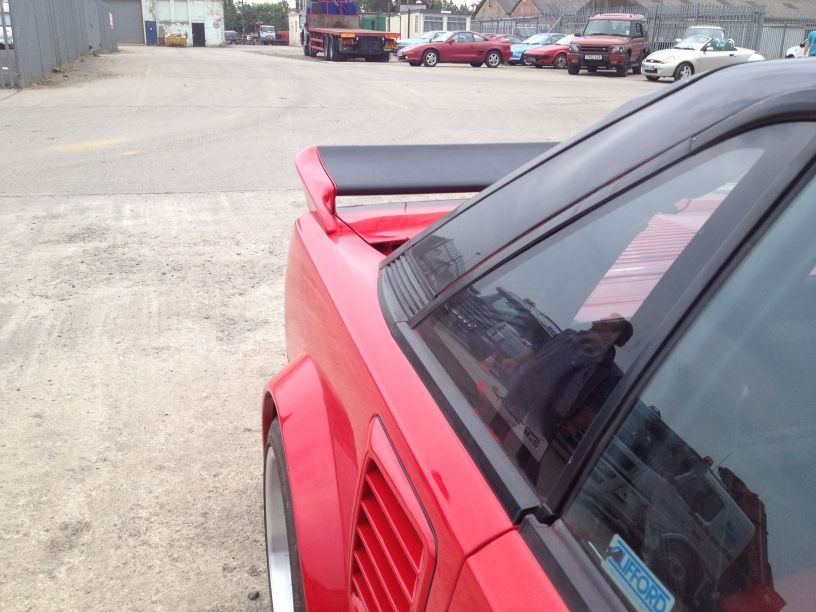
Given how nicely the blade blends into the end pieces it almost seems counter productive to highlight the multipart nature of the wing by having it different colours. I'd have been tempted to have painted it all matching - in my case I'd have painted the blade red as I'm not a fan of carbon from a styling perspective but I appreciate that's a minority point of view and painting the ends black would achieve the same effect
-
PW@Woodsport
- Posts: 7642
- Joined: Tue Dec 14, 2004 6:40 pm
- Location: durham
- Contact:
Re: Project MRX350
That's actually a very fair point, i gave the blade colouring a lot of thought, the original idea was to paint it either all red or all black, it would work really well either way.
My problems arose when i came across that damn carbon bonnet and carbon visor, i figured it would tie in better at the rear, plus the wing was carbon by default..... so it was a tough decision.
I'm still easy either way, if the mood takes me it could well go all red one day.
My problems arose when i came across that damn carbon bonnet and carbon visor, i figured it would tie in better at the rear, plus the wing was carbon by default.
I'm still easy either way, if the mood takes me it could well go all red one day.

Re: Project MRX350
For some reason I thought you were going to use a carbon engine and boot lid as well
-
PW@Woodsport
- Posts: 7642
- Joined: Tue Dec 14, 2004 6:40 pm
- Location: durham
- Contact:
Re: Project MRX350
I did have a rare NA carbon engine lid but it wouldn't fit with the 2gr so I sold it to Stenky
Re: Project MRX350
That is a shame it would have finished the car off perfectly with carbon panels at the back as well as the front.
This car is probably the best example of a mk1 mr2 and shows what should have been done by the factory. Every detail is perfect.
This car is probably the best example of a mk1 mr2 and shows what should have been done by the factory.
-
PW@Woodsport
- Posts: 7642
- Joined: Tue Dec 14, 2004 6:40 pm
- Location: durham
- Contact:
Re: Project MRX350
Thanks chaps, the hard work is starting to pay off as it all comes together, should be on the road very soon.
-
PW@Woodsport
- Posts: 7642
- Joined: Tue Dec 14, 2004 6:40 pm
- Location: durham
- Contact:
Re: Project MRX350
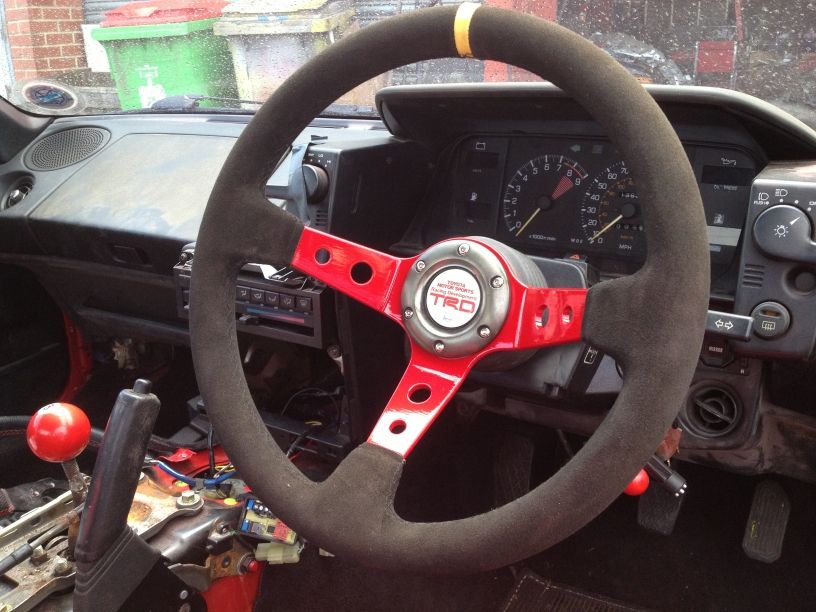
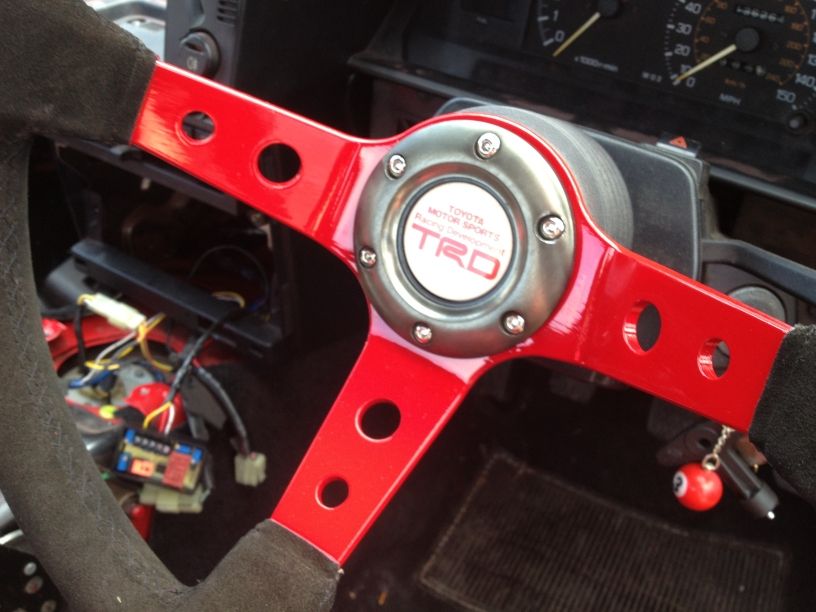
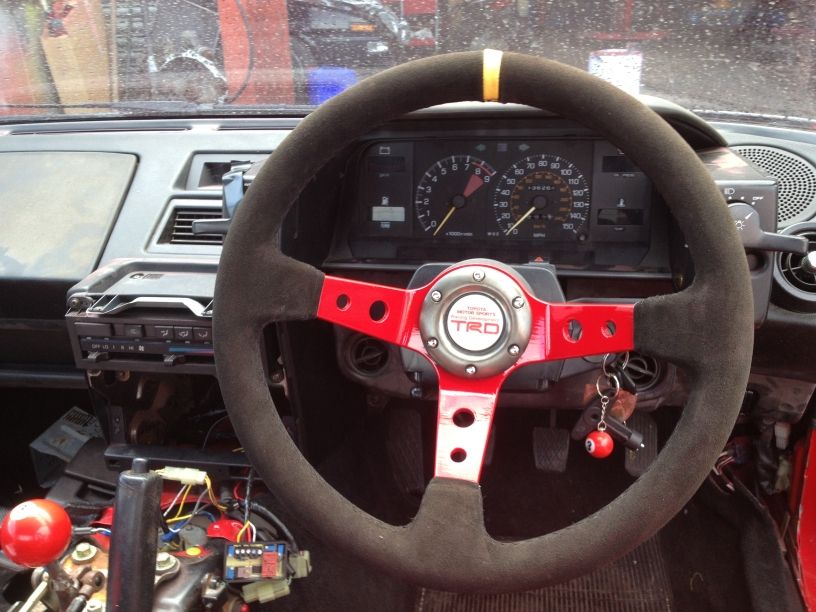
Ok hardly update of the year but i've started interior work, overhauled my deep dish suede wheel, painted the centre 3P0 same as the car and changed the horn push, suits the car much better.
Re: Project MRX350
looking amazing paul, attention to detail is awesome. the skirt moulding is available from toyota, its fitted to the side skirts on the 2004 ish corolla. i used some on mine. the double glazing seal looks good though
will you and this be at JAE?
will you and this be at JAE?

-
PW@Woodsport
- Posts: 7642
- Joined: Tue Dec 14, 2004 6:40 pm
- Location: durham
- Contact:
Re: Project MRX350
Thanks mate, yes it will definitely be on the Twobrutal stand at JAE, it should be on the road properly within the next few weeks so i have plenty of tinkering time left between now and JAE.
-
PW@Woodsport
- Posts: 7642
- Joined: Tue Dec 14, 2004 6:40 pm
- Location: durham
- Contact:
Re: Project MRX350
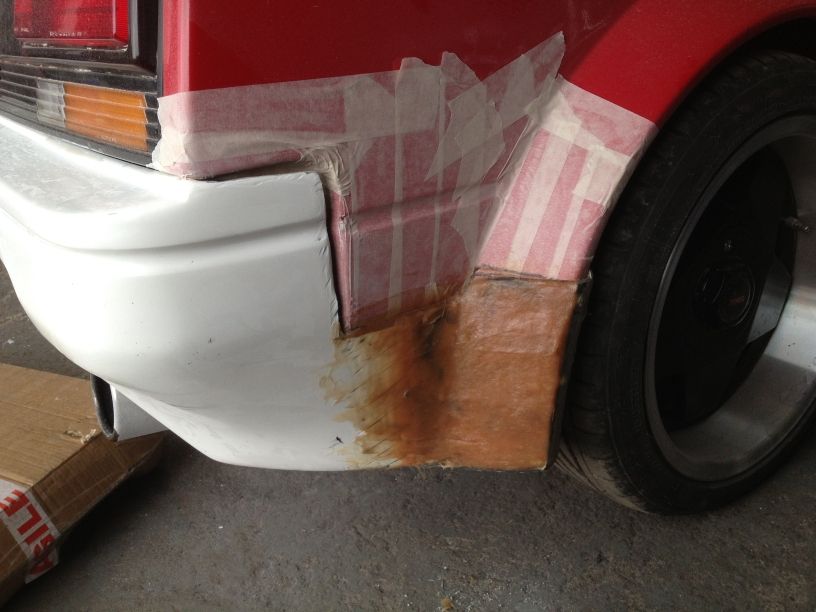
Ok this post is a bit pic heavy, i decided to hit this awkward rear arch area to come up with a spat/bumper solution, the car just looked very unbalanced from the side view, so i downed tools on customers stuff at 4pm and got stuck into it to see what i could come up with.
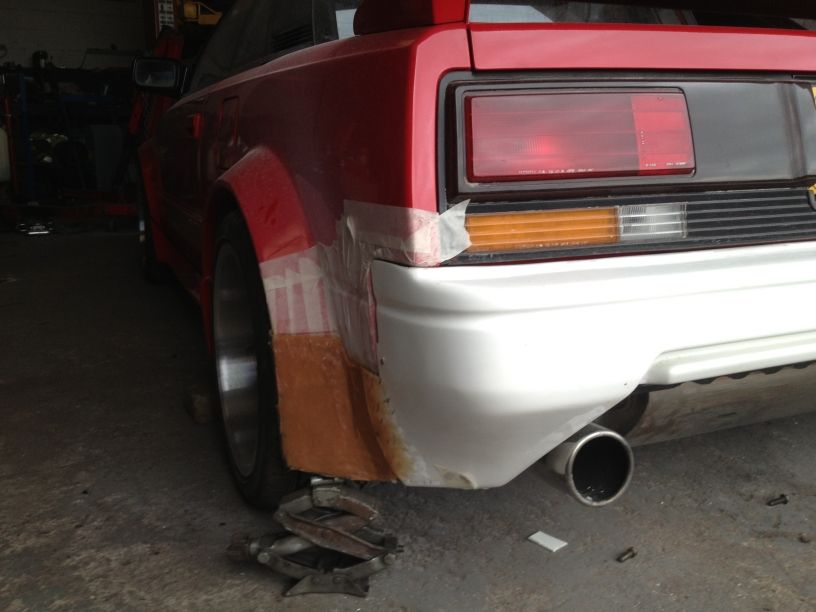
Rather than make something fit under the stock bumper(which would look like an add on rather than look "super OEM" as Geoff put it) i decided to use one of my Styleauto reps. I took my old bumper off and chopped out the centre of the styleauto to expose the exhaust silencer, i much prefer the rear like this...
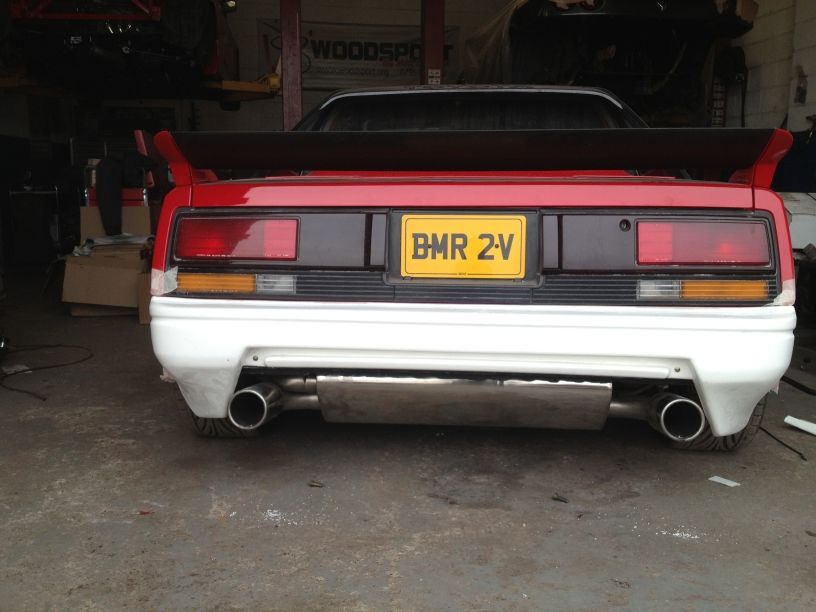
The SA bumper now"frames" the exhaust, much better than the stock bumper, but what to do about those awkward areas where the bumper meets the arch.
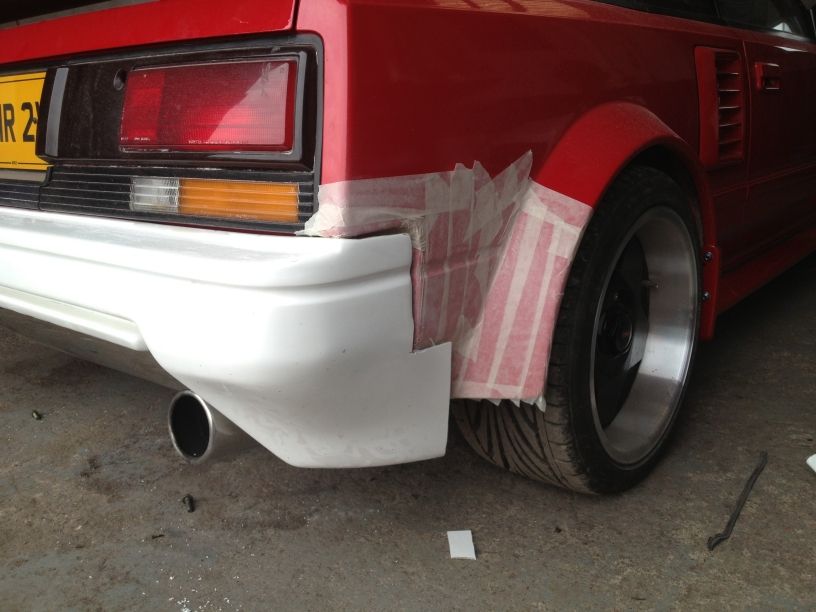
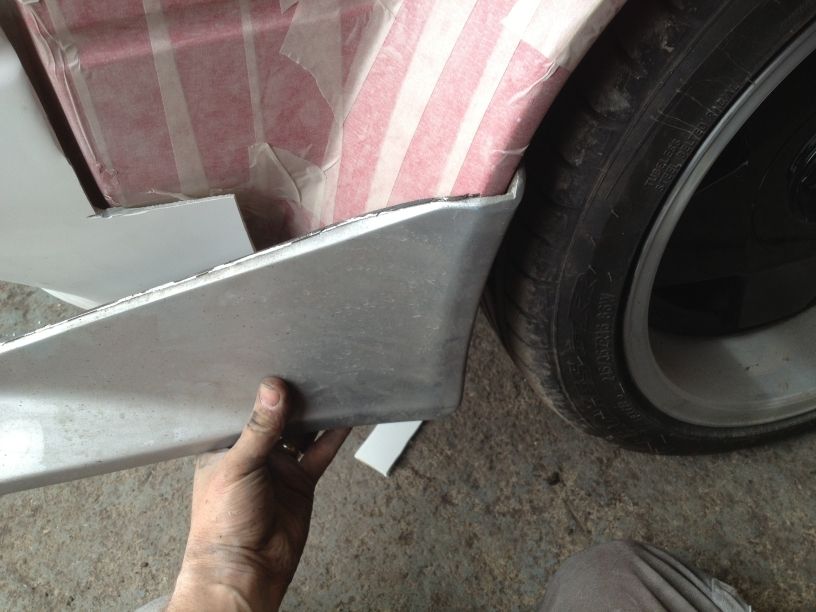
As Tiggs guessed on another thread the solution is to make spats that wrap around the arches and then flow down into the bumper, the trick here is to make the spat bits look as OEM as possible, this was done by removing the lip from the opposite side triangle that usually goes infront of the arch...
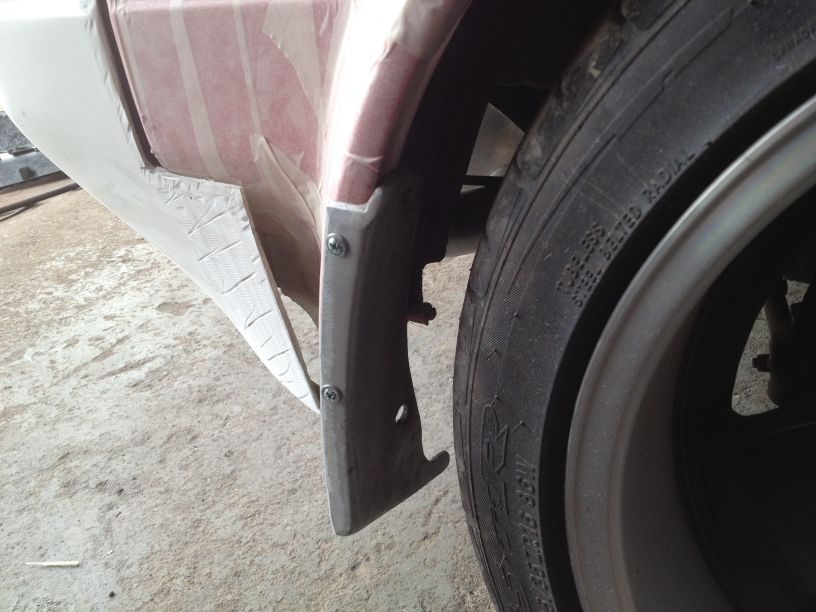
I then made an aluminium bridging piece, this area is too wide to just use Fibral on without some support, so the ally plate is temporarily screwed into both arch lip and bumper...
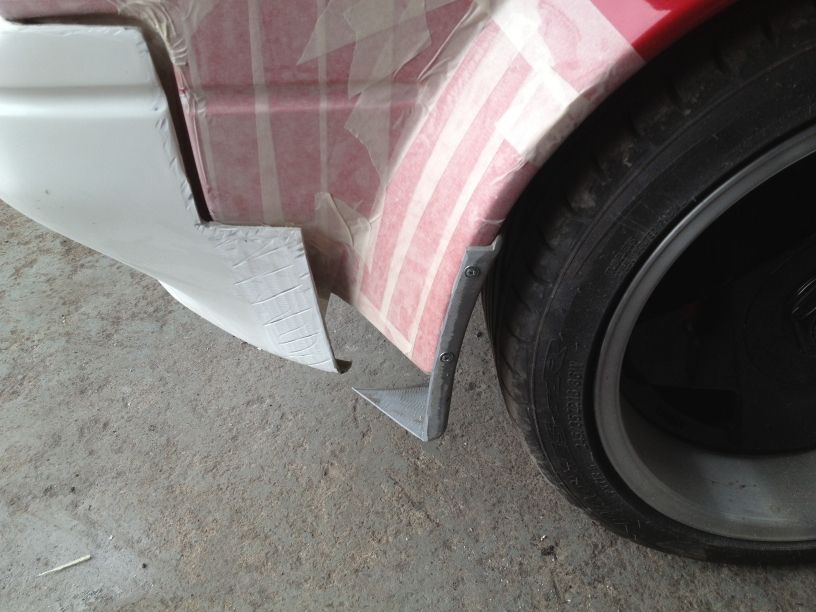
This is then bridged across, further strengthening and bridging work will take place on the rear of this area once the whole bumper is removed....
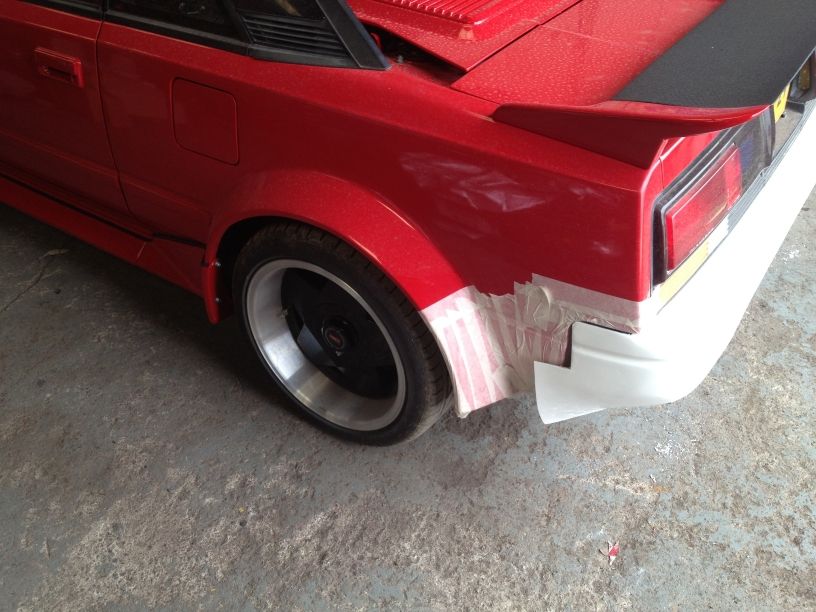
This totally works as a solution to this area and getting the whole rear to the same height as the sideskirts...
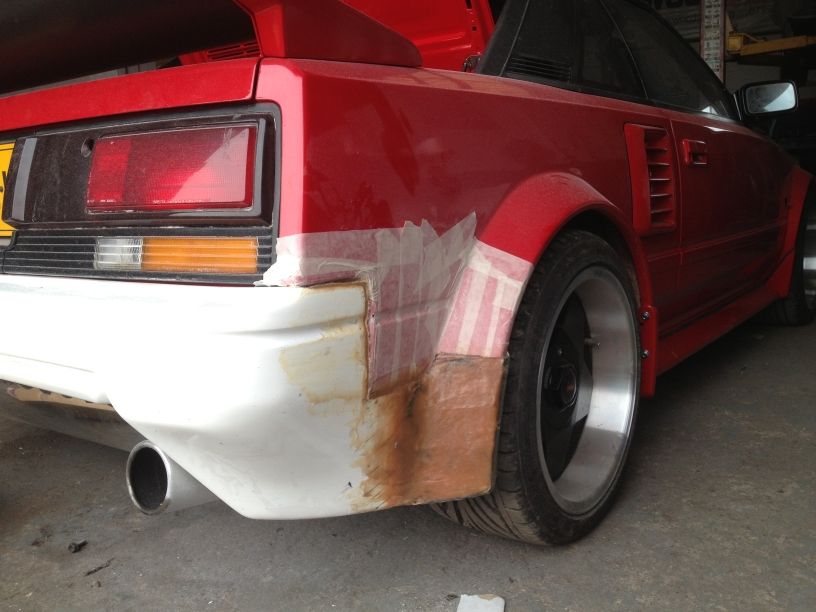

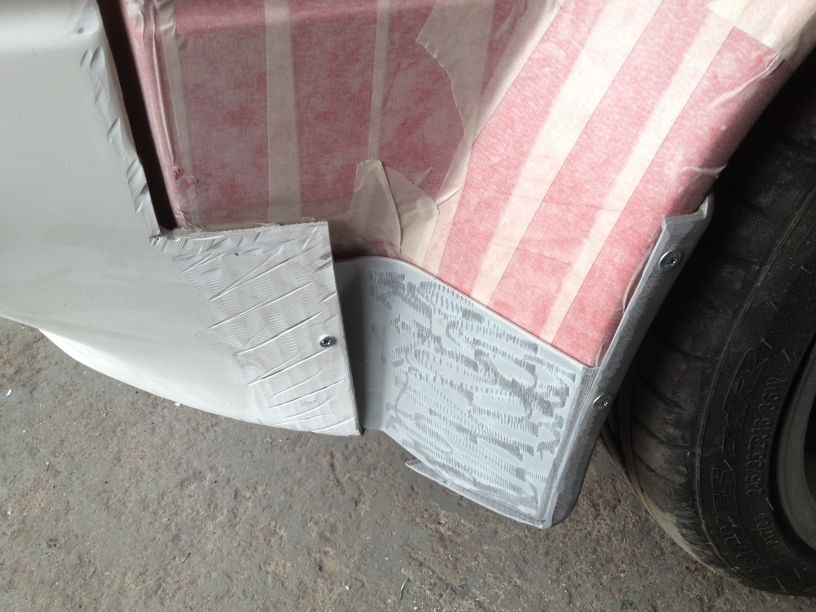
I repeated the whole process on the NS...
There is at least another week in the sanding and prep of this before it can be painted, the spat to arch area will then get a rubber seal trim like the front part of the sideskirt does to really make it look like a factory job.
Here is the binnacle top i have been working on....
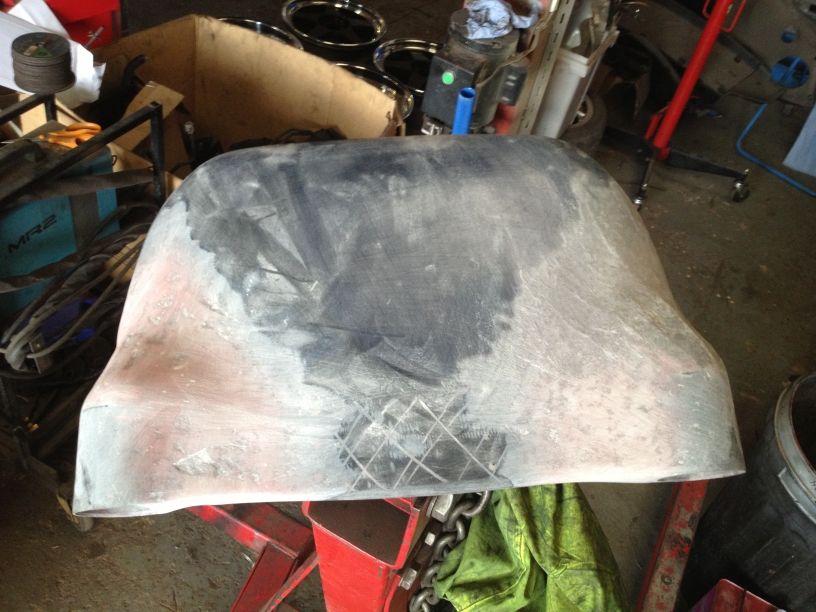
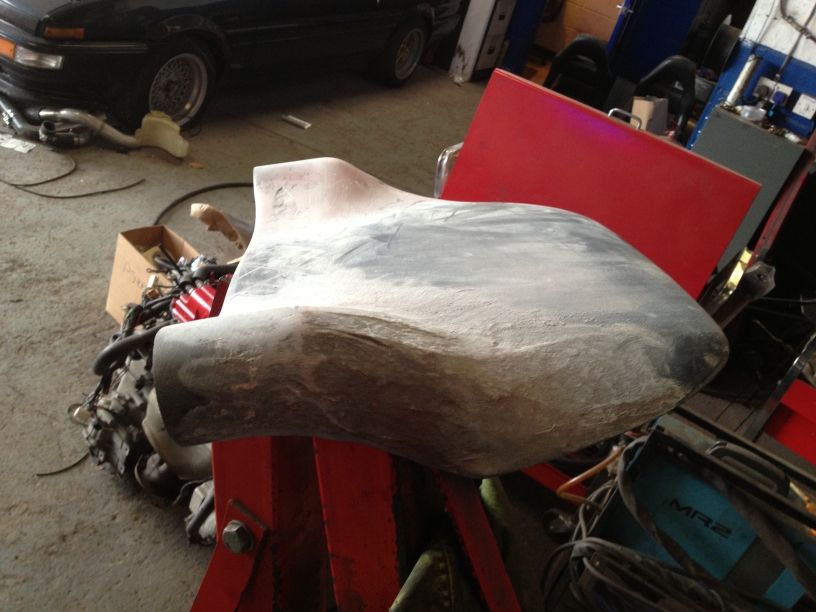
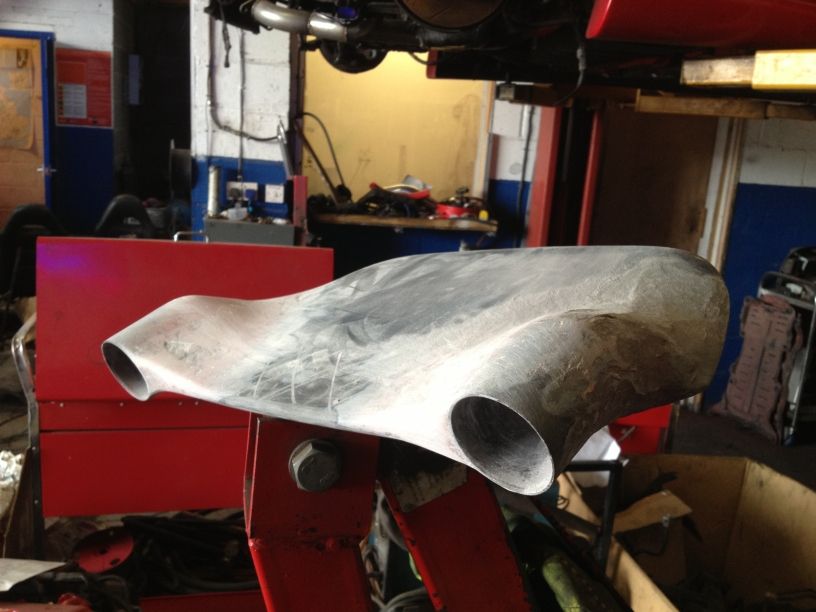
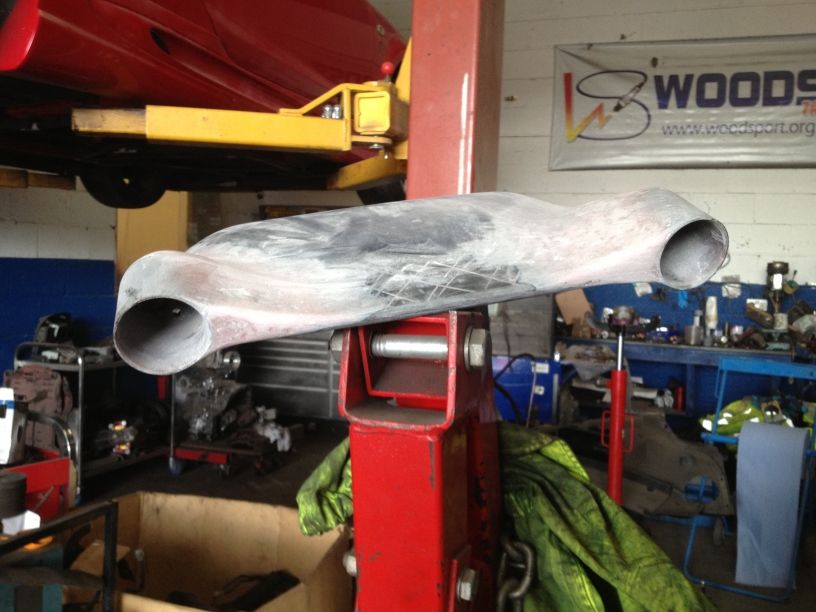
This needs a ton of work before i know if it is going to work or not, my main concern is it looks like Sids head from Ice Age...

Rather than make something fit under the stock bumper
The SA bumper now
As Tiggs guessed on another thread the solution is to make spats that wrap around the arches and then flow down into the bumper, the trick here is to make the spat bits look as OEM as possible, this was done by removing the lip from the opposite side triangle that usually goes infront of the arch.
I then made an aluminium bridging piece, this area is too wide to just use Fibral on without some support, so the ally plate is temporarily screwed into both arch lip and bumper.
This is then bridged across, further strengthening and bridging work will take place on the rear of this area once the whole bumper is removed.
This totally works as a solution to this area and getting the whole rear to the same height as the sideskirts.
I repeated the whole process on the NS.
There is at least another week in the sanding and prep of this before it can be painted, the spat to arch area will then get a rubber seal trim like the front part of the sideskirt does to really make it look like a factory job.
Here is the binnacle top i have been working on.
This needs a ton of work before i know if it is going to work or not, my main concern is it looks like Sids head from Ice Age.