Krish's MR2 - CONVERSION FINISHED - LOVING IT - pg5
Moderators: IMOC Moderators, IMOC Committee Members
-
Chris_9011
- Posts: 510
- Joined: Thu Apr 26, 2007 10:32 am
- Location: West Midlands
Re: Krish's MR2 - CONVERSION FINISHED - LOVING IT - pg5
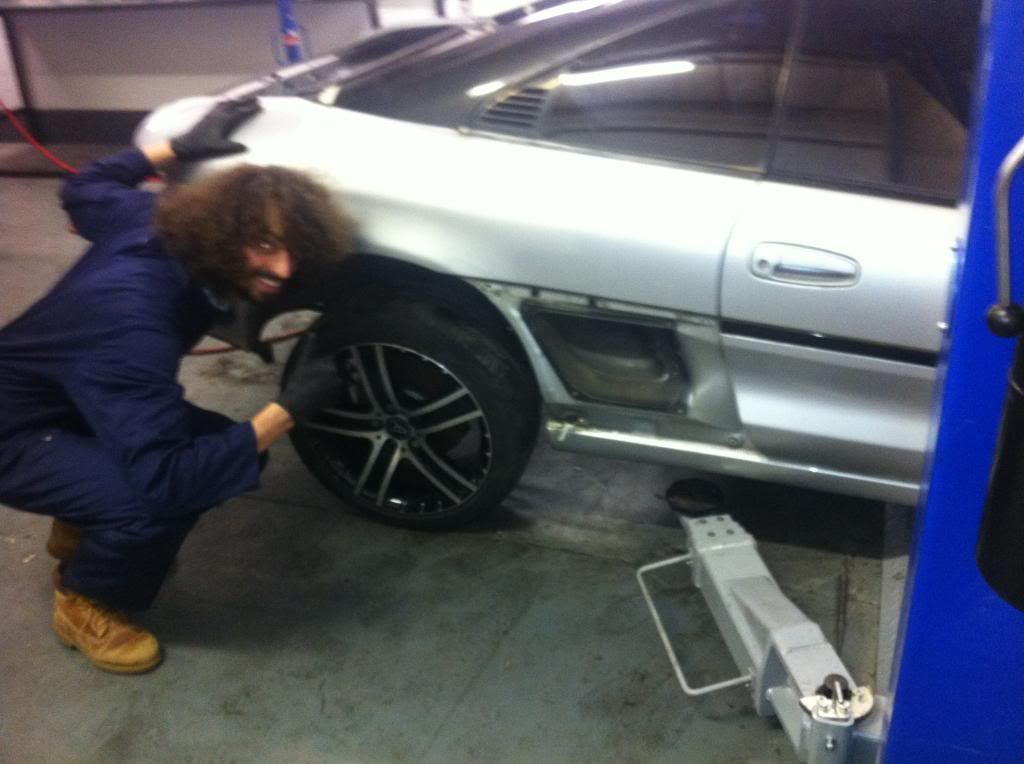
good to see the wheels finally on Krish. .. they look great!
Re: Krish's MR2 - CONVERSION FINISHED - LOVING IT - pg5
RikH77 wrote:Good lad is Nij
Car looks good
Yep top lad
RedMR² wrote:Good stuff mate, glad it's all happening for you.
I've seen this car so many times over the years
Enjoy it mate, welcome back.
Thanks mate, some of the body mods may come off at some stage and changed a little but good base I thought for a transplant!
Magic Beans wrote:Welcome back
Thanks mate
Draven wrote:I'm in Milton Keynes.
Hey Draven, thanks mate.
Gullzter wrote:Last post was a good read or look, i like pics
Glad you came to your senses and got the tbar!
Your right mate.
Chris_9011 wrote:good to see the wheels finally on Krish.
Thanks mate.
3S-GTE Lump Out!!!
So the engine drop happened this weekend gone!!
What a crazy weekend it was. Before I start I just want to thank Simba, Peter (SBITS) and David (Draven).
Special thanks to David for all his pms and knowledge of wealth
So where to begin.......
The plan from Friday to Sunday was to get the chargecooler system, rear clip and everything else I might need off the sonic shadow.
This all flopped when the garage was busy and I didnt get a ramp until 5pm on Saturday. Couldnt really complain since they have a business to run and Im just grateful for power tools and a ramp.
Anyway, with a brand new workshop I thought the conversion would be nice and easy but it wasnt. Their new mechanic is a messy guy ](./images/smilies/eusa_wall.gif "Brick wall")
Tools were all over the place, all the tools were dirty and before I could even start I had to clean up the workshop area and sort out some of the tools](*,)](*,)
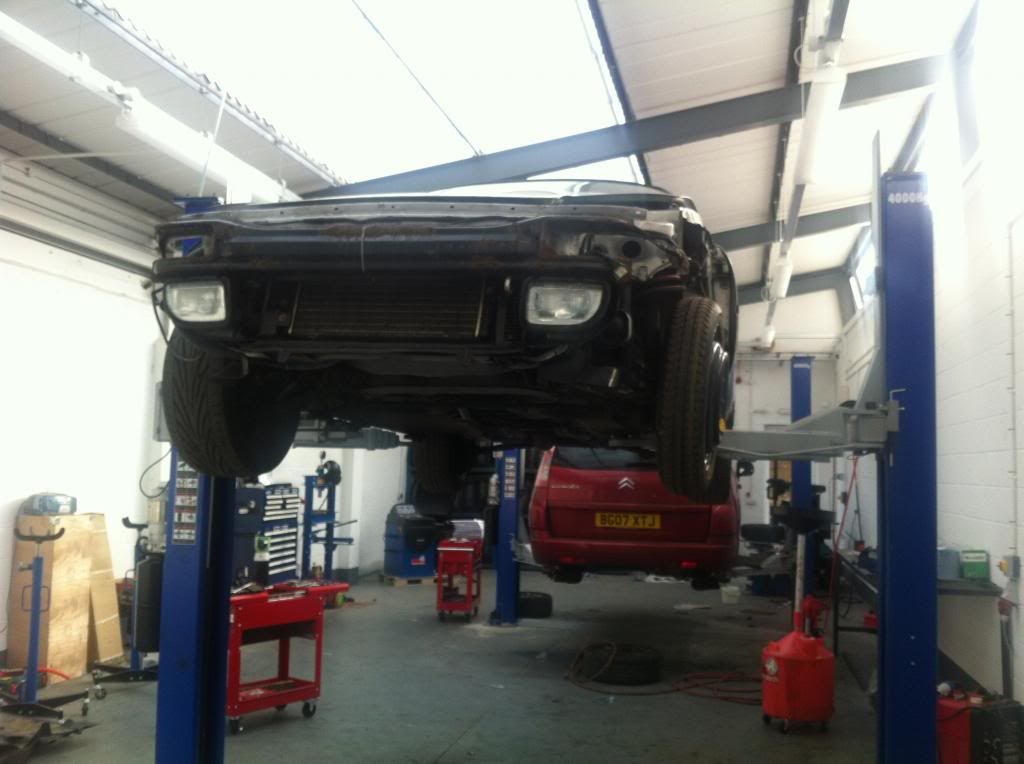
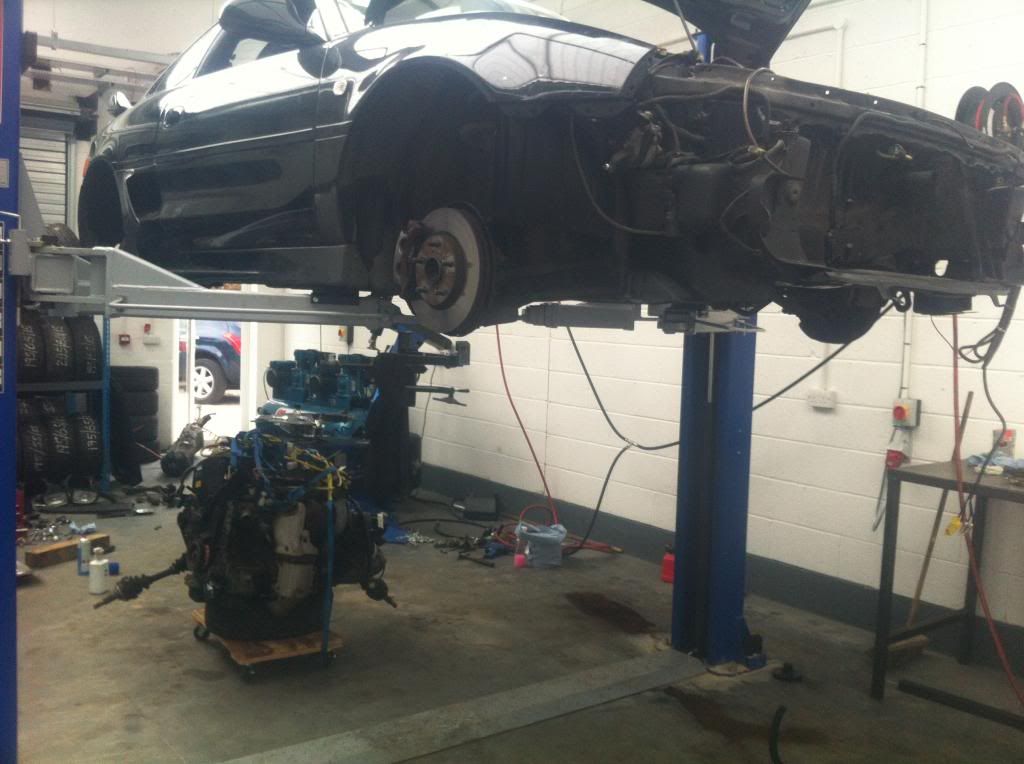
Finally by 6pm I had the car up in the air. My game plan was to remove the chargecooler system including engine rad and then move onto the rear clip. Progress was sloooooow. So many videos, pics to make sure I could then refit the system back in.
So start with the essentials:


Moving onto the chargecooler strip down:
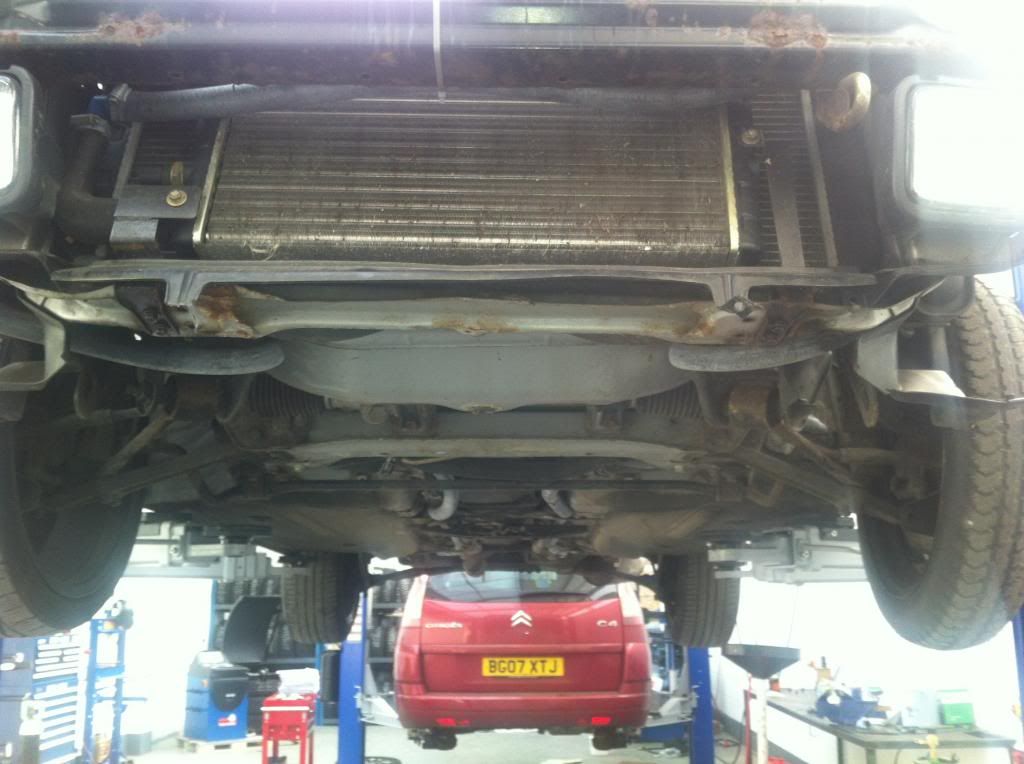
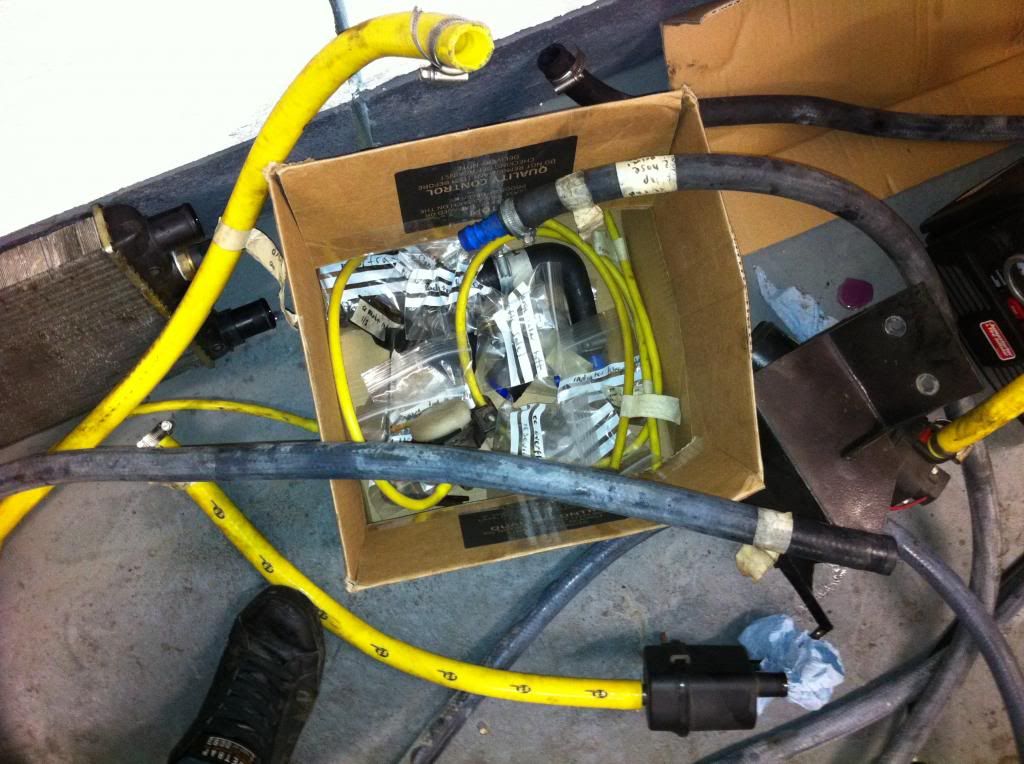
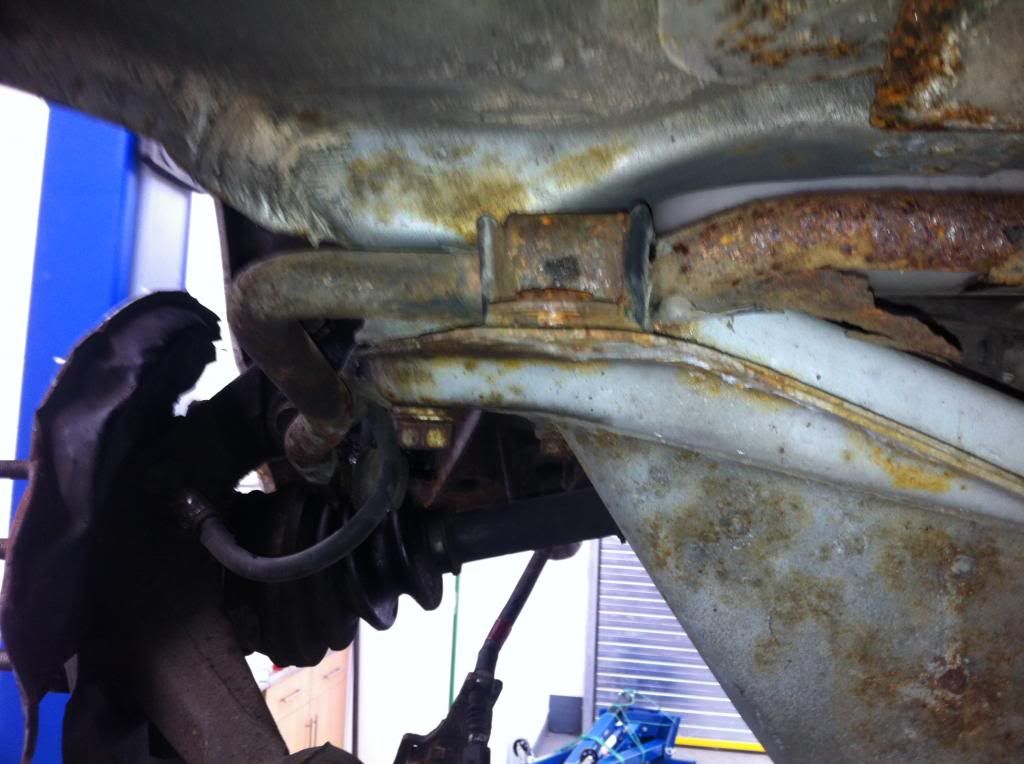
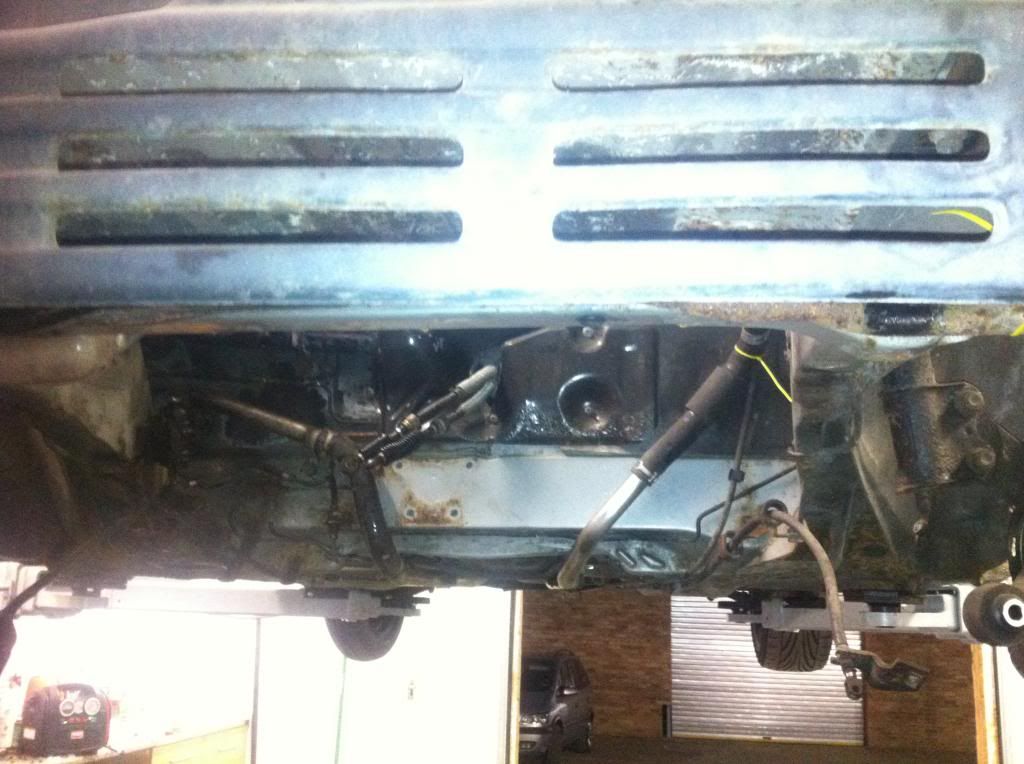
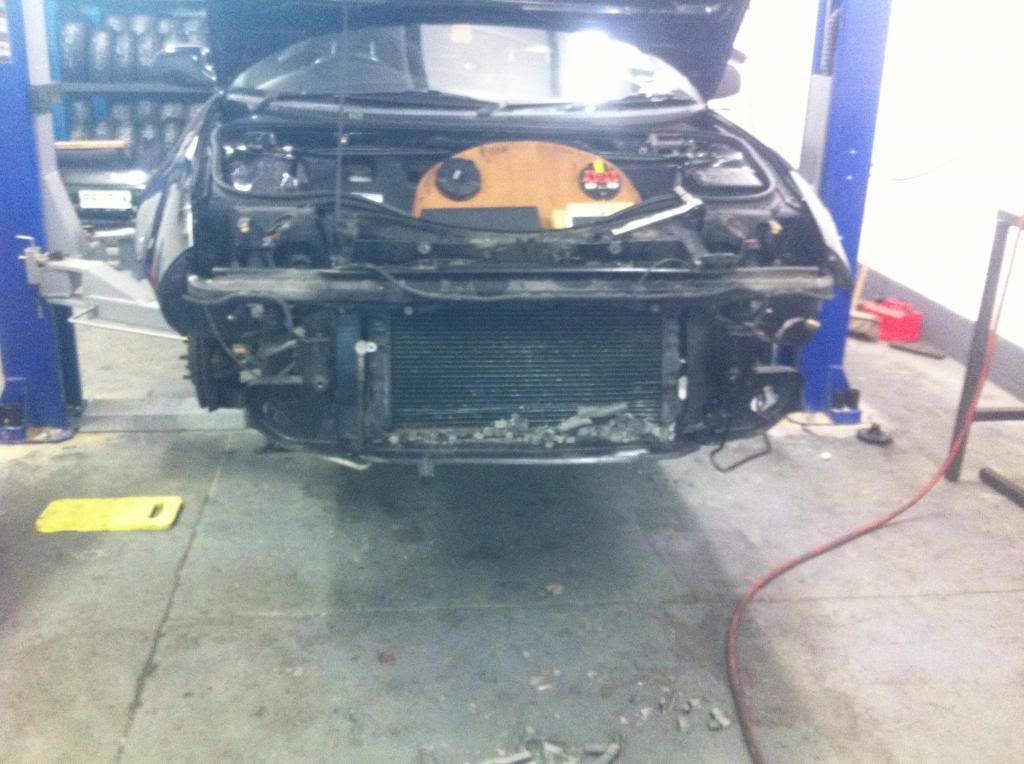
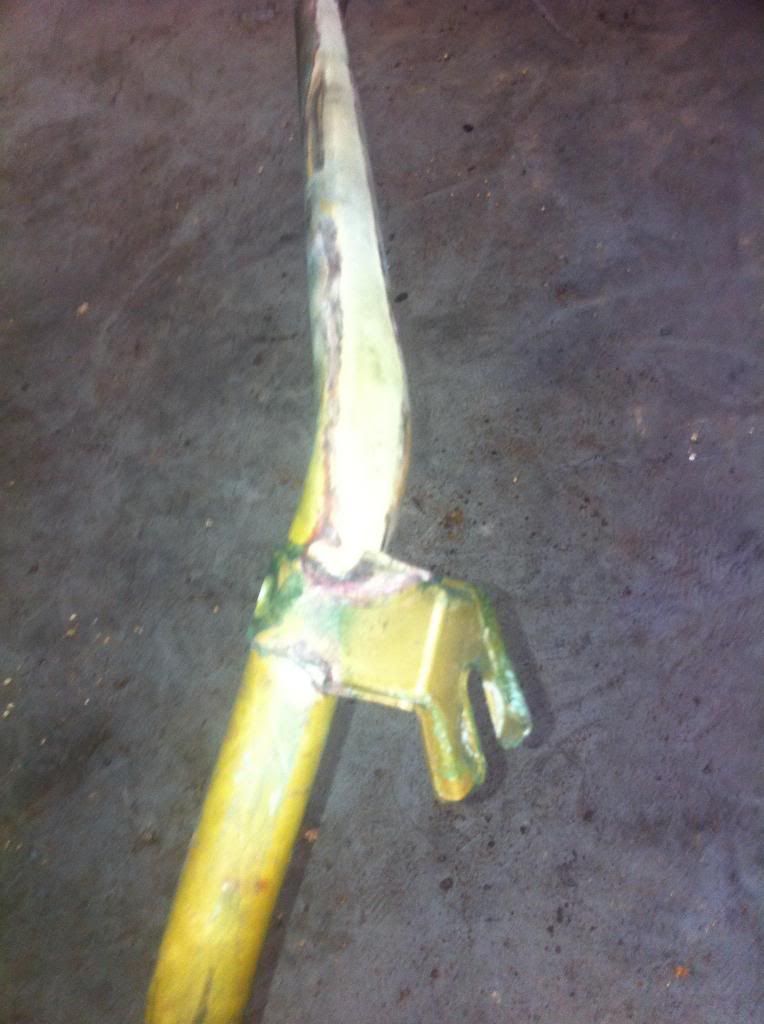
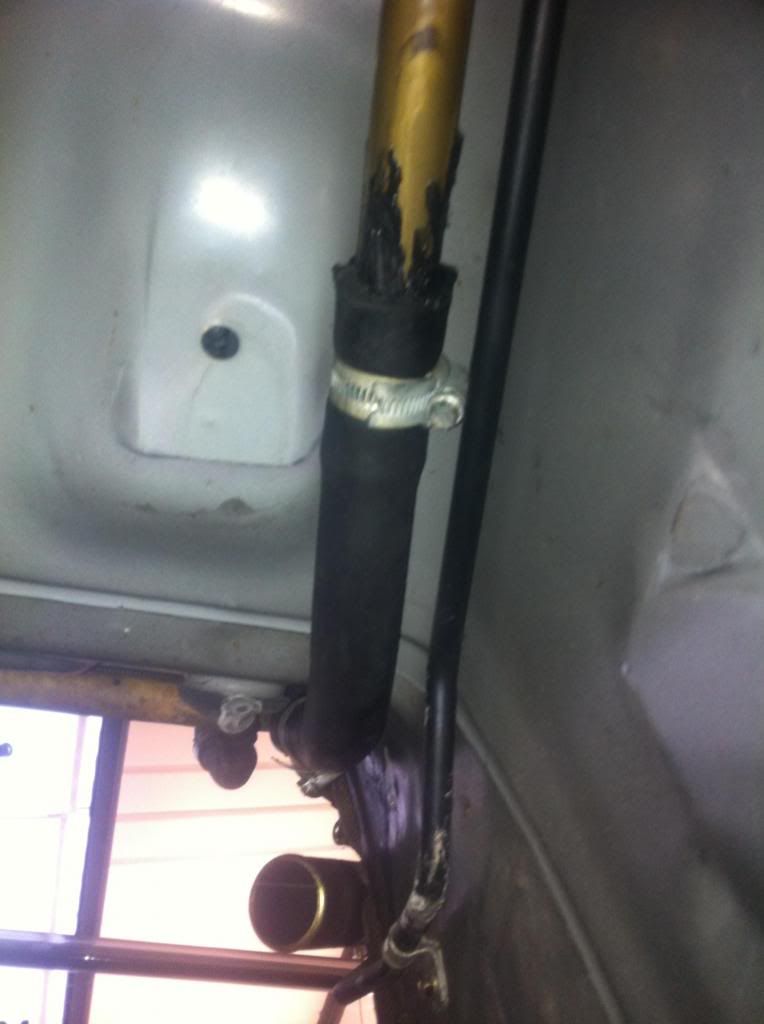
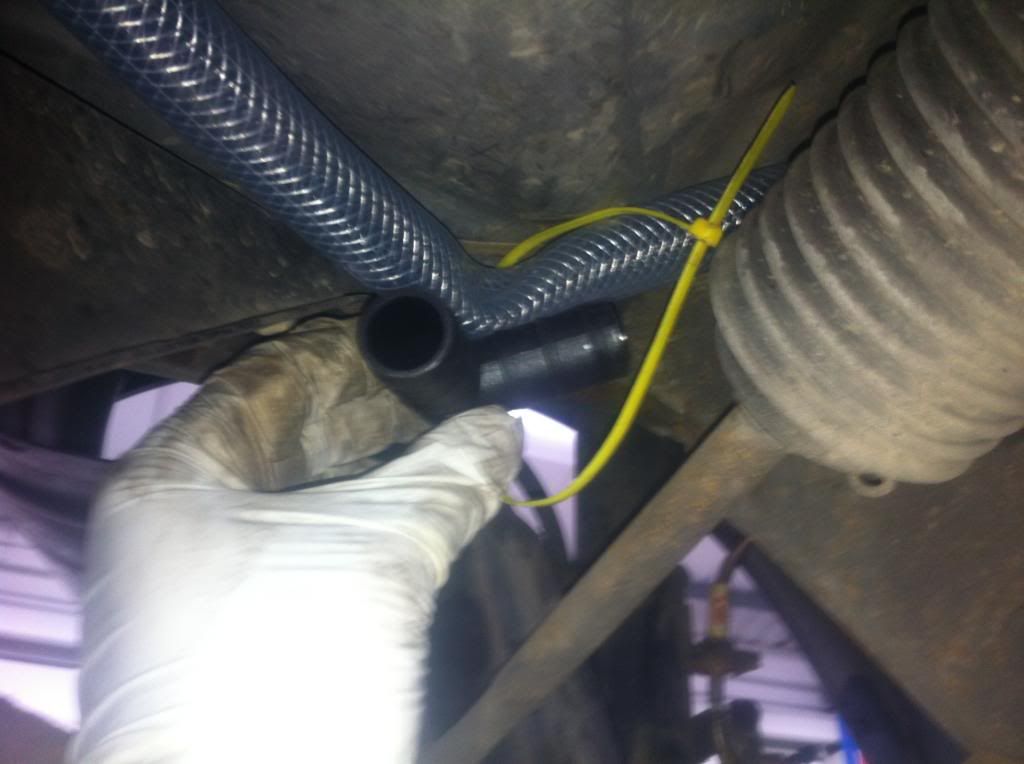
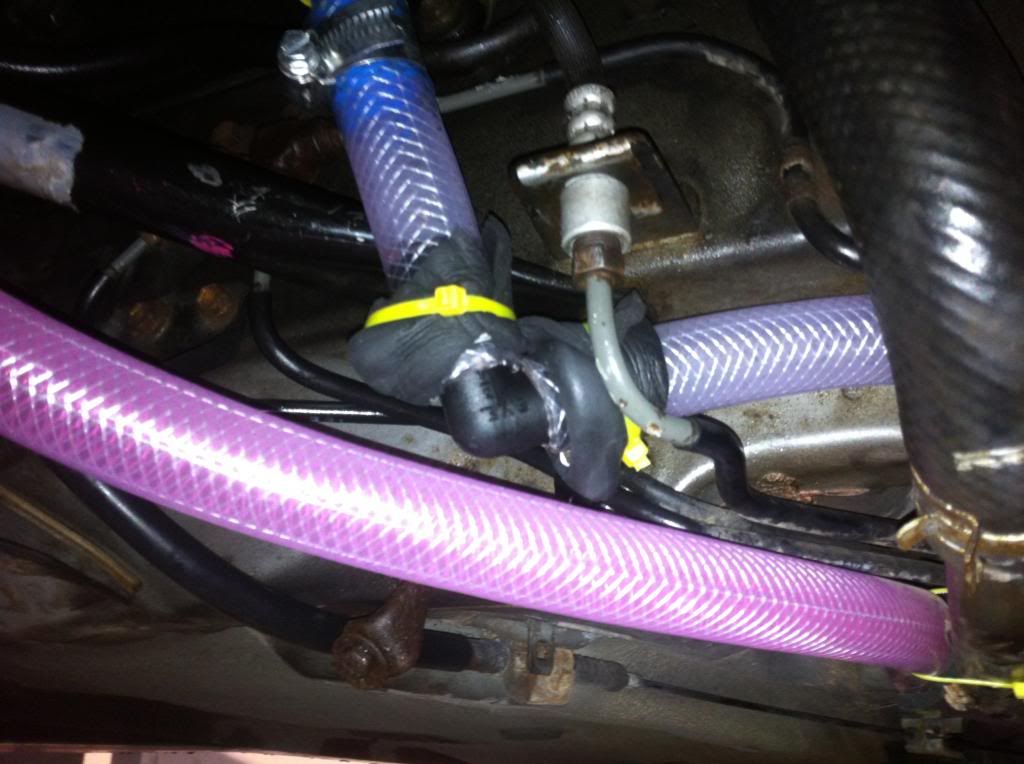
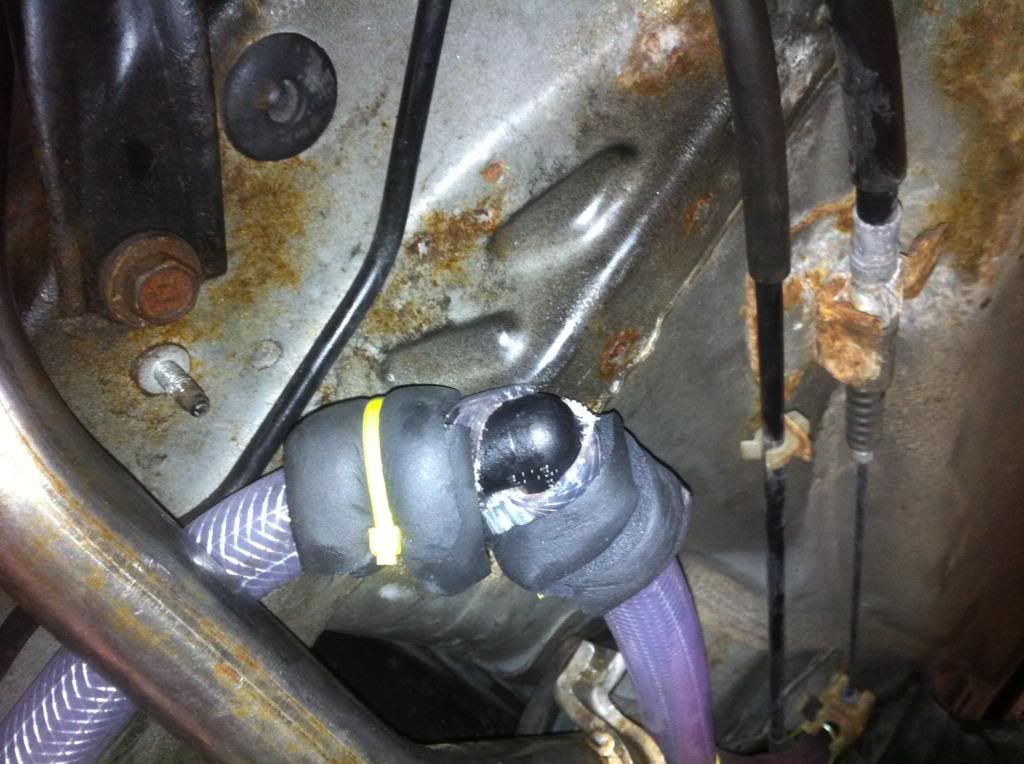
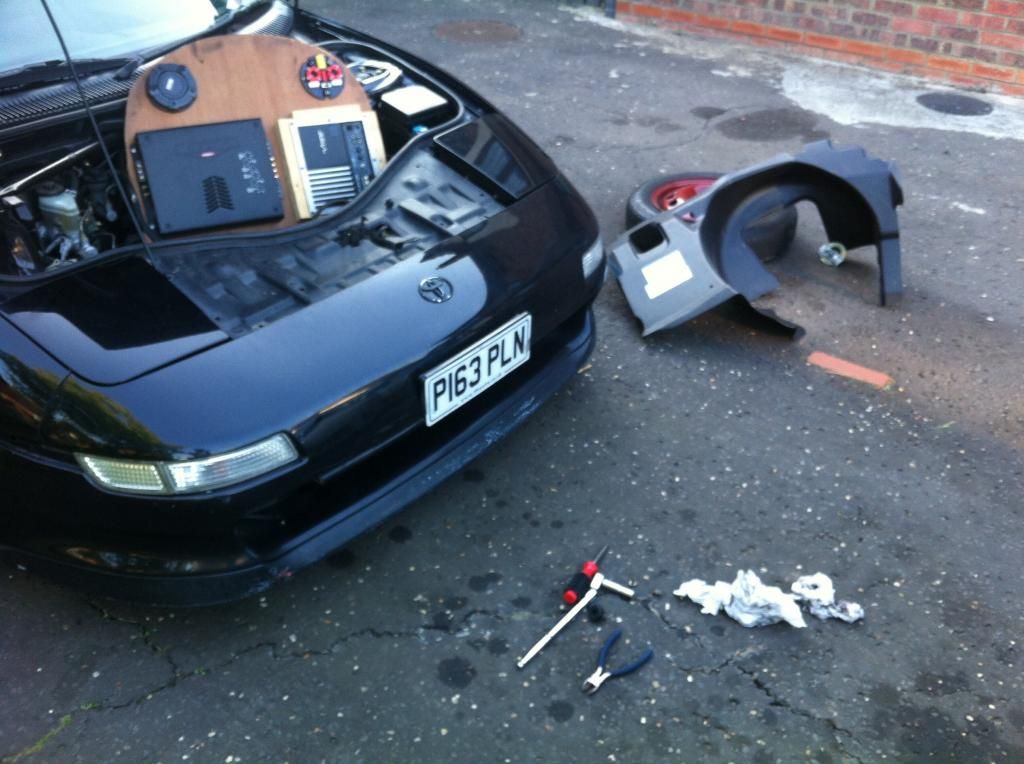
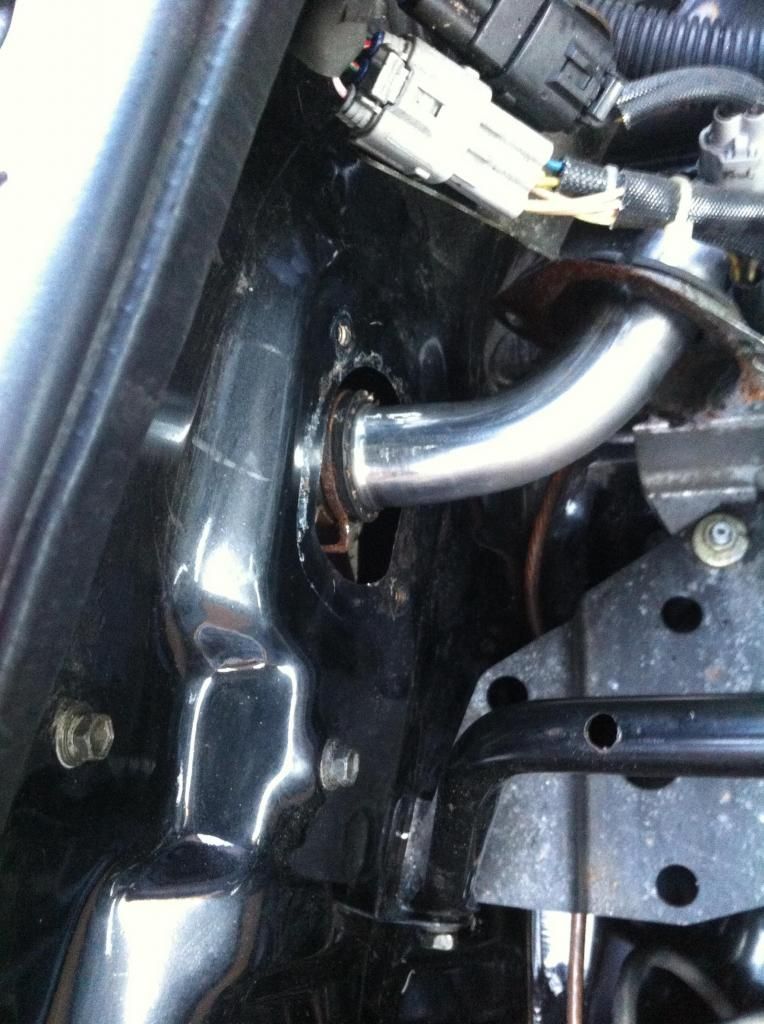
After removing all the covers I found 2 issues under the car. Firstly the routing of the passenger side of the pipe work near the steering rack was shoved into the shell and this was the outcome:
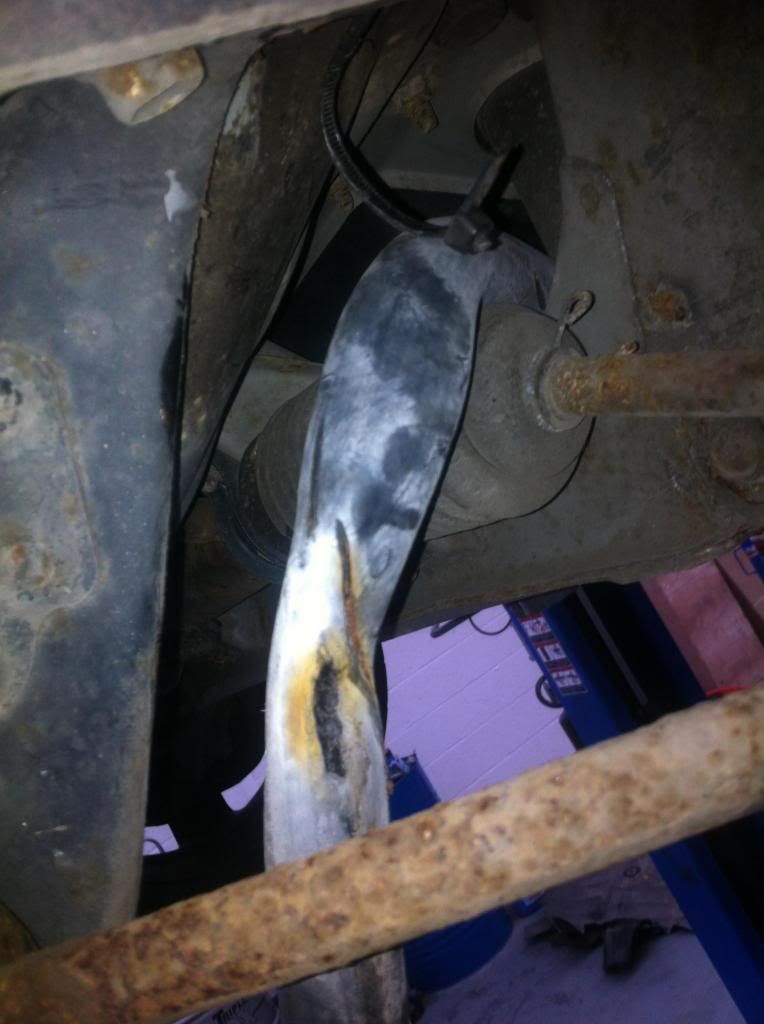

Shock horror! The chargecooler system ran for 3 months, I then crashed the car and it sat there for a year. Any advice on this would be great. Im not sure I can reuse the pipe and really dont want to add another join. Best bet might be to just get new pipe work. Where from though? 

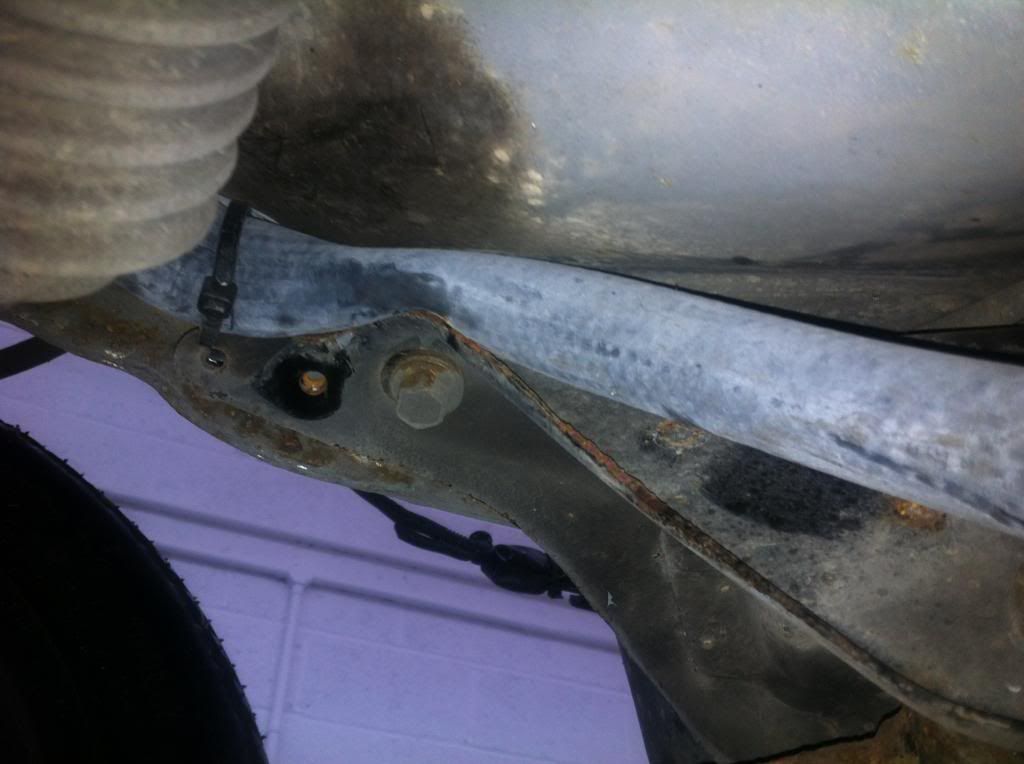
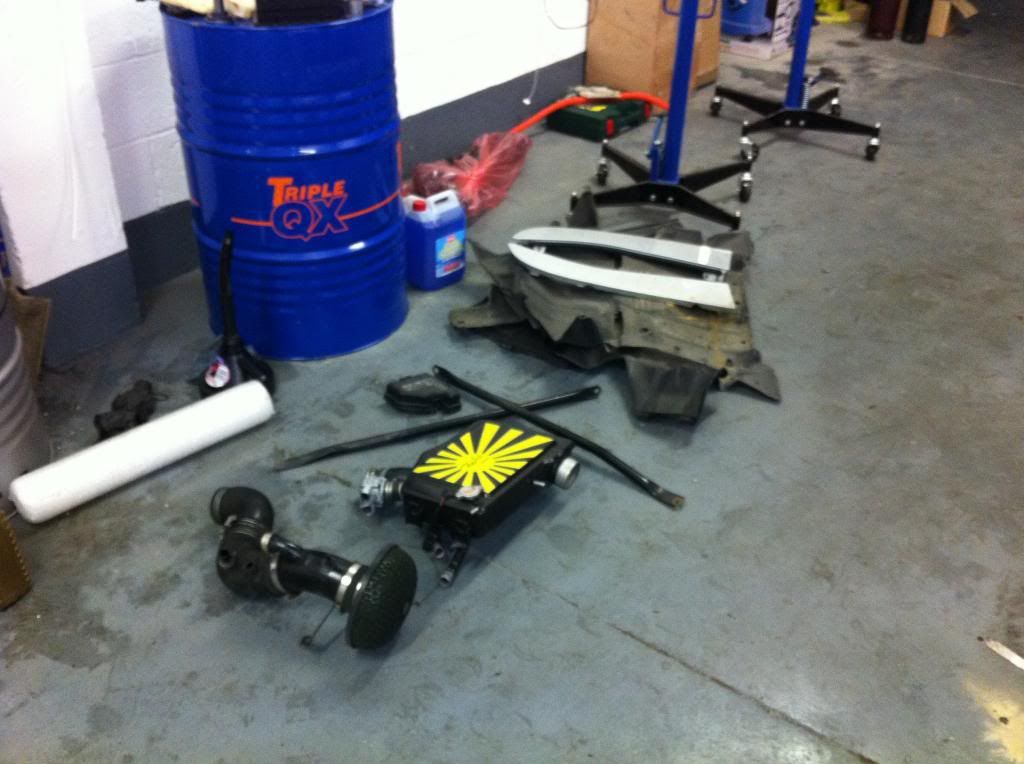
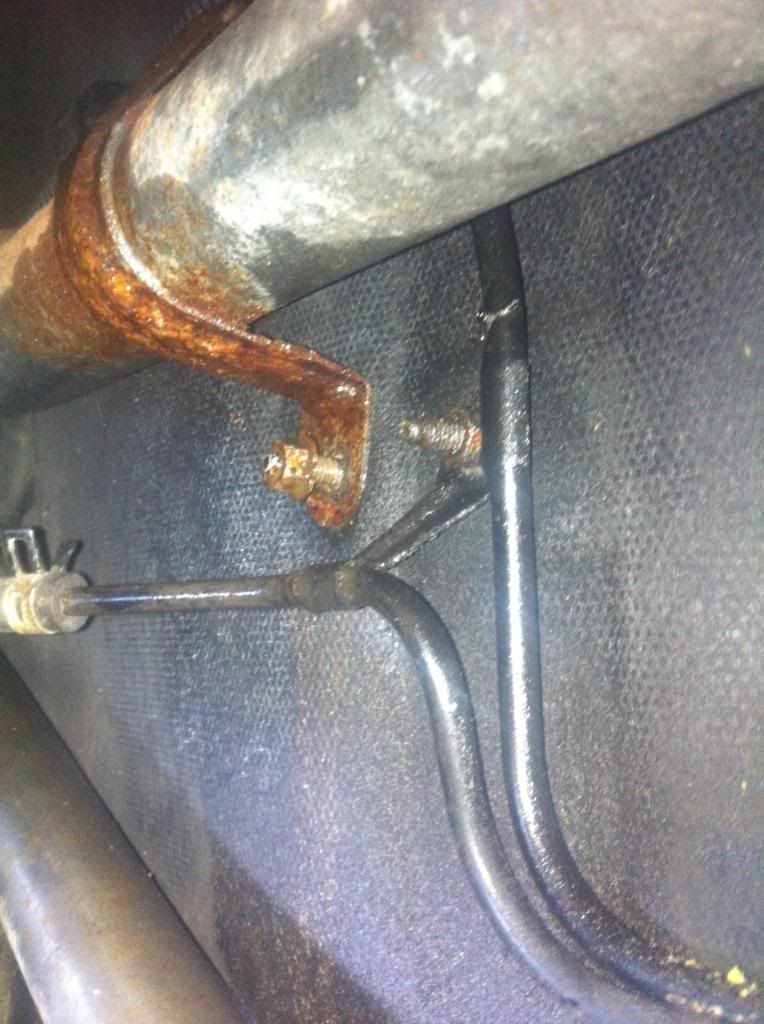
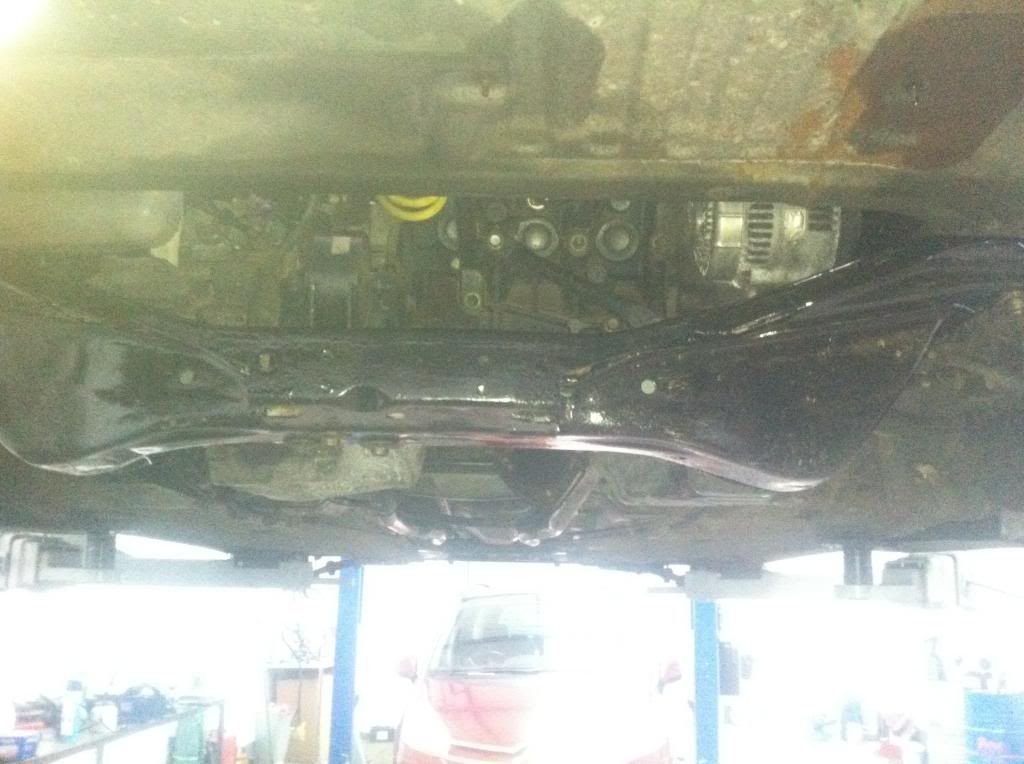
The second problem I found under the car was the rear cancer bars are missing???? Really not happy about this!!!
While I removing all the pipe work I did have a good look and tried to think alternatives. But this is for another thread.
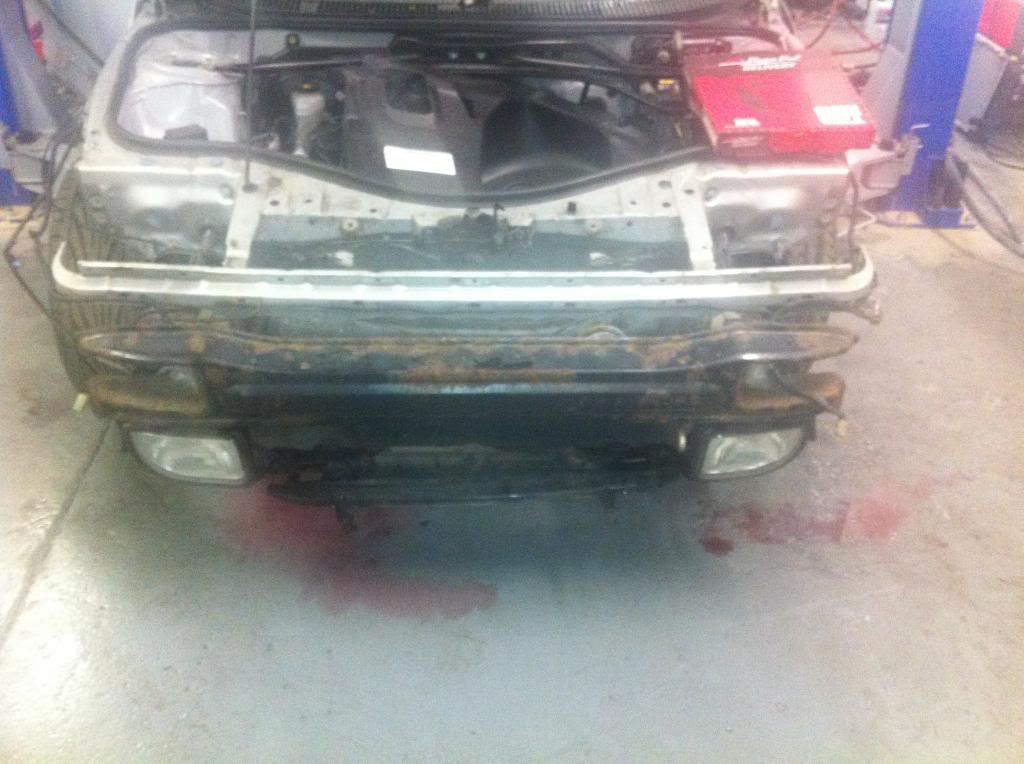
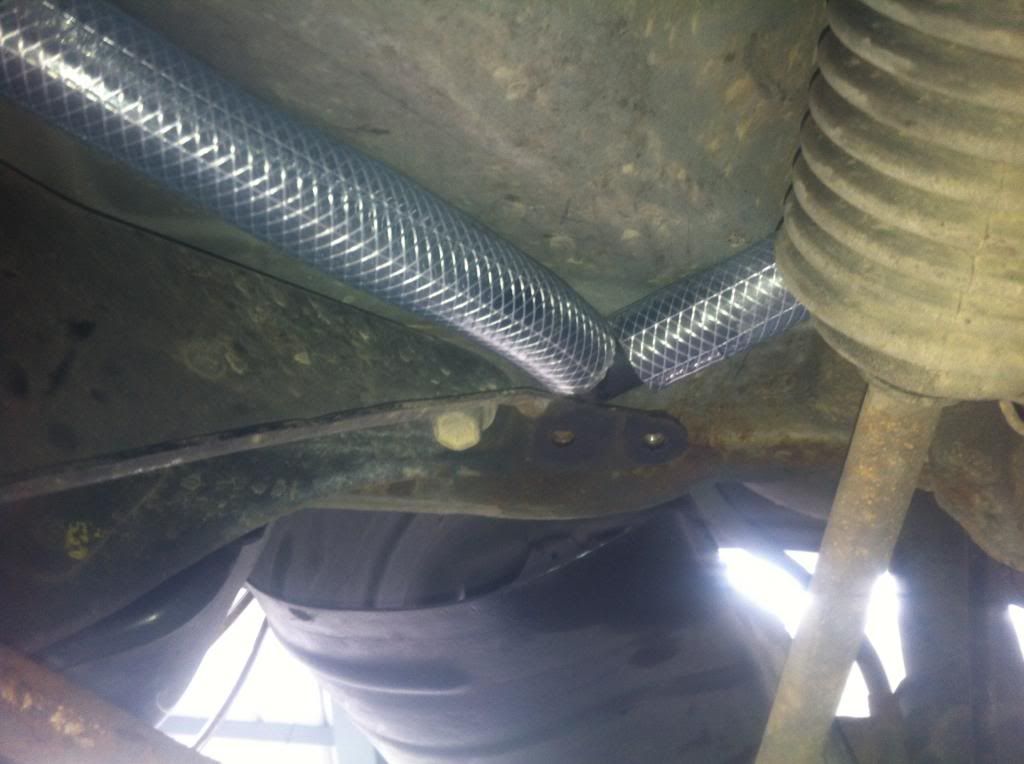
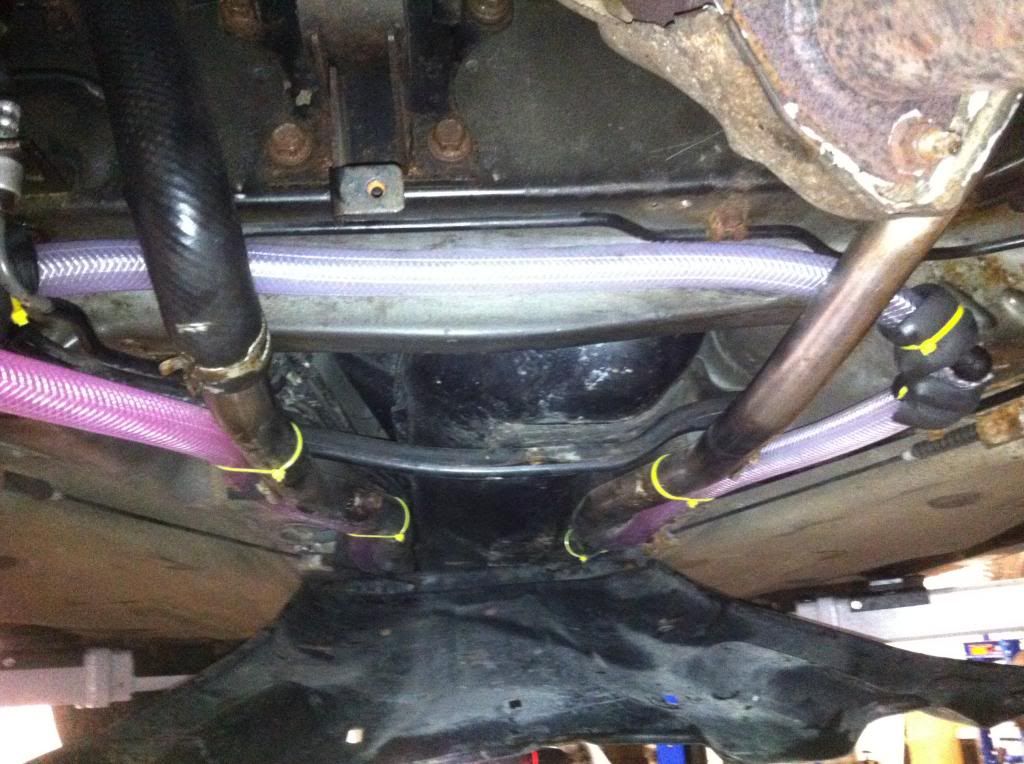
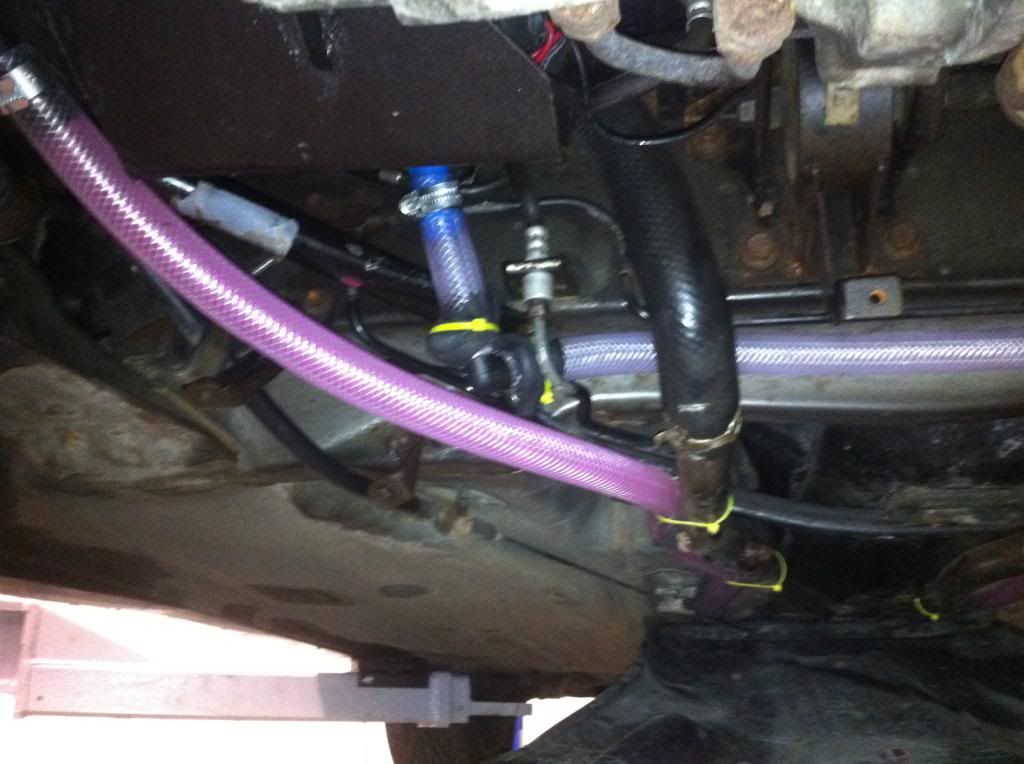
The rest of the system came off nice and easy. Simply routing the pipe work back through after removing the cc rad, brackets and also the engine radiator. Time for dinner:
So it took me up 6 hours to get this far
Now everything from the front moving to the back was undone and I could start on the engine bay. I cleaned up the workshop, cleared all the spills and set up for Sunday morning start.
Progress up to this point was very slow. I didnt rush into starting and wanted to document the CC properly.
I was expecting my mates to show up and help for Sunday but they thought sex was more important and let me down
Roll on Sunday and the one man army....
My plan was to remove the chargecooler and then use this epic guide for removal. I moved the whole thing into a word doc, sorted everything out and printed it...........64 pages!!!
Heres the guide you need people:
Removal Guide
So Sunday I woke up, showered, had breakfast and went to the workshop. From this point onwards I removed the CC core and followed the guide religiously!!!
Starting point:
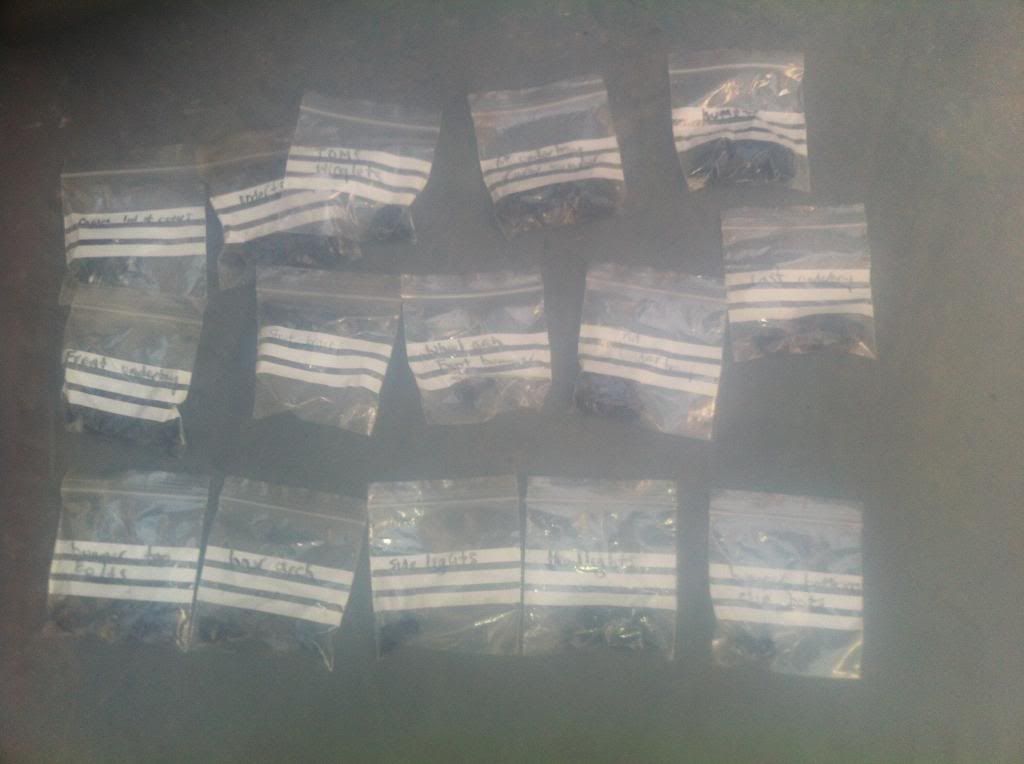
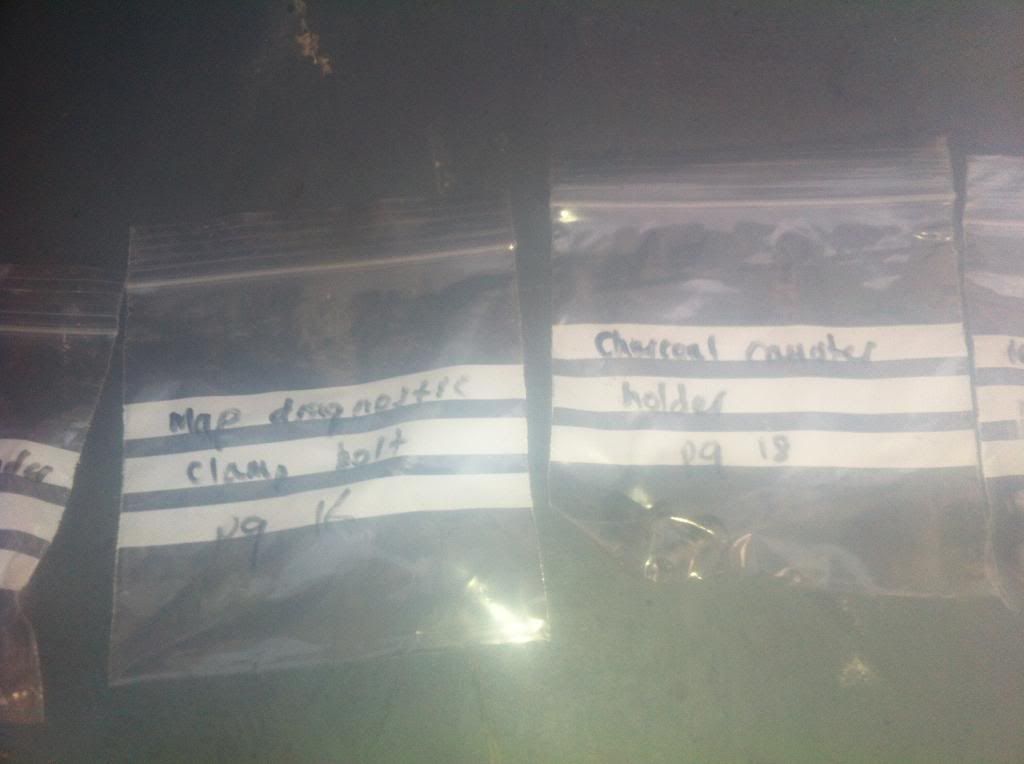
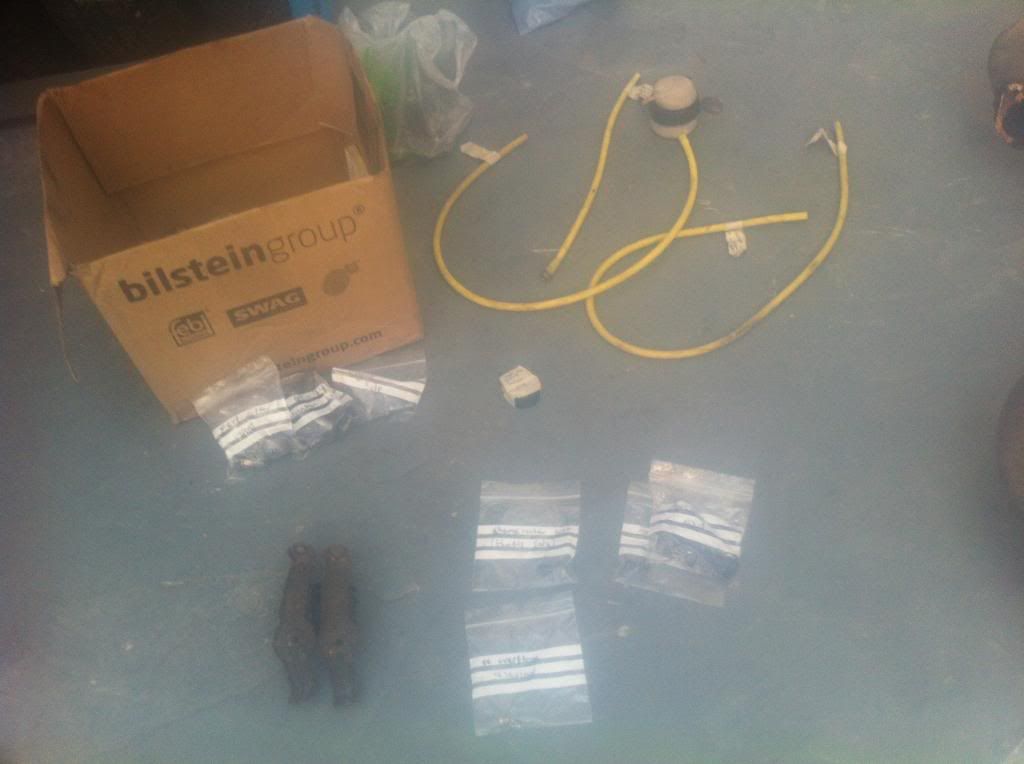
Ok, lets discuss labelling.... How much time does this add to a job....HOURS!!!! I masked up every pipe/wire, wrote down where it goes and all bolts went into a bag with description including what page of the guide I am on. This way if I reverse the process, I can see from the guide what I did. Thats the plan anyway.....
The guide is amazing. It tells you exactly how to unclip things and I was beginning to enjoy myself. It was painfully slow and I was getting stressed out. However if I had help, then how would I know where it all goes? In the end I think it was a Godsend that I did the whole top end strip down without anyone there.
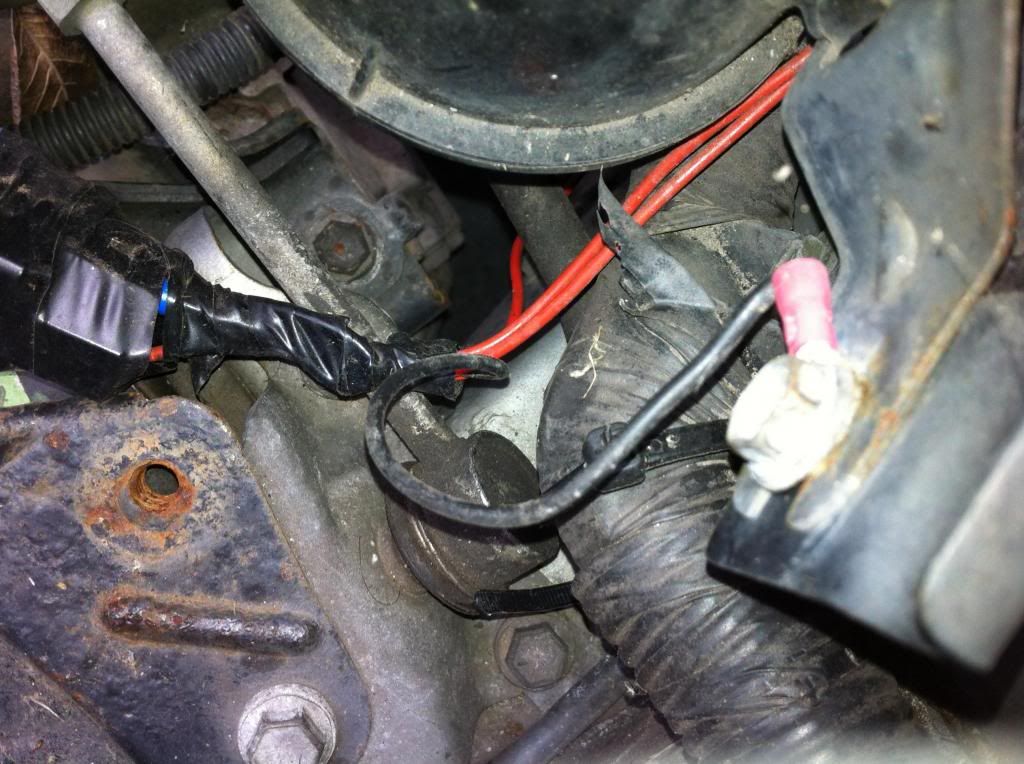
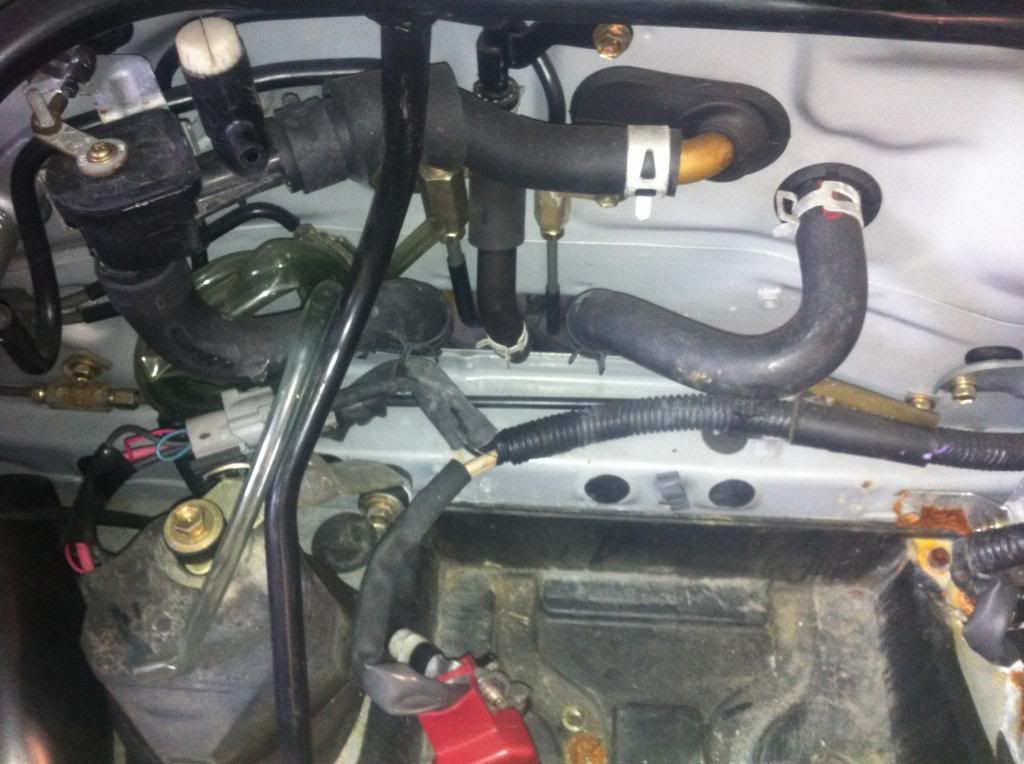
The only wiring plug I couldnt remove from the whole build was this one:
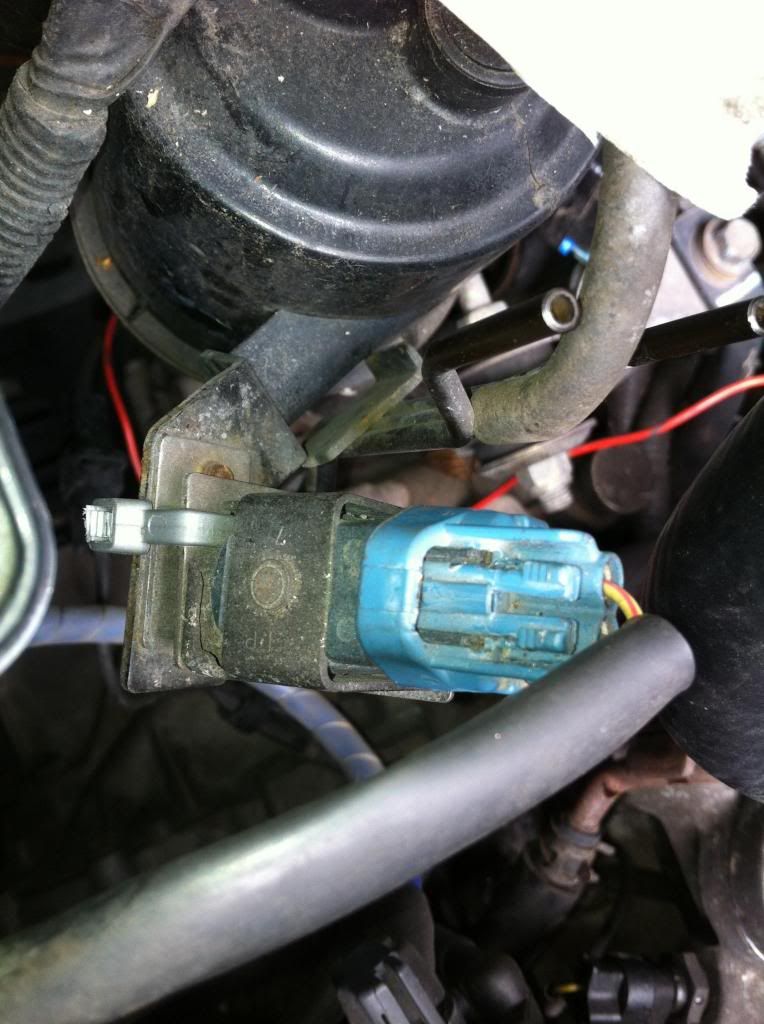
I decided to just cut the cable tie that was there, labelled the 2 pipes going to the charcoal canister and then just removed the charcoal canister.
At this point I was starting to realise that I was labelling stuff I might not even take to the new car 
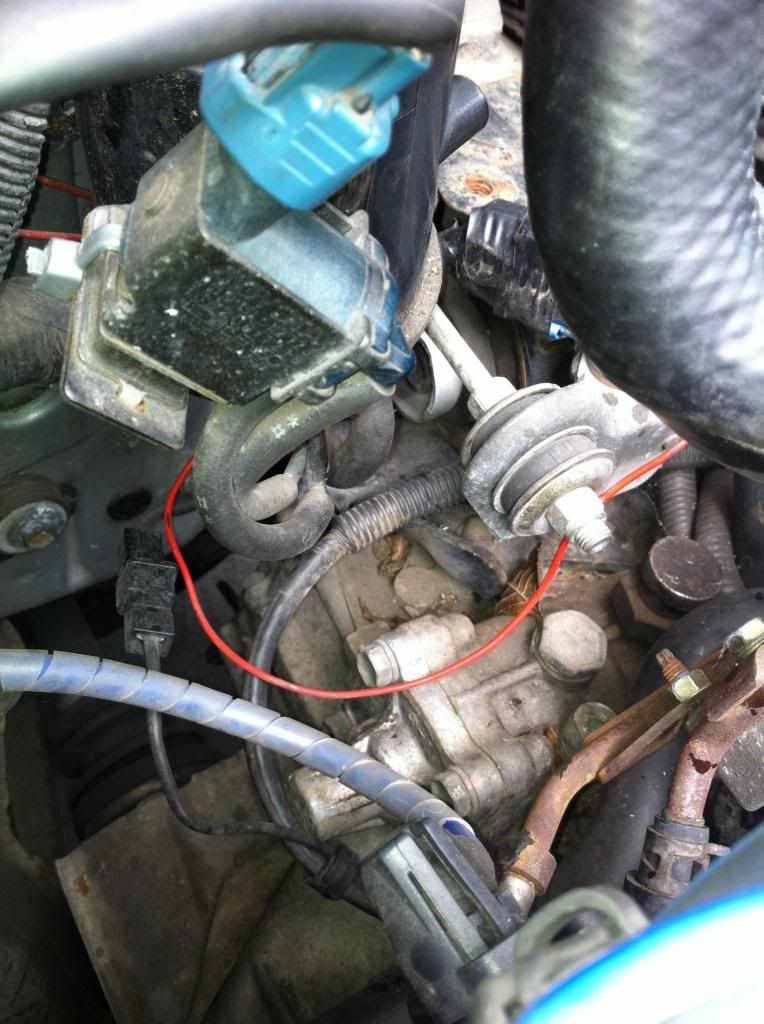
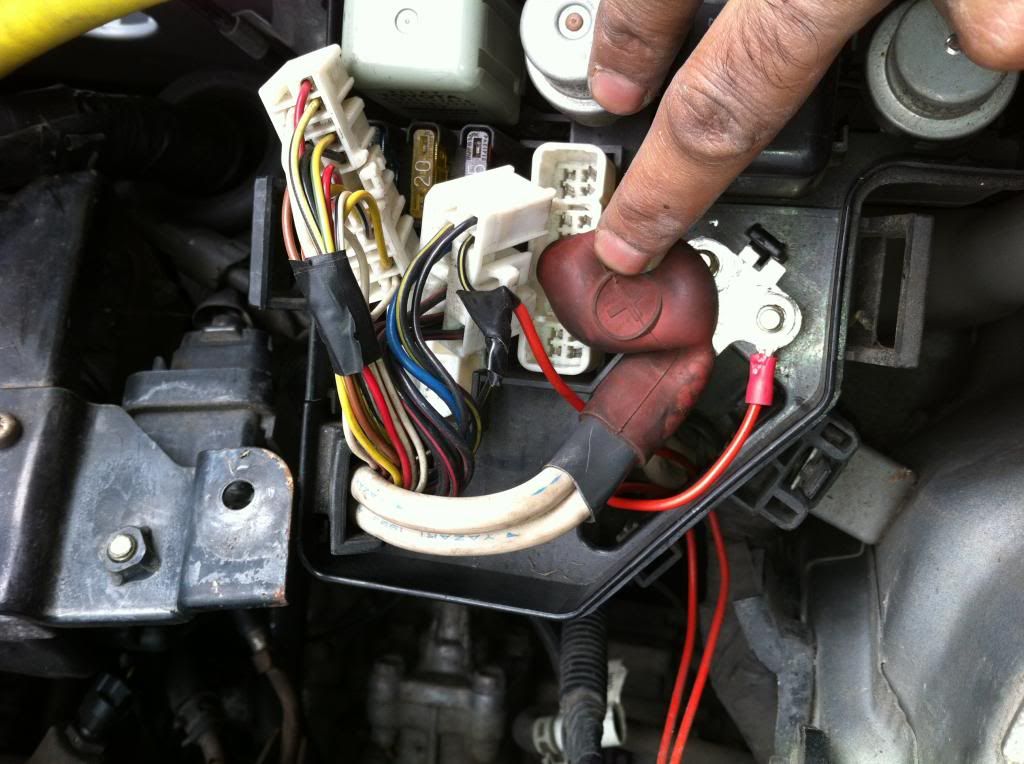
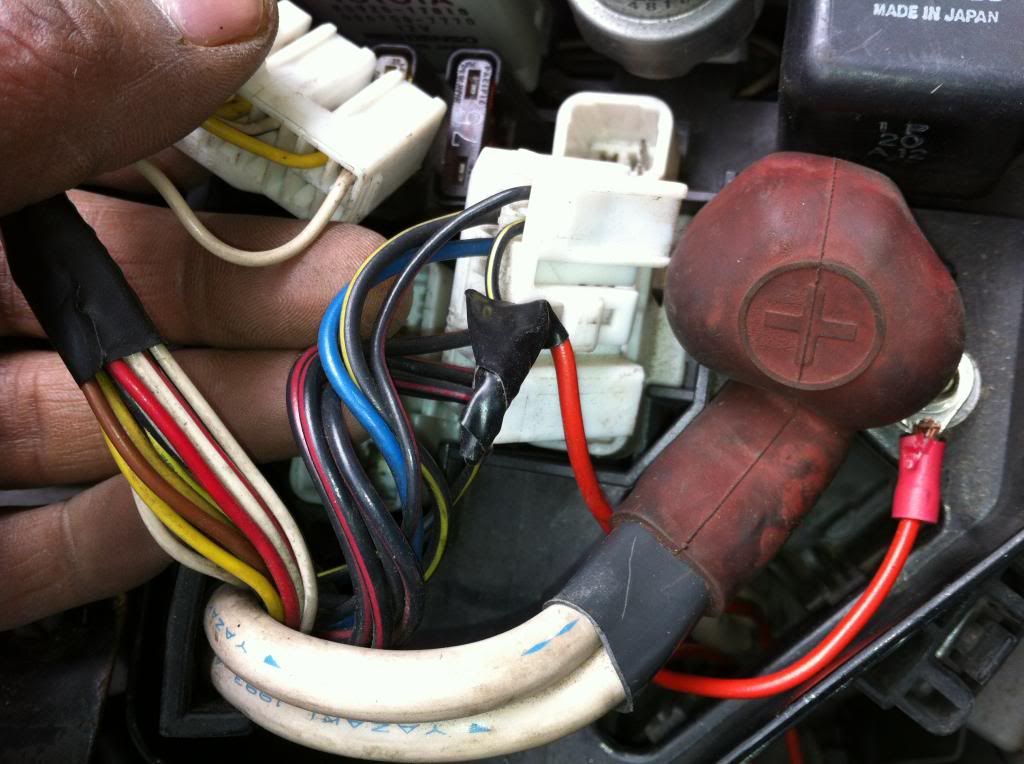
Anyway, I was close to finishing off unbuttoning everything from the top of the engine. I wanted to make sure I got the CC relay bit correct:
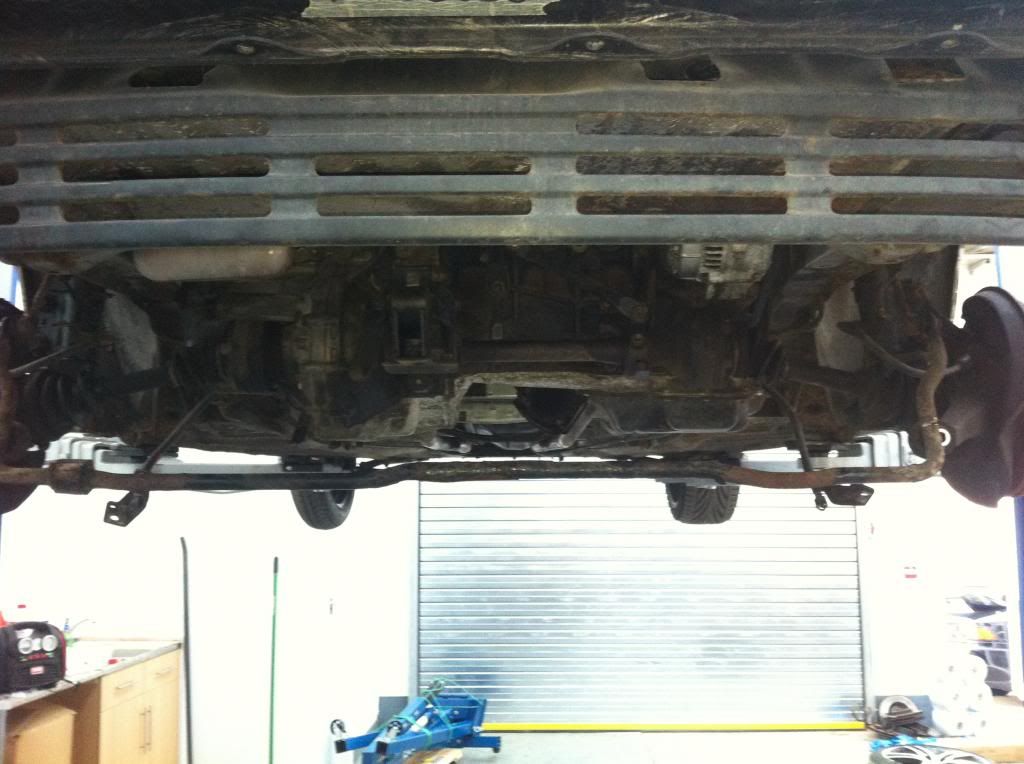
Finally with everything undone, I raised the car and started attacking the underneath.
HOW AMAZING ARE POWER TOOLS WITH THE CAR UP IN THE AIR.
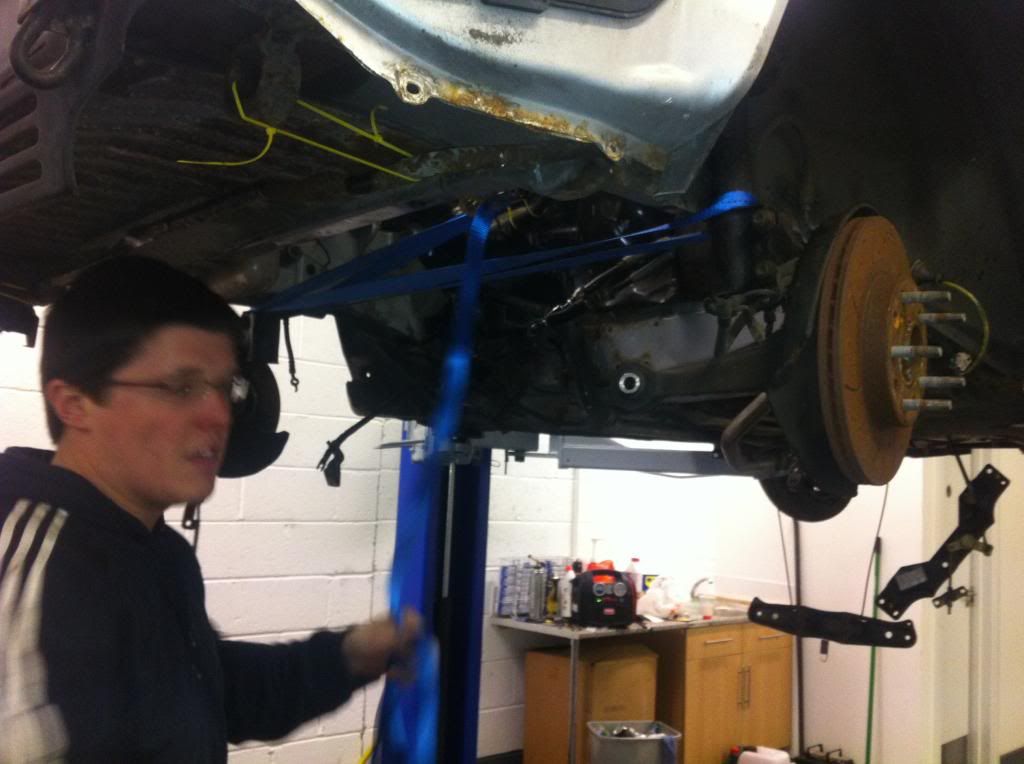
Within no time, the driveshafts were out, all suspension bits removed(I left the driveshafts in the spindle while I worked on everything else)

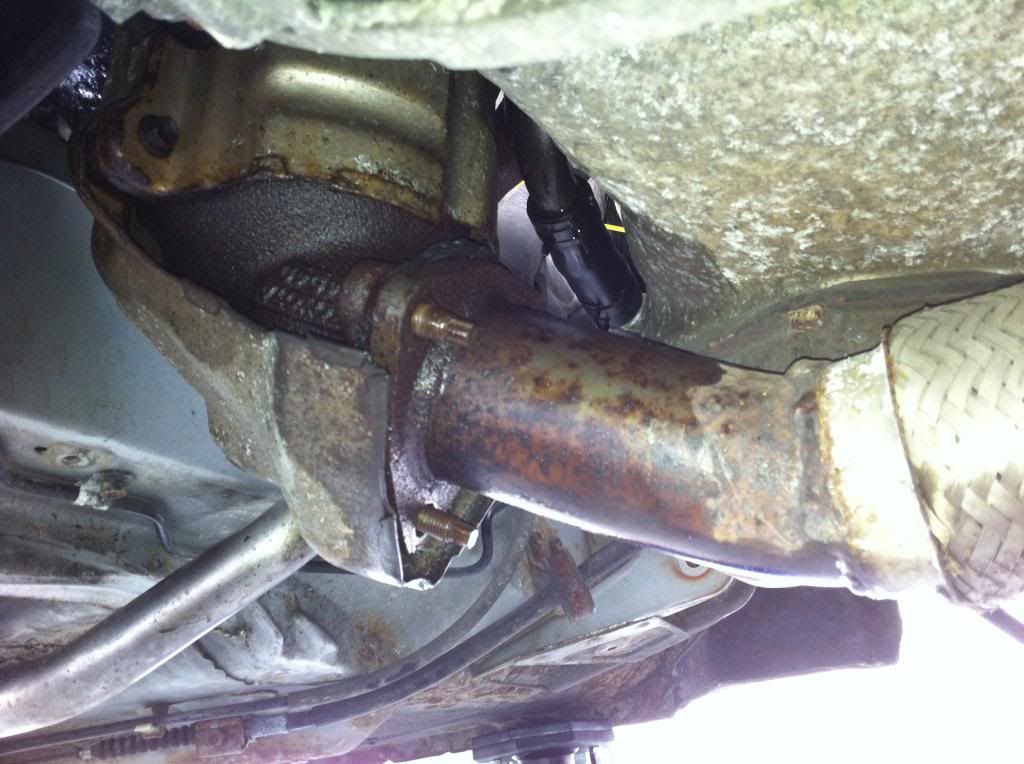
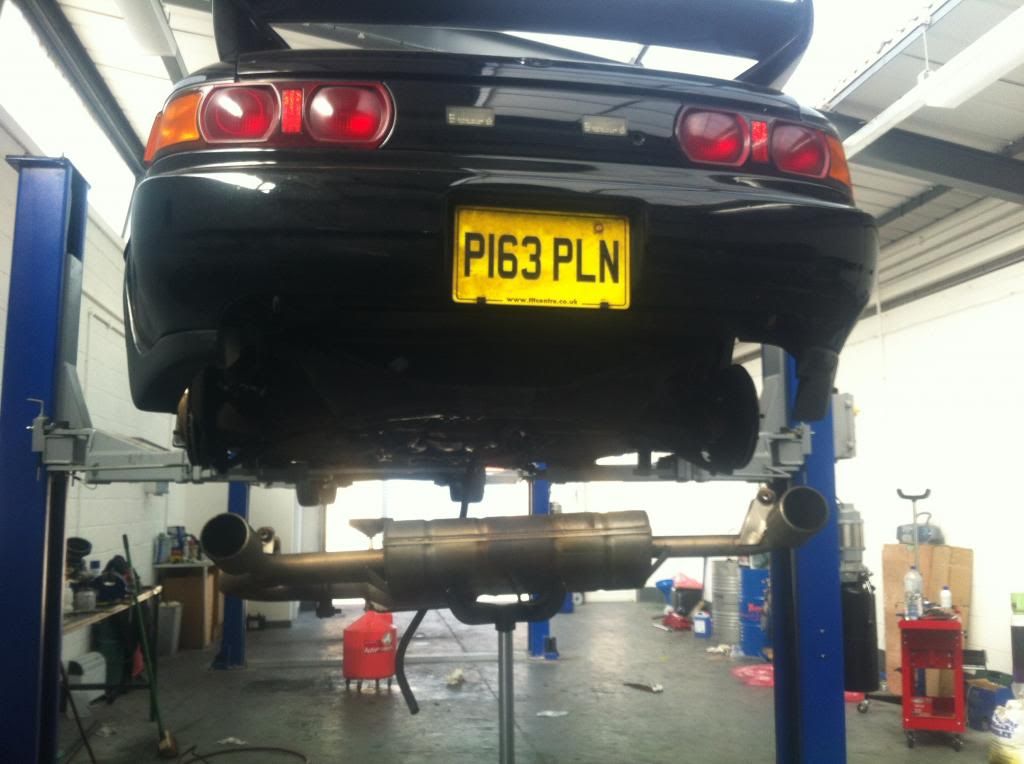
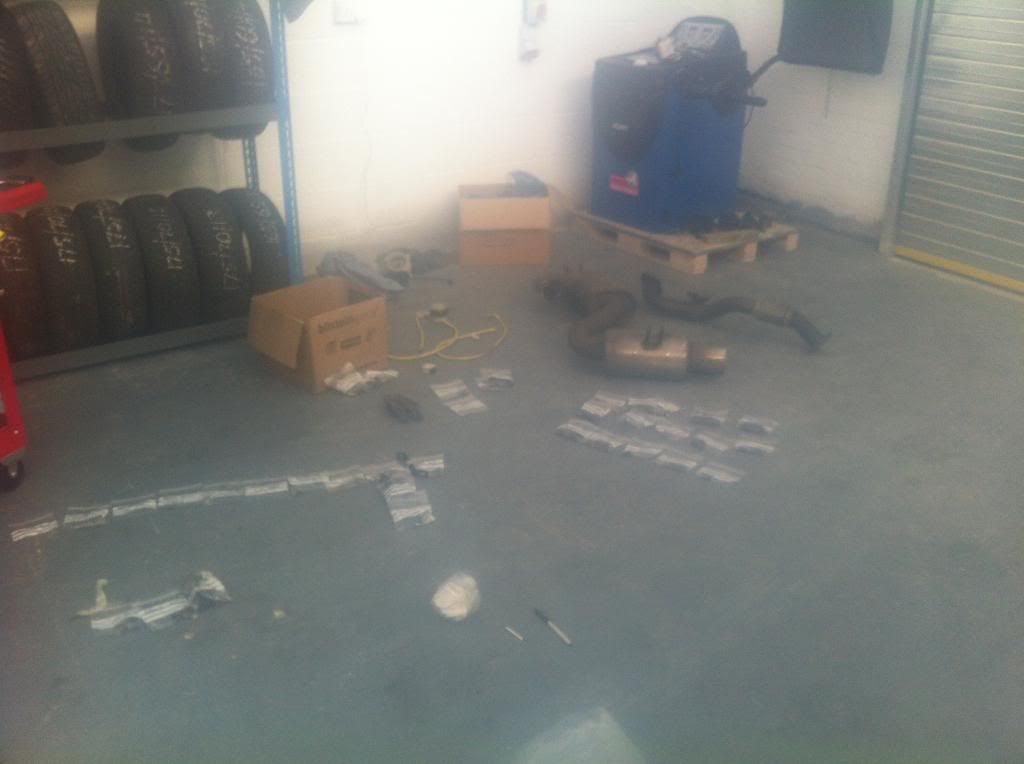
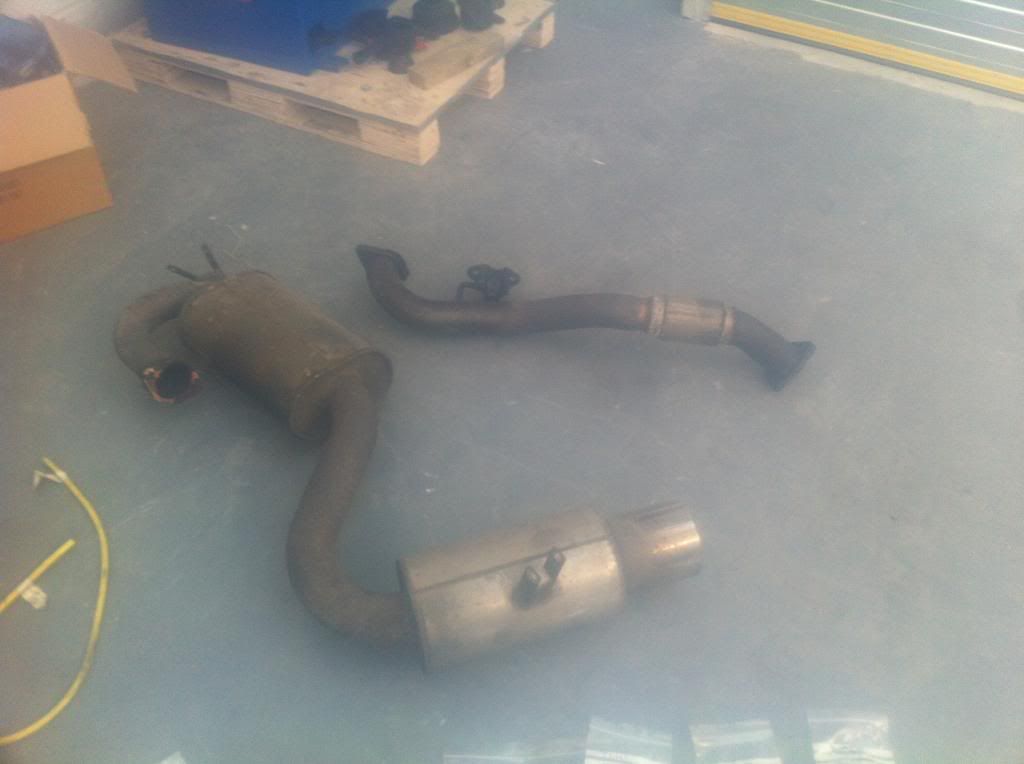
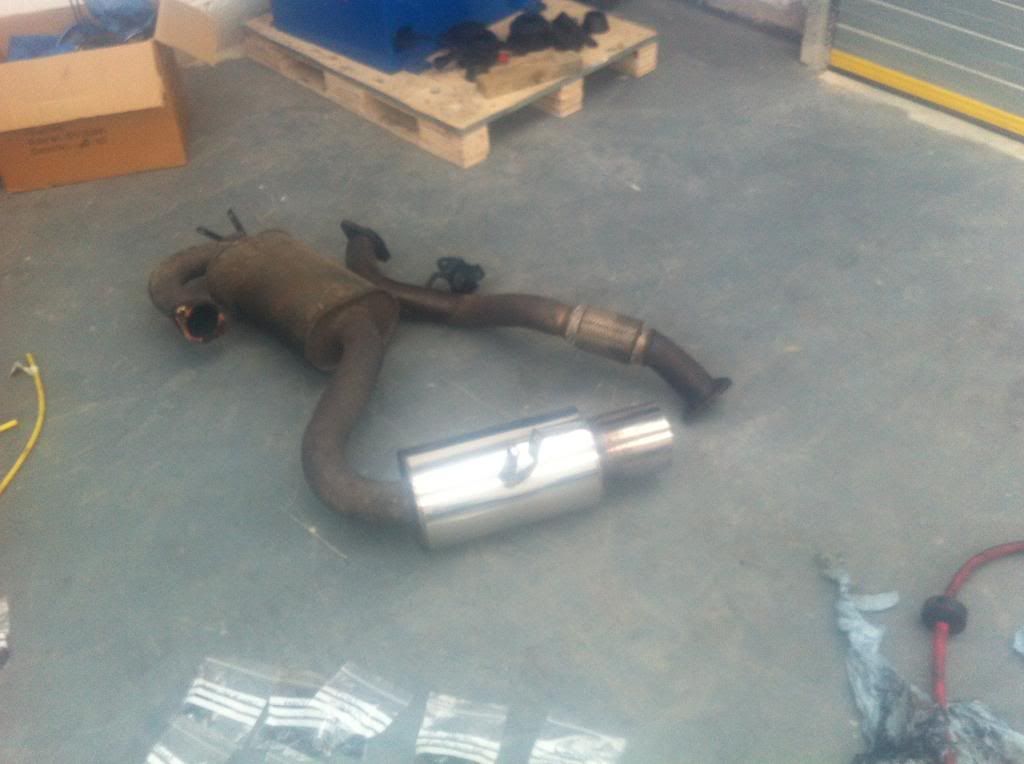
Next attack the exhaust. When working on your drive, you can jack the car up but never high enough to get a breaker bar on there. With the car in the air, breaker bar and the exhaust bolts were off:
So it was around 7pm now and the guide saidThis is a good time to get a buddy to help! and finally my mates show up I have friends All day Im calling my people begging them to show up and in the space of 30 minutes, three of them show up. Thanks guys
Getting the exhaust off was nice and easy with more than 1 pair of hands and we moved straight onto the subframe. This where I had my first bolt snap (ARB one):
Now my mate works on gas turbines all day so all he wanted to do was start cutting xxxx out!!!! He grabbed the angle grinder and started cutting the ARB. While he was man handling the power tools I decided to just prise the ARB out of the way, saving us the trouble with cutting. Impact gun on the nuts and subframe dropped out

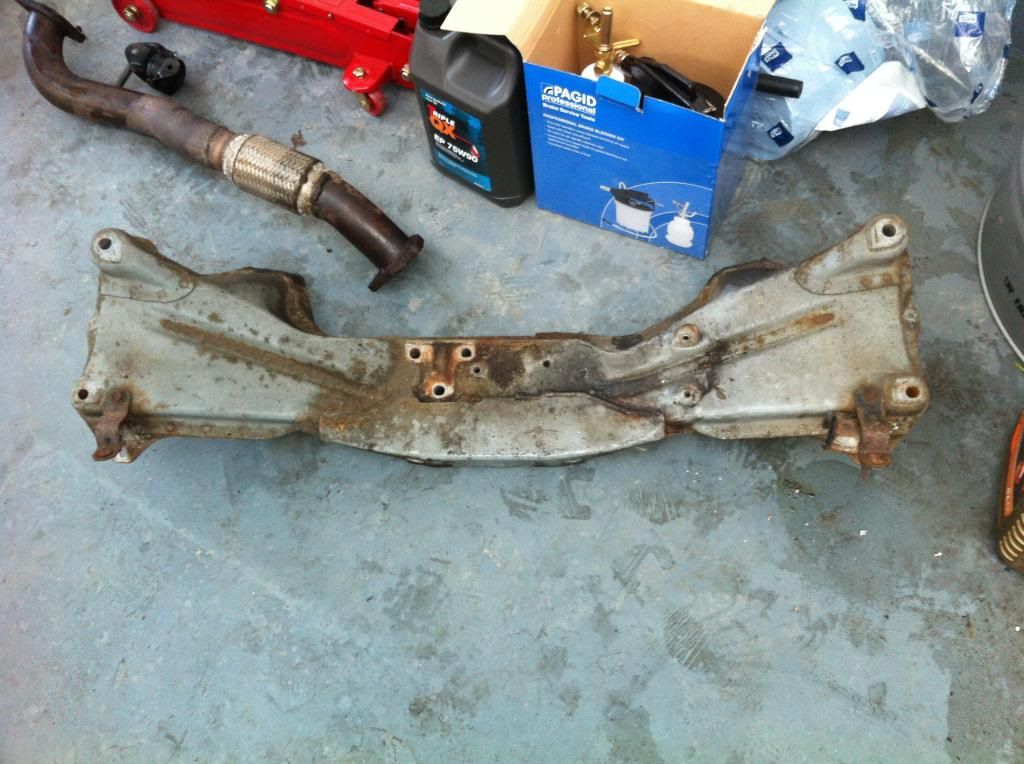
While we were under the car the front engine mount was removed.
At this point nothing should have been attached but somehow I had missed the clutch slave pipe. I tried to remove the hose by undoing it but I couldnt and with time really running out, I decided to chop the hose and address this later.
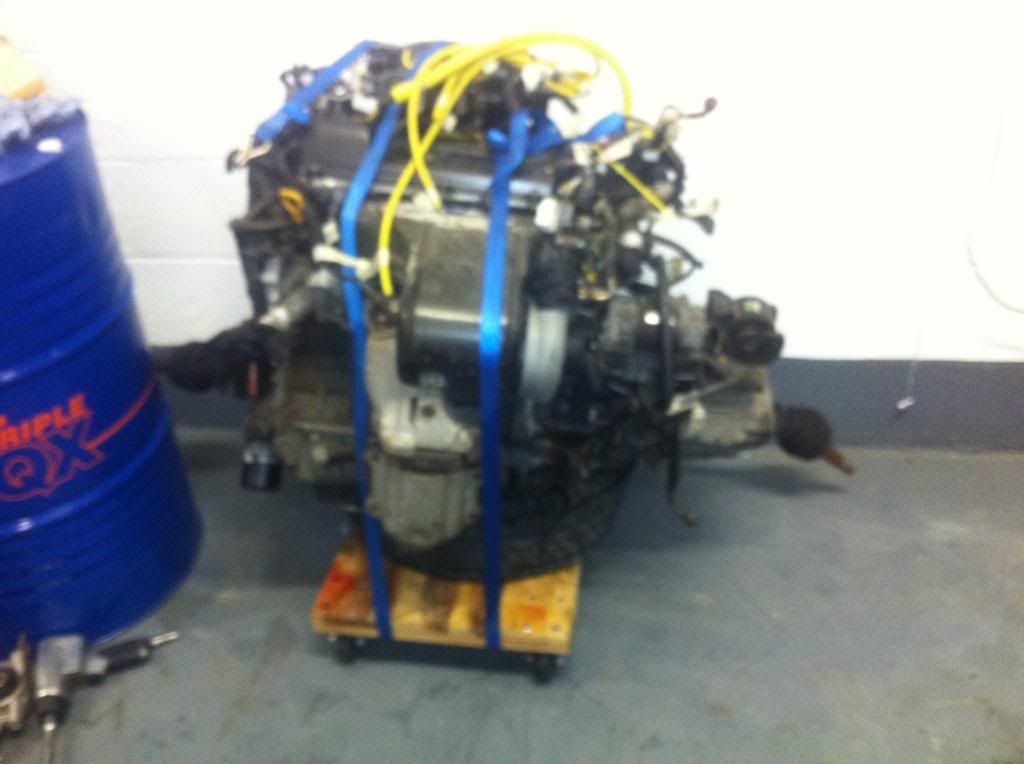
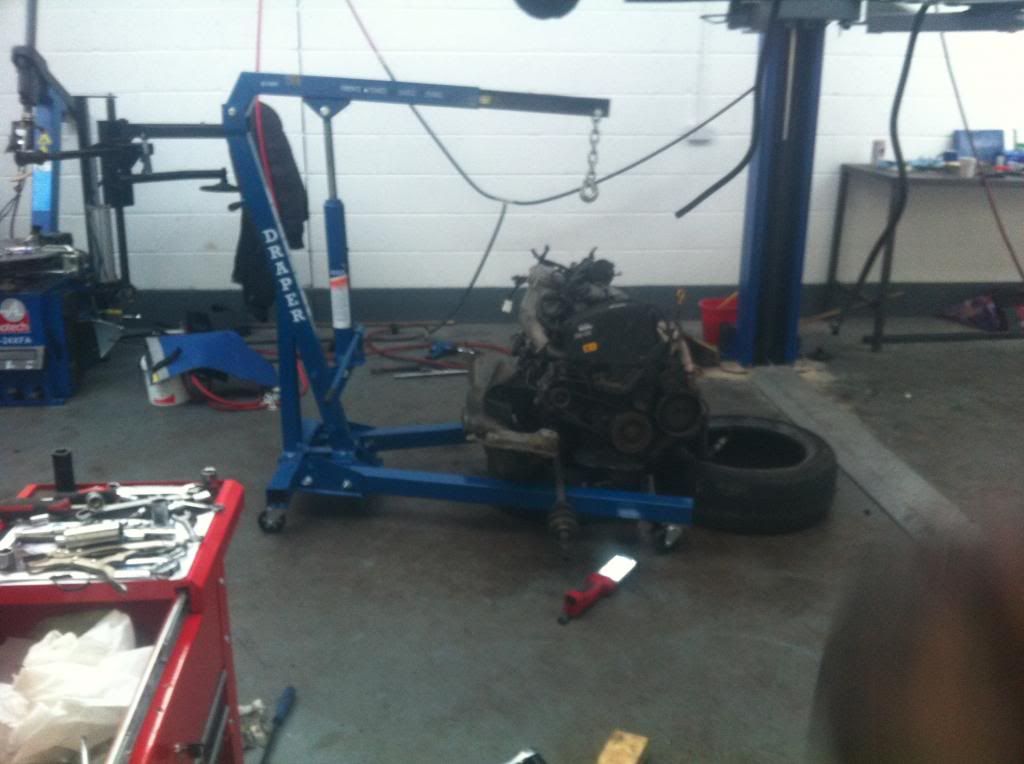
Next job...........DROP ENGINE!!!!!
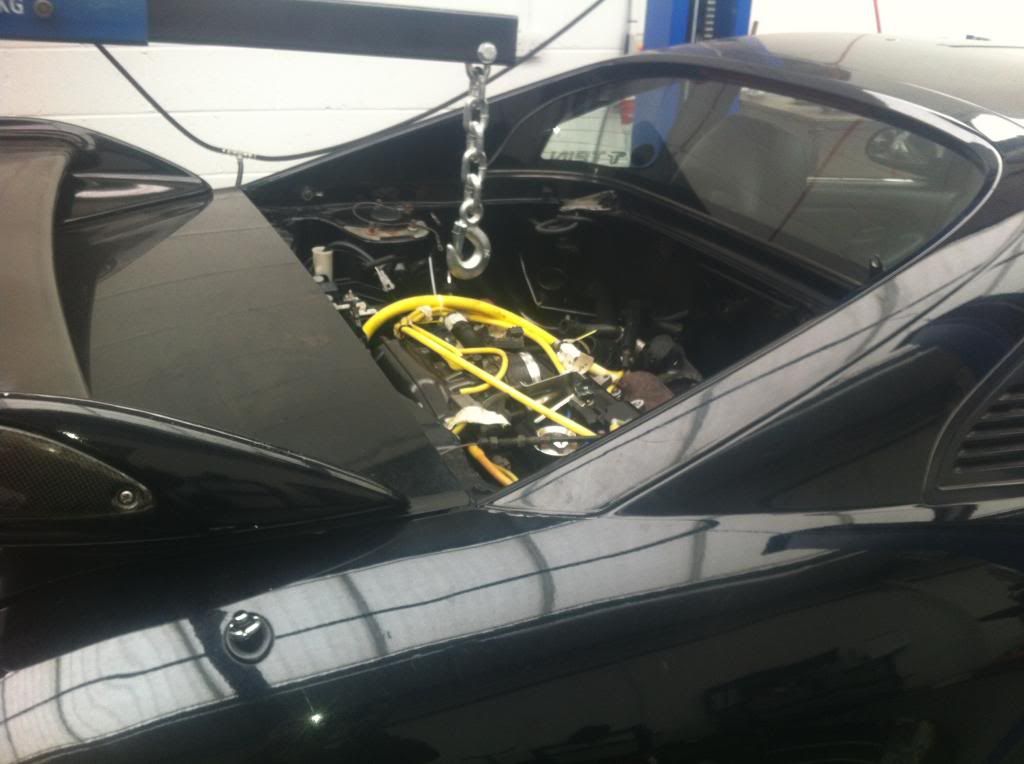
Got the crane in position and attached it to the mounting brackets(thanks again David aka Draven for all your advice).
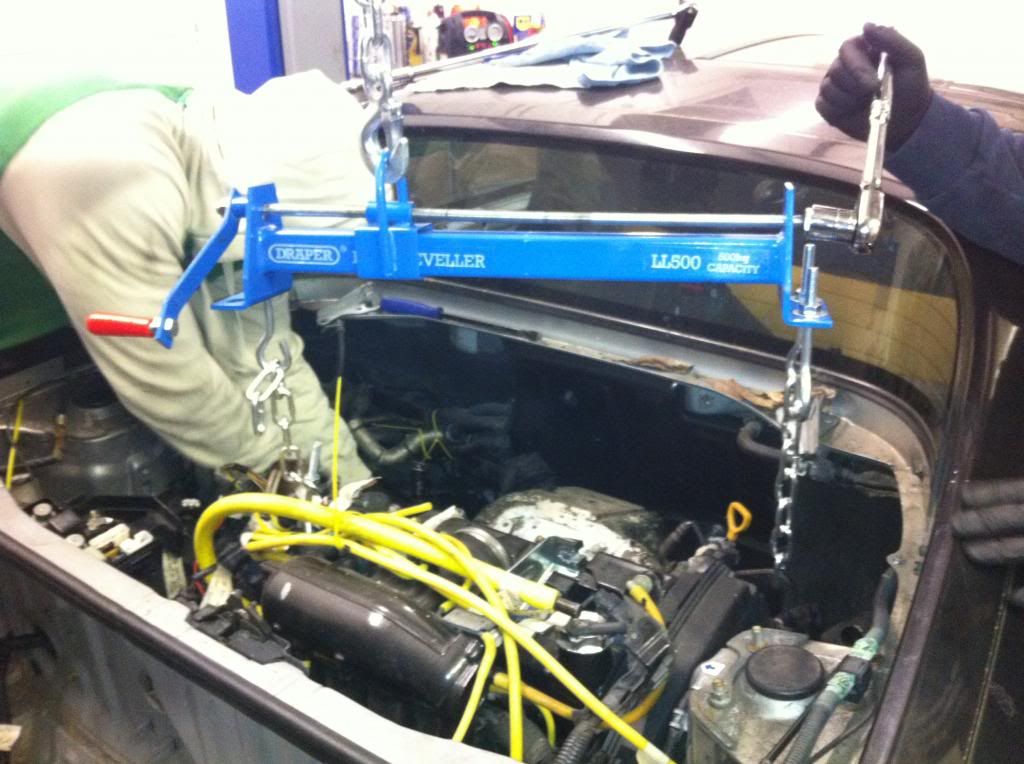
I bought a dolly from machine mart and also used an old tyre and block of wood to balance the engine. On the fourth attempt the engine was perfectly balanced:

Yes people I did it!!!!
By this time it was late, everyone needed to go and I needed to get the car down, all parts put away in the storage unit(including car) and clean the workshop.
The problem was with all the suspension missing, how were we going to move the car into the neighbouring unit???
Ratchet straps people:
The look on mates faces was we attempted this:
Carrollable:

All parts and car safely in the storage unit:
So whats left....
I didnt have time to remove the fuel tank so I quickly gunned all the nuts off the underneath and kept the plastic tab in place to hold the fuel tank in. I need to remove the wiring from the cabin and the unclip the hoses in the engine bay.
The gear linkage cables need to be removed as well as the rear heat shield thingy.
Once these items are removed I ready to start on the NA engine drop 
This week I will be popping into the workshop to:
Clean and paint the subframe
Clean whole engine and touch up some paint.
Remove engine heat shield and paint again. Heat shield is all flaked up and needs some sort of heat resistant paint I think.
Check the engine out properly for any damage and pipes from hell.
That was my weekend people.
After doing all this with the facilities at my disposal I have amazing respect for those who tackle this job on their drive/garage and do it in half the time. Amazing stuff
Roll on Easter weekend!!
What a crazy weekend it was.
Special thanks to David for all his pms and knowledge of wealth
So where to begin.
The plan from Friday to Sunday was to get the chargecooler system, rear clip and everything else I might need off the sonic shadow.
This all flopped when the garage was busy and I didnt get a ramp until 5pm on Saturday.
Anyway, with a brand new workshop I thought the conversion would be nice and easy but it wasnt.
Tools were all over the place, all the tools were dirty and before I could even start I had to clean up the workshop area and sort out some of the tools
Finally by 6pm I had the car up in the air.
So start with the essentials:


Moving onto the chargecooler strip down:


After removing all the covers I found 2 issues under the car.


Shock horror! The chargecooler system ran for 3 months, I then crashed the car and it sat there for a year.
The second problem I found under the car was the rear cancer bars are missing???? Really not happy about this!!!
While I removing all the pipe work I did have a good look and tried to think alternatives.
The rest of the system came off nice and easy.

So it took me up 6 hours to get this far

Now everything from the front moving to the back was undone and I could start on the engine bay.
Progress up to this point was very slow.
I was expecting my mates to show up and help for Sunday but they thought sex was more important and let me down
Roll on Sunday and the one man army.

My plan was to remove the chargecooler and then use this epic guide for removal.
Heres the guide you need people:
So Sunday I woke up, showered, had breakfast and went to the workshop.
Starting point:

Ok, lets discuss labelling.


The guide is amazing.
The only wiring plug I couldnt remove from the whole build was this one:

I decided to just cut the cable tie that was there, labelled the 2 pipes going to the charcoal canister and then just removed the charcoal canister.
At this point I was starting to realise that I was labelling stuff I might not even take to the new car
Anyway, I was close to finishing off unbuttoning everything from the top of the engine.


Finally with everything undone, I raised the car and started attacking the underneath.
HOW AMAZING ARE POWER TOOLS WITH THE CAR UP IN THE AIR.
Within no time, the driveshafts were out, all suspension bits removed

Next attack the exhaust.

So it was around 7pm now and the guide said
Getting the exhaust off was nice and easy with more than 1 pair of hands and we moved straight onto the subframe.

Now my mate works on gas turbines all day so all he wanted to do was start cutting xxxx out!!!! He grabbed the angle grinder and started cutting the ARB.


While we were under the car the front engine mount was removed.
At this point nothing should have been attached but somehow I had missed the clutch slave pipe.
Next job.
Got the crane in position and attached it to the mounting brackets

I bought a dolly from machine mart and also used an old tyre and block of wood to balance the engine.


Yes people I did it!!!!

By this time it was late, everyone needed to go and I needed to get the car down, all parts put away in the storage unit
The problem was with all the suspension missing, how were we going to move the car into the neighbouring unit???
Ratchet straps people:

The look on mates faces was we attempted this:

Car


All parts and car safely in the storage unit:


So whats left.
I didnt have time to remove the fuel tank so I quickly gunned all the nuts off the underneath and kept the plastic tab in place to hold the fuel tank in.
The gear linkage cables need to be removed as well as the rear heat shield thingy.
Once these items are removed I ready to start on the NA engine drop
This week I will be popping into the workshop to:
Clean and paint the subframe
Clean whole engine and touch up some paint.
Remove engine heat shield and paint again.
Check the engine out properly for any damage and pipes from hell.
That was my weekend people.
After doing all this with the facilities at my disposal I have amazing respect for those who tackle this job on their drive/garage and do it in half the time.
Roll on Easter weekend!!
Last edited by Krish on Tue May 20, 2014 11:43 am, edited 2 times in total.
-
Magic Beans
- Posts: 4789
- Joined: Thu Nov 24, 2011 1:01 pm
- Contact:
Re: Krish's MR2 - CONVERSION FINISHED - LOVING IT - pg5
It's never just easy is it
You don'tneed to have the cancer bars but they will help. I believe Pacific Works sell replacements, should you choose to put new ones in.
Personally I'd look at replacing the entire hose, both if the other has wear on it too. If it's not doing it's job properly you'll find yourself under the car again doing it anyway. Do it once, do it right
When running the pipework I'd try to ensure you keep it well away from the coolant pipes, to avoid heat transfer. Or you could wrap the bits which have to run near each other in this http://www.ebay.co.uk/itm/290620186760? ... 1423.l2649
Good luck with the next phase
You don't
Personally I'd look at replacing the entire hose, both if the other has wear on it too.
When running the pipework I'd try to ensure you keep it well away from the coolant pipes, to avoid heat transfer.
Good luck with the next phase
-
pistol pete
- Posts: 7068
- Joined: Mon Feb 11, 2008 5:47 pm
Re: Krish's MR2 - CONVERSION FINISHED - LOVING IT - pg5
good work
its always feels great when you achieve something yourself.. keeping an eye on this 
its always feels great when you achieve something yourself.
MR2 Sprint zombie outbreak response vehicle
https://www.facebook.com/pages/Zombie-S ... 0272127049
https://www.youtube.com/channel/UCNBrEd ... s-qbox0FwQ
https://www.facebook.com/pages/Zombie-S ... 0272127049
https://www.youtube.com/channel/UCNBrEd ... s-qbox0FwQ
Re: Krish's MR2 - CONVERSION FINISHED - LOVING IT - pg5
Magic Beans wrote:It's never just easy is it
You don't
Personally I'd look at replacing the entire hose, both if the other has wear on it too.
When running the pipework I'd try to ensure you keep it well away from the coolant pipes, to avoid heat transfer.
Good luck with the next phase
Thanks for the advice! Ive decided to scrap all the pipework and ordered this stuff from AVT:

They say this stuff is heatproof which might be better than the general black piping I removed.
My current NA has cancer bars so will inspect and reuse them.
pistol pete wrote:good work
its always feels great when you achieve something yourself.
Thanks mate.
RedMR² wrote:Some effort gone in there! Nice work.
ashley wrote:Great progress- good stuff!!

Went to Toyota today I ordered new u-clips things for the gear linkage cables, new cotton pins with the cap for the driveshafts, new clutch hose as well as Toyota coolant.
Ive also order 32mm to 19mm reducer elbow with straight hose joiners which I may use if I decide to change the routing for the CC pipe work.


Thats me finished with bits to order, all i need now is some paint brushes and Im set for the long weekend.
-
slipping clutch
- Posts: 1844
- Joined: Sun Jan 30, 2005 1:22 pm
Re: Krish's MR2 - CONVERSION FINISHED - LOVING IT - pg5
Good write up, enjoyable read and excellent work but more importantly you ate 3 double choc tescos hot cross buns before you started - Hero!
Re: Krish's MR2 - CONVERSION FINISHED - LOVING IT - pg5
slipping clutch wrote:Good write up, enjoyable read and excellent work but more importantly you ate 3 double choc tescos hot cross buns before you started
Never had double choc hot cross buns before.
Re: Krish's MR2 - CONVERSION FINISHED - LOVING IT - pg5
That's impressive work, always interesting the first time you strip it down, it definitely gets easier once you're familiar with what goes where.
It's a shame I'm not over that way any more, I'd have been there to give you a hand. Do you know kelvin? (Kayjay) He is just round he corner from you.
It's a shame I'm not over that way any more, I'd have been there to give you a hand.
Re: Krish's MR2 - CONVERSION FINISHED - LOVING IT - pg5
Fozzy wrote:That's impressive work, always interesting the first time you strip it down, it definitely gets easier once you're familiar with what goes where.
It's a shame I'm not over that way any more, I'd have been there to give you a hand.
Hello mate, yep kayjay is literally a 5 minute drive away.
Currently trying to work out how to repin the ECU.
So far I've found a thread where Peter
Re: Krish's MR2 - CONVERSION FINISHED - LOVING IT - pg5
Kelvin is a good guy, had a fair few parts from him when he changed his mind.
I wish I could help with the wiring, mine was a rev 4 turbo engine into a rev3 an shell. Tbh most of my help came direct from Paul woods over the phone, the guy is certainly knowledgable. From what I remember though there aren't too many wire to mess around with. My engine is currently in the shed, so if you want I can take a look at the plugs and see if anything has been moved around
I wish I could help with the wiring, mine was a rev 4 turbo engine into a rev3 an shell.
Re: Krish's MR2 - CONVERSION FINISHED - LOVING IT - pg5
Fozzy wrote:Kelvin is a good guy, had a fair few parts from him when he changed his mind.
I wish I could help with the wiring, mine was a rev 4 turbo engine into a rev3 an shell.
Thanks mate, if it's not too much trouble to have a look that would be great.
Thanks again
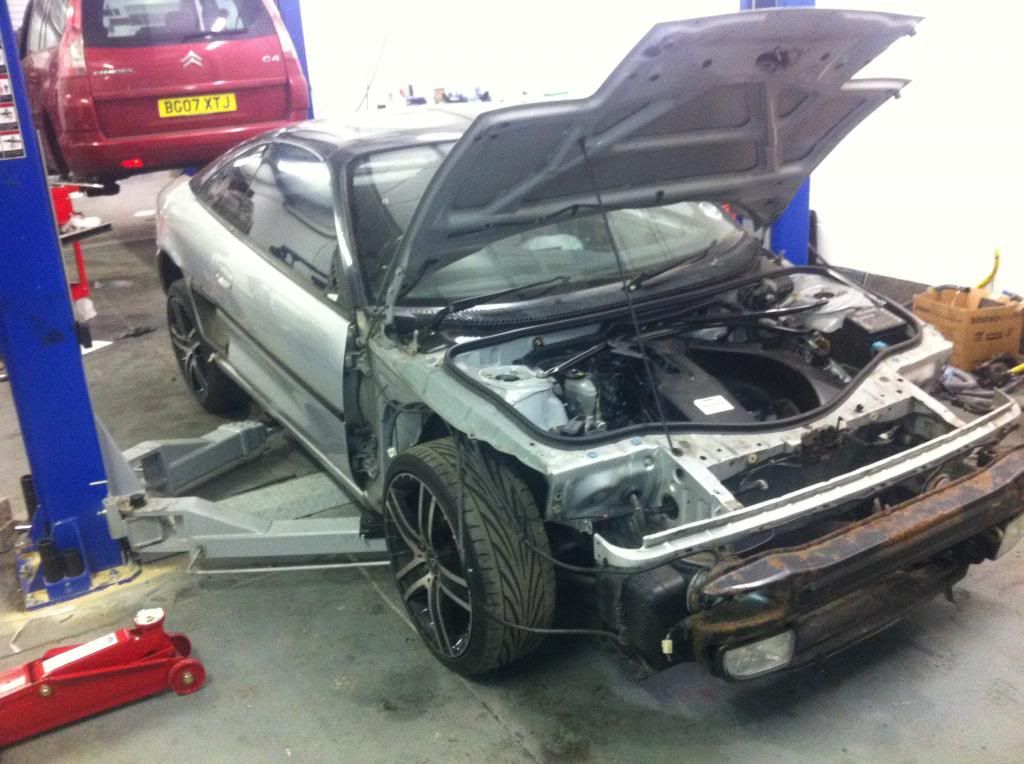
Conversion - Part 2
Right update time. The plan for the long weekend was to get the NA lump out, remove rad, and slap the turbo in, chargecooler and new rad.
Stripping the silver shadow was easy, no rusted bolts. Im sure there would have been but with Luke only doing the conversion a while ago, all bolts came off nice and easy....unlike my current MR2; every bolt was a right asshole! I kept snapping bolts everywhere!!
Anyway moving onto the swap:

From this point onwards, it took a good 30-45 minutes just jacking the car up. Had to get an Toyota jack in, jack up the front a little, then get the trolley jack under the front and raise the car. This allowed me to get the lift points under the front jacking points before moving onto the rear. Finally the car was safely on its sills.
I decided to tackle the front end first. Removed the bumper (what a headache), got pi$$ed off with the fog lights so just snapped them off
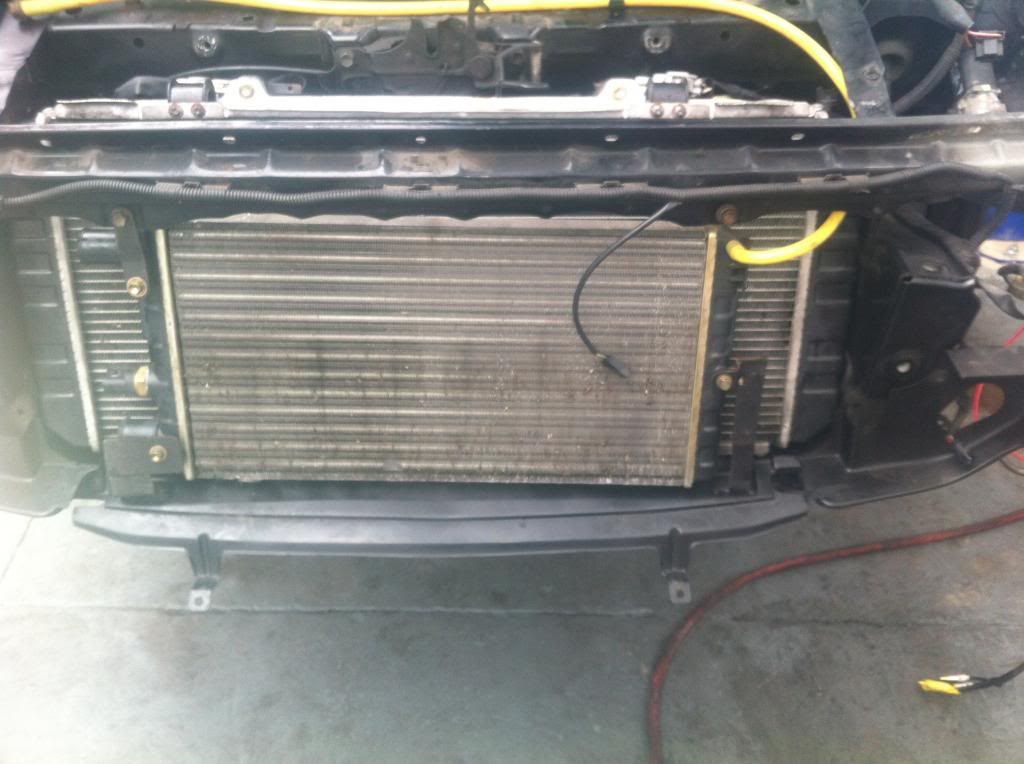
I removed the condenser and radiator. I decided to rip all the aircon bits out. Time will tell if this was a good idea!!
Coolant drain, was nice and clean
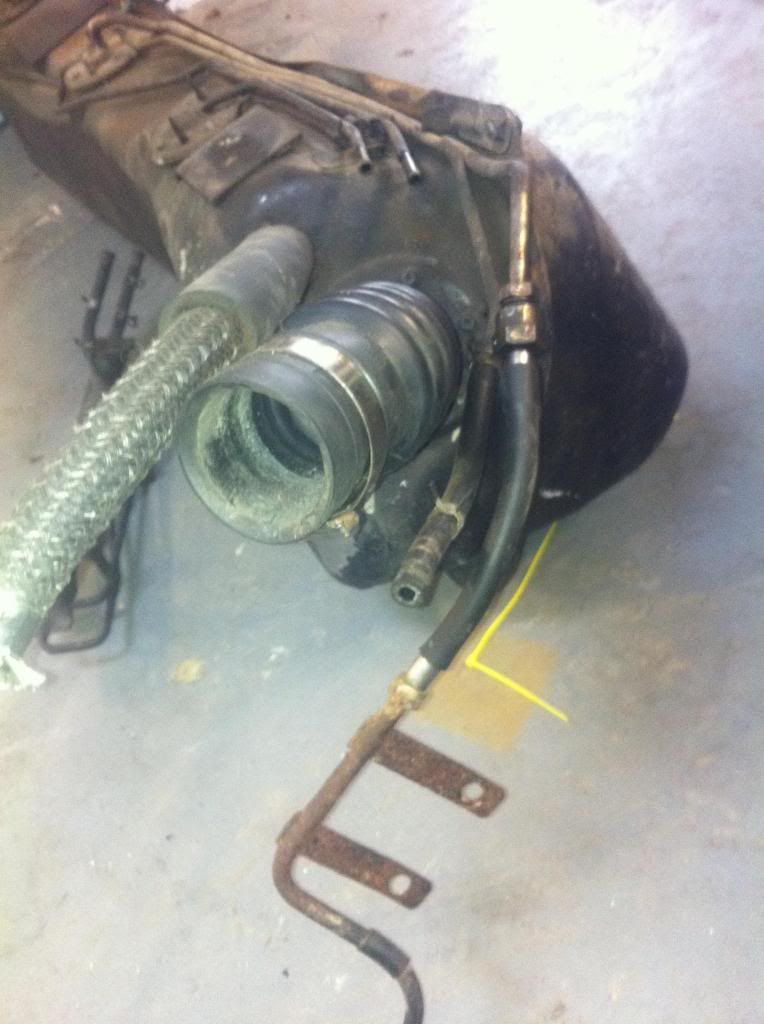
There was something dodgy going on with my cooling system. I had too many pipes running from the front to the rear of the car?? I had two aircon pipes and two other pipes similar to a chargecooler conversion.
Turns out, there must have been a coolant leak in the past and to save removing the tank, new pipes were run. I didnt like this and removed the whole lot.
By the time I had the front end off, radiators off, coolant lines and aircon pipes removed, I was already way behind schedule. After taking pics, struggling with front bumper, reading the manual on aircon parts and trying to work out what the pipes were for I was finally done.
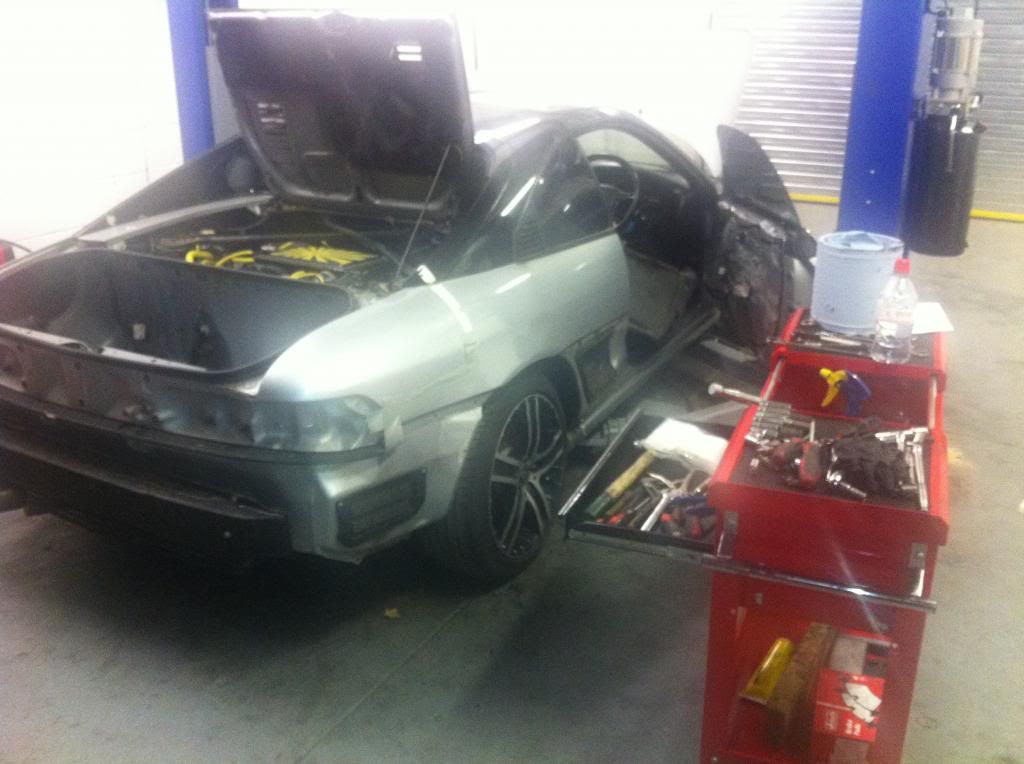
I turned my attention to the engine bay. This was nice and easy this time around. No labelling to do, just pull the thing out
Had some interest in the lump and if all things work out, I should be shipping it off on Monday. No payment yet so you never know.
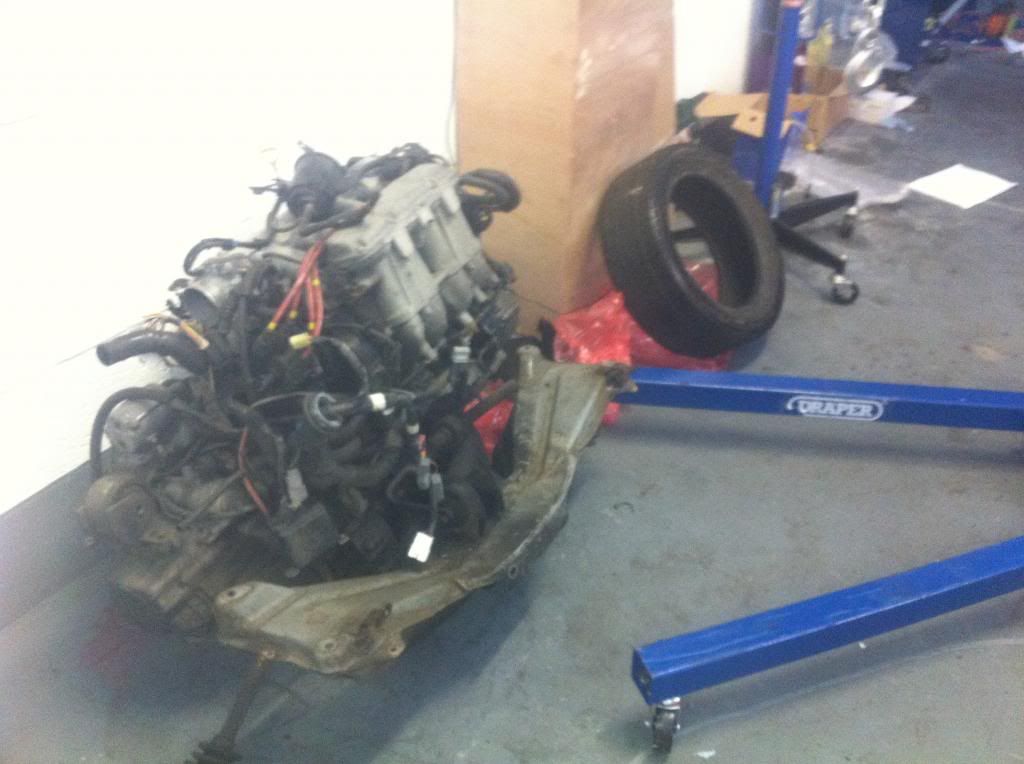
Engine out and the bay was dirty!

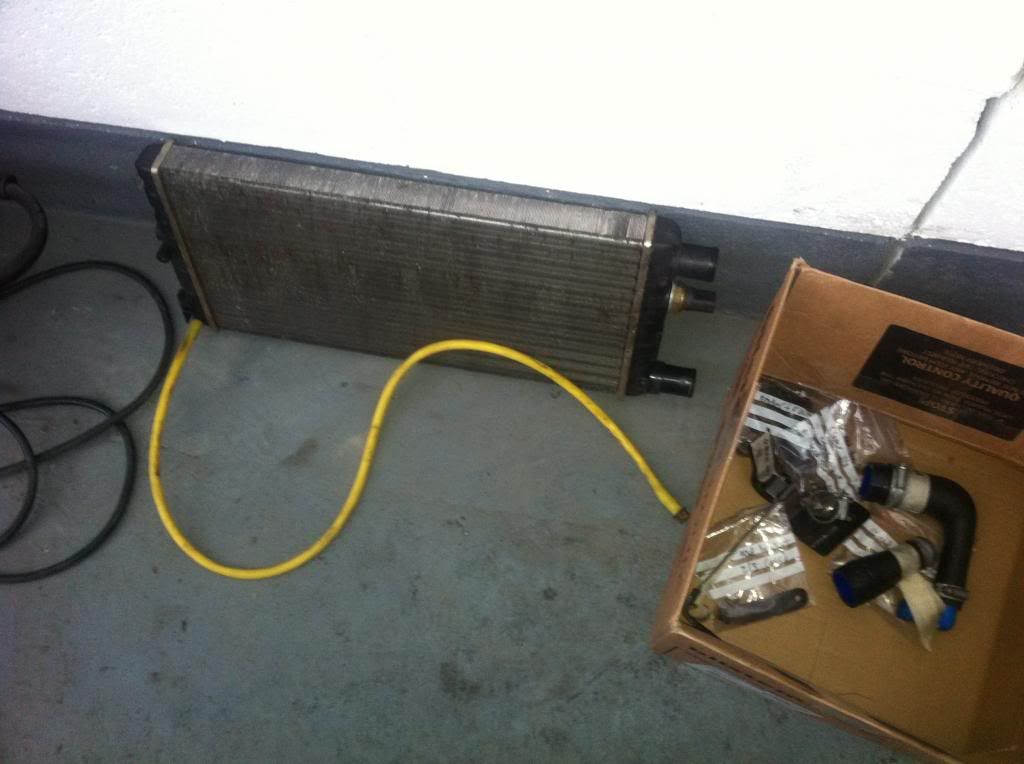
I moved onto the fuel tank and inspection of the heater pipes:
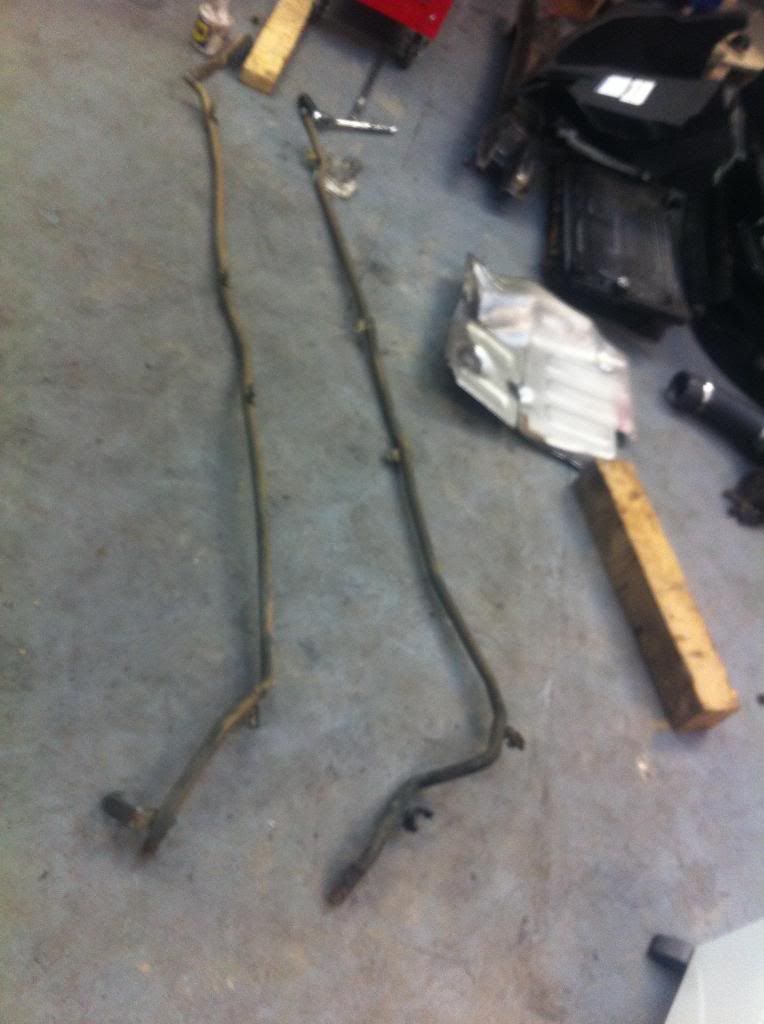
As suspected, the heater pipe was leaking in the common place(around the weld). I remember Luke telling me mines were really bad too. He fixed them when I had my conversion done so it was back to the sonic shadow to remove the heater pipes. Not a fun job on the ground I tell you!!!
With the new pipes in, I put the turbo petrol tank in.
Next up was removing the pipe which takes fuel from the petrol cap to the tank. This was rusted and the bay would look poo if I left it. However the nut was rusted solid and was not sure how to deal with snapped nuts (what are they called) from the bulkhead!! So I took forever trying to take the nuts off.
My new method was:
And the bolt was free!!!
This was more satisfying then being awarded my PhD........How sad is that
Painted and drying
So I was now ready to drop the lump in but before I could do that I needed to clean the engine bay. I spent an absolute age cleaning the bay up. In fact I went all out. I used autoglym engine cleaner and then pulled out my detailing spray and waxed the xxxx out of the engine bay. I was so happy with the result. I wish I had some pics. Again I was working alone so dont even have the obligatory pic of me inside the engine bay 
Anyway hours later with all painted parts dry I put in the bits I needed to and prepared to lower the car with the 3SGTE in place
Engine in:
Painted subframe on:
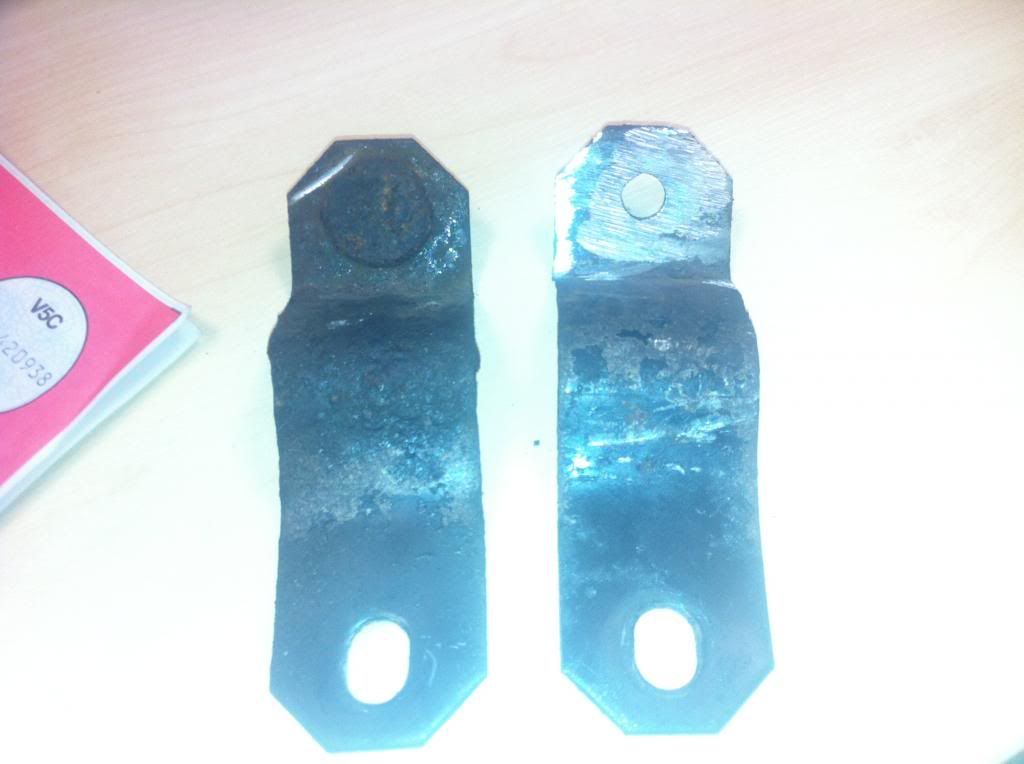
When I removed the subframe I snapped the bolt holding the antirollbar on. I removed the brackets when I painted the subframe but never put them back on
So I ground the bracket and used some spare nut and bolts I had. I also painted the brackets for rust protection and then had to drop the subframe again to put them on. Its xxxx like this that p1$$e$ me off. Already behind schedule and adding more work for me.
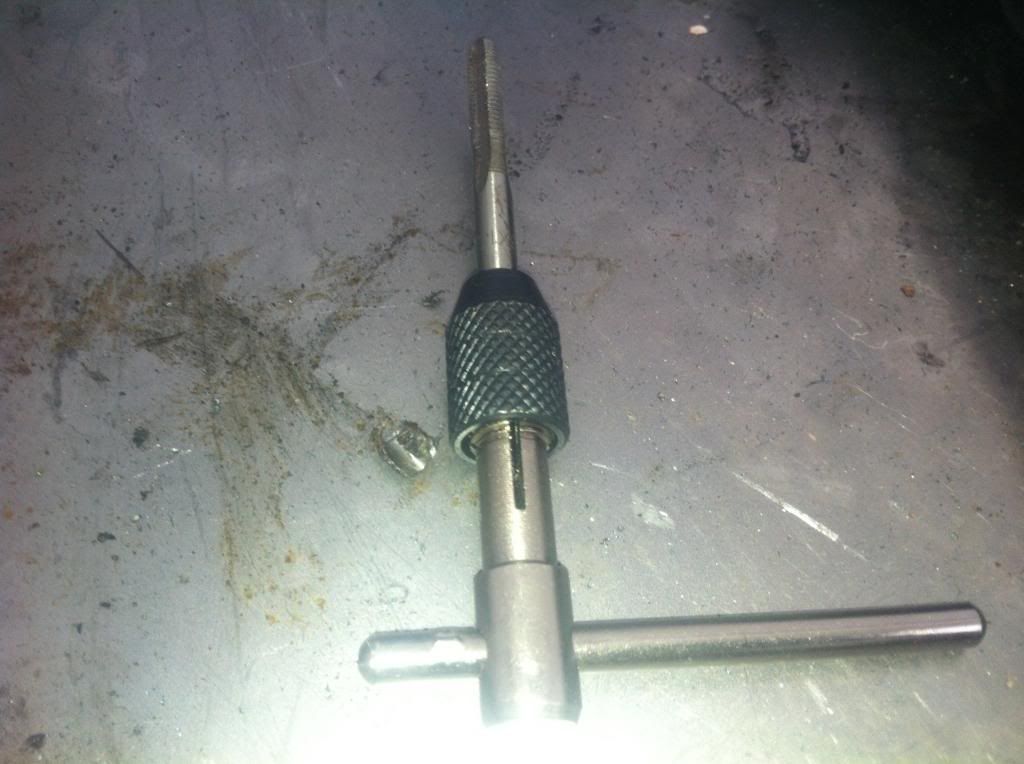
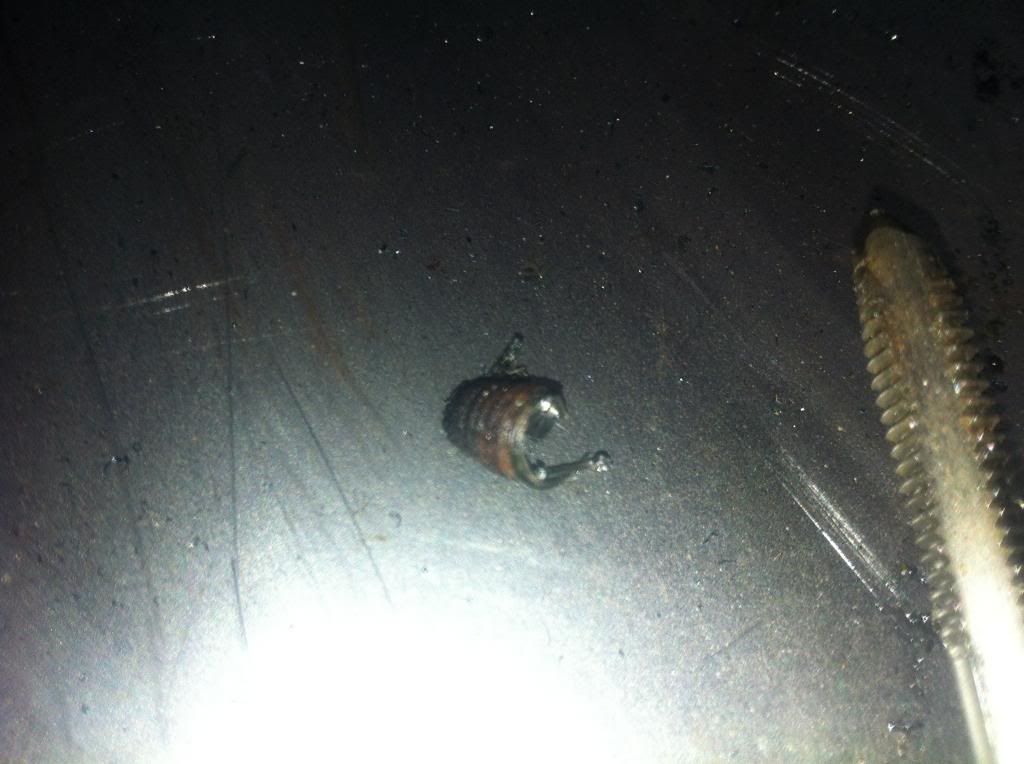
With the lump I turned my attention to the front again. I decided to put the engine rad in and then chargecooler rad. When lining up the CC rad brackets I saw all four bolts under the car were snapped in place. After going out the back and having a quick cry I decided to raid the workshop and find the correct tools. To be honest Ive never removed a snapped bolt before. Quickly jumped on the net and worked out the best way to remove them. Back in the garage I:
Happy days
With the chargecooler on I started to think about the piping:
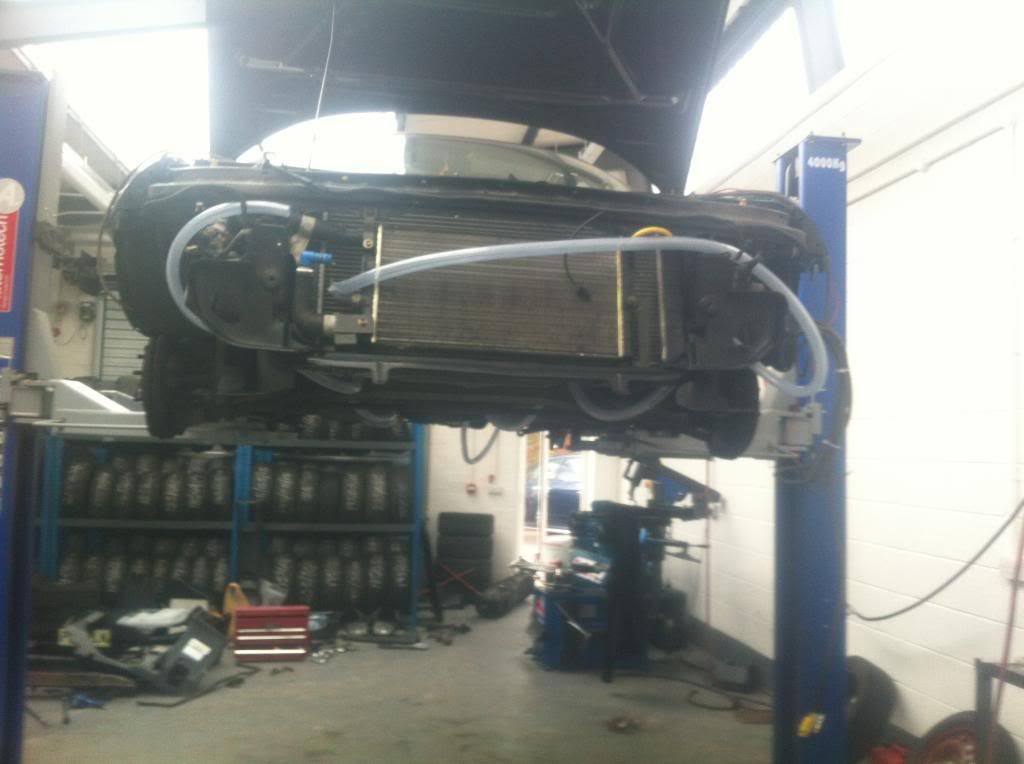
Got to this stage and had a small issue:
No matter what tried I couldnt remove the kink in the pipe. So I decided to put a elbow in there. To be honest Im not very happy about this. All this does is add another point where a leak can occur
This is the last pic I took. It was getting late, I still had loads to do and close to time where I had to finish cleaning the workshop and get the car ready for storage for the new weeks work to begin.
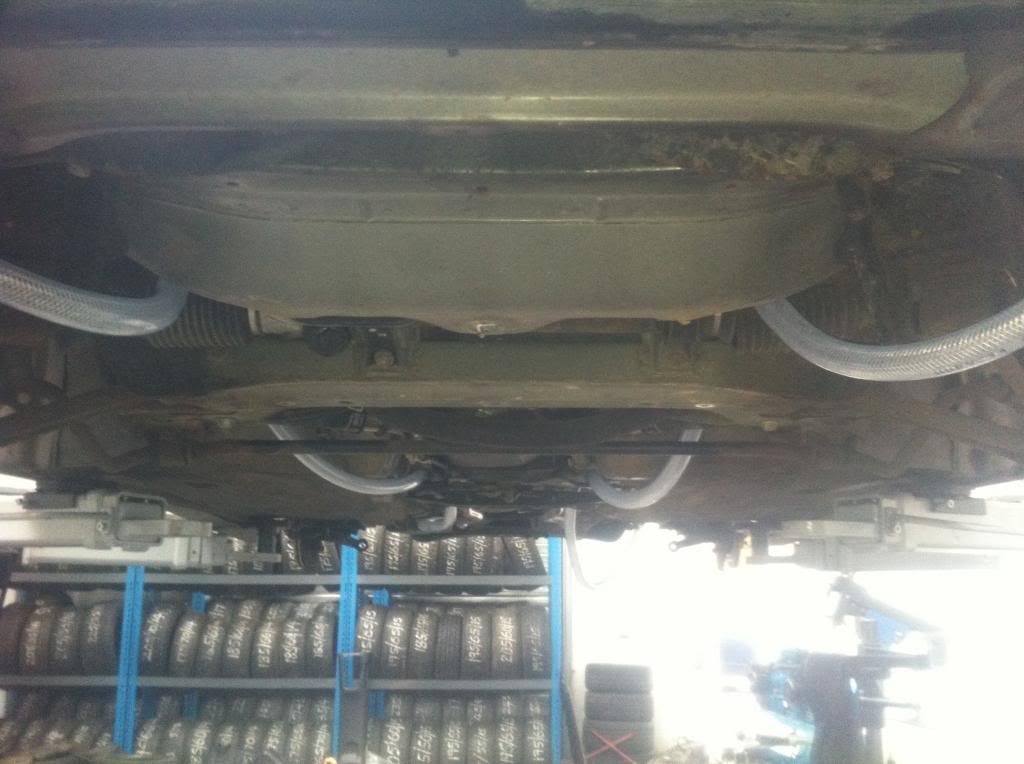
I managed to get the pipework all tied down with clips up to the CC pump. The pump is on the car and pipework needs to be cut and attached. Subframe, antiroll bar and rear suspension is all done. I hit a problem where I couldnt get the driveshafts to fit. After measuring them I realise I needed the turbo hubs too What an idiot. So close to midnight, I'm back working on the silver shadow!
Another issue I have is the silver shadow hubs have 15 or 20mm Eibach spacer and longer studs which I do not want. I managed to knock all 10 studs out of my NA hubs but could not get the studs out of the turbo hubs.
The process should be simple. Chuck a lug nut on there and smash away. Should I just man up and smack the xxxx out of it???
So thats where it ended. Now I just need to:
Fit exhaust
Finish wiring in engine bay
Attach pipes to CC pump
Change spark plugs
Change oil and filter
Fit CC core and plump in
Finalise everything and double check all bolts
Add coolant and check for leaks.
Fit bumper
Then Im ready for the wiring
Ive not worked out what to do but I had a pm from Luke at Pacific Works and he said he would wire the car up for me forFREE, yes people FREE!!!!! What can I say; Im overwhelmed with the offer. Im going to arrange the car to be towed to him to finish off the wiring and fire her up!!!!!!
I hope to finish off the build this weekend. There not much left now.
Hope to get some decent pics of the engine bay when Im all done 
Stripping the silver shadow was easy, no rusted bolts.
Anyway moving onto the swap:

From this point onwards, it took a good 30-45 minutes just jacking the car up.
I decided to tackle the front end first.
I removed the condenser and radiator.

Coolant drain, was nice and clean

There was something dodgy going on with my cooling system.

Turns out, there must have been a coolant leak in the past and to save removing the tank, new pipes were run.
By the time I had the front end off, radiators off, coolant lines and aircon pipes removed, I was already way behind schedule.
I turned my attention to the engine bay.


Had some interest in the lump and if all things work out, I should be shipping it off on Monday.
Engine out and the bay was dirty!

I moved onto the fuel tank and inspection of the heater pipes:


As suspected, the heater pipe was leaking in the common place

With the new pipes in, I put the turbo petrol tank in.
Next up was removing the pipe which takes fuel from the petrol cap to the tank.
My new method was:
- xxxx loads of WD40
Brillo pad to clean thread and nut.
Slightly tighten and loosen and tighten up again
More WD40 and brillo pad action
Slightly tighten and loosen and tighten up again
More WD40 and brillo pad action
Pray
Feeling impatient so went to smoke
Prayed some more
Slightly tighten and loosen and tighten up again
And the bolt was free!!!

This was more satisfying then being awarded my PhD.
Painted and drying

So I was now ready to drop the lump in but before I could do that I needed to clean the engine bay.
Anyway hours later with all painted parts dry I put in the bits I needed to and prepared to lower the car with the 3SGTE in place

Engine in:

Painted subframe on:

When I removed the subframe I snapped the bolt holding the antirollbar on.
So I ground the bracket and used some spare nut and bolts I had.

With the lump I turned my attention to the front again.
- Punch a mark into the centre of the bolt
Use a small drill bit to drill through the centre
Got a larger drill bit and did the same
Got to a point where not much material was left and used this thing to get the remaining metal out
Happy days


With the chargecooler on I started to think about the piping:


Got to this stage and had a small issue:

No matter what tried I couldnt remove the kink in the pipe.


This is the last pic I took.
I managed to get the pipework all tied down with clips up to the CC pump.
Another issue I have is the silver shadow hubs have 15 or 20mm Eibach spacer and longer studs which I do not want.
The process should be simple.
So thats where it ended.
Fit exhaust
Finish wiring in engine bay
Attach pipes to CC pump
Change spark plugs
Change oil and filter
Fit CC core and plump in
Finalise everything and double check all bolts
Add coolant and check for leaks.
Fit bumper
Then Im ready for the wiring
Ive not worked out what to do but I had a pm from Luke at Pacific Works and he said he would wire the car up for me for
I hope to finish off the build this weekend.
Hope to get some decent pics of the engine bay when Im all done
Conversion Finished!!!!!!
Right, I thought it was about time I finished writing up the conversion results. Been a hectic couple of weeks but the car is done and Im happy as a pig in xxxx!
Finished the car on Sunday 4th of May!!
So I had a few bits left to do since my last post(see list above). After the strip down I dropped my phone and had to replace the back. After the replacement back glass I forgot to remove the plastic cover on the lenses cover which meant nearly all the following pics are xxxx!
Right I followed this removal guide for the engine. It was quite comprehensive so what I did was put all the bolts in baggies and also put on the label the pg number so I knew exactly what bolt went where when I put everything back together. This helped loads!!
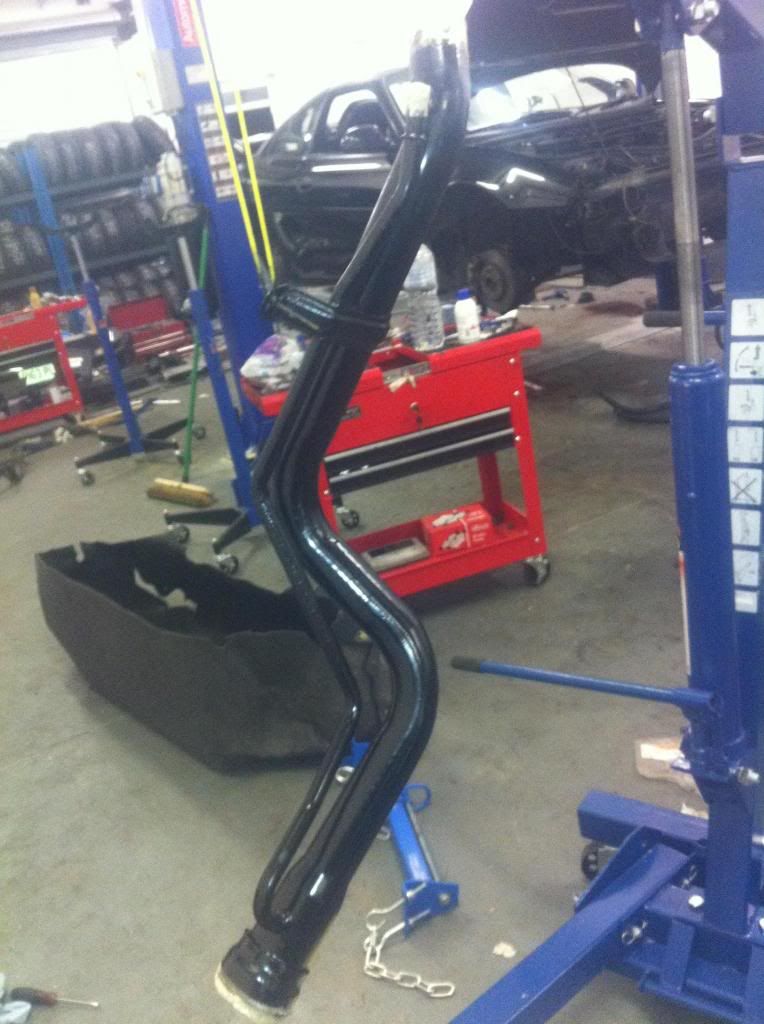
Fitting the exhaust was nice and easy. Gave the box a nice clean before fitting:
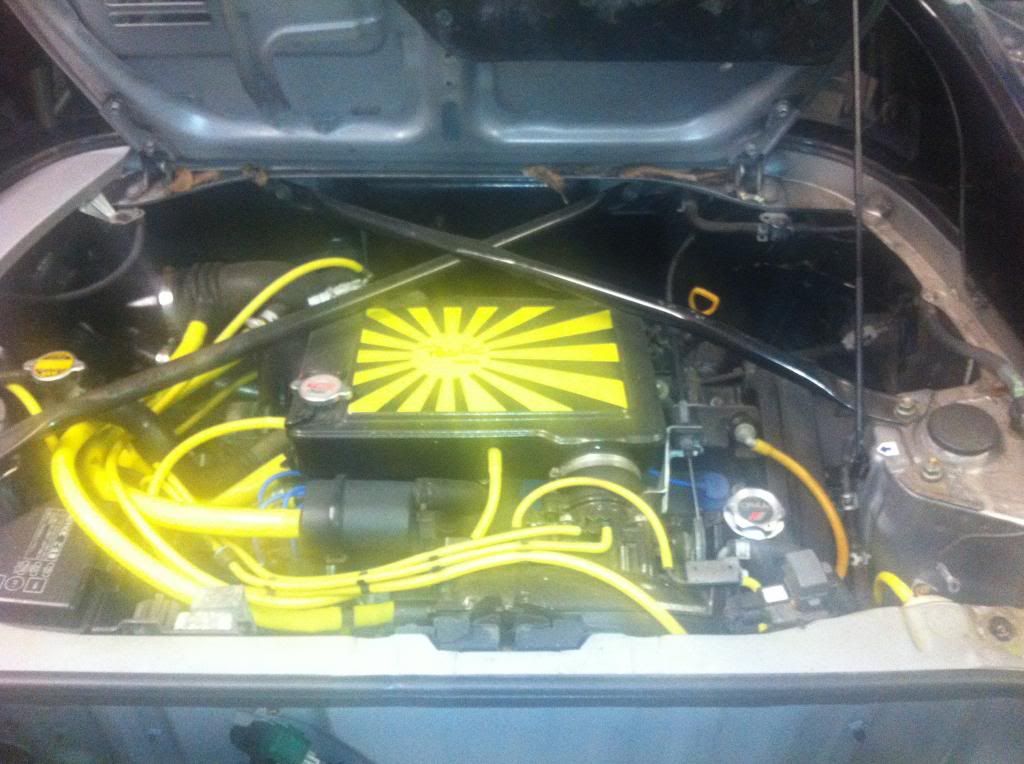
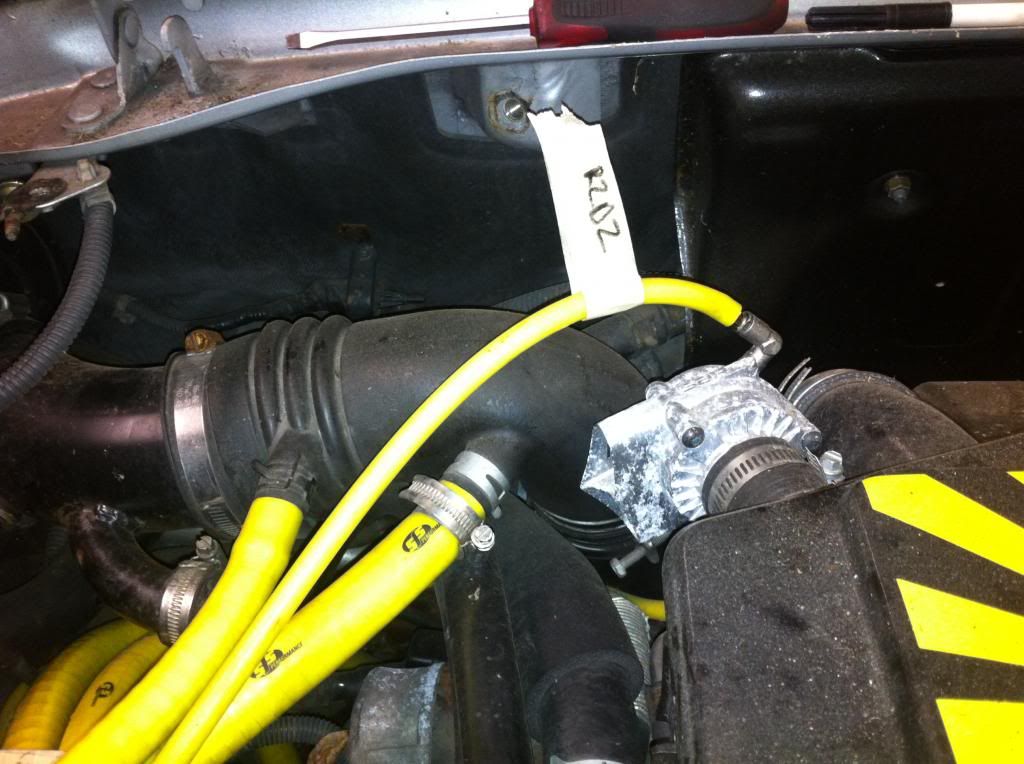
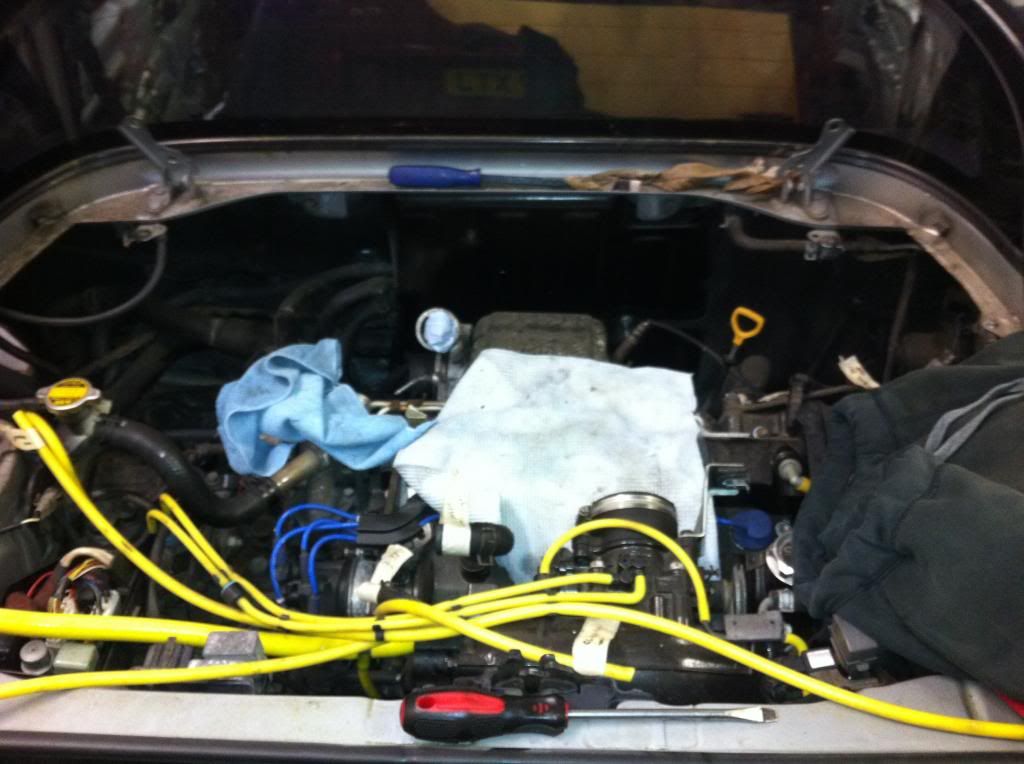
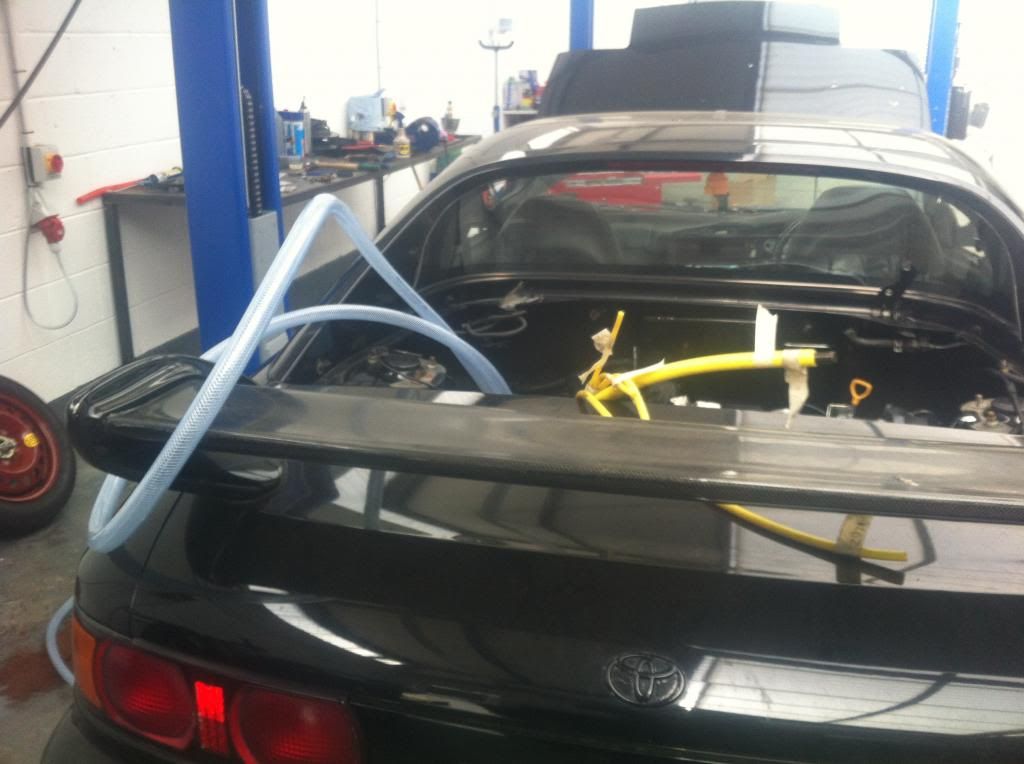
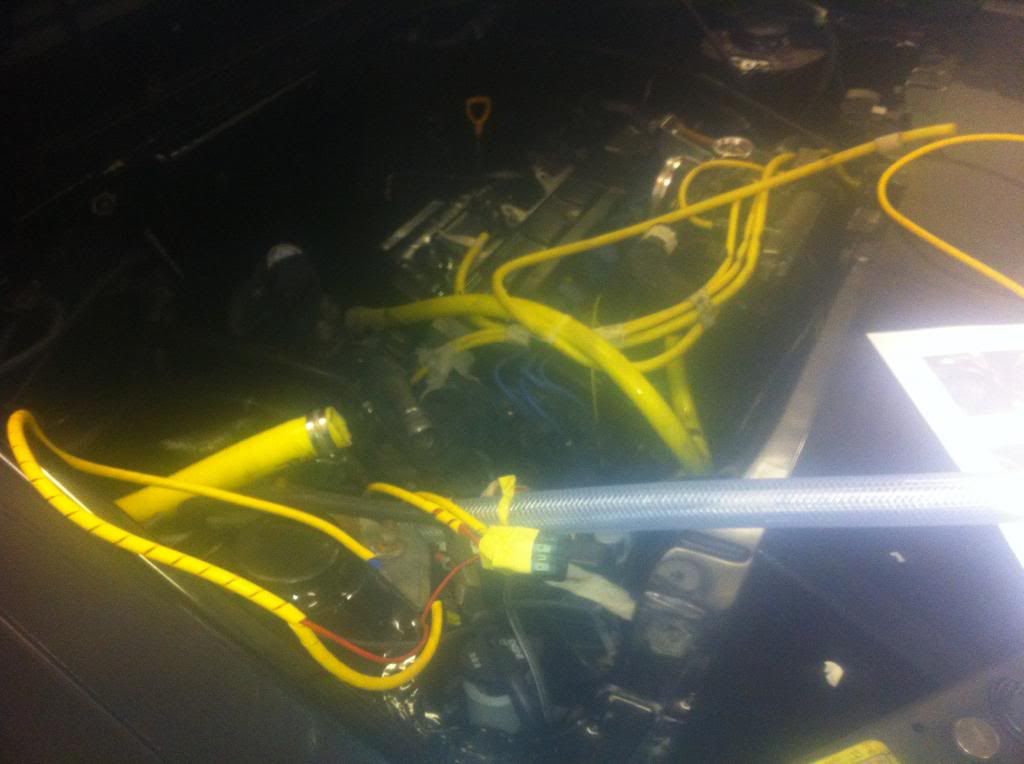
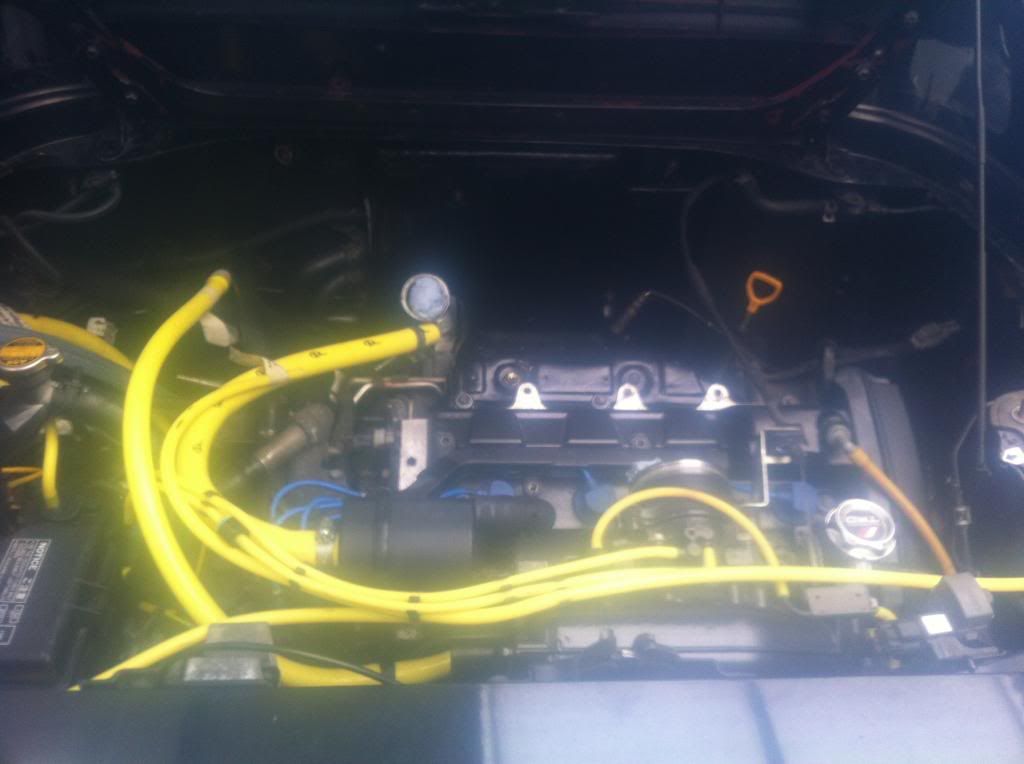
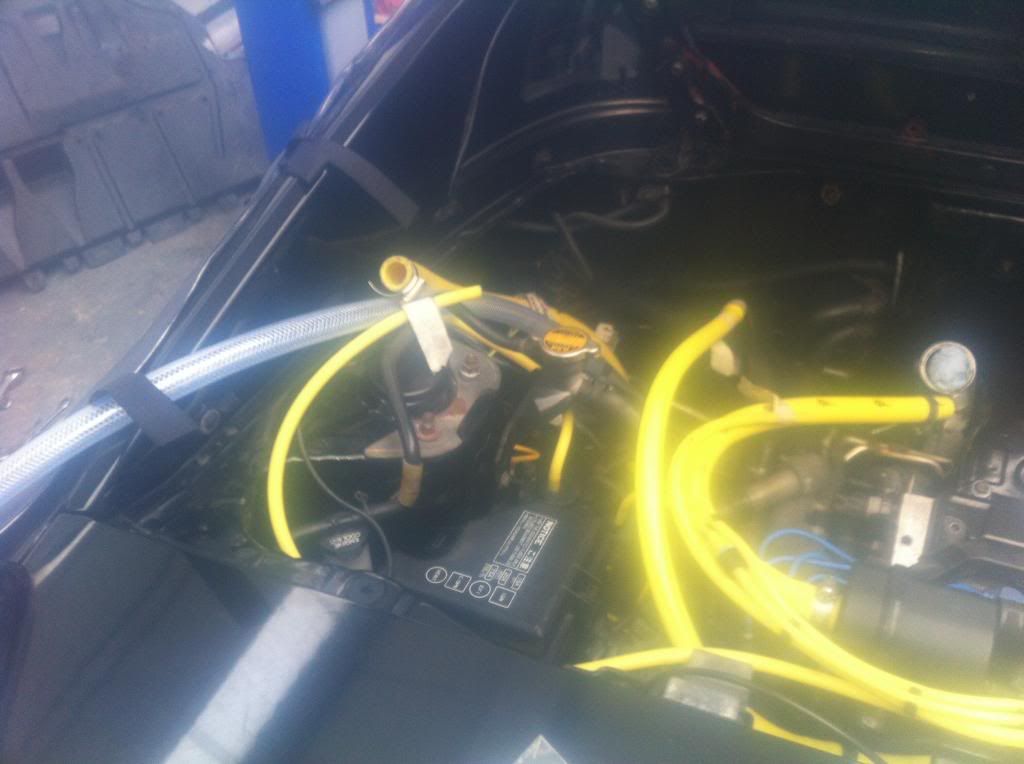
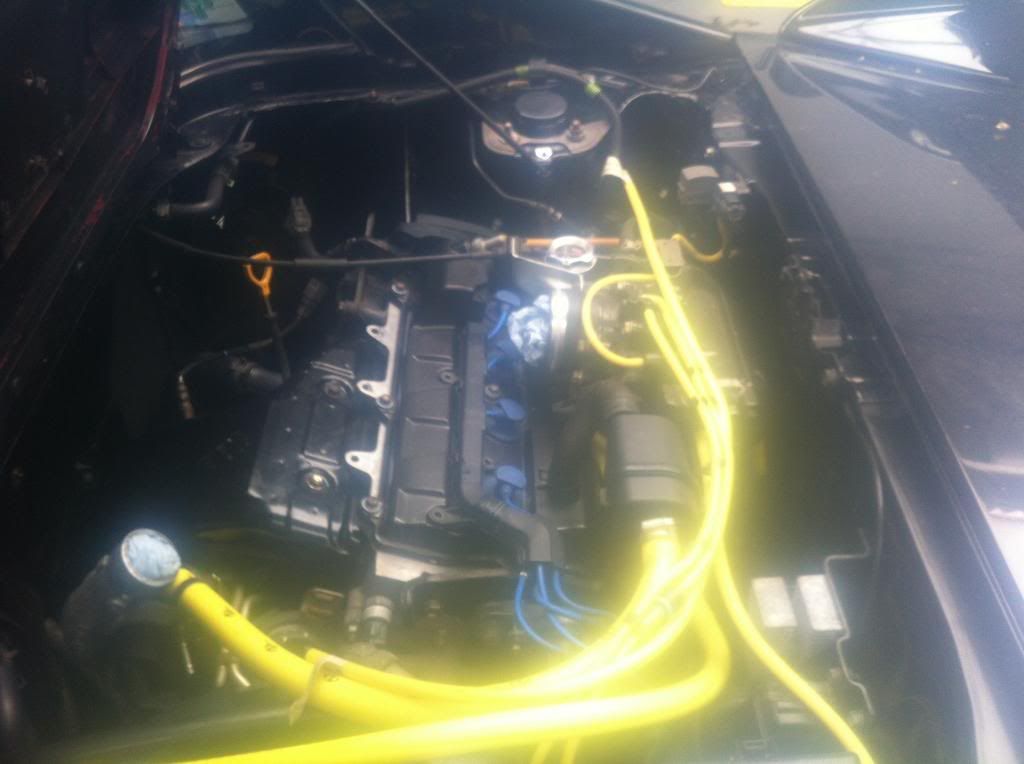
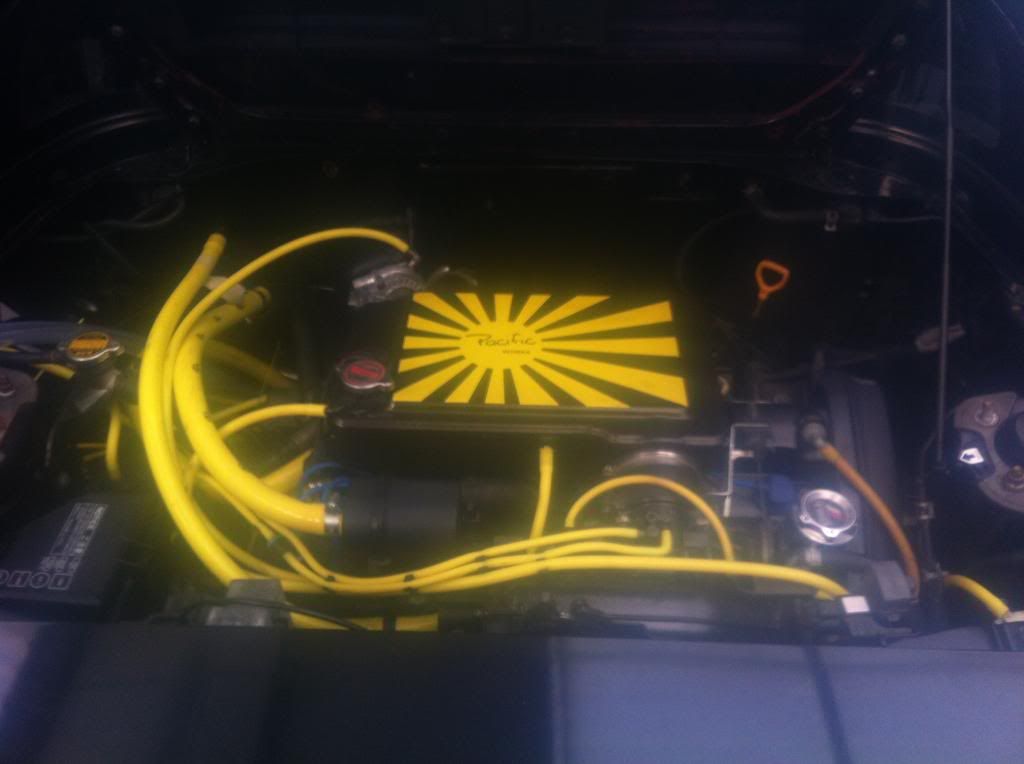
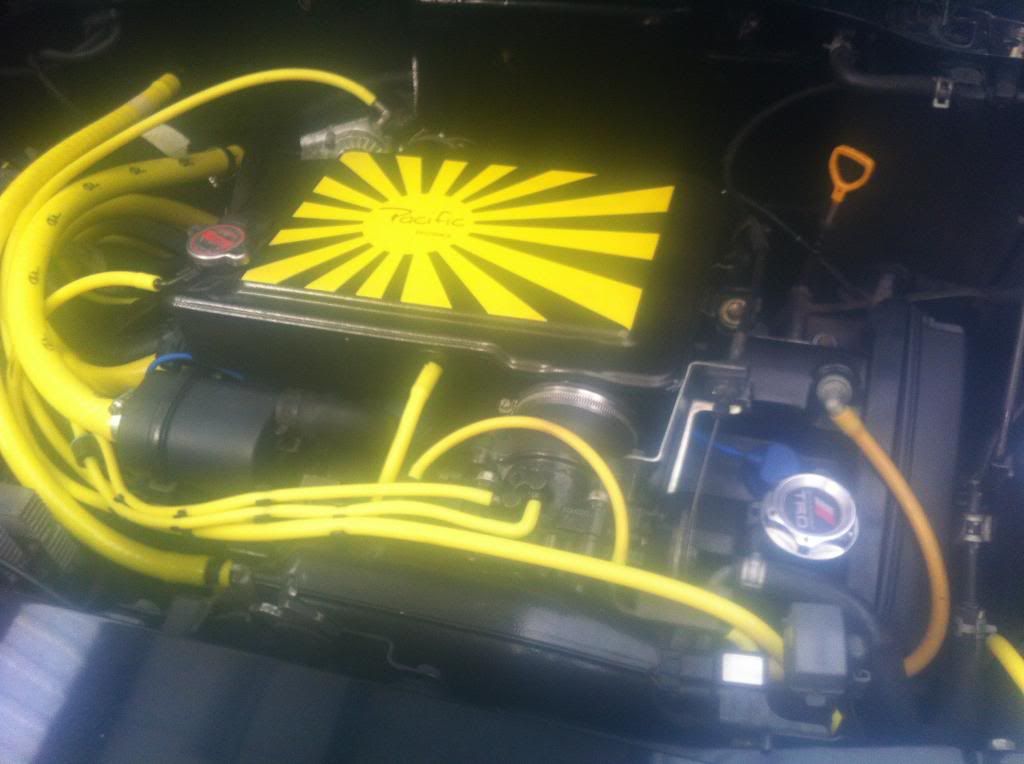
I was then in a position to start the wiring to fire her up for the first time. I wanted to wire the chargecooler relay first and I got some yellow wire sleeves to make the bay look nice and clean with no loose wires running around:


Next up was wiring for the ECU. The plan was to get the car towed to Luke at PW but then I would have to finish the build off there and this was not ideal. Instead I had a good chat with Luke on the phone and then decided it would be easier to go to Luke armed with some knowledge and get so first hand info on what to do. He was always going to have a turbo sitting there for reference so thats what I did.
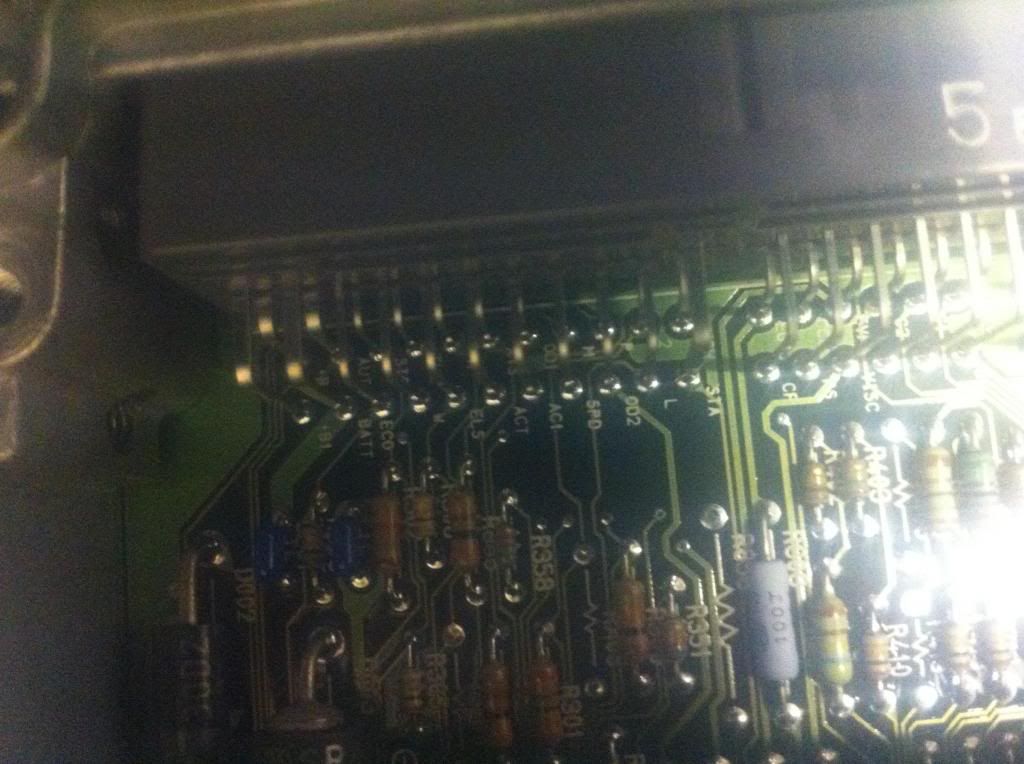
So I couldnt find any information on wiring for the NA body loom to match the turbo ECU. Luke told me there are only 5 wires that I need to get the car fired up!
These are:
+B - Ignition
BATT Constant Live
SPD- Speedo
W- Diagnostics
FC Something to do with the fusebox
Luke told me to open up the NA ECU and see where these 5 wires were located. This way I know where they are on the body loom plug and then I can look at the Turbo ECU to see if they are close.
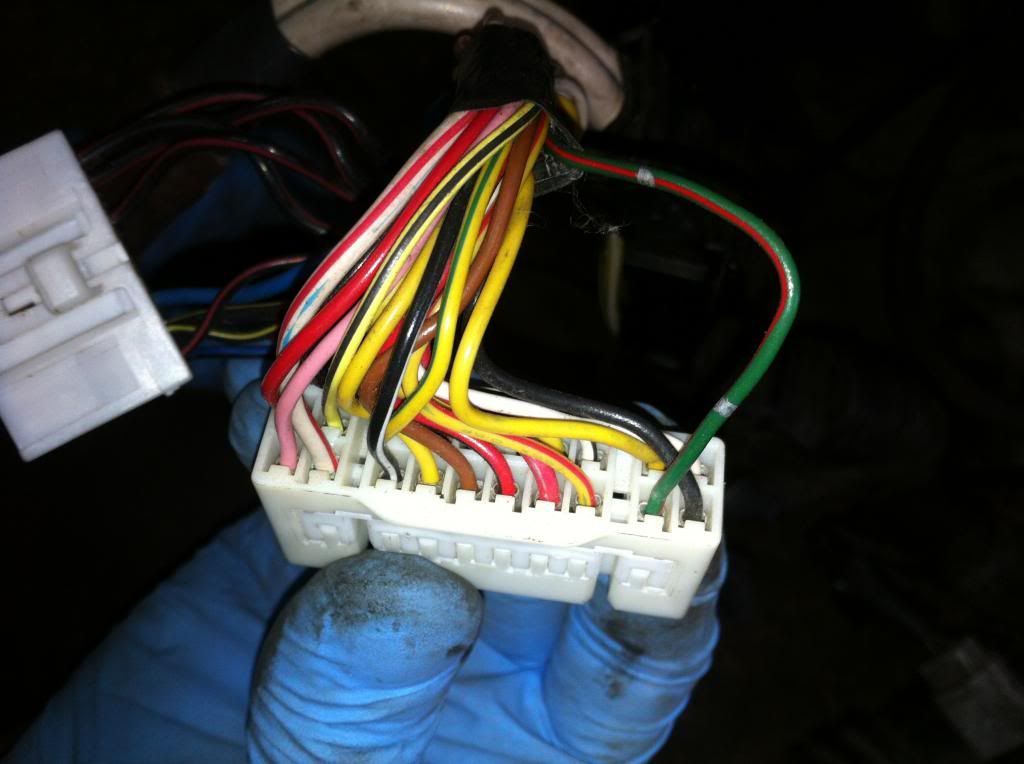
The only wire that was not present from the NA was the FC wire running from the fuse block to the ECU. So I opened up the plug on the fuse block and ran a wire down to the ECU. I opened up the wiring harness so I could run the wire and make it look OEM (Big thanks to Luke for guiding me through this and giving me a spare plug so I could run the green/red stripe wire from the fusebox to the ECU plug).
Since I have never soldered before I thought it would be wise to give it a go before I start on the ECU wiring:
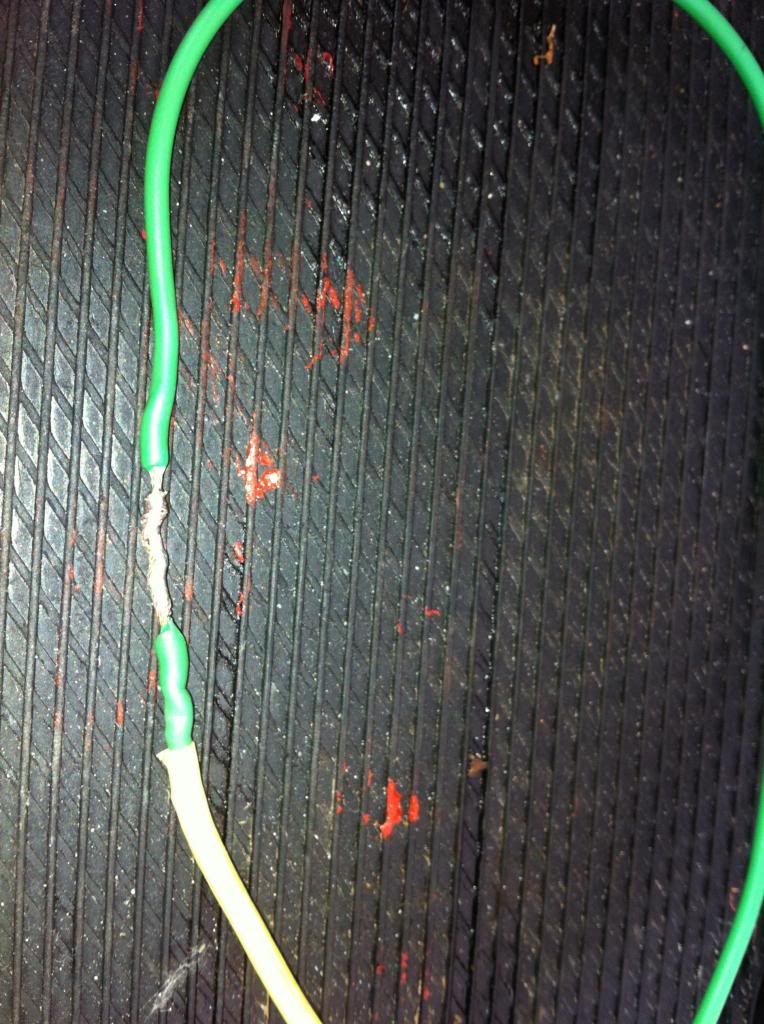
Happy
Next I had a few plugs that I was unsure of. First was the aircon idle up plug. Since I dont have aircon anymore I just left this plug (after Luke told me that plug was for) and the second was the air temperature sensor plug on the air filter. On the NA, this plug is on the body wiring loom but on the turbo its on the engine loom. So this was the second plug that was left disconnected. They are still in the bay; I might just chop them at some point to make it look a bit neater.
Now Im close to firing her up for the first time!!! I changed the oil and filter using Fuchs Titan Race Pro S and genuine filter(Thanks Ashley for the oil filter; saved a few quid).

Since its been a full year that the engine has not turned over Luke recommended I turn the engine over with the plugs removed and removal of engine bay fusebox fuses. I kept turning her over for 10-15 second bursts until I had decent oil pressure. I then put the plugs and fuses back in and did a little prayer to the car Gods.
SHE FIRED UP INSTANTLY
Next up was to attach the chargecooler pipework and start the bleeding process
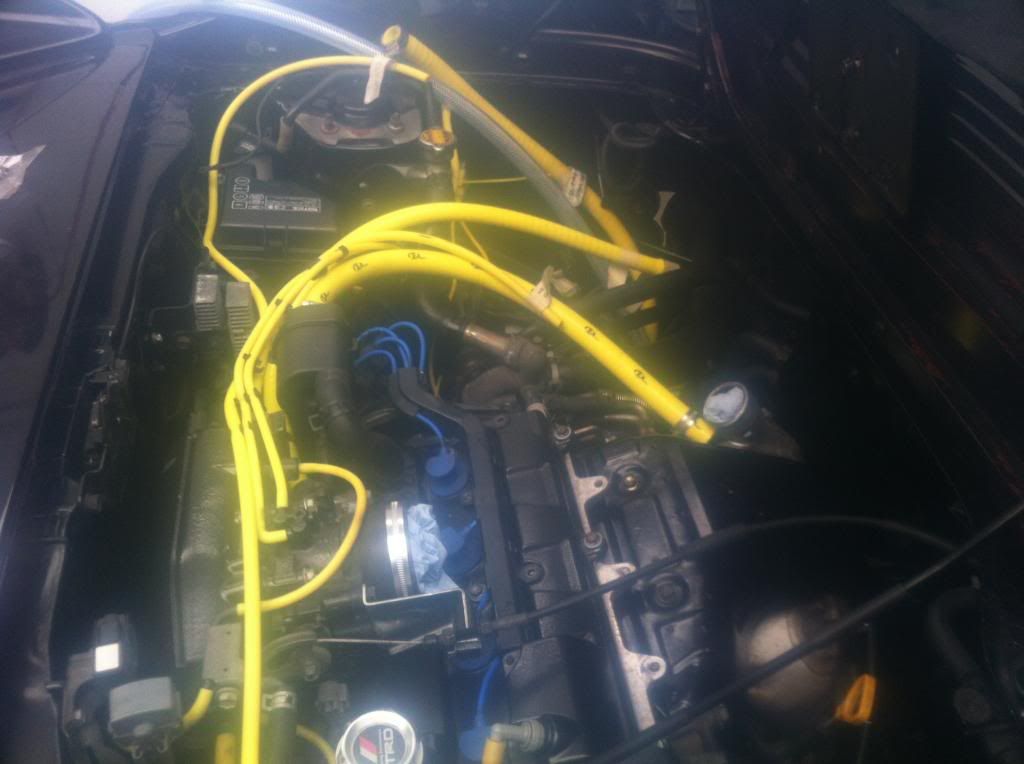
Bleeding the chargecooler, radiator and heater matrix was not so bad. I followed the Toyota manual and she seemed fine. I finalise everything , double check all bolts and checked for leaks.
To my surprise, there were no leaks so I put the front bumper back on(badly) and decided to go for a spin.
For the first drive I took it easy. When I got back to my mates house I opened up the engine lid to check all was OK and I could hear water hissing out of somewhere. On closer inspection I saw the filler neck cap was leaking. The next morning I swapped the chargecooler TRD one and all has been fine since. Im going to get a standard one soon.
So i went back to the workshop to get the car back up in the air and check underneath for leaks. By the time I had got the stupidly low car in the air I noticed a nice big leak coming from up front. Had a good look and the engine radiator rubber pipes (the small ones) were leaking. The clips holding the pipes on were not on properly, so I sorted this out, took the car out for a good spin and no leaks!!!!!!!
So we were now at Sunday and time to take the car back home to London and make sure everything was working correctly. I had a trip to the Norfolk Broads planned the following weekend so I wanted to run the car for a week before I made the trip up there.
During the week the car ran fine and I did a good 200 miles without any issues. During the week I headed up to Kwik Fit (mates the manager) to have another good look underneath to make sure all was OK.
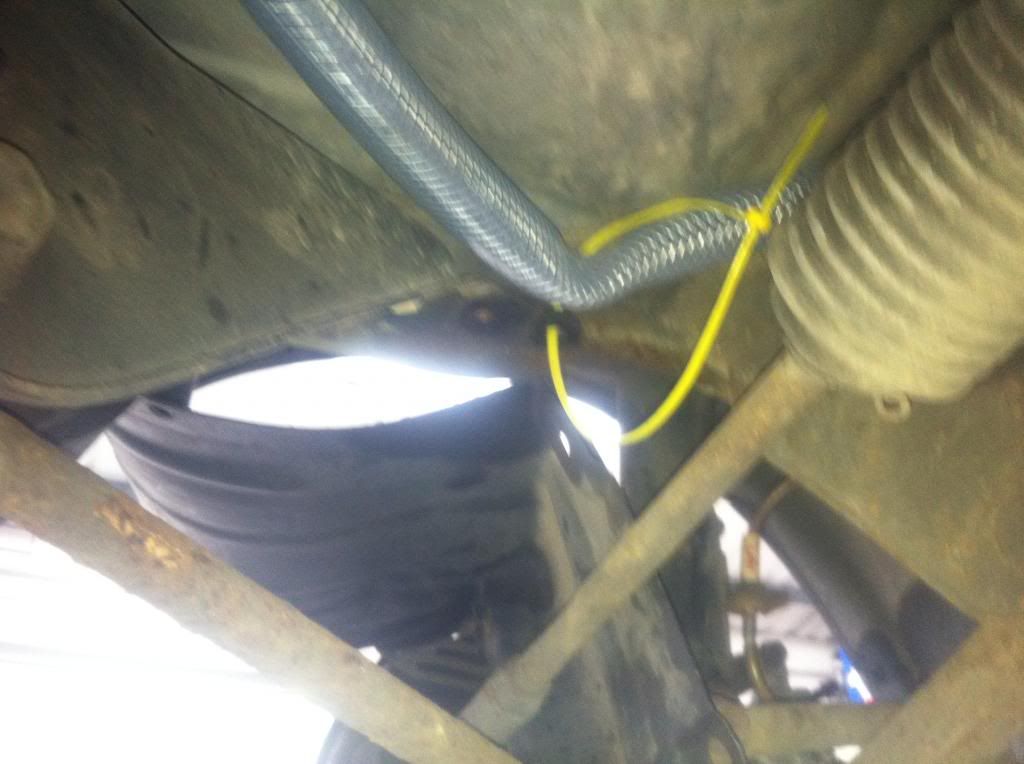
When I had the car up in the air, I noticed to massive kinks in the chargecooler pipe work. When I finished with the pipe work before the initial start up, these kinks were very minor, but during the week, the kinks had become quite severe and reduced the flow big time:
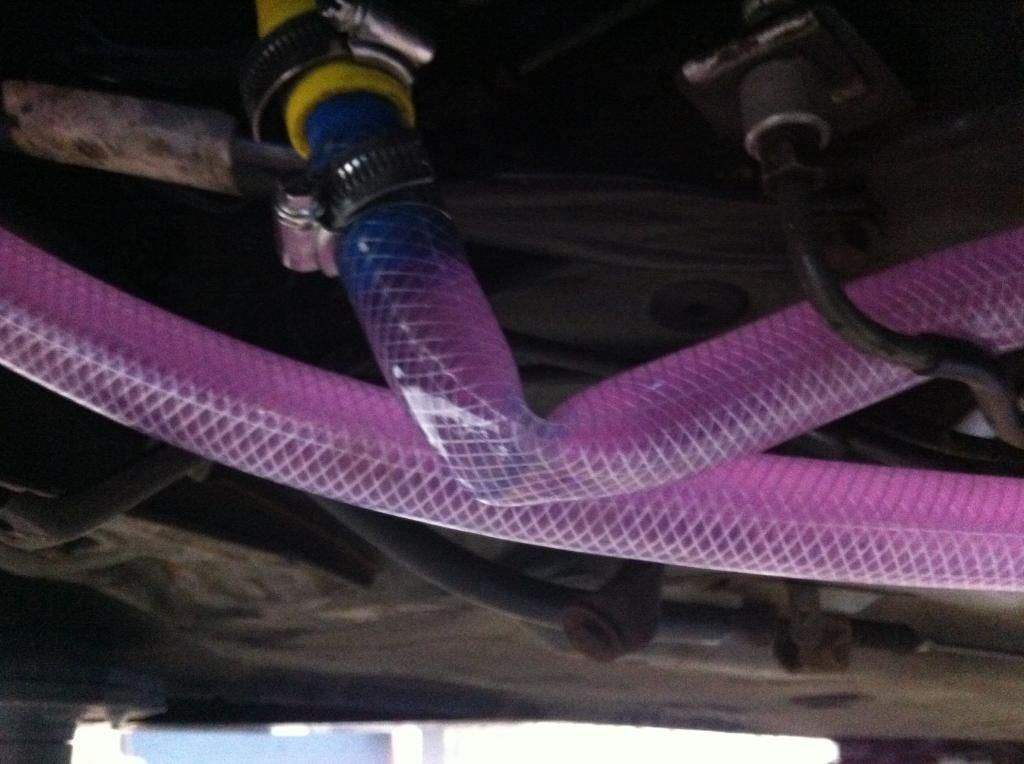
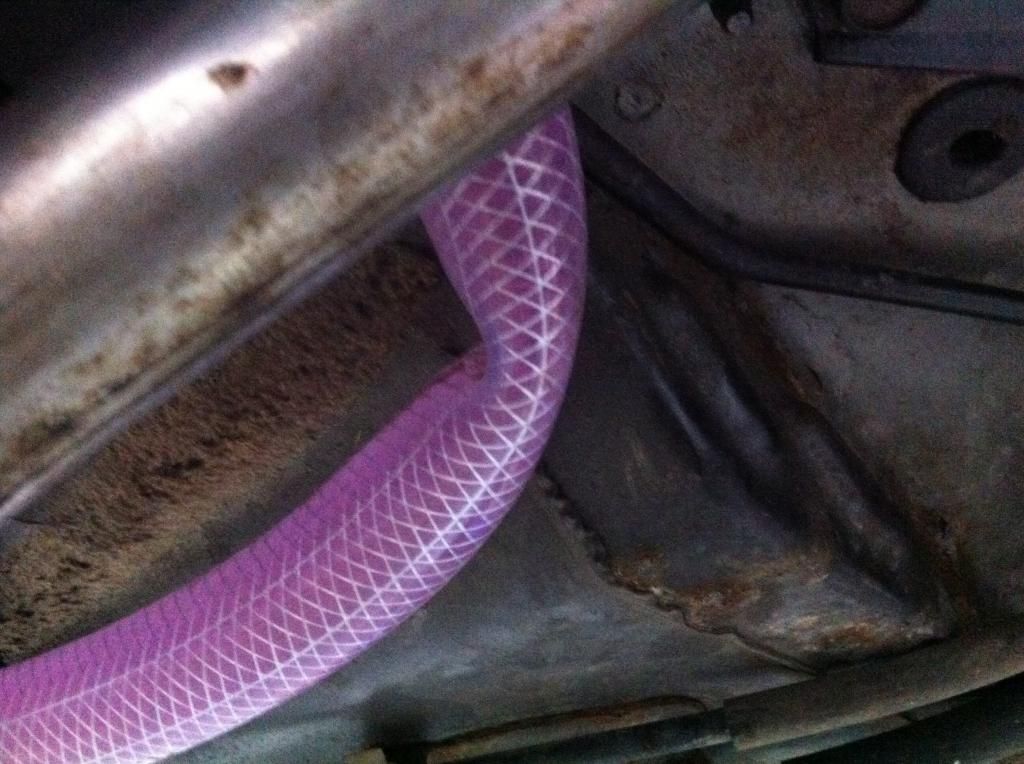
I decided to add two more elbows to sort these out and covered them with the aircon pipe foam lagging. I needed to add the lagging because the jubilee clips were hitting the body and clutch pipes. I made sure I did not cover the joins so I could easily see any leaks. Im not sure how good a job this is really. Seems a bit of a bodge but the cars is running sweet and chargecooler flow is nice.

With the car complete, I put all the undertrays back on and went off to Norfolk. Got absolutely hammered over the weekend with friends and drove back. The car ran like a dream
Got back to London and the next morning noticed a puddle of coolant from the front of the car. Checked for leaks and found the other engine radiator rubber pipe was weeping. Sorted this and now there are no leaks and the car is running lovely!!!!!
With everything running perfect all i need to do is feed the car:
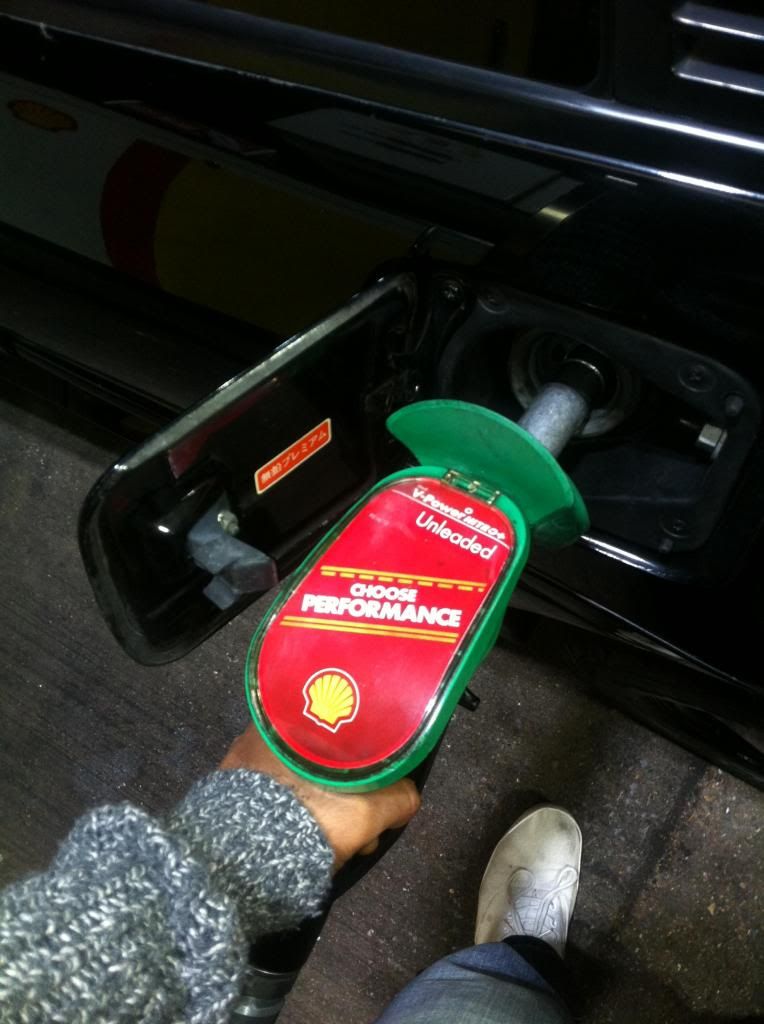
Although during my last filling I noticed Id lost my petrol filler cap!!!
Not sure how this happened. Obviously I was too busy right hand jockey in action over the car to put the cap back on and just drove off.
Must say a massive thank you to thomp1983(Chris) for sending me one in the post for free and not allowing me to refund him for postage. Absolutely love this forum; some really great people on here! Hoping to make the effort to start meeting up with more members on here
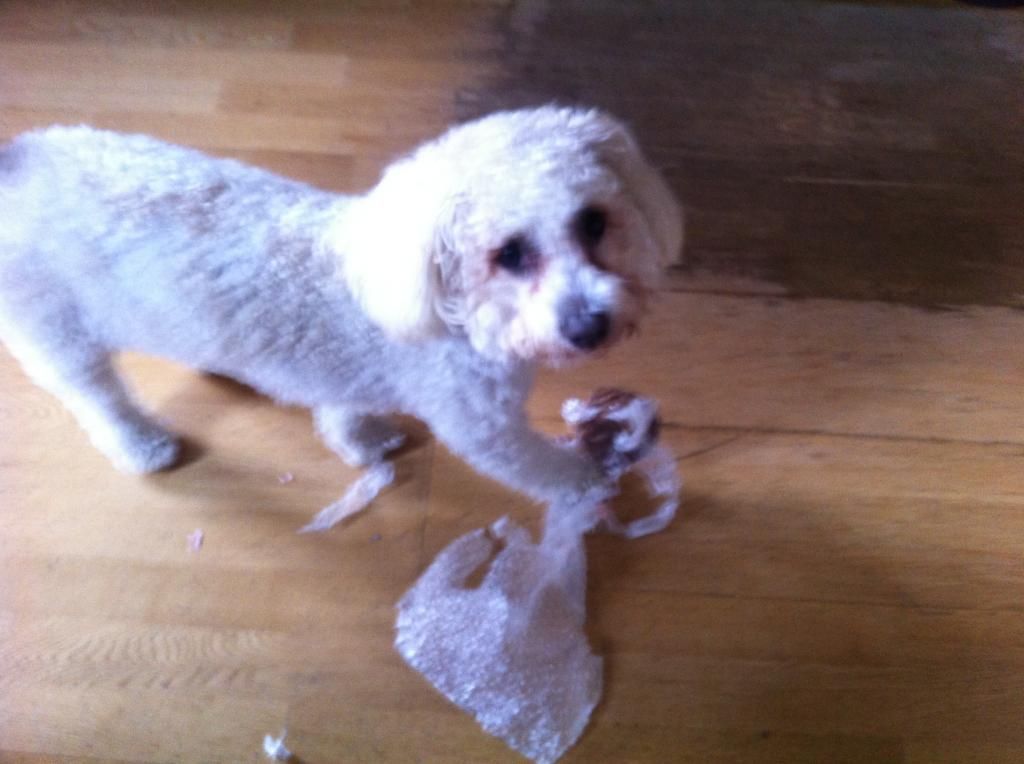
Finally heres a pic of my dog trying to rip the packaging off the filler cap.
Need to take some decent pics of the finished product after I clean her up. Keeping the bay clean is such a mission
Thanks everyone. I promise not to drive like a asshole and keep her on the road!!!
Finished the car on Sunday 4th of May!!
So I had a few bits left to do since my last post
Right I followed this removal guide for the engine.


Fitting the exhaust was nice and easy.


Next up was wiring for the ECU.
So I couldnt find any information on wiring for the NA body loom to match the turbo ECU.
These are:
BATT
SPD
W
FC
Luke told me to open up the NA ECU and see where these 5 wires were located.
The only wire that was not present from the NA was the FC wire running from the fuse block to the ECU.


Since I have never soldered before I thought it would be wise to give it a go before I start on the ECU wiring:

Happy
Next I had a few plugs that I was unsure of.
Now Im close to firing her up for the first time!!! I changed the oil and filter using Fuchs Titan Race Pro S and genuine filter

Since its been a full year that the engine has not turned over Luke recommended I turn the engine over with the plugs removed and removal of engine bay fusebox fuses.
SHE FIRED UP INSTANTLY
Next up was to attach the chargecooler pipework and start the bleeding process


Bleeding the chargecooler, radiator and heater matrix was not so bad.
To my surprise, there were no leaks so I put the front bumper back on
For the first drive I took it easy.
So i went back to the workshop to get the car back up in the air and check underneath for leaks.
So we were now at Sunday and time to take the car back home to London and make sure everything was working correctly.
During the week the car ran fine and I did a good 200 miles without any issues.
When I had the car up in the air, I noticed to massive kinks in the chargecooler pipe work.


I decided to add two more elbows to sort these out and covered them with the aircon pipe foam lagging.


With the car complete, I put all the undertrays back on and went off to Norfolk.
Got back to London and the next morning noticed a puddle of coolant from the front of the car.


With everything running perfect all i need to do is feed the car:

Although during my last filling I noticed Id lost my petrol filler cap!!!
Not sure how this happened.
Must say a massive thank you to thomp1983
Finally heres a pic of my dog trying to rip the packaging off the filler cap.

Need to take some decent pics of the finished product after I clean her up.
Thanks everyone.
-
Magic Beans
- Posts: 4789
- Joined: Thu Nov 24, 2011 1:01 pm
- Contact:
-
madbasshunter
- Posts: 2029
- Joined: Sat May 16, 2009 11:23 pm
- Location: Cullompton
Re: Krish's MR2 - CONVERSION FINISHED - LOVING IT - pg5
Good Job Krish
RyanRs wrote:Skywalker wrote:explain how the coolant leaves the expansion tank and goes back into the coolant system?
Seriously
Re: Krish's MR2 - CONVERSION FINISHED - LOVING IT - pg5
Nice story Krish, I remember seeing your old car at Uni.
Here's a pic from our old cars together:
(I also have a new one now )

Greetings from Holland
Here's a pic from our old cars together:
Greetings from Holland