Project MRX350

Discussion and technical advice for 84-89 AW10 & AW11 MR2. 3A-LU, 4A-GE, 4A-GZE.

Moderators: IMOC Moderators, IMOC Committee Members

Post Reply
PW@Woodsport
Posts: 7642
Joined: Tue Dec 14, 2004 6:40 pm
Location: durham
Contact:

Re: Project MRX350

Post by PW@Woodsport »

You know, sometimes it takes someone else to highlight an issue before you can see it yourself, i'm not without error, especially when doing something as outrageous as this.

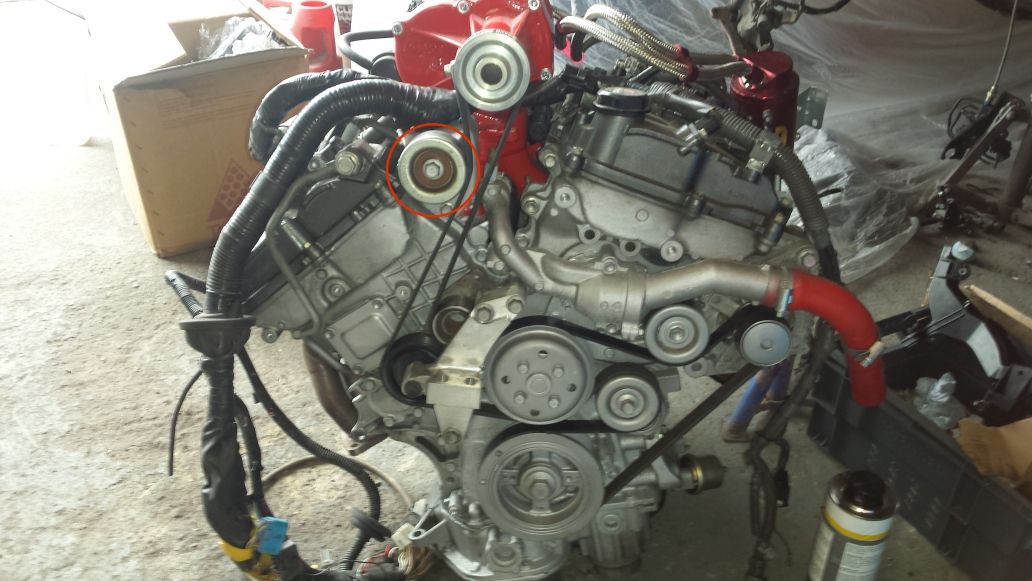
Anyway the top Subaru idler i used, Gouky brought it to my attention that i had used a cambelt idler and not a serpentine belt one, i'm like so what? It was then he opened my eyes to the bearings maximum operating speed, something i had not even considered!

Cam belts move at around 0.65ft/revolution due to the small crank cog, but serpentine crank pulleys are 2 or 3 times as big, meaning you can nearly triple the belt speed, so my Subaru idler is used to seeing maximum speeds of around 16,000 rpm (on a cambelt), now due to its tiny size and it now being on a serpentine belt running off a large crank pulley it could expect to see 40,000 rpm!

That is just not acceptable, and i suspect it would turn into a skateboard wheel very quickly at those speeds, so huge thanks to Gouky for bringing that to my attention.

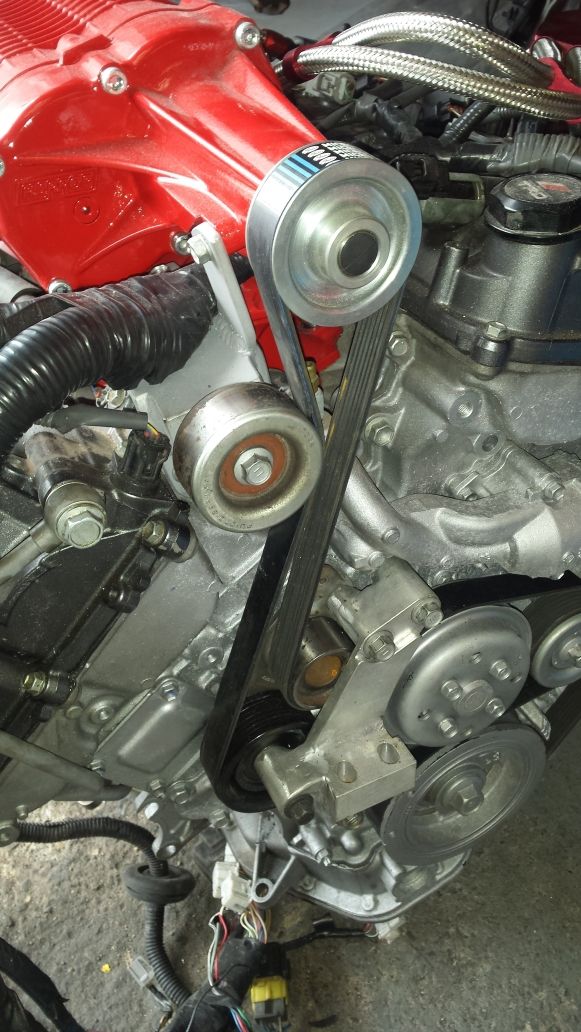
Today i redesigned the top idler and used the same one Lotus use in the Evora, it is meant to be seeing 40k rpm speeds.

New top idler...

Image

Image

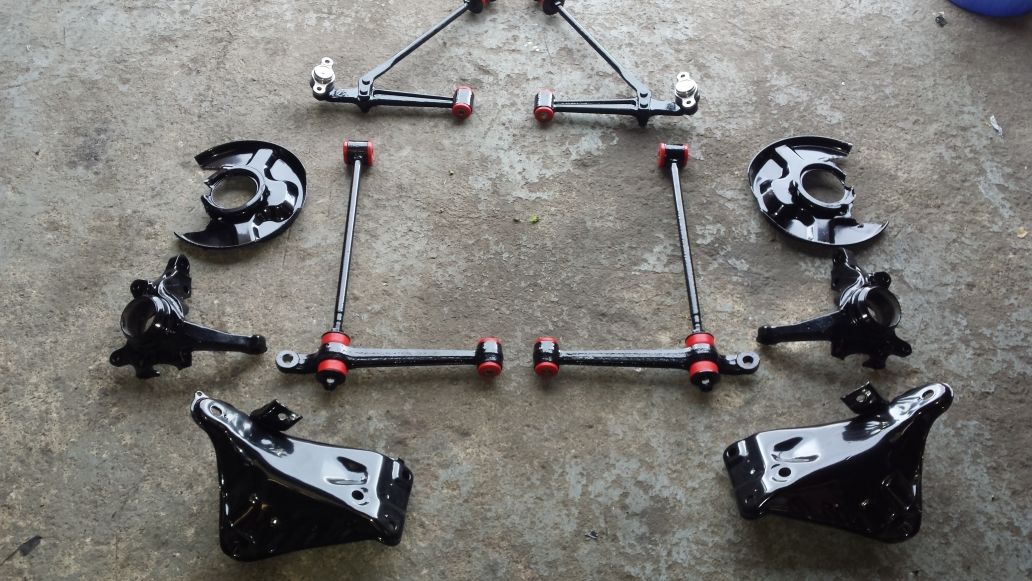
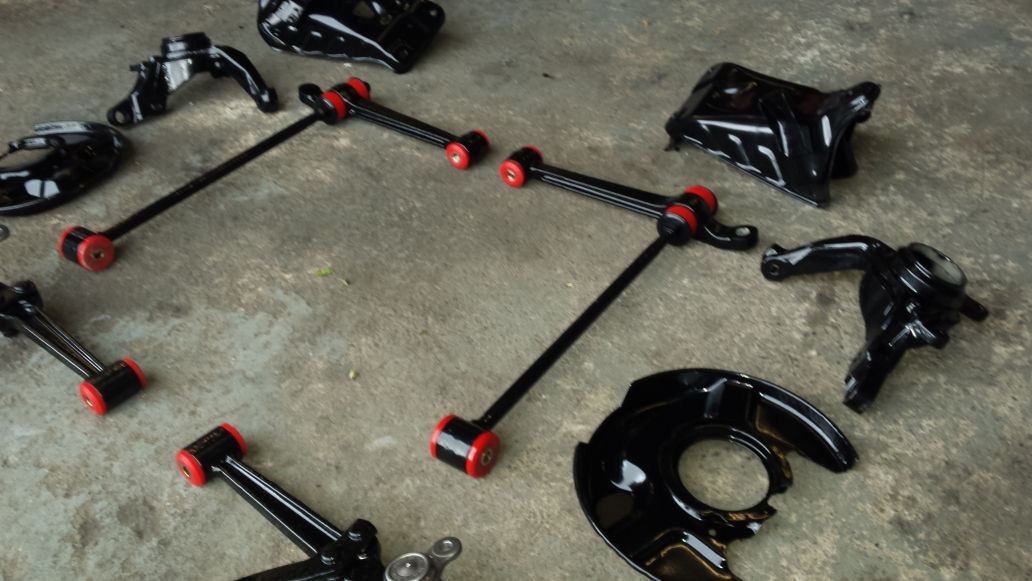
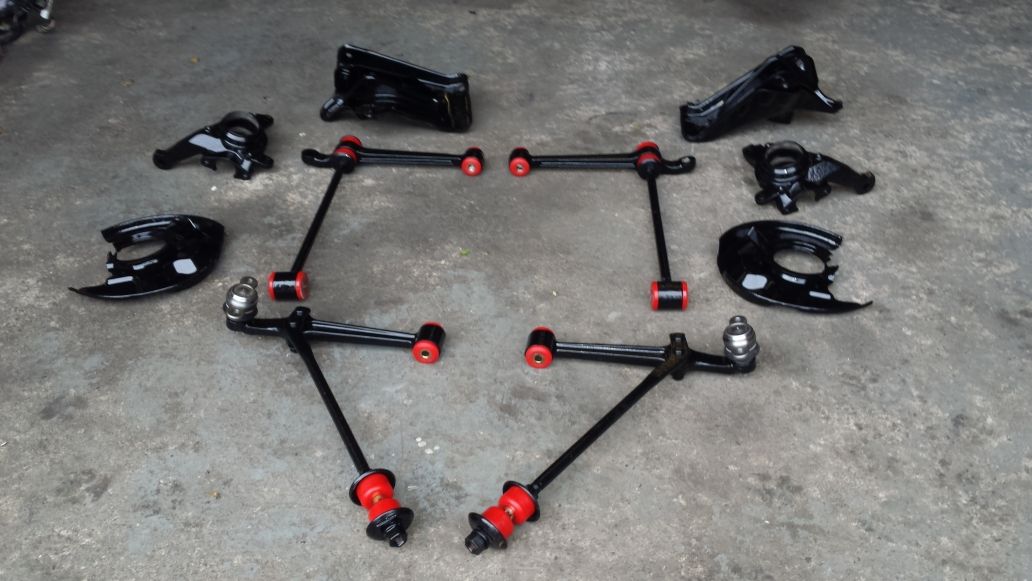
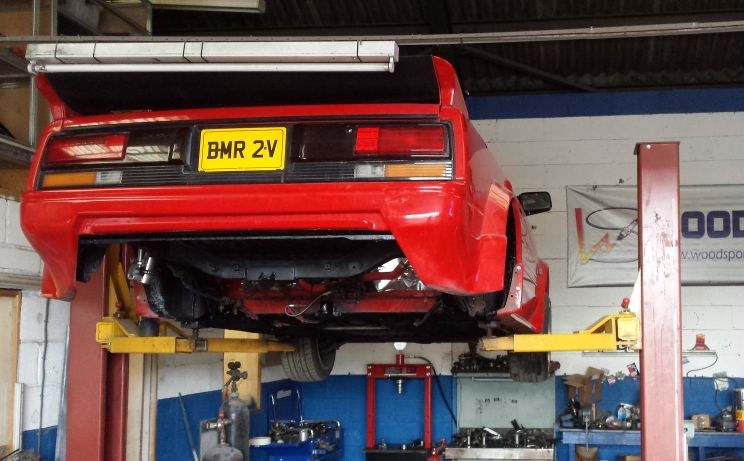
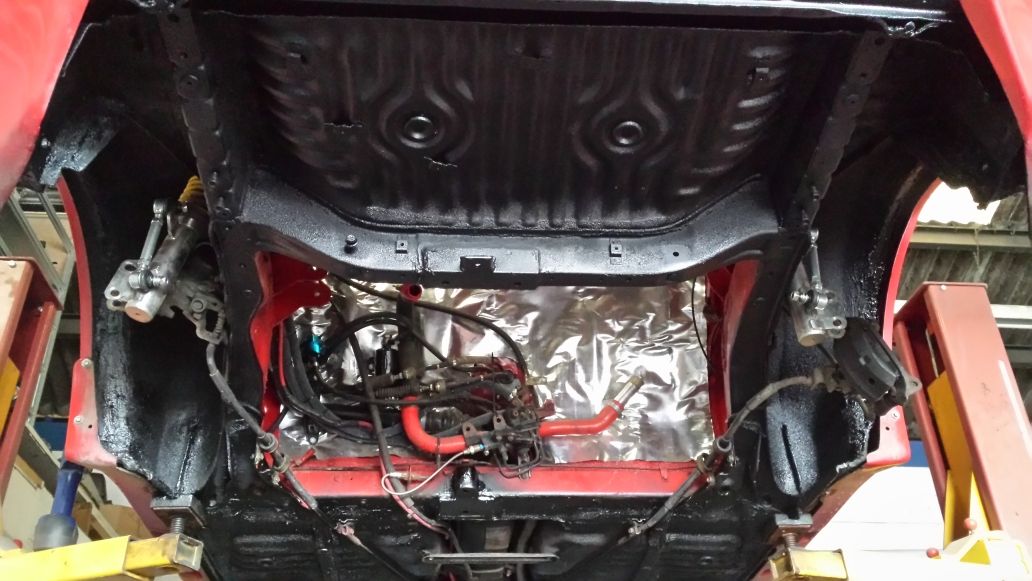
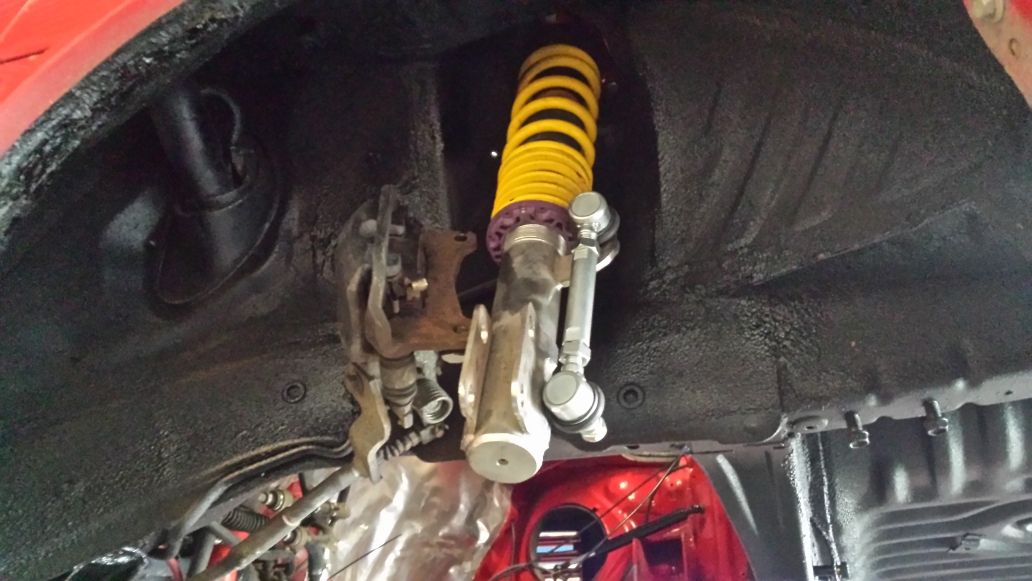
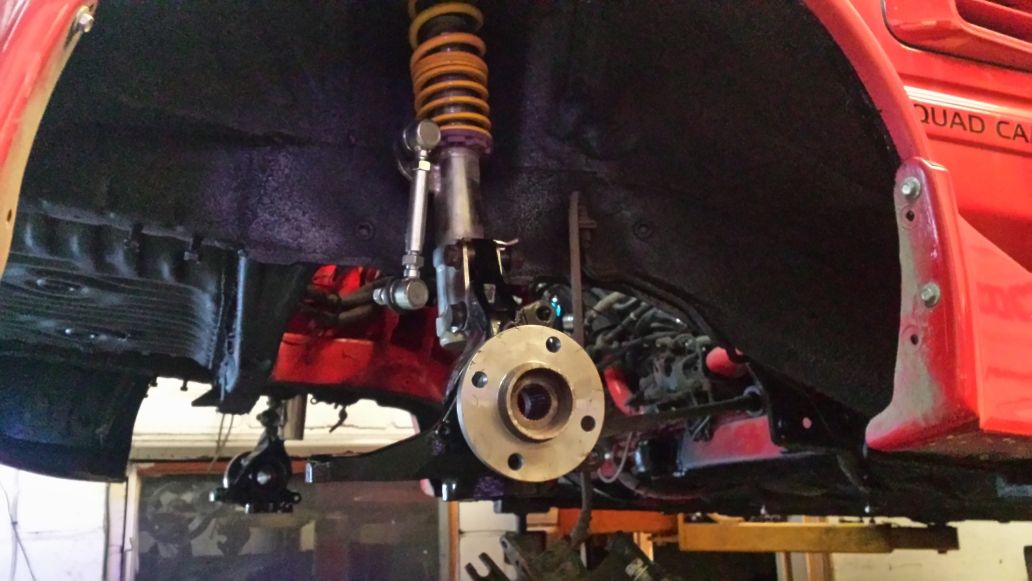
Also the car is getting a full running gear restoration at the same time, all of my suspension arms, hubs, subframes and brake dust shields have been shot blasted and powder coated, i have fitted a new polybush kit and all new balljoints and wheel bearings etc, this year i want it to look as good underneath as it does elsewhere.

Image

Image

Image

Image
Image
stenky
Posts: 356
Joined: Wed Mar 23, 2011 9:04 pm
Location: Slovakia

Re: Project MRX350

Post by stenky »

that suspension is something i would like to do with mine. i think i'll cover mine in POR15. very clean job :)
Image
PW@Woodsport
Posts: 7642
Joined: Tue Dec 14, 2004 6:40 pm
Location: durham
Contact:

Re: Project MRX350

Post by PW@Woodsport »

Thanks, i also bought a chrome plating kit last year, so i'm tempted to plate all of the suspension bolts too.... problem is it's a disease once you start down that road and you end up over-restoring the whole car down to the last P clip :D
Image
stenky
Posts: 356
Joined: Wed Mar 23, 2011 9:04 pm
Location: Slovakia

Re: Project MRX350

Post by stenky »

i first need to get a decent compressor to sandblast my own stuff. i am sick of wire-brush in a drill already. then an aluminium anodizing kit it is :)
Image
PW@Woodsport
Posts: 7642
Joined: Tue Dec 14, 2004 6:40 pm
Location: durham
Contact:

Re: Project MRX350

Post by PW@Woodsport »

I've also had excellent results with electrolytic rust removal, very easy to set up and labour free.
Image
stenky
Posts: 356
Joined: Wed Mar 23, 2011 9:04 pm
Location: Slovakia

Re: Project MRX350

Post by stenky »

i have tried rust electrolysis in soda solution but wasn't very pleased. rust flakes went off but metal was still rusty (but acceptable for rust converting paints). maybe i didn't leave it there long enough.
Image
PW@Woodsport
Posts: 7642
Joined: Tue Dec 14, 2004 6:40 pm
Location: durham
Contact:

Re: Project MRX350

Post by PW@Woodsport »

You have to leave it in there a long time, and it eventually converts all of the rust black, mind you as soon as you remove it from the solution it rusts extremely quickly, so must be thoroughly dried and primed/painted immediately.
Image
PW@Woodsport
Posts: 7642
Joined: Tue Dec 14, 2004 6:40 pm
Location: durham
Contact:

Re: Project MRX350

Post by PW@Woodsport »

Spring upgrades continue... the car went on one of my lifts for a fresh undersealing and rustproofing, she will remain here for the next few weeks to have the new engine/gearbox combo installed along with all of the suspension and brake upgrade work...

Image

Image

KW variant 2 coilovers fitted with Technotoy camber adjustable top mounts along with the beefiest droplinks known to mankind.... those calipers are coming off to get overhauled/painted too.

Image

A lot more parts to take off the underside this week to have shotblasted and powder coated.
Image
PW@Woodsport
Posts: 7642
Joined: Tue Dec 14, 2004 6:40 pm
Location: durham
Contact:

Re: Project MRX350

Post by PW@Woodsport »

I've also had some custom rear stub axles (hubs) made for this car, which will allow the Mr2 turbo driveshafts to be used complete while retaining the Mk1 hub carrier, they have also been converted from 5 stud (114.3 PCD) to 4 stud (4x100).

Part of that mod means i cannot run stock Mk1b rear discs, so a good excuse to upgrade them at the same time as getting something that fits.

The front brakes are going to be Aston Martin V8 Vantage Brembos on Rangerover discs which have already been modified to fit, so to compliment this the rears are Rav4 front 302mm vented discs which will fit the 62mm hub centre on my new hubs (old Mk1 hub was 54.1mm bore)

Image

I will be fitting rev3 Mk2 calipers with these along with a Mk2 Rev2> master cylinder.

Go big or go home as they say.
Image
coanda
Posts: 512
Joined: Wed Apr 15, 2009 8:22 pm

Re: Project MRX350

Post by coanda »

Looking good Paul!

Where did you get those humungous drop links from?!
PW@Woodsport
Posts: 7642
Joined: Tue Dec 14, 2004 6:40 pm
Location: durham
Contact:

Re: Project MRX350

Post by PW@Woodsport »

An Ebay seller is doing some universal ones at a reasonable price so i thought i would give them a go, the end joints look very substantial so we shall see how they fair long term.

http://www.ebay.co.uk/itm/151210750880? ... 1439.l2649
Image
coanda
Posts: 512
Joined: Wed Apr 15, 2009 8:22 pm

Re: Project MRX350

Post by coanda »

They do seem to be very reasonable, considering some I've seen. Will pick a couple of pairs up too. Thanks!

I'm going for some laser cut spacers to fill out the extra gaps between the hub carrier and the suspension brackets. Will need them for both front and back but they'll fit well with them on. Any pics of your custom hub bits?
PW@Woodsport
Posts: 7642
Joined: Tue Dec 14, 2004 6:40 pm
Location: durham
Contact:

Re: Project MRX350

Post by PW@Woodsport »

Not yet, i have had to drill out the lower bolt hole of the front hub carrier where it bolts to the shock to 15mm so i can use Mk2 hub carrier bolts, i'll also need to replace the eccentric top adjuster with a simple 15mm ID bush, my camber adjusting duties are now taken care of by the top mount.
Image
coanda
Posts: 512
Joined: Wed Apr 15, 2009 8:22 pm

Re: Project MRX350

Post by coanda »

I do have my mk.2 front struts on, and remember them going on ok, so will need to check those bolts again in case I missed something. S'ok tho as I've only wheeled it in to and out of the garage.

Haven't got around to drilling out the upper holes for the mk.2 rear mounts yet. Will assemble hub carrier and strut on the bench to see whats what.

I'm going with HSD Monopro to begin with. Fairly certain I'll need some different springs, but we'll so how we go when she's up and running again.

Will you get the bush made or is that commonly available?

Edited for Paul's message tense and additional info....
Last edited by coanda on Sat Apr 12, 2014 12:00 pm, edited 2 times in total.
PW@Woodsport
Posts: 7642
Joined: Tue Dec 14, 2004 6:40 pm
Location: durham
Contact:

Re: Project MRX350

Post by PW@Woodsport »

If you used the orignal Mk1 hub bolts they will have passed through the much larger Mk2 strut hole, i suppose if you nip that tight it will be ok, but i preferred to drill the hub hole out to 15mm and use the Mk2 bolt to keep it all as intended.

The top bush i'll just make myself, although simple washers would do.
Image
coanda
Posts: 512
Joined: Wed Apr 15, 2009 8:22 pm

Re: Project MRX350

Post by coanda »

Ahh, that'll be it. I agree with you, bolts and holes should match. If it had been the hub carrier hole that was too big, I would have gone with a bush, but because it's the strut holes, as you say, I'll need to drill out the hub carrier.

As far as the strut bracket width and hub carrier width differences go, I initially went with repair washers to fill the gaps and that did work. On the front I had one repair washer either side of the hub carrier, and on the back I needed one repair washer to fill the gap. Thought this looked like something an MOT man would frown upon so decided to get some proper spacers made.
PW@Woodsport
Posts: 7642
Joined: Tue Dec 14, 2004 6:40 pm
Location: durham
Contact:

Re: Project MRX350

Post by PW@Woodsport »

Yes a proper spacer is the way to go, but it's just aesthetics really, the washers do the same job from a mechanical point of view.
Image
craig
Posts: 43936
Joined: Sat Dec 18, 2004 3:44 am

Re: Project MRX350

Post by craig »

Just caught up with this thread, wow! Really nice work with the engine! :clap:

SC does look good in red. :thumleft:
PW@Woodsport
Posts: 7642
Joined: Tue Dec 14, 2004 6:40 pm
Location: durham
Contact:

Re: Project MRX350

Post by PW@Woodsport »

Cheers Craig :thumleft:
Image
PW@Woodsport
Posts: 7642
Joined: Tue Dec 14, 2004 6:40 pm
Location: durham
Contact:

Re: Project MRX350

Post by PW@Woodsport »

Custom rear hubs now fitted, these are extremely rare in the Mk1 world, in fact i've only ever done this twice before on customers cars in the last 15 years, these are Mk2 turbo hubs that have been machined to share the same dimensions as Mk1 hubs, so it fits the Mk1 wheel bearing and has the Mk1 4x100 PCD.

This allows complete Mk2 turbo driveshafts to be fitted with the much stronger outer CV spline.

Image
Image
Post Reply

Return to “MR2 MK1 1984-1989 NA & SC”