Jacks' TRD rev5
Moderators: IMOC Moderators, IMOC Committee Members
Re: Jacks' TRD rev5
wheels look better now J-Boy. What are the recaro's out of?
Re: Jacks' TRD rev5
thanks tom, they're alot better than they were but not really the colour i was after to be honest... ah well! im not sure actually, bought them off a bloke on here 
-
badlad69er
- Posts: 10
- Joined: Mon Jan 25, 2010 11:59 am
Re: Jacks' TRD rev5
amazing build pal cracking job you have done there!!!
-
Mike 'MR2' McHugh
- Posts: 3426
- Joined: Wed Dec 15, 2004 1:53 am
- Location: Warwickshire
Re: Jacks' TRD rev5
Thats a cracking job mate, you doing the shows this summer ?
Re: Jacks' TRD rev5
read this build through for the first time a few days ago, and wow ! 
Congrats on a really nice looking TRD
Congrats on a really nice looking TRD
Re: Jacks' TRD rev5
I feel a bit of an appology is in order as I haven't bothered updating here for ages! Sorry to anyboy who was interested and didn't follow it on other sites (talking to myself at this point  )
)
So with a little persuation from Karl heres an update 
Firstly I decided the red bucket seats were a little too loud for my liking so replaced them the standard seats.
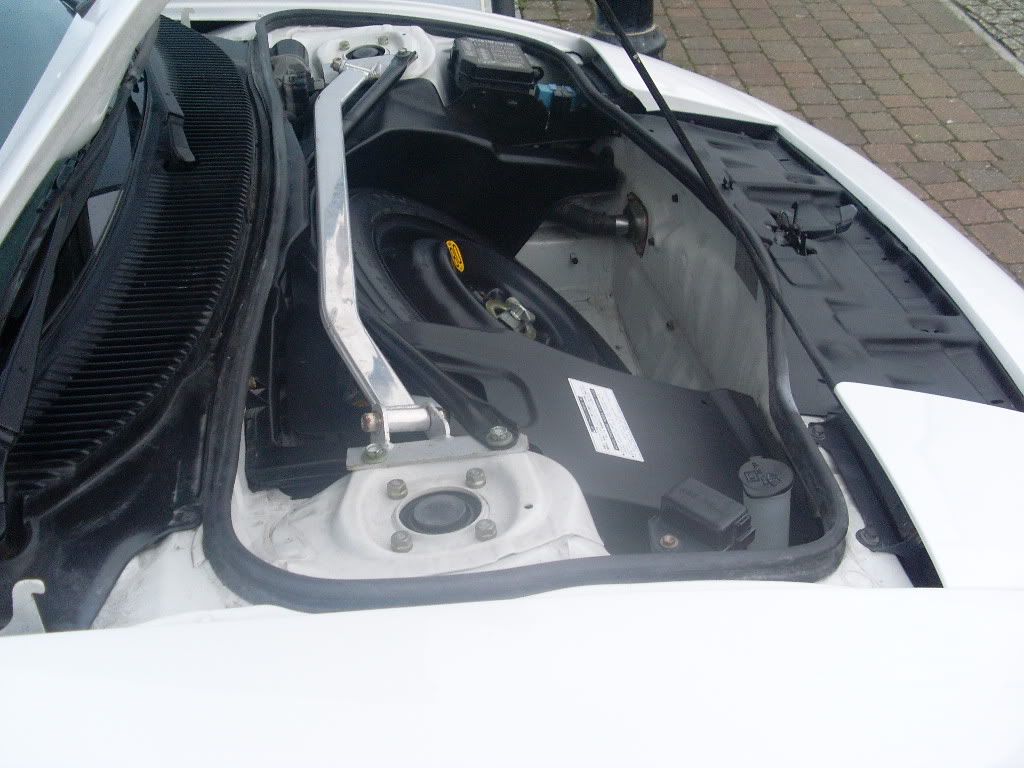
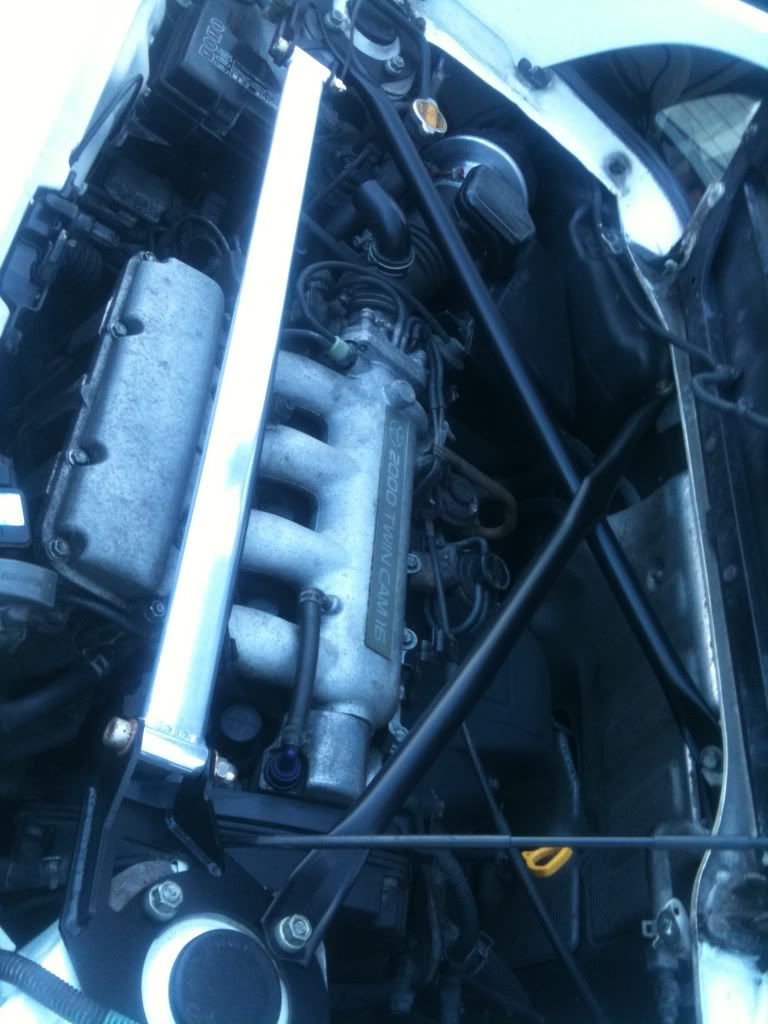
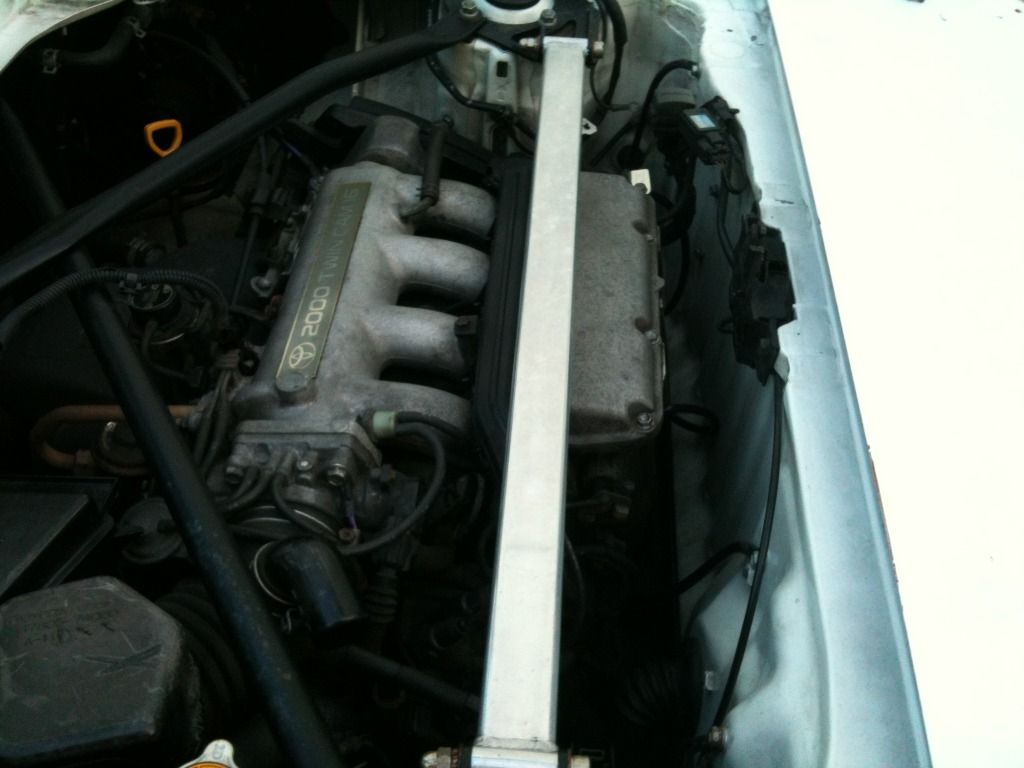
I also fitted front and rear strut braces
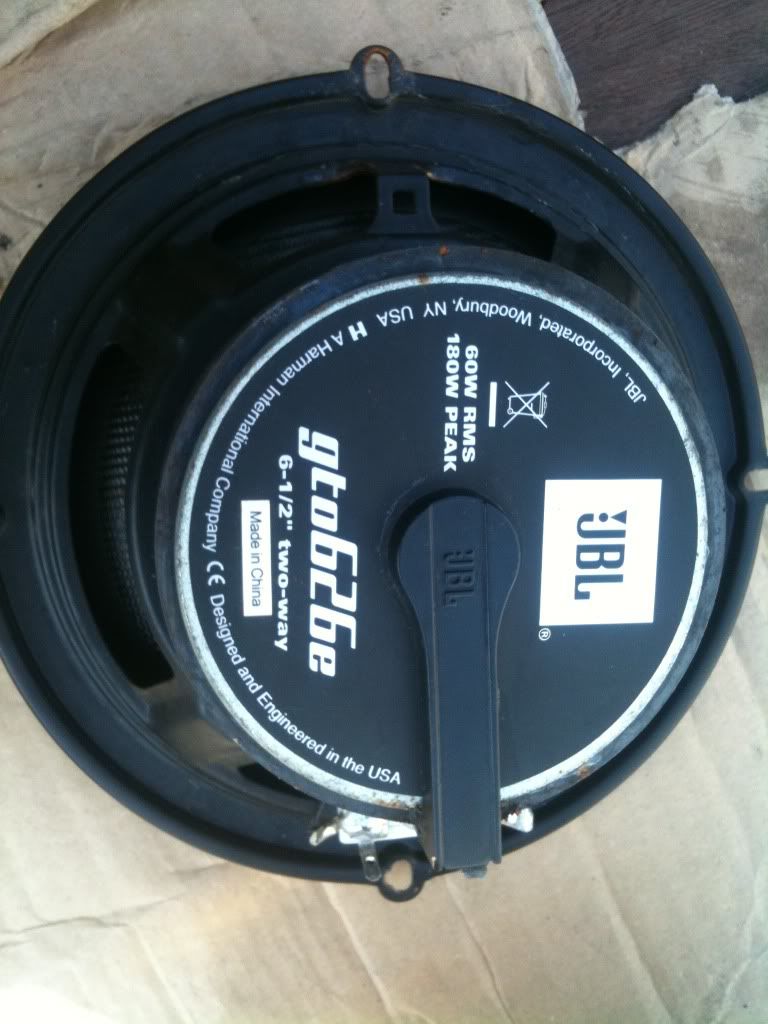
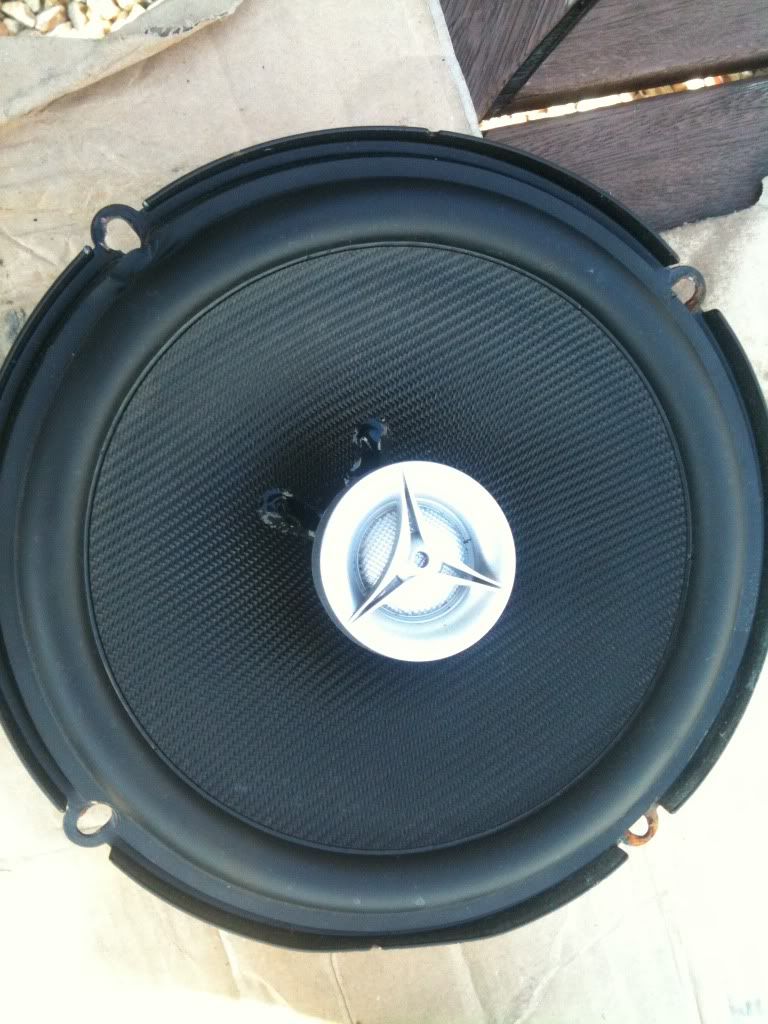
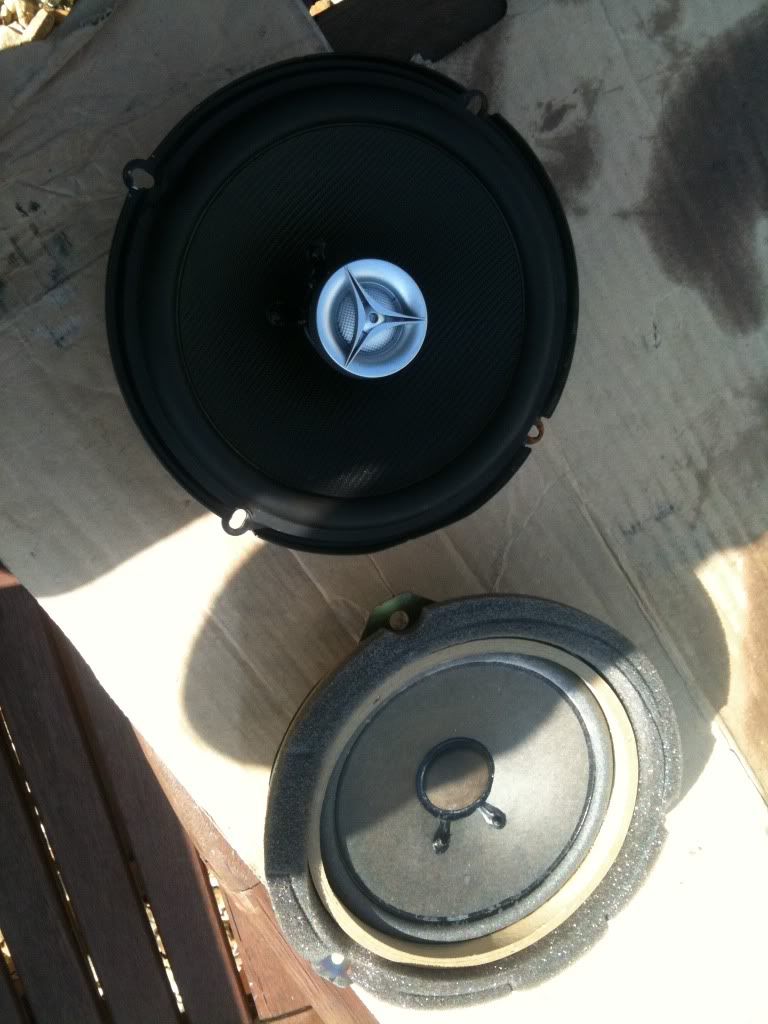
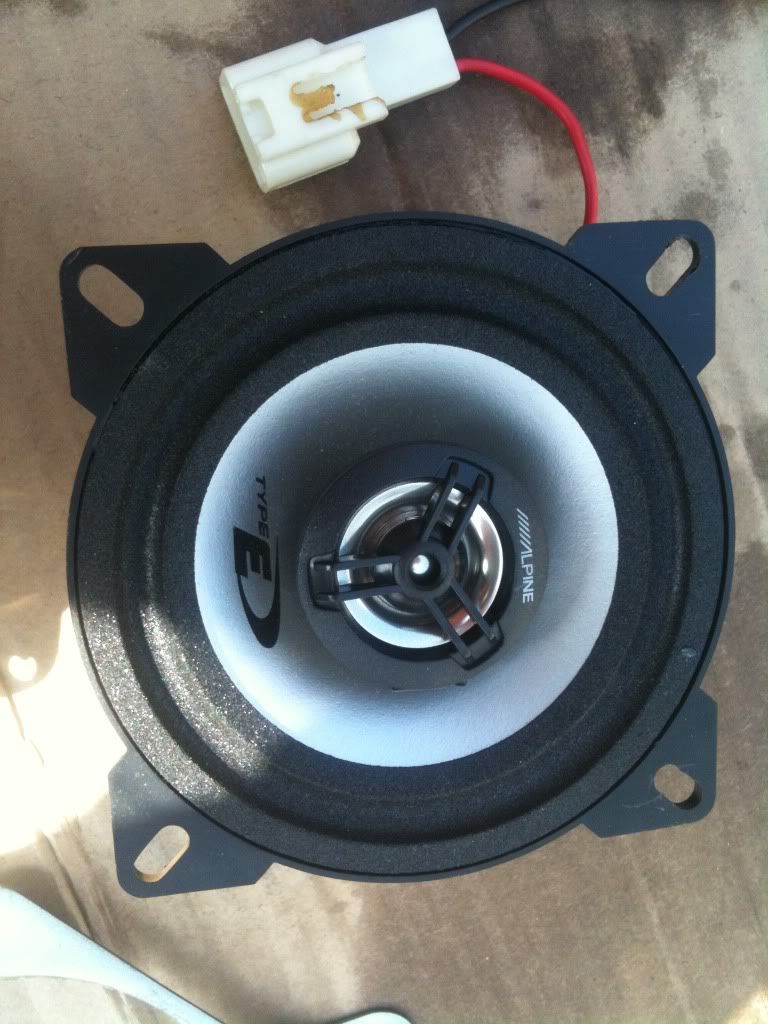
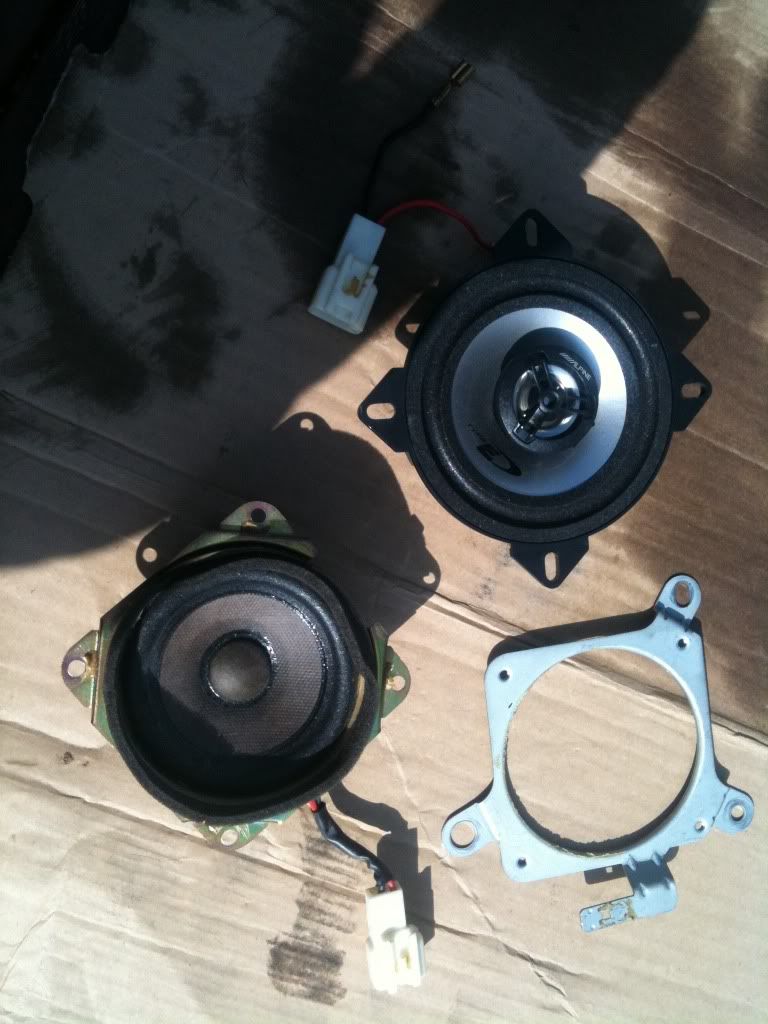
Upgraded the audio a little, I'm not really into ICE as such but I had these lyeing around in the garage from my previous mr2 so thought it a worthwhile upgrade from standard.
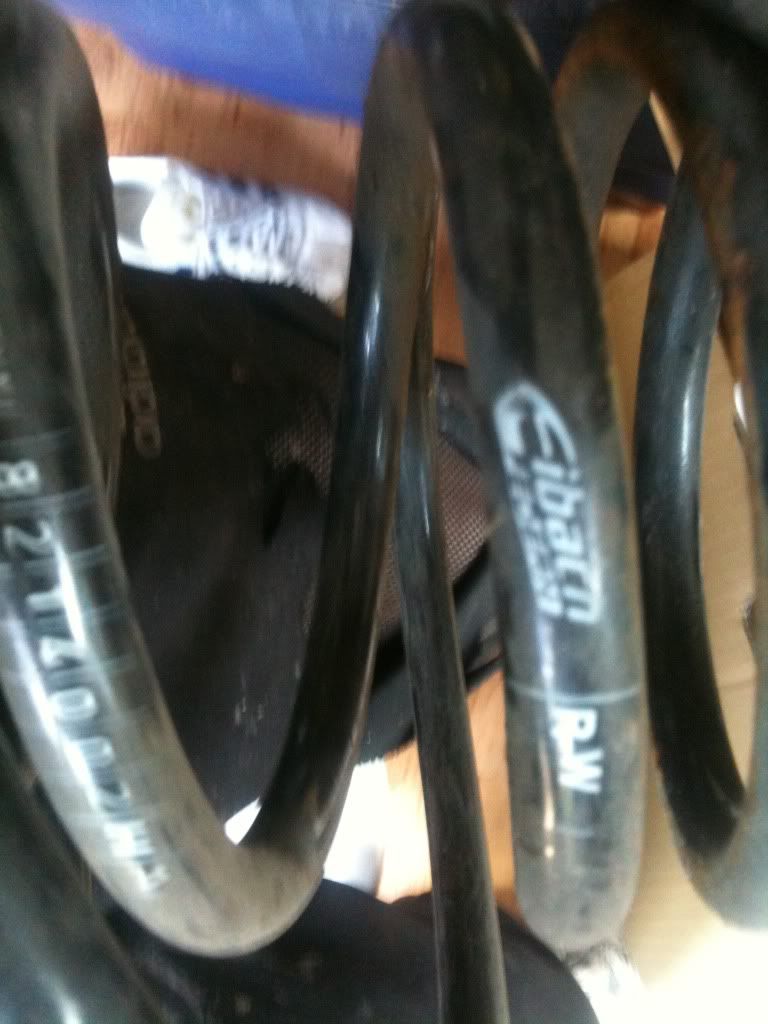
TRD kits are supposed to be fitted with TRD springs. These are very hard to get hold of (especially for a ecent price) so I opted for the next best thing, eibach lowering springs. They drop the car by the same amount and are one of the more comfortable lowering springs.
I took the car to japfest for the first time an while there met the owner of the genuine trd no. 21... put me to shame a little but was really good to see a genuine car

So with a little persuation from Karl heres an update
Firstly I decided the red bucket seats were a little too loud for my liking so replaced them the standard seats.
I also fitted front and rear strut braces
Upgraded the audio a little, I'm not really into ICE as such but I had these lyeing around in the garage from my previous mr2 so thought it a worthwhile upgrade from standard.
TRD kits are supposed to be fitted with TRD springs.
I took the car to japfest for the first time an while there met the owner of the genuine trd no.
Re: Jacks' TRD rev5
The car stayed like that for a little while and I just enjoyed using it.
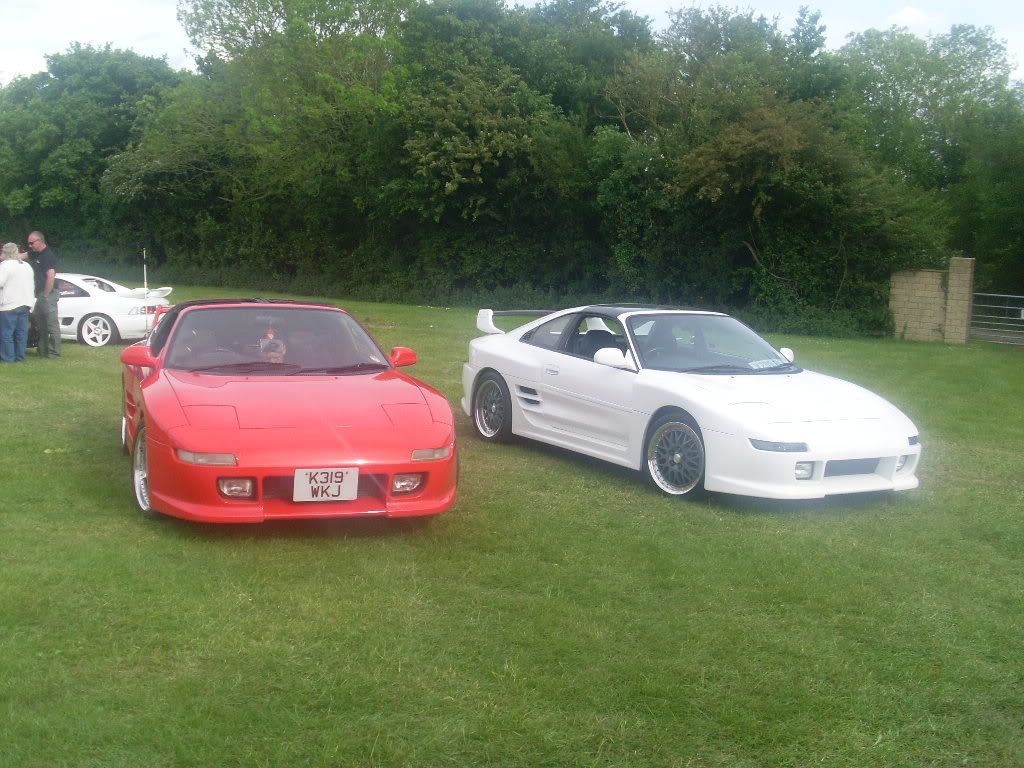
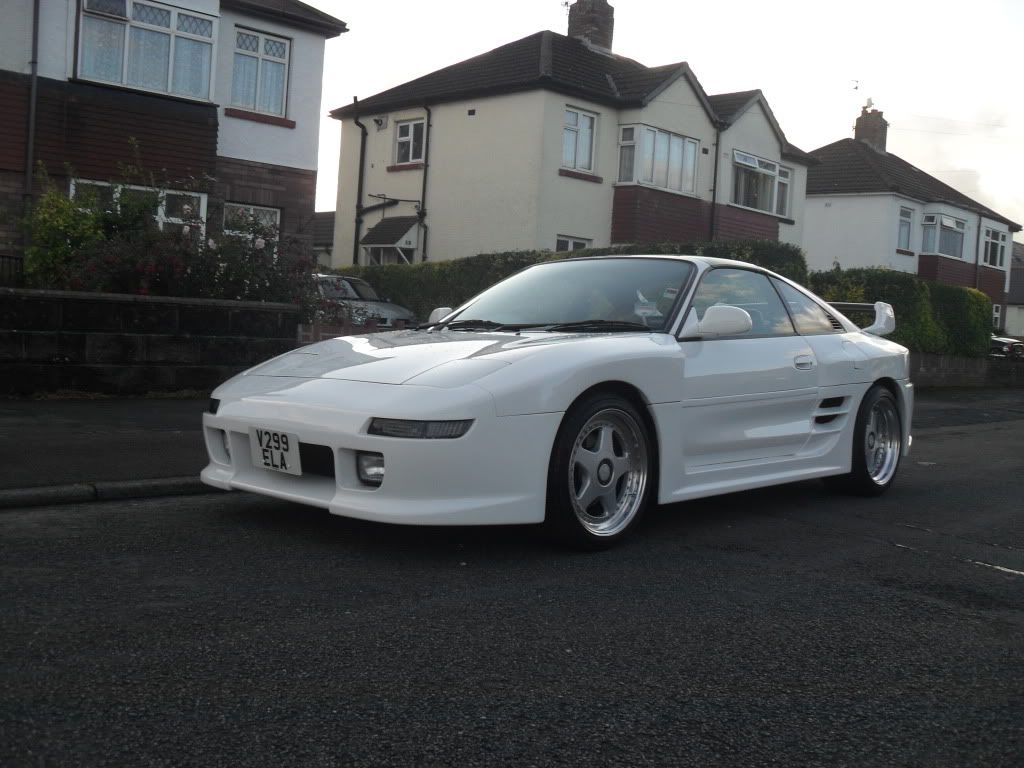
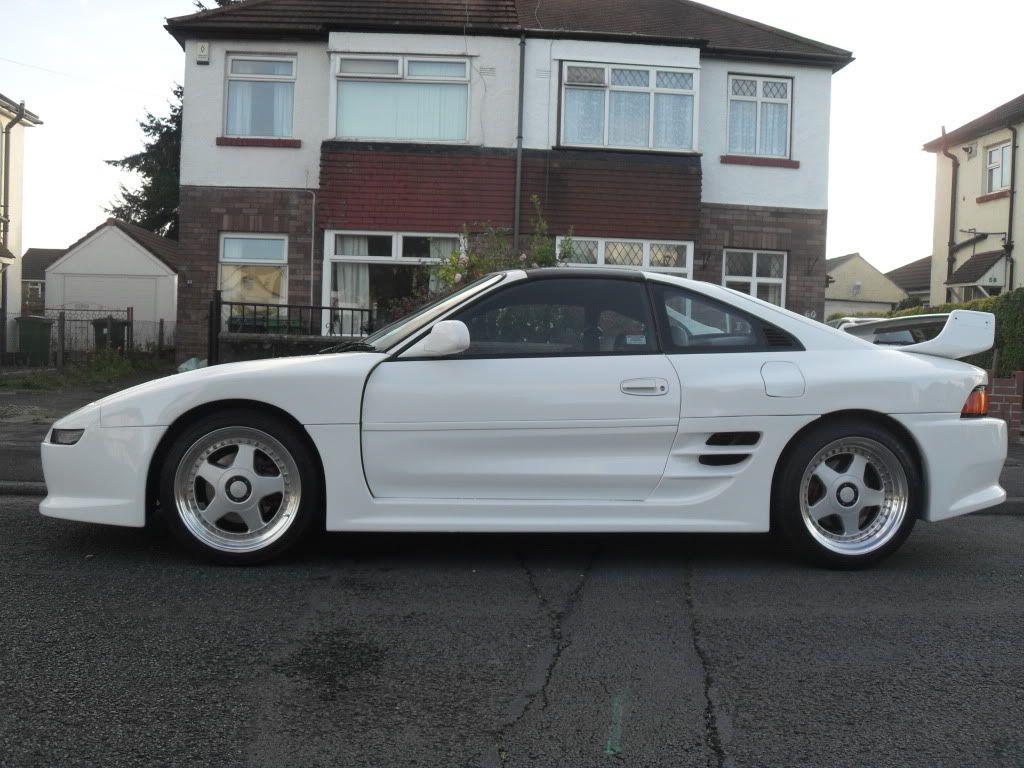
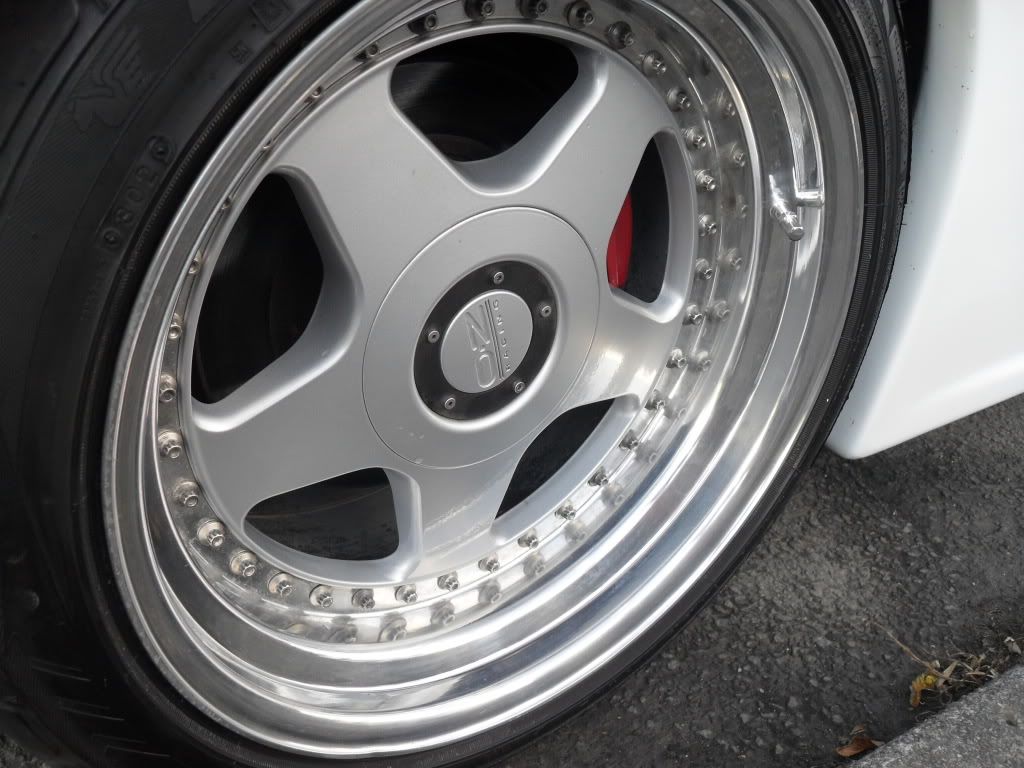
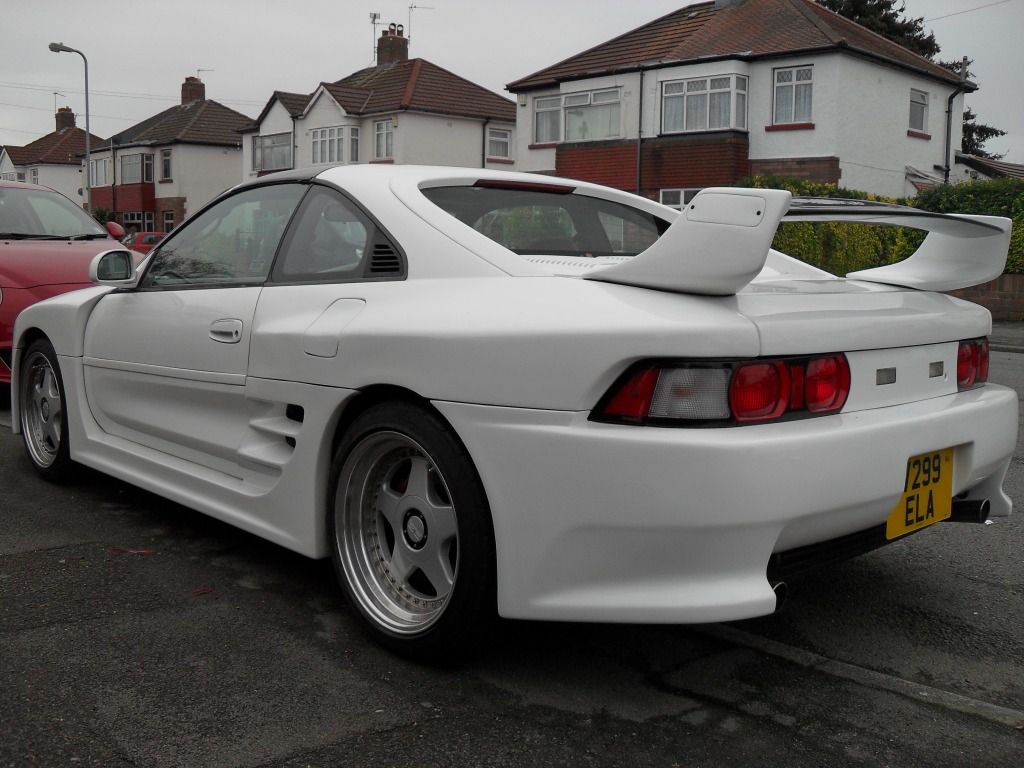
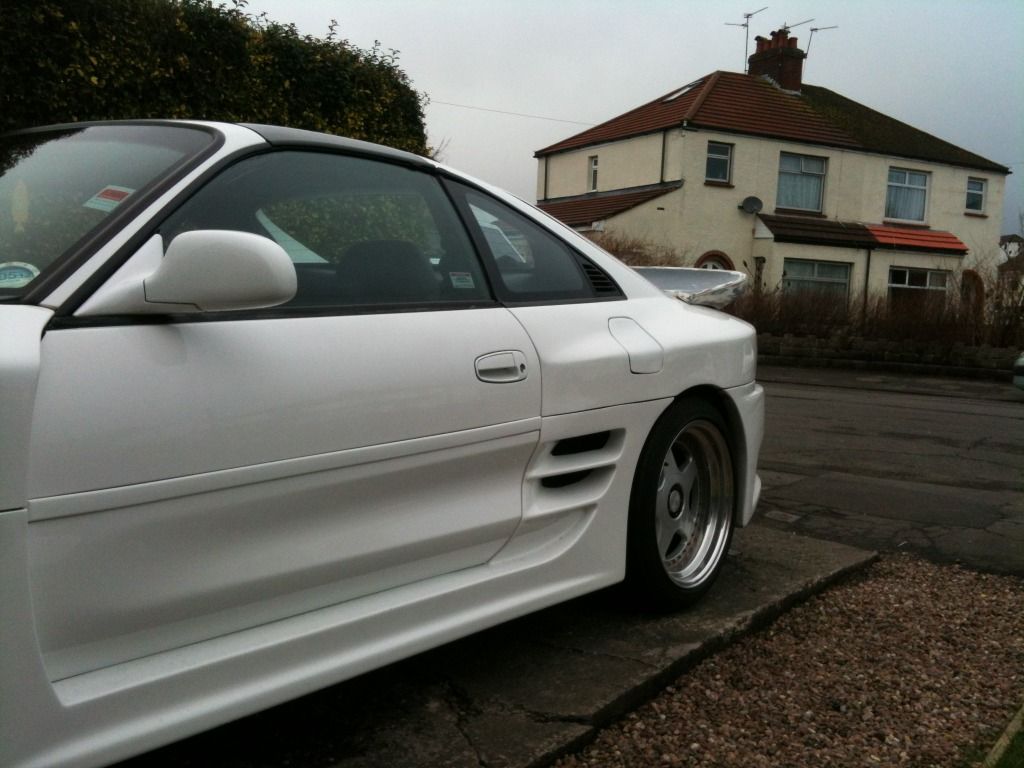
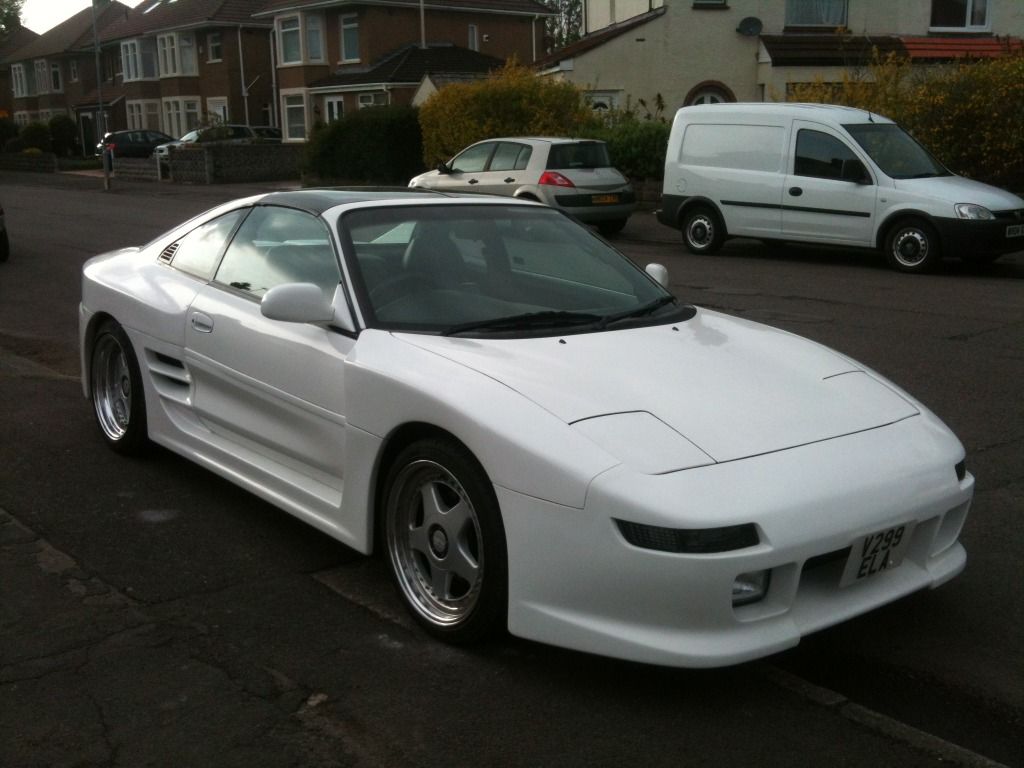
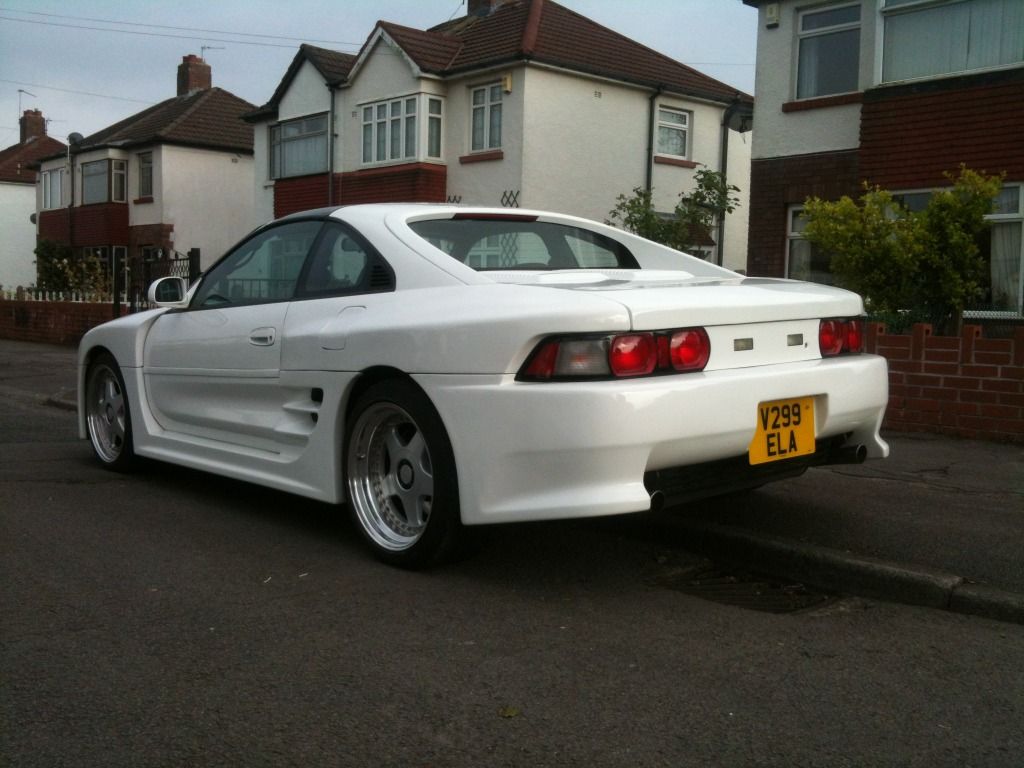
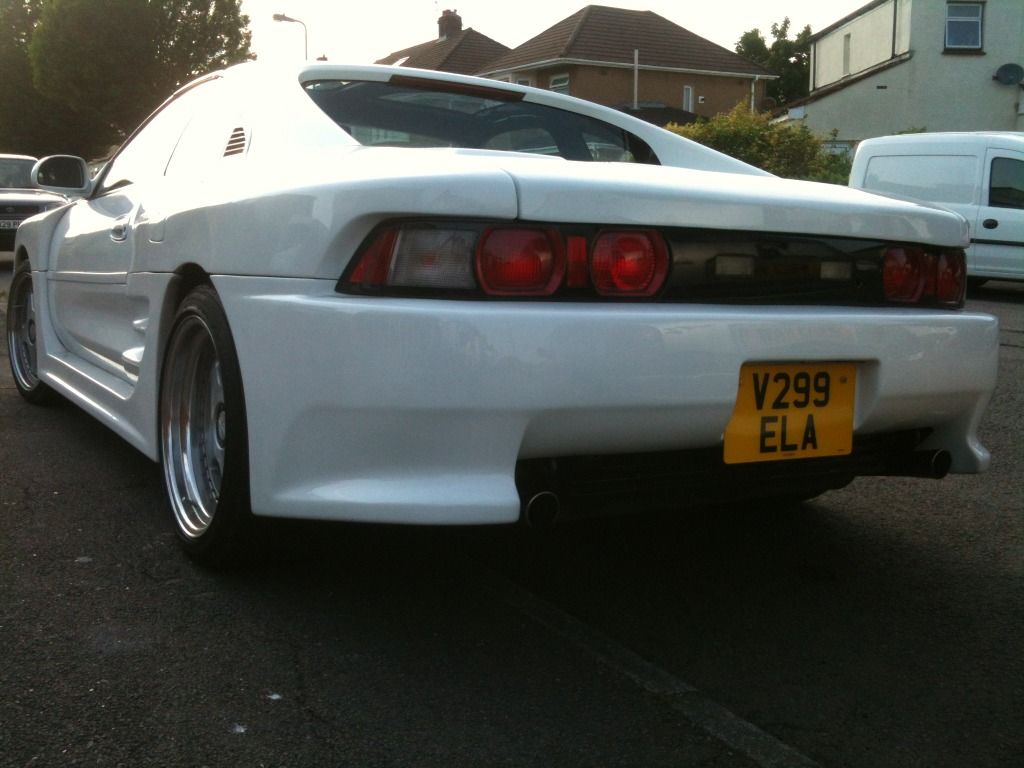
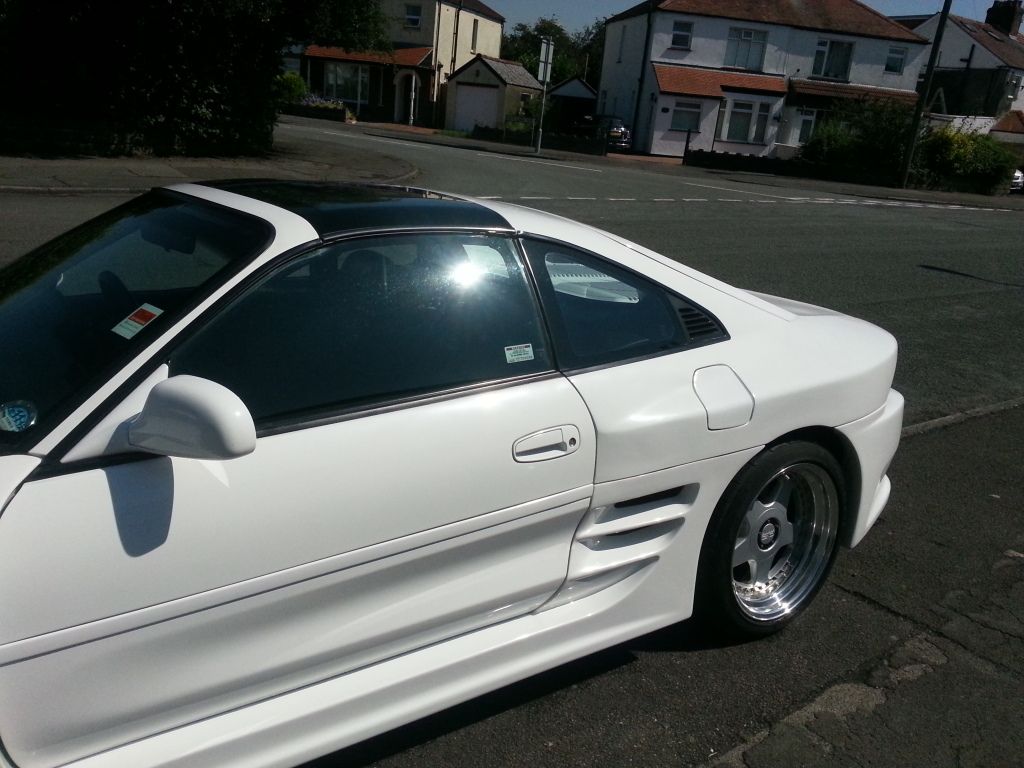
Then I decided to change the wheels. I wanted rid of the spacers and was never happy with the colour the old wheels came out in so went on the hunt for a set of O.Z Racing futuras. Easier said than done, finding a set in the appropriate sizes wasn't easy! anyway I did manage to source a set and ended up having to take a gamble because the stickers with the offsets had been lost uring the refurb. I knew they'd be about right but wasn't sure, luckily the gamble paid off 
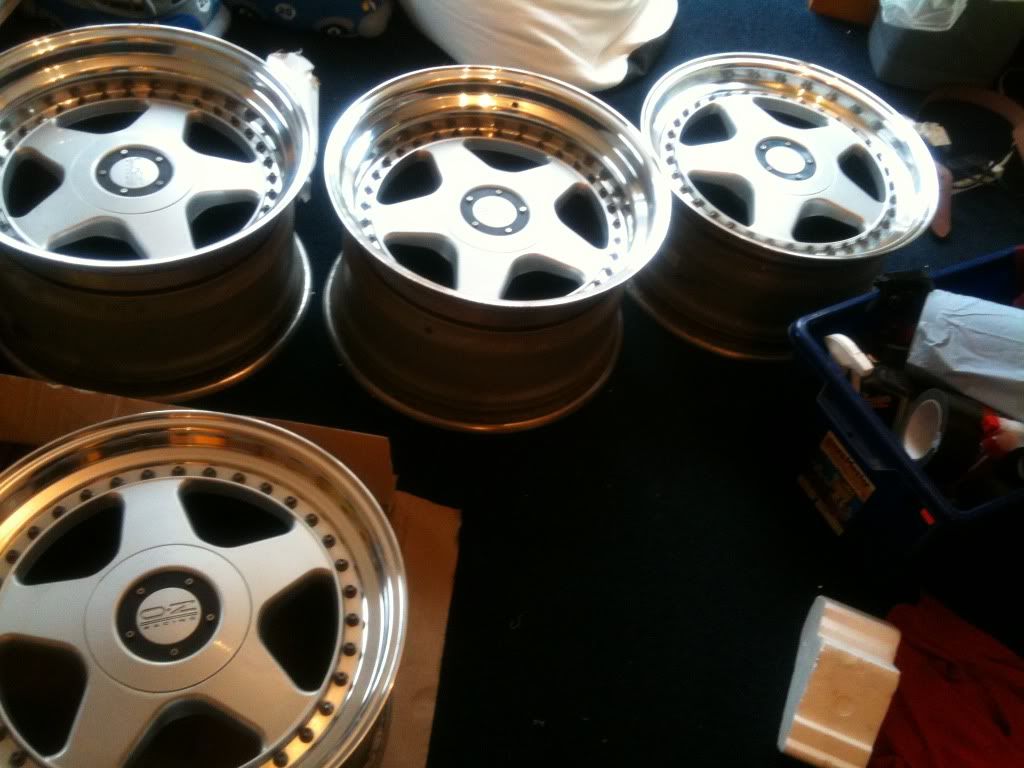
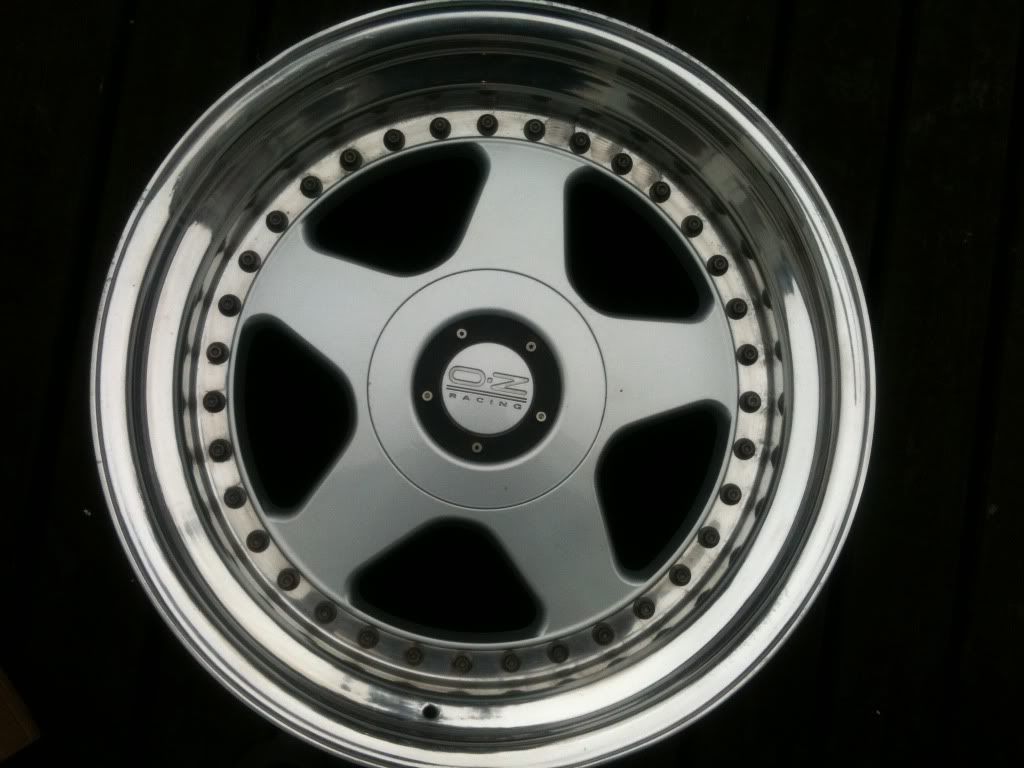
I think they should suit the period of the car and being 5 spoke split rims with a polished lip they're not a million miles away from the Alumi-K's so I was fairly confident they'd suit the style of the car.
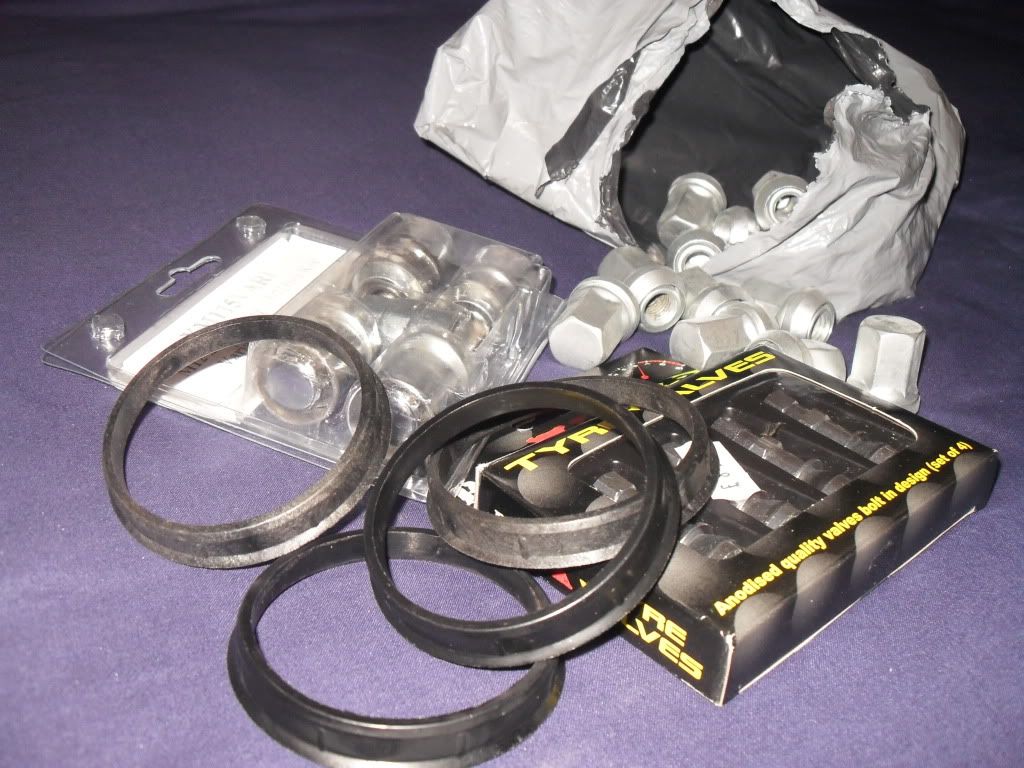
It took a little while getting all the bits to fit them through the post. Nuts, locking nuts, spigot rings and new valves because standard ones wouldnt fit.
on the ramps:
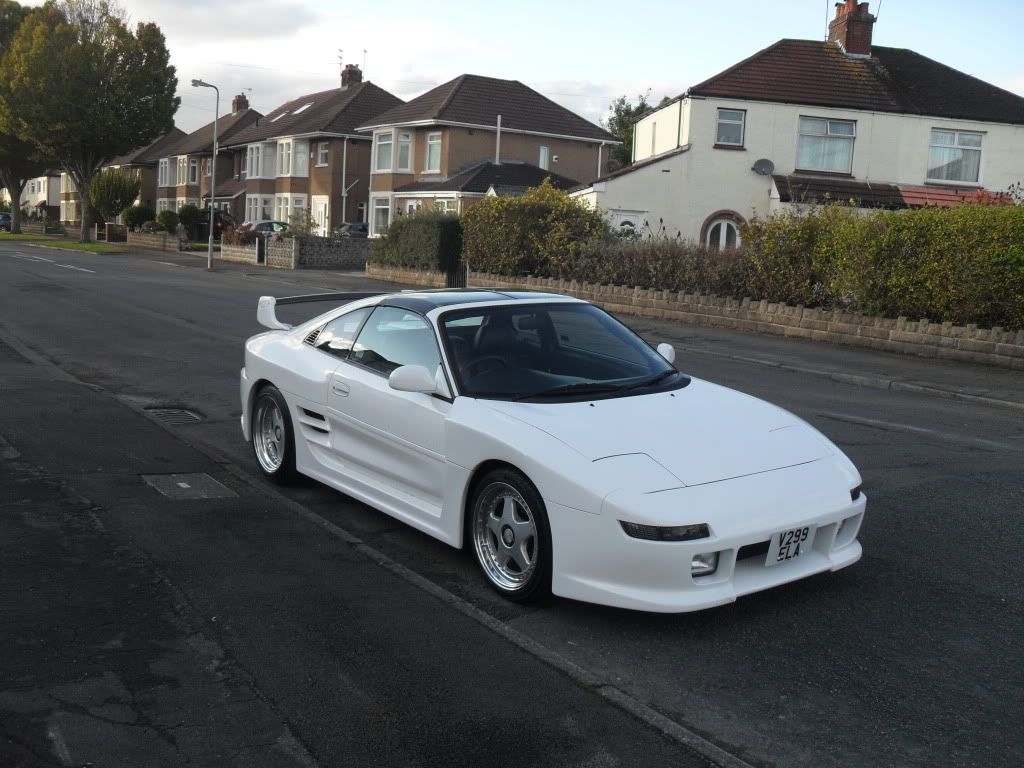
and fitted:(the suspension looks a little high in some of these pics, probably hasn't had time to settle all the way down yet)
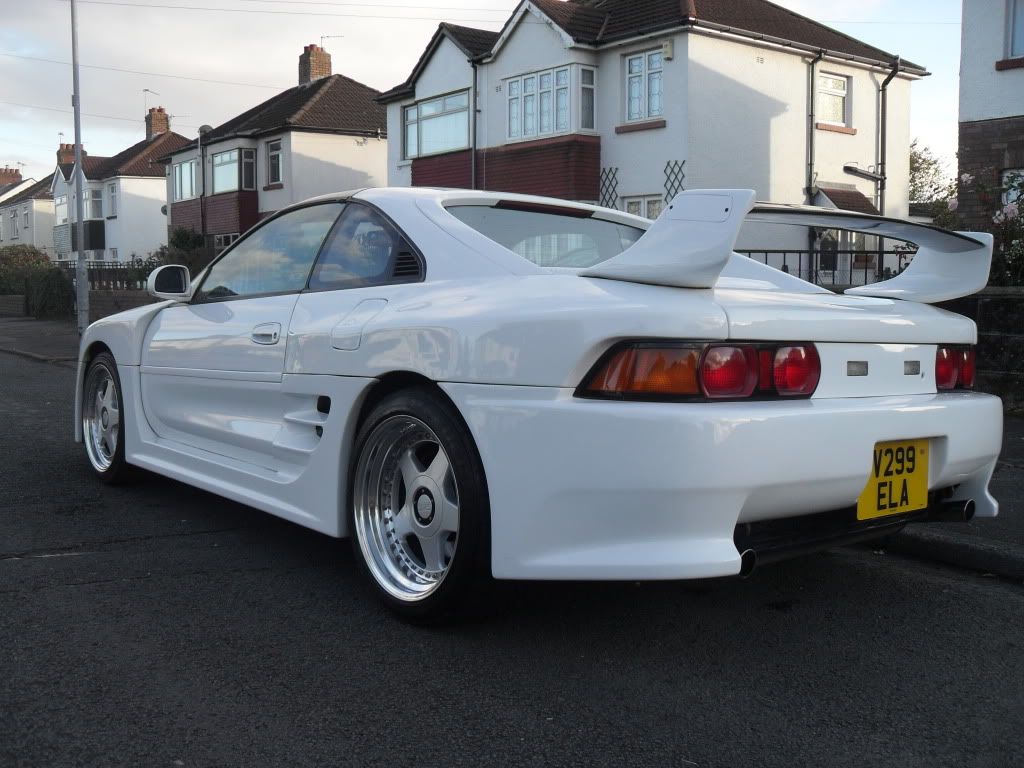
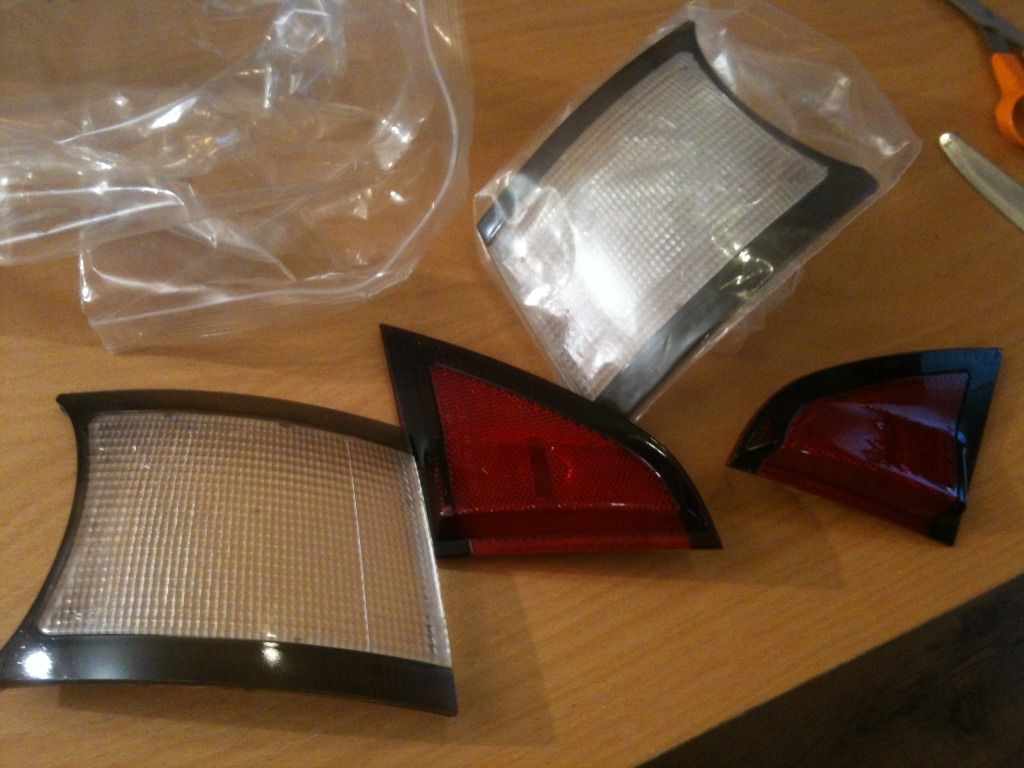
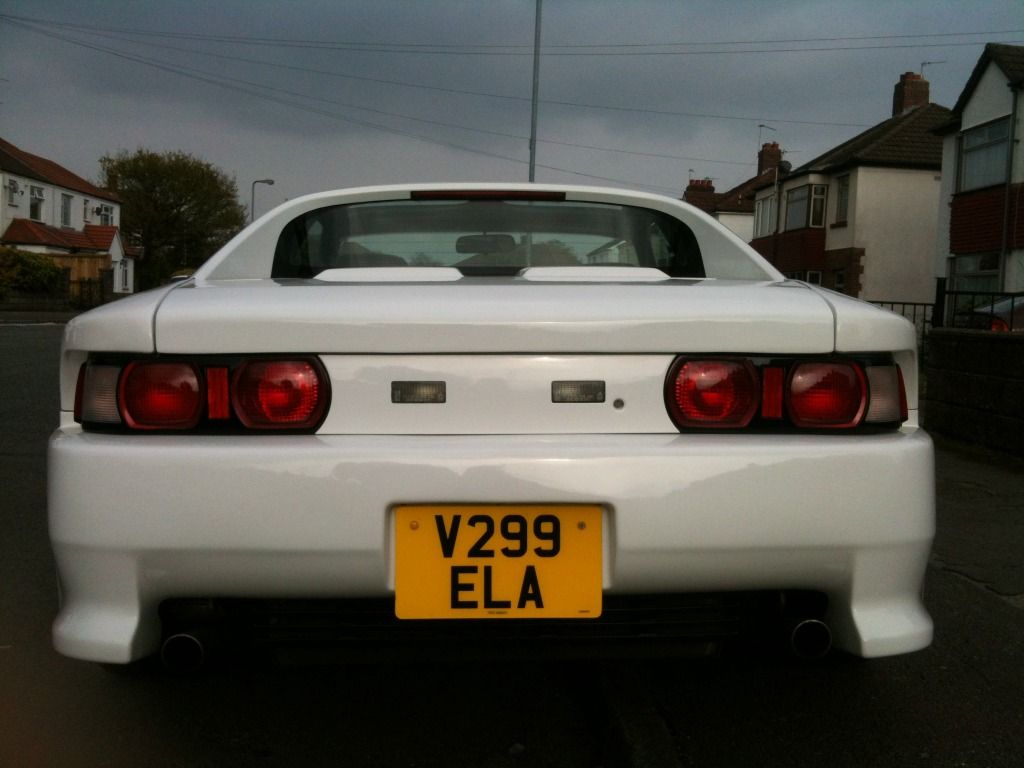
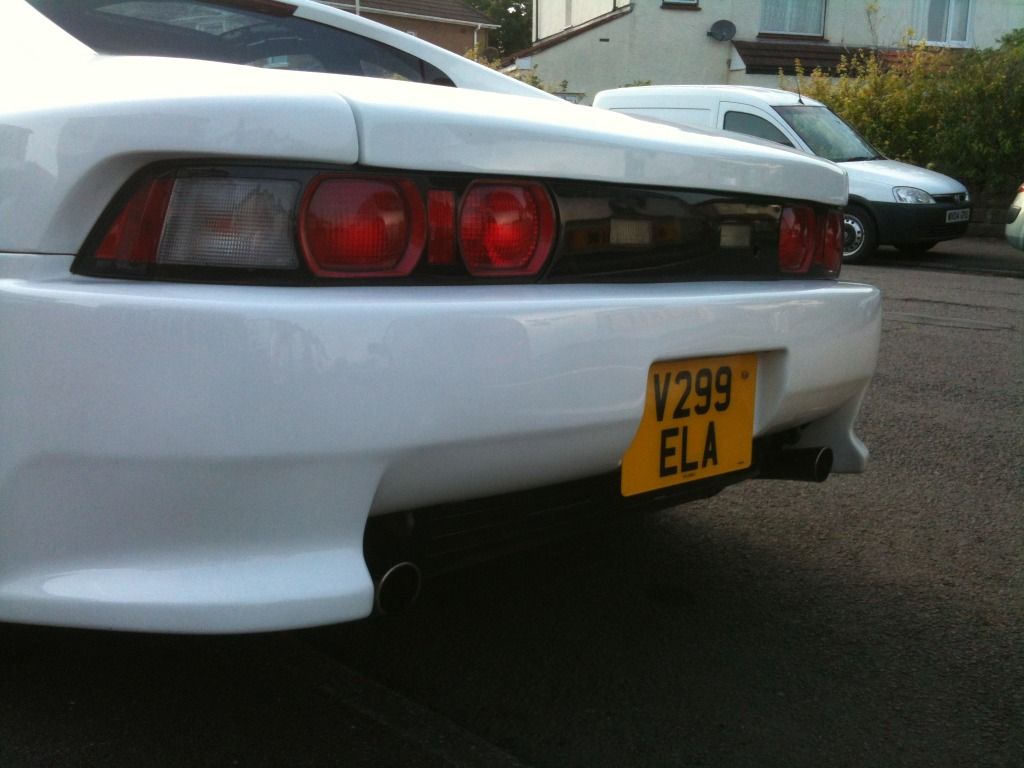
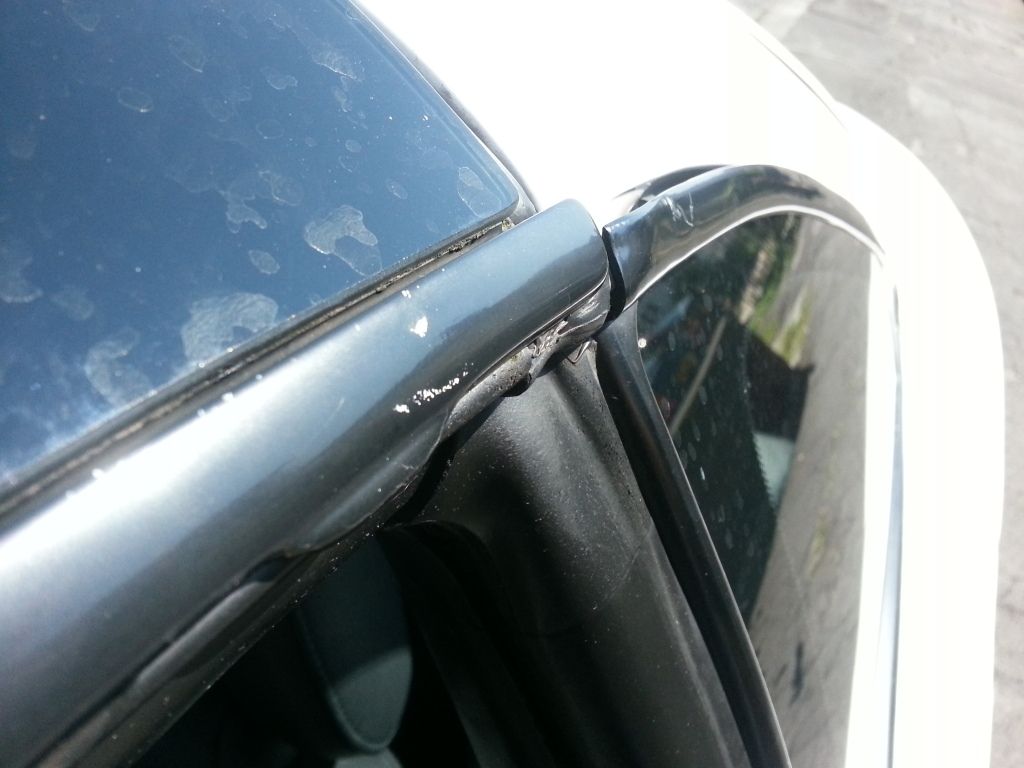
For chirstmas I got a set of clear lenses for the rear lights... these are not easy to fit! I managed to put a small crack in one of the lenses but it isnt too bad and it's on the black band so not that noticeable either, thankfully!
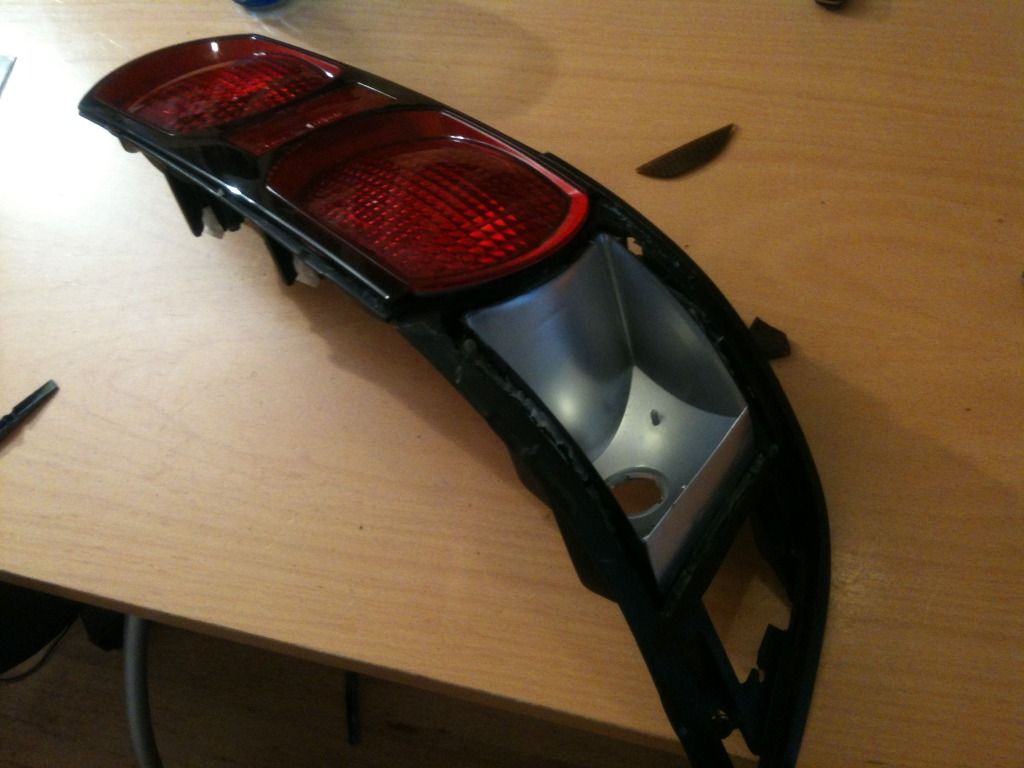
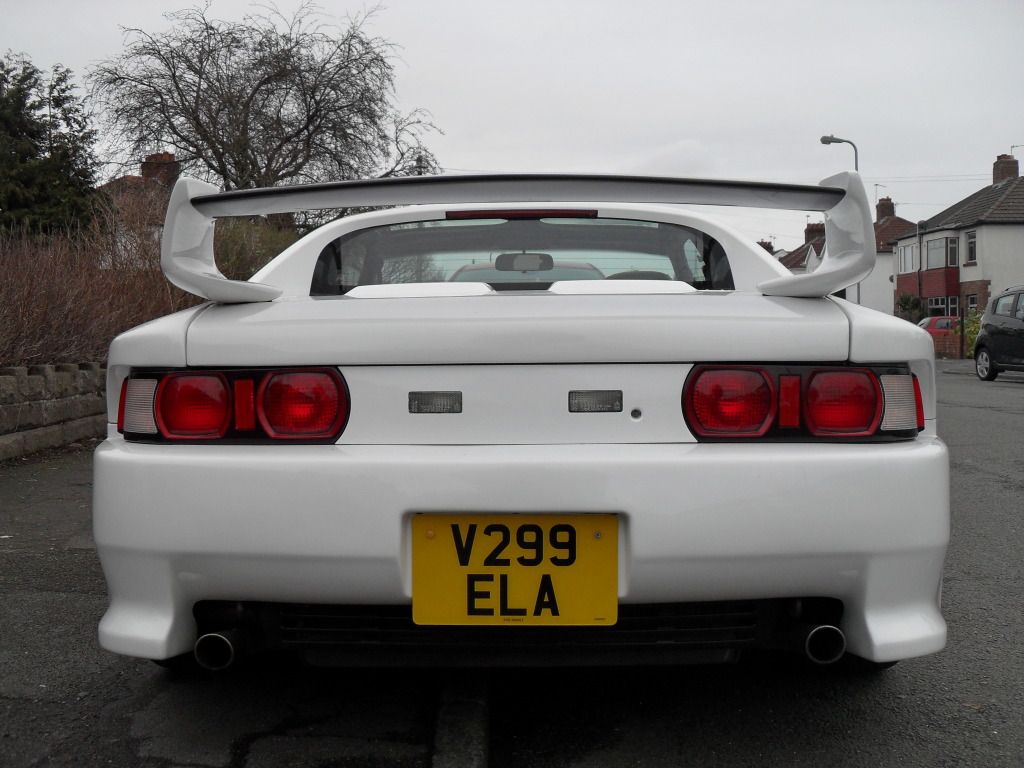
and the bad bit... in my defence these things are bloody brittle!!
<a href="http://s417.photobucket.com/albums/pp25 ... C11156.jpg" target="_blank"><img src="http://i417.photobucket.com/albums/pp25 ... C11156.jpg" border="0" alt="Photobucket"></a>
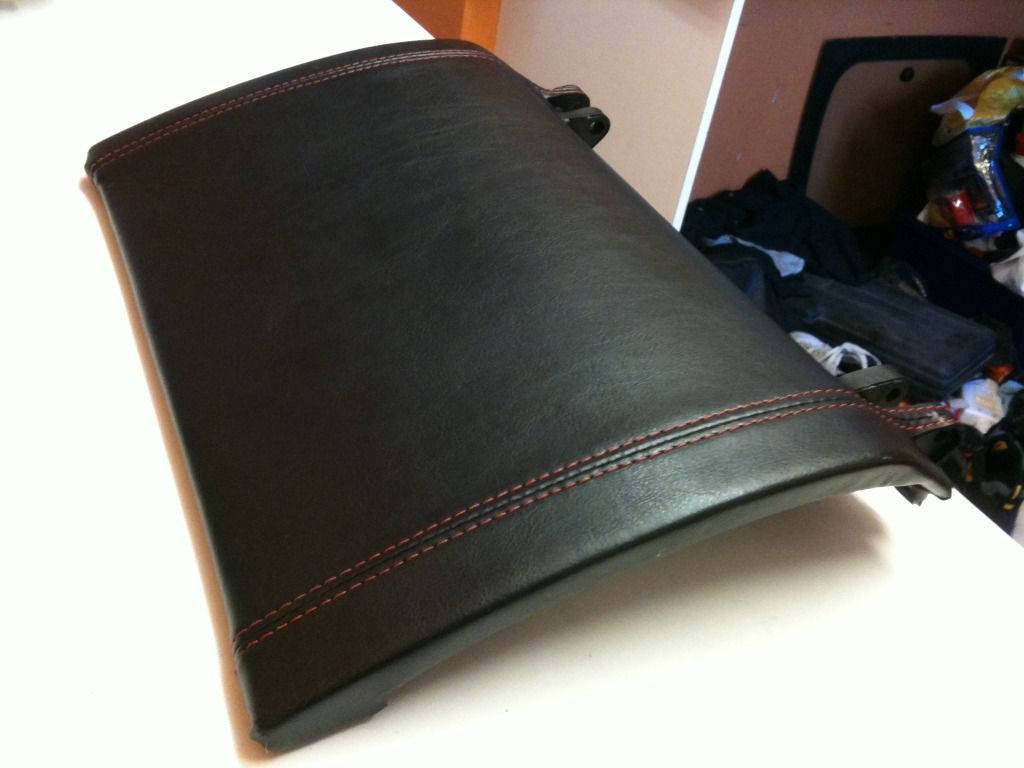
I recently sent my glove box off to get retrimmed to match my gear gaitor, huge thanks to Rhon for that, the qulity is amzing too. So I stripped my glove box down to this and posted it off
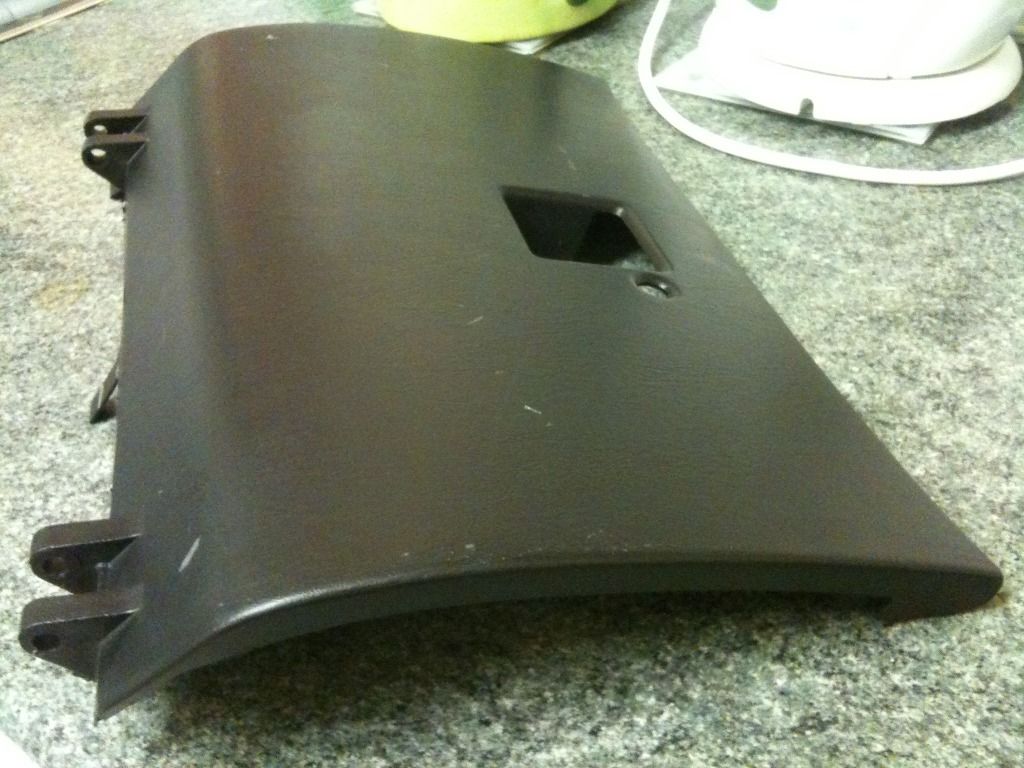
and it came back like this
while I had it all apart I thought I'd attack the lock with some autosol too!
and all finished, again a fiddly job but I'm please with the outcome.
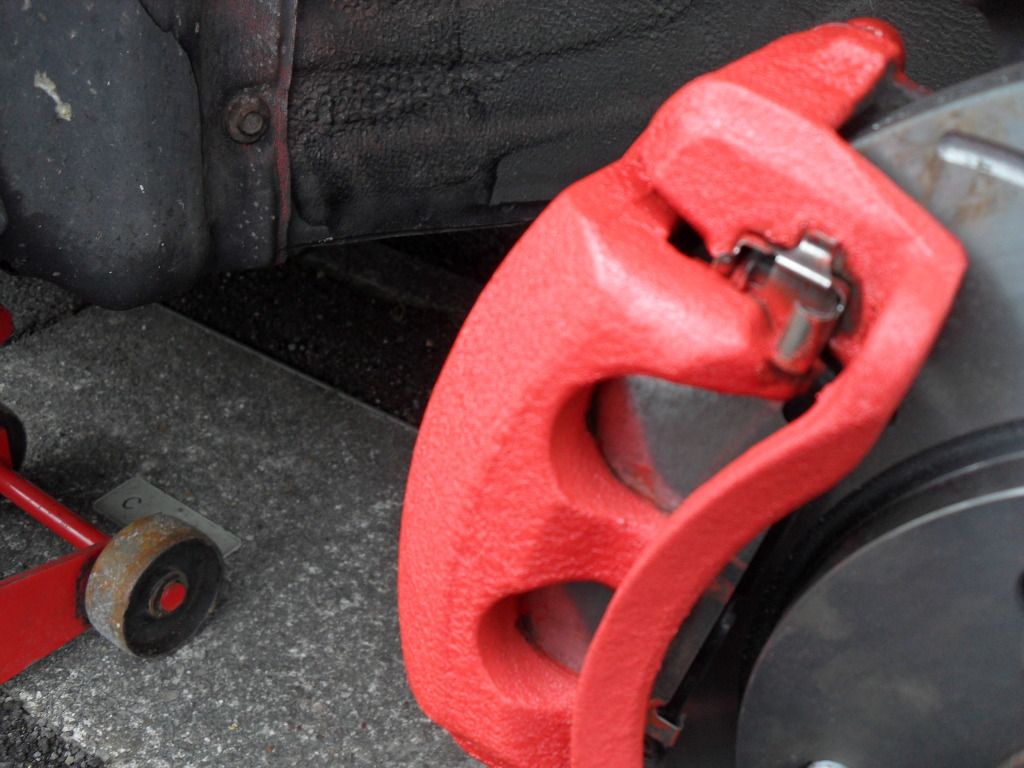
After a year of abuse my calipers were looking a bit worse for wear as the paint had chipped so since I was changing the pads and discs anyway I decided to re-paint. I decided to use wrinkle paint and I'm really happy with the finish (I haven't seen this used on calipers before but I dont see any reson not to).
before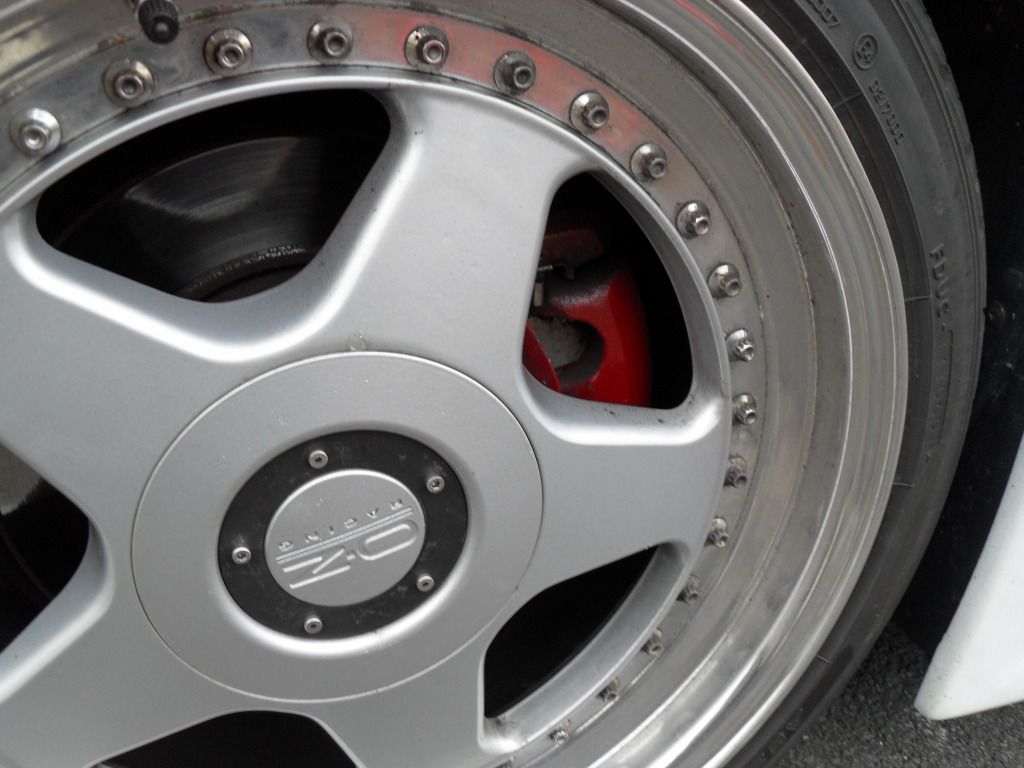
after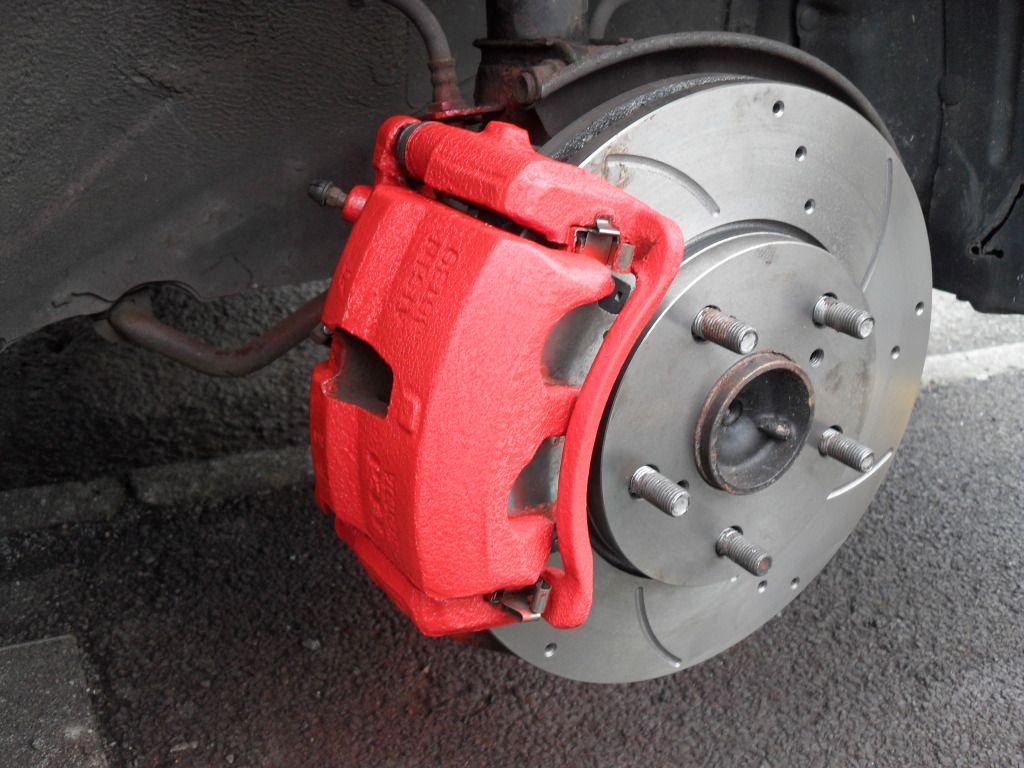
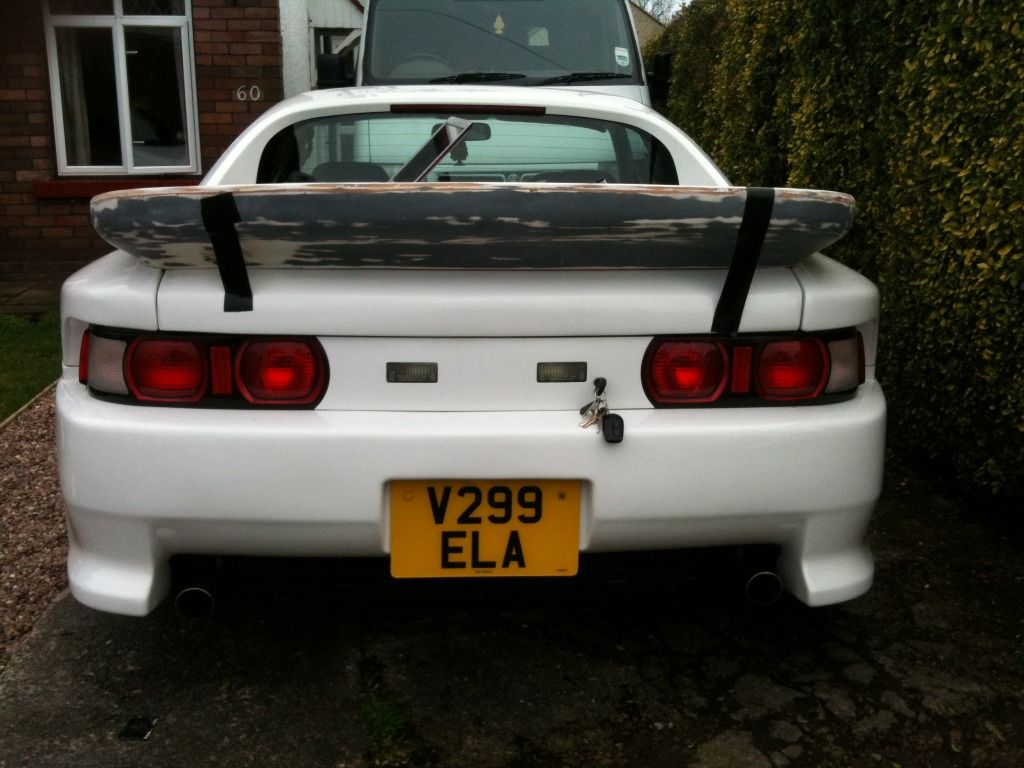
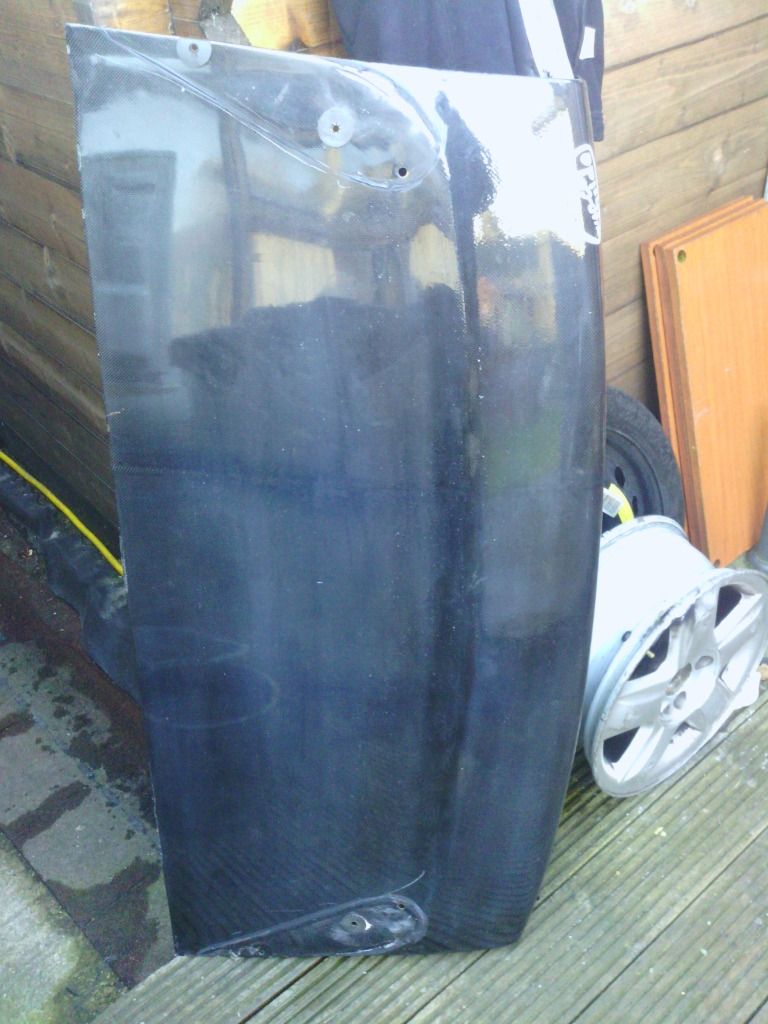
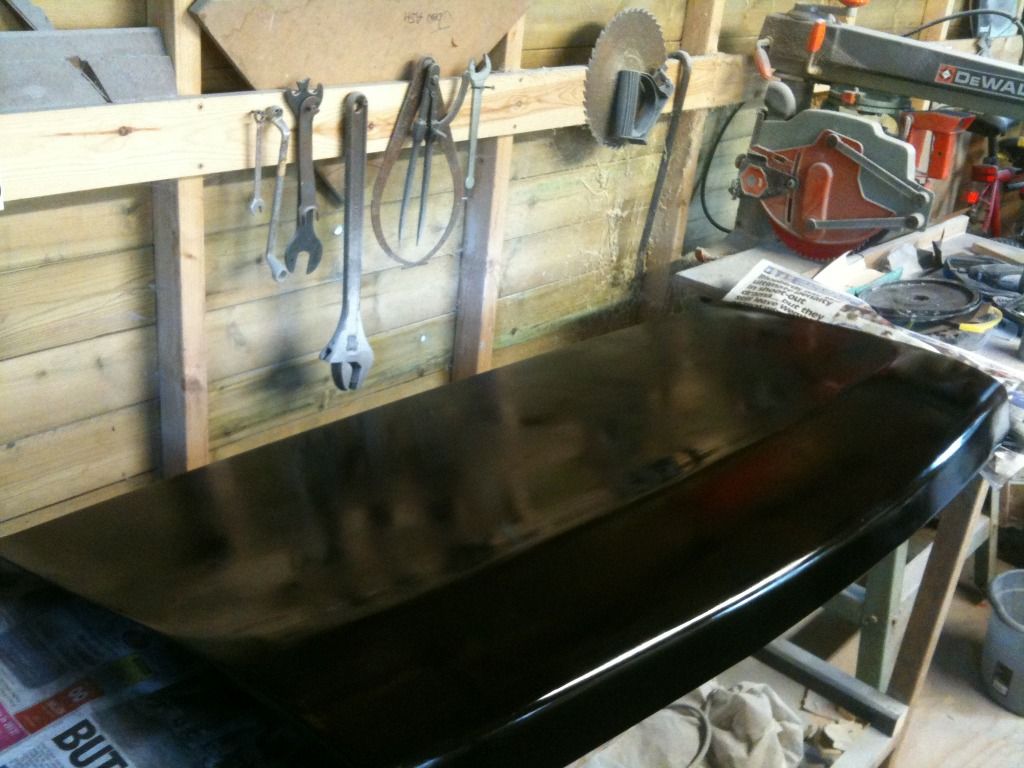
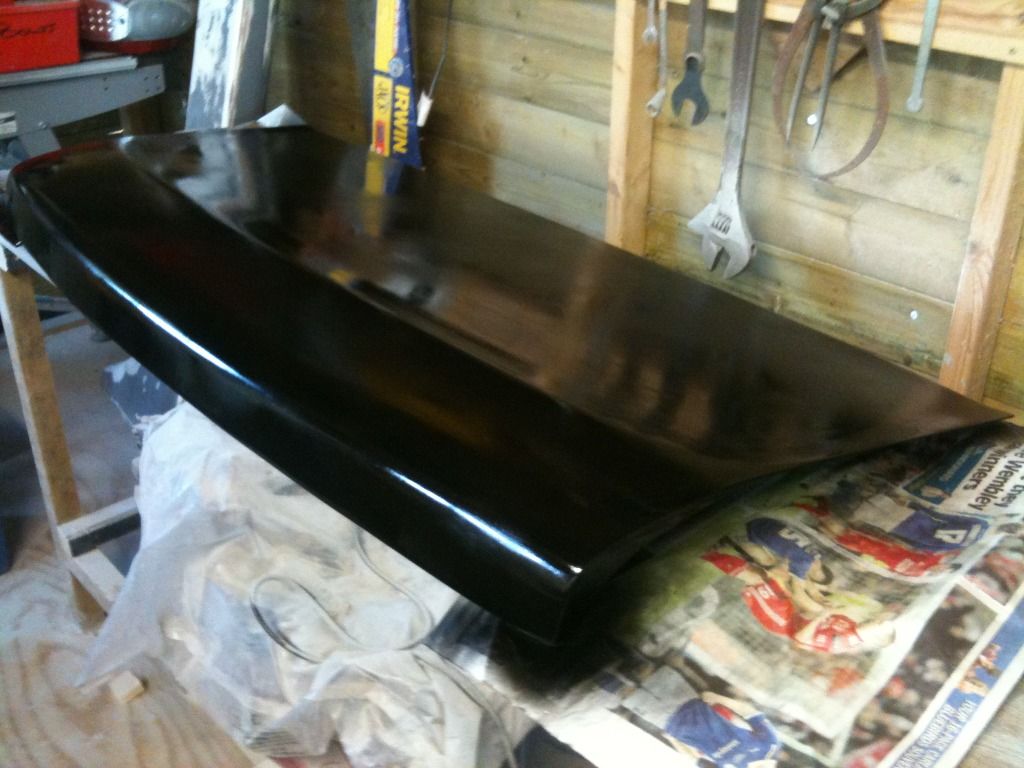
I then bought a Bomex Drift style spoiler.
I got this for a bit off a bargain and although I was told that"the paint just needs a bit of a polish" and "all mounting points are present and working" it was a right state when i got it. To be honest I couldnt be happier about it though because it gives me a little project.
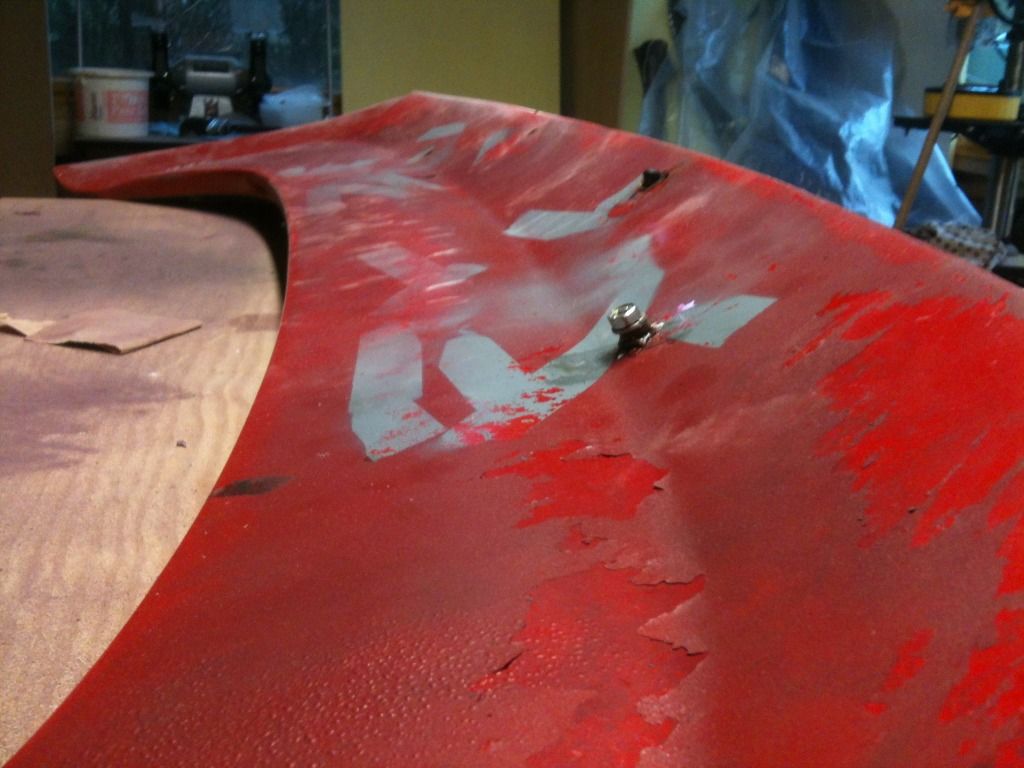
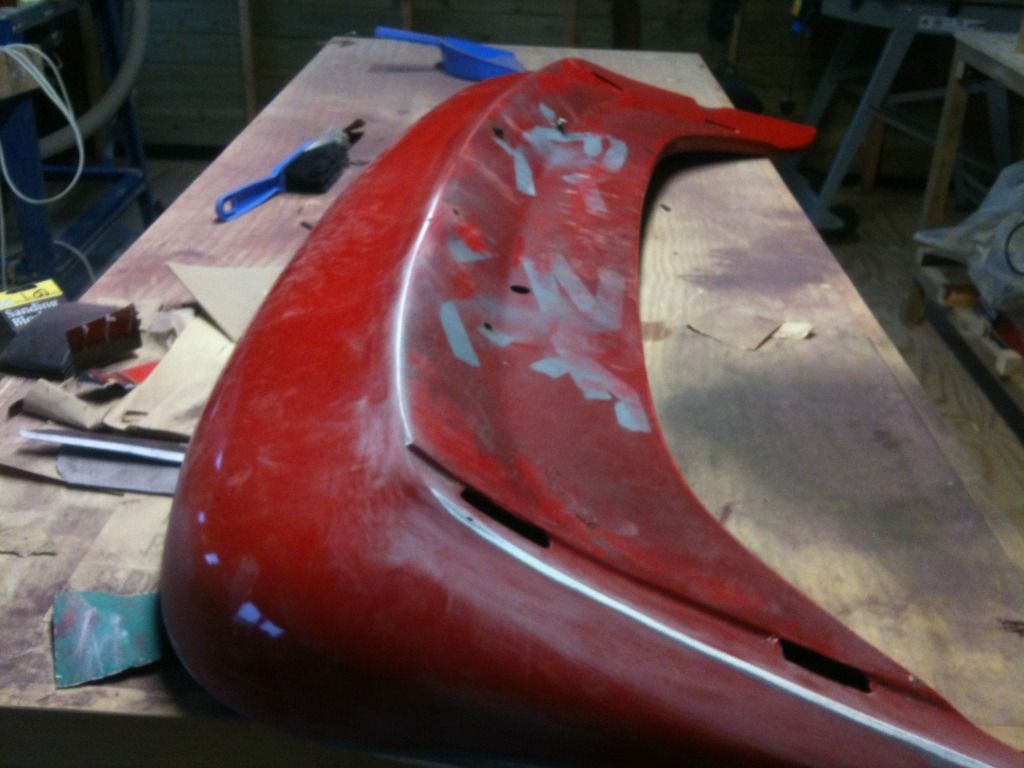
Try polishing that out!
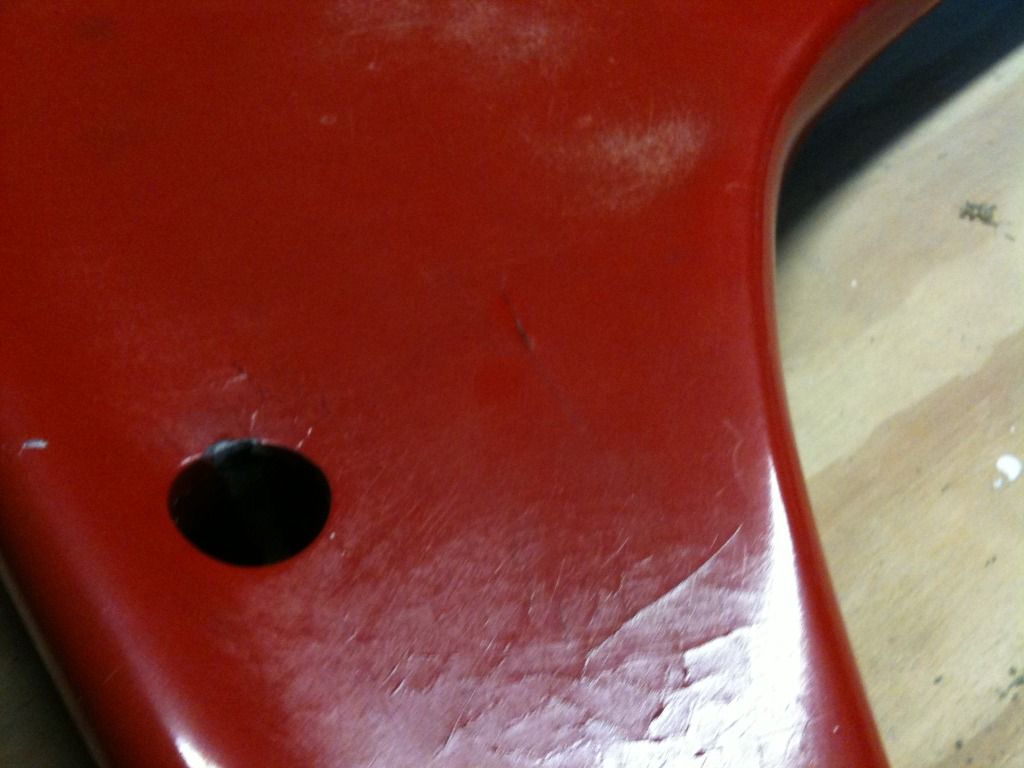
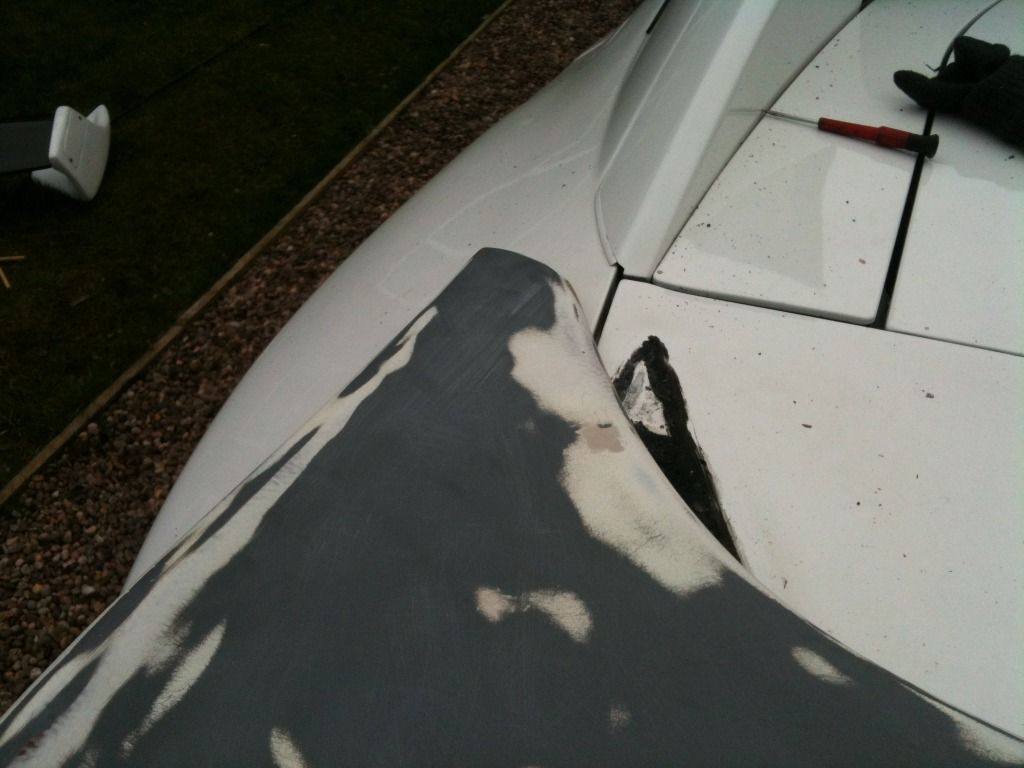
I also wanted rid of the arial hole whilst I was at it so set about cutting the tunnel out and smoothing back over then moulding it back in for a better finish:
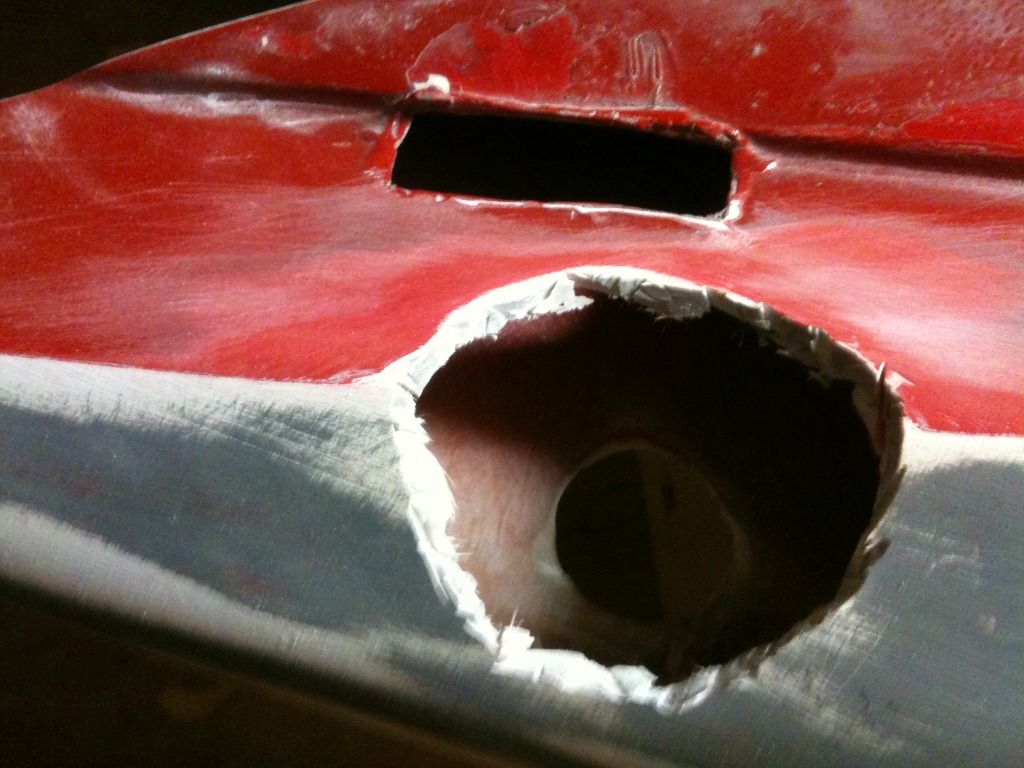
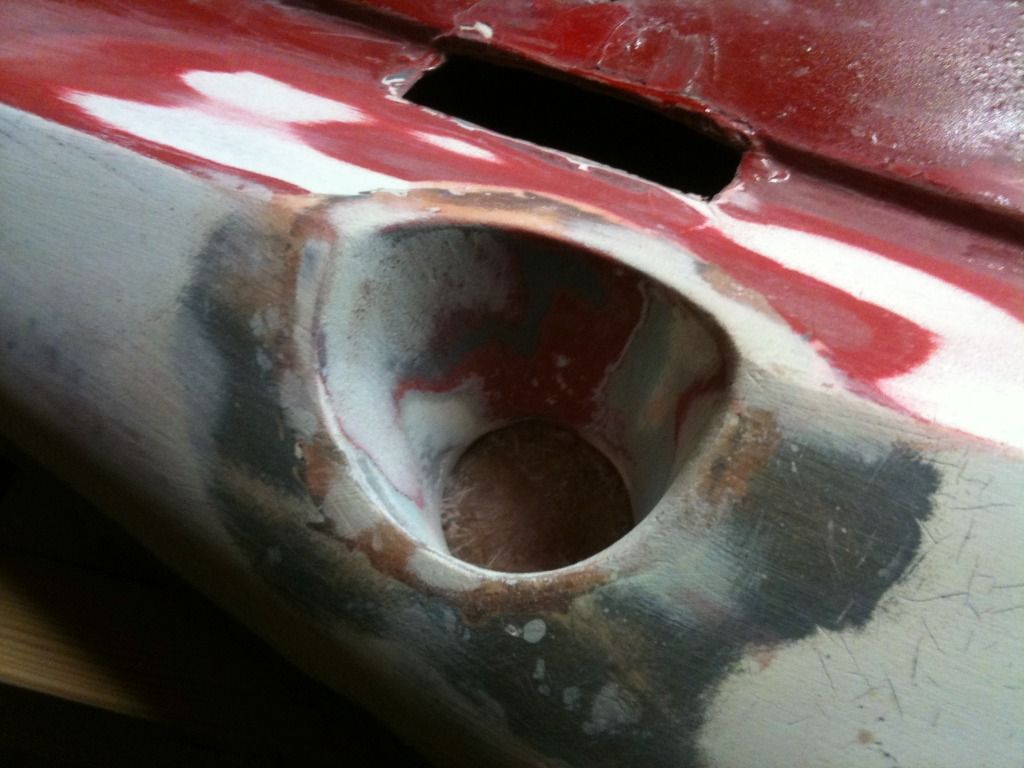
It then dawned on me while looking at pics of the spiler online that you could see the underside of the hole from the side of the car too!
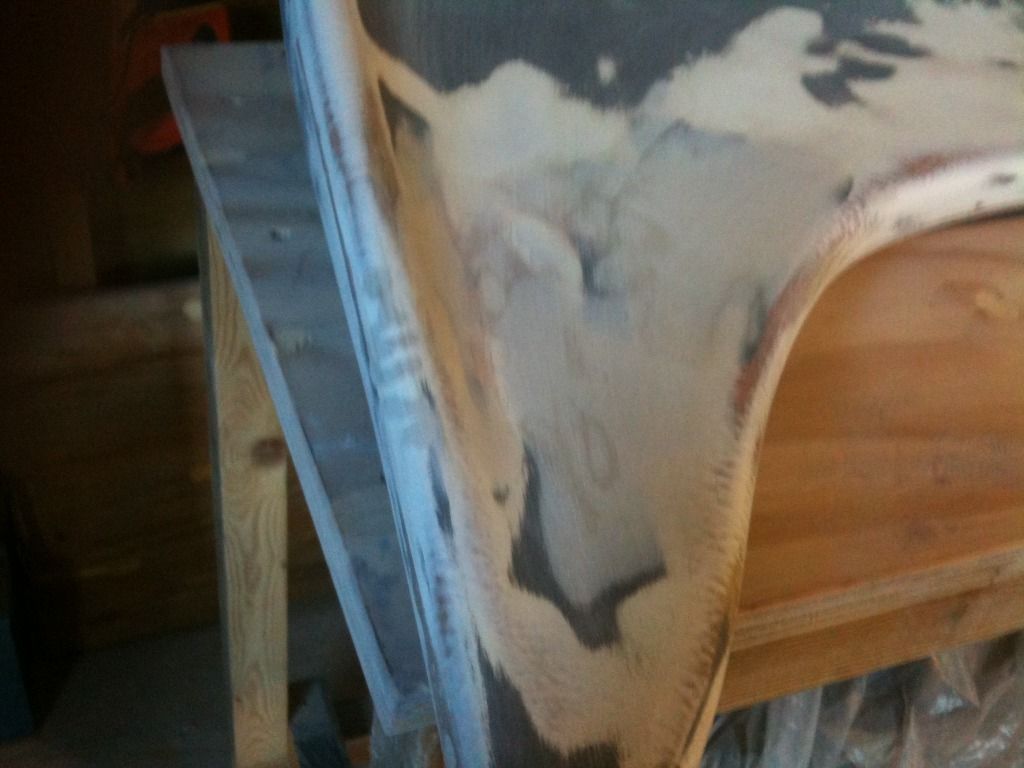
So my next plan of action was to fill the hole with polystyrene, cut a piece of plastic to size and fibreglass over it all followed with a skin of filler and flatted back down again.
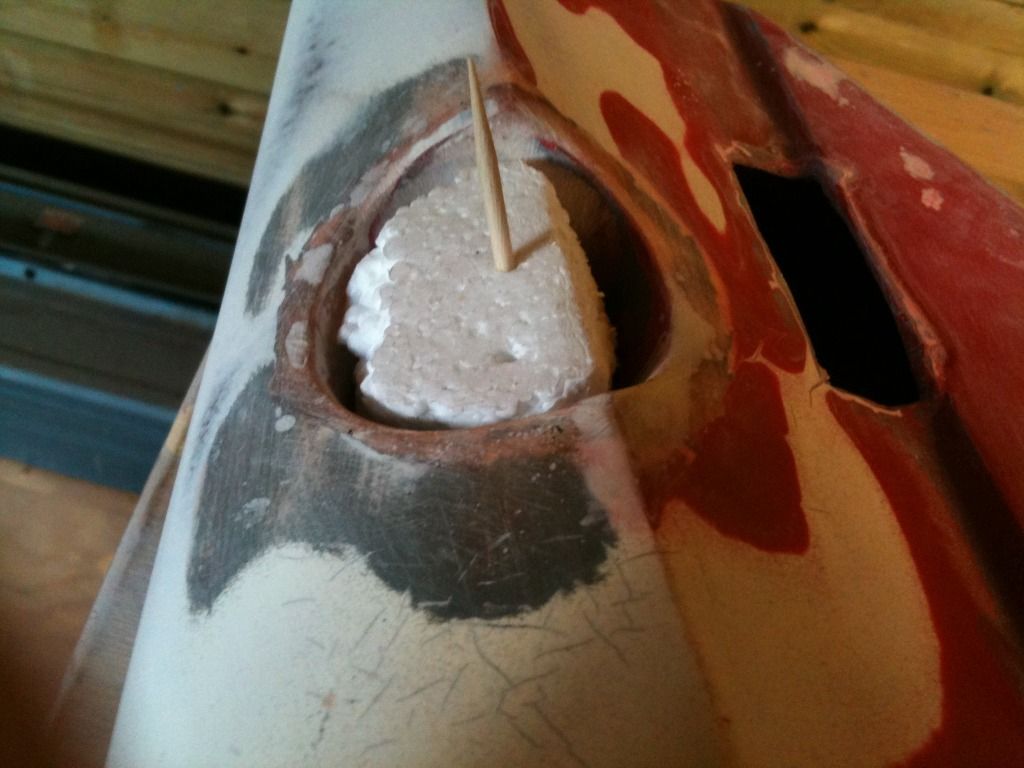
and then I set about filling the pin holes
Then I decided to change the wheels.
I think they should suit the period of the car and being 5 spoke split rims with a polished lip they're not a million miles away from the Alumi-K's so I was fairly confident they'd suit the style of the car.
It took a little while getting all the bits to fit them through the post.
on the ramps:
and fitted:
For chirstmas I got a set of clear lenses for the rear lights.
and the bad bit.
I recently sent my glove box off to get retrimmed to match my gear gaitor, huge thanks to Rhon for that, the qulity is amzing too.
and it came back like this
while I had it all apart I thought I'd attack the lock with some autosol too!
and all finished, again a fiddly job but I'm please with the outcome.
After a year of abuse my calipers were looking a bit worse for wear as the paint had chipped so since I was changing the pads and discs anyway I decided to re-paint.
before
after
I then bought a Bomex Drift style spoiler.
I got this for a bit off a bargain and although I was told that
Try polishing that out!
I also wanted rid of the arial hole whilst I was at it so set about cutting the tunnel out and smoothing back over then moulding it back in for a better finish:
It then dawned on me while looking at pics of the spiler online that you could see the underside of the hole from the side of the car too!
So my next plan of action was to fill the hole with polystyrene, cut a piece of plastic to size and fibreglass over it all followed with a skin of filler and flatted back down again.
and then I set about filling the pin holes
Re: Jacks' TRD rev5
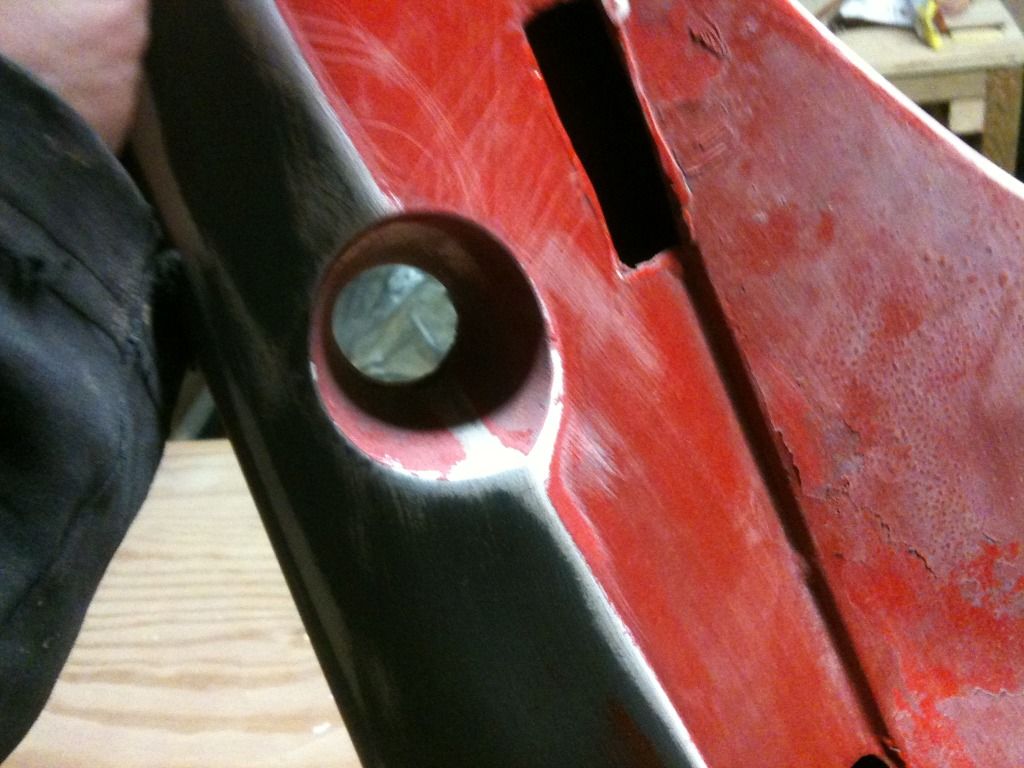
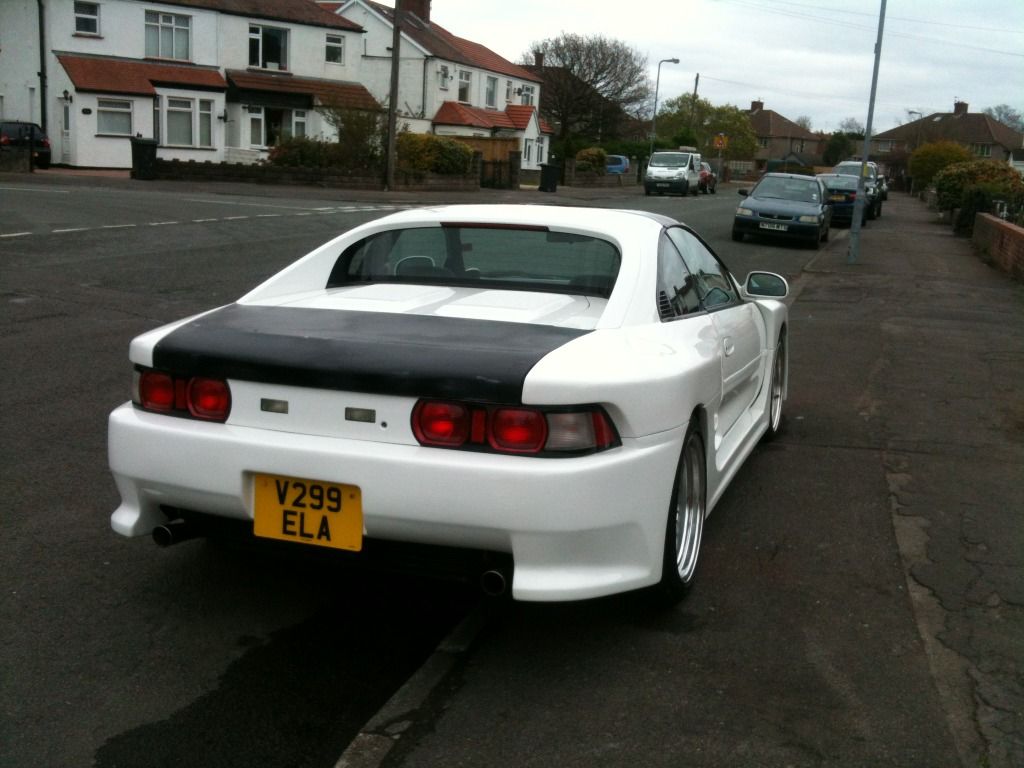
Then came fitting. I managed to get the old spoiler off but since it had been boned on with tiger seal it left a few scars behind (I wasn't happy about this at the time but the bodyshop insisted on doing it this way, I think he just wanted rid of me by that point!).

One thing that bugs me slightly about it is the way it ends at each corner, it just seem to come to a blunt end and ruins it from flowing with the lines of the car as well as if it came to more of a point, it's this way so that the boot can open though so I'm stuck on that one I'm afraid.
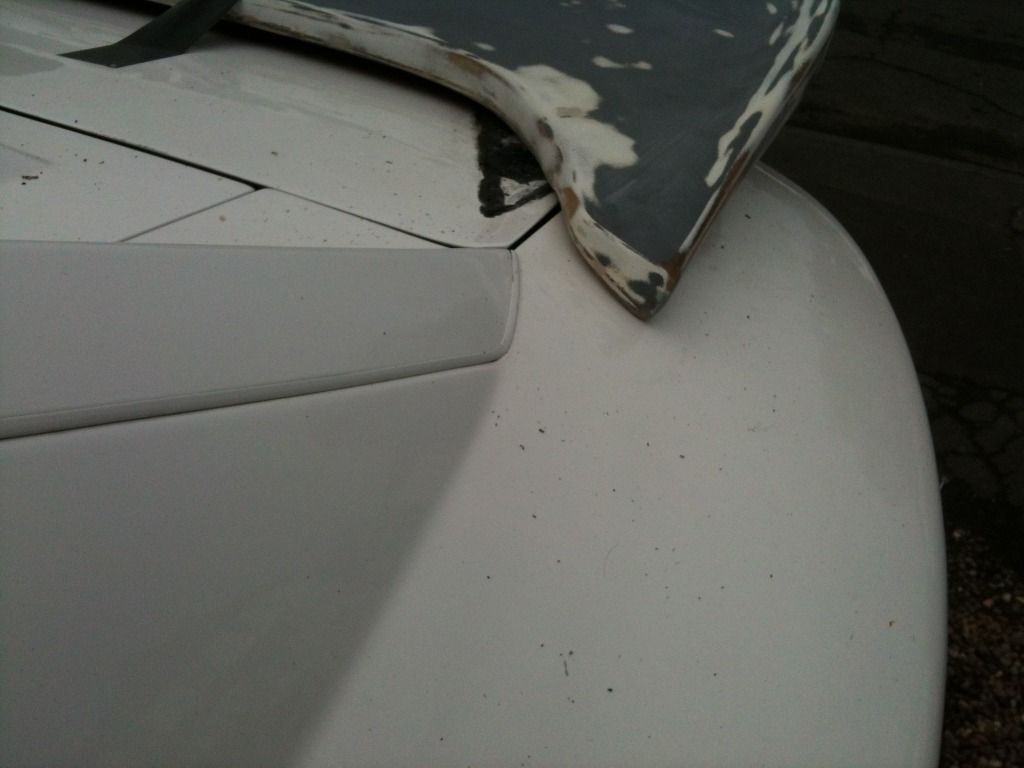
It was at this point I made the decision that this spoiler really didn't suit the body kit. Honestly that one came out of nowhere, I'd pictured it for ages in my head and it seemed like the angles of it should match well, in reality I wasn't confident with it enough to continue to spend money on it.
While I had the spoiler off the car the look really grew on me, at first it looked naked but the longer it was left that way the more my love for it grew.
The thing I liked most about spoilerless is it gives the car a more mature look. The TRD spoiler seemed to be viewed by most as too big and lairy... I still like it I might add
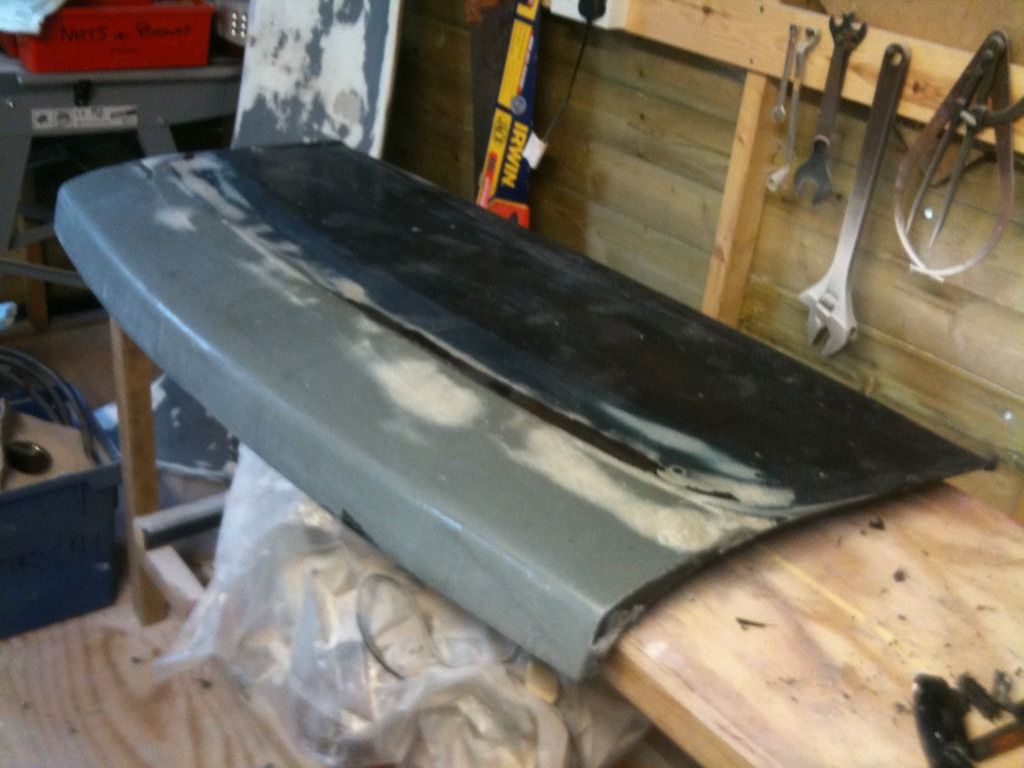
So the Bomex sold and I bought a boot with the trd boot extention fitted to replace it. Not an easy thing to find but without much trouble, I got one (lucky).
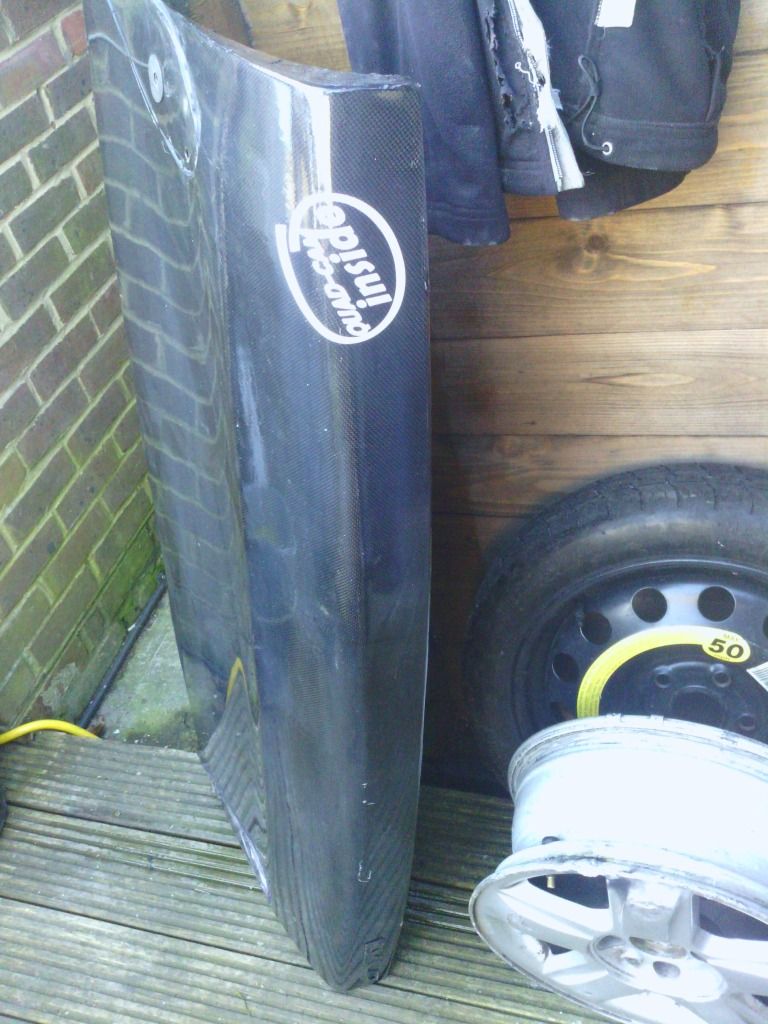
Got it at an absolute steal and is carbon skinned too although I will be removing this and painting white to match
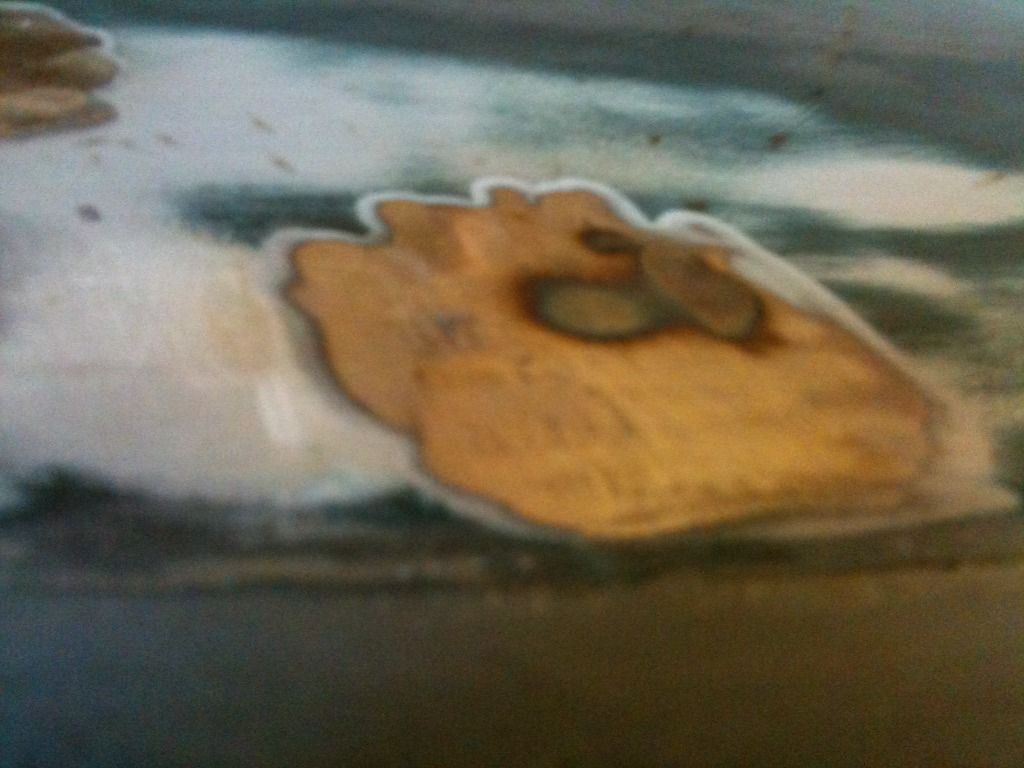
I removed the carbon skin from the bootlid which left behind quite a mess of old resin and not such a tidy finish(I guess it didnt matter as it was being skinned).
the old carbon skin
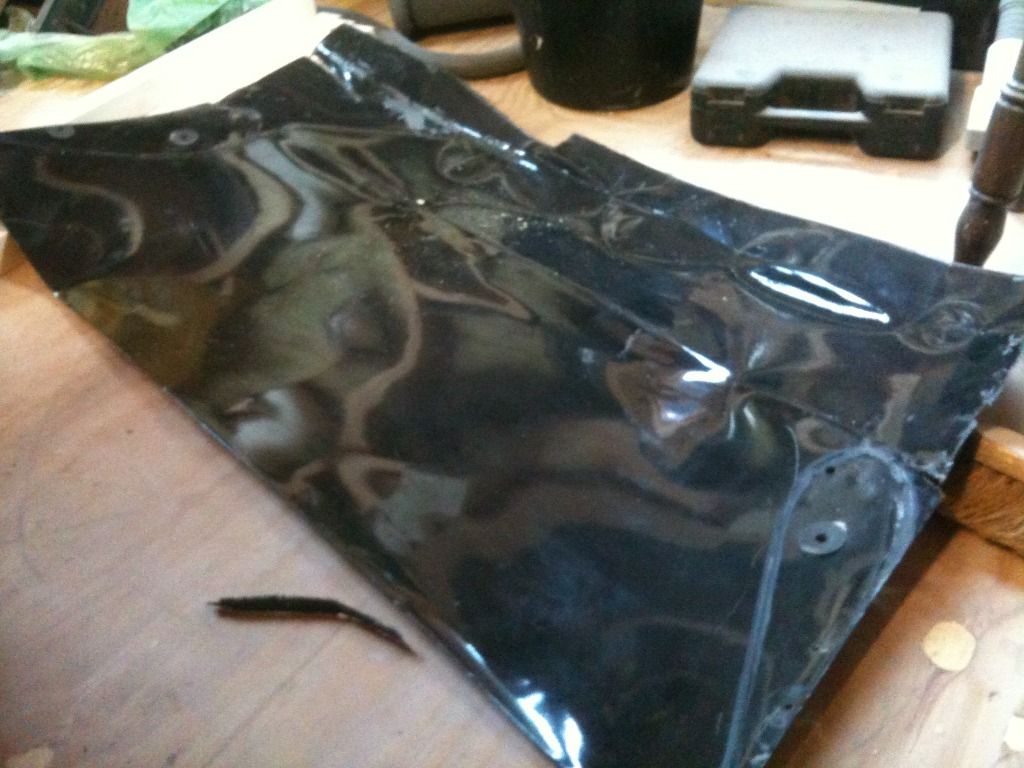
this shows the left over resin, quite a job sanding all that off!

half'n' half
At this stage I test fitted the boot and to be fair quite alot of work has been done to get it to fit nicely, never the less I manage to get it fitting pretty well :th: a good fit is essential, since it will be spoilerless you will notice every line more.
The boot was then sent off to have the holes welded and came back looking like this:
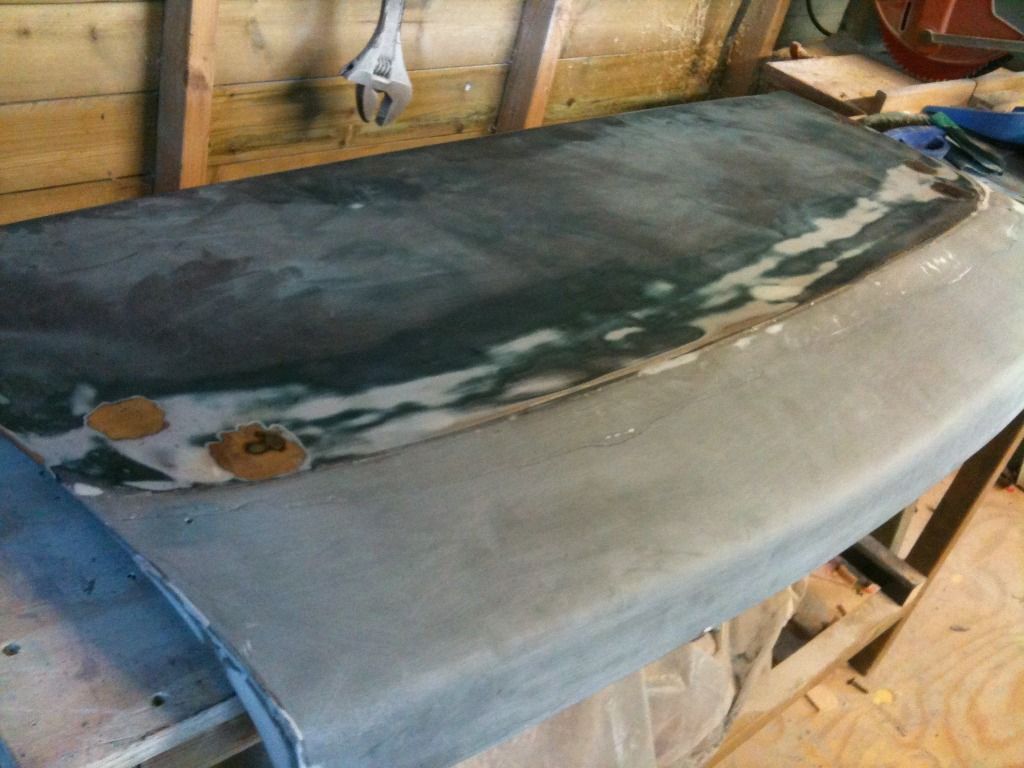

then first skim with filler(after giving it a little tap with a hammer to ensure the new metal wassn't sitting slightly higher than the rest of the boot) and it's currently looking like this, waiting for me to finish it off before paint... I can't wait!

I've been driving the car around without a spoiler for a couple of weeks now and have got to say it's grown on me so much, the car seems to have a more mature look about it without such a big wing on the back... you'll have to wait for the finished pictures to see what i mean though! 
Also, after alot of scare-mungerring from a friend about my car setting itself alight if I didnt add more earths I bought these:

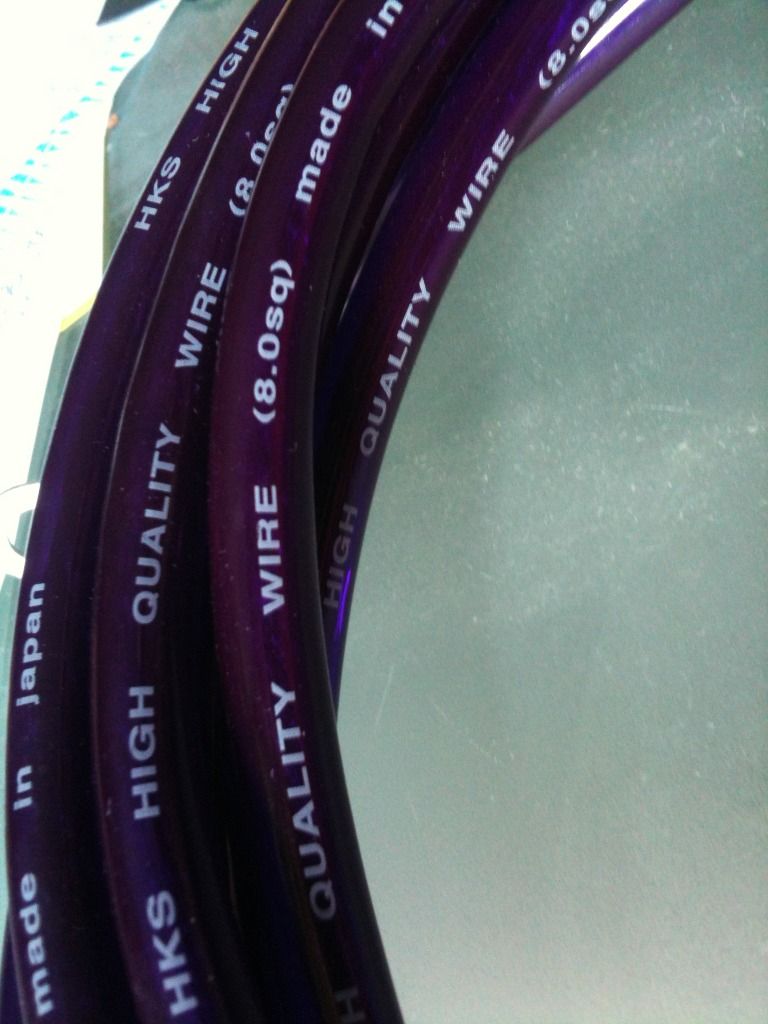
They're purple because they were considerably cheaper than other kits on ebay not because I'm that way inclined! And they say HKS, wether or not HKS knows about this though I'm not sure!
Fitted:
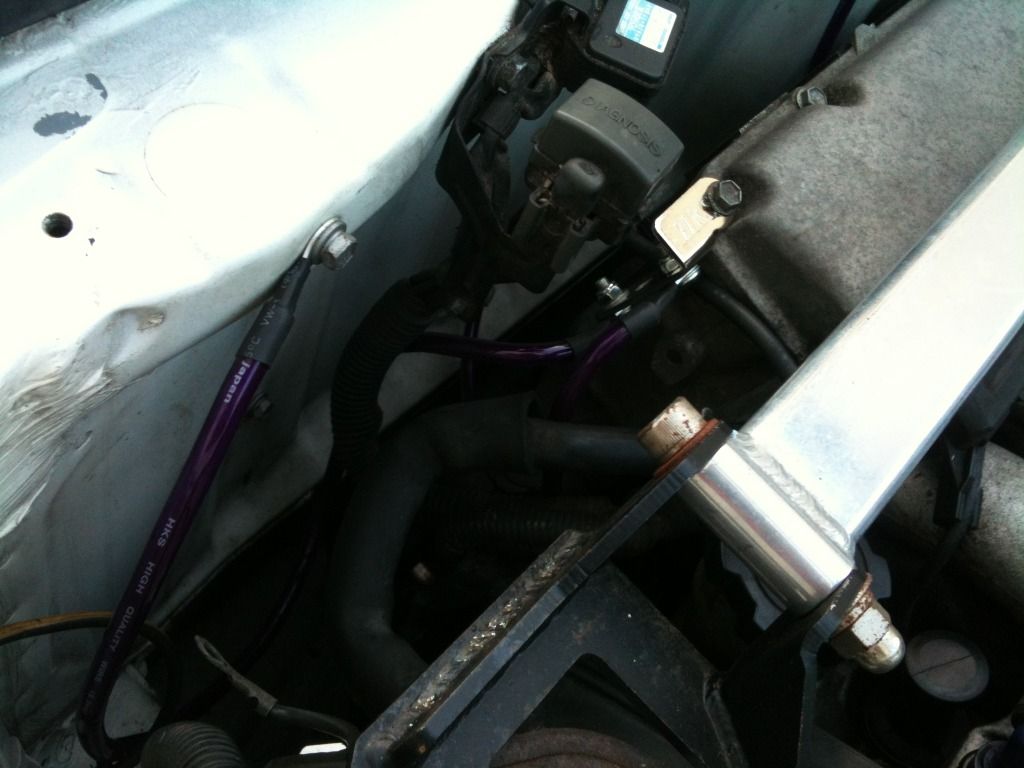
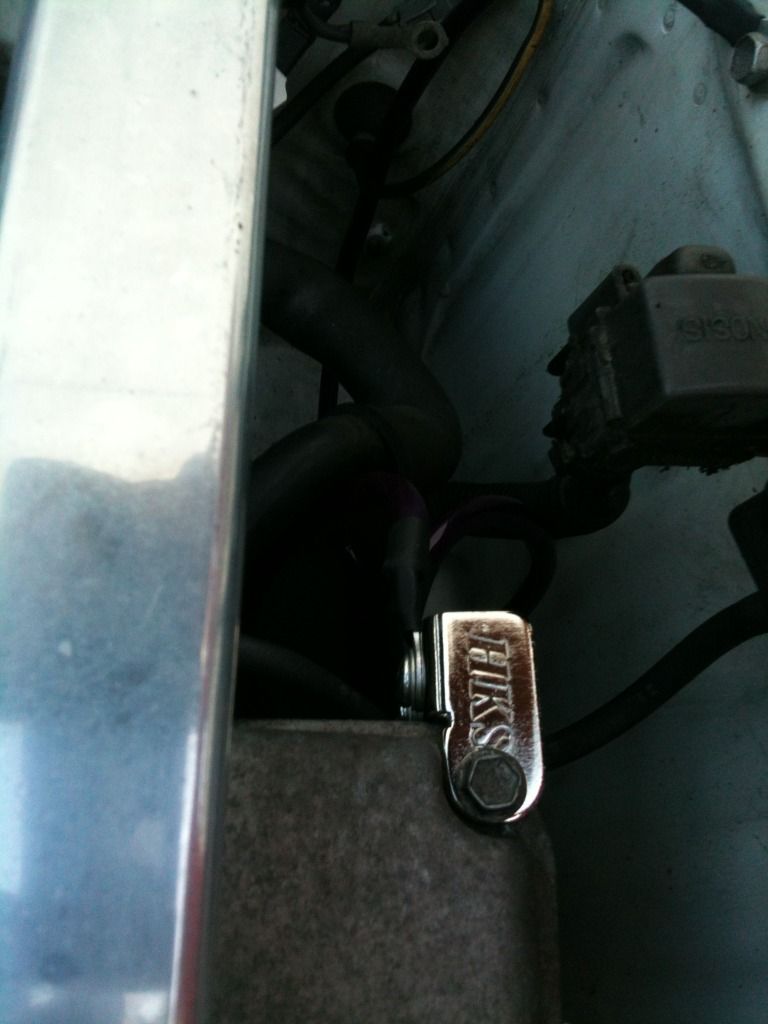
barely noticeable in there
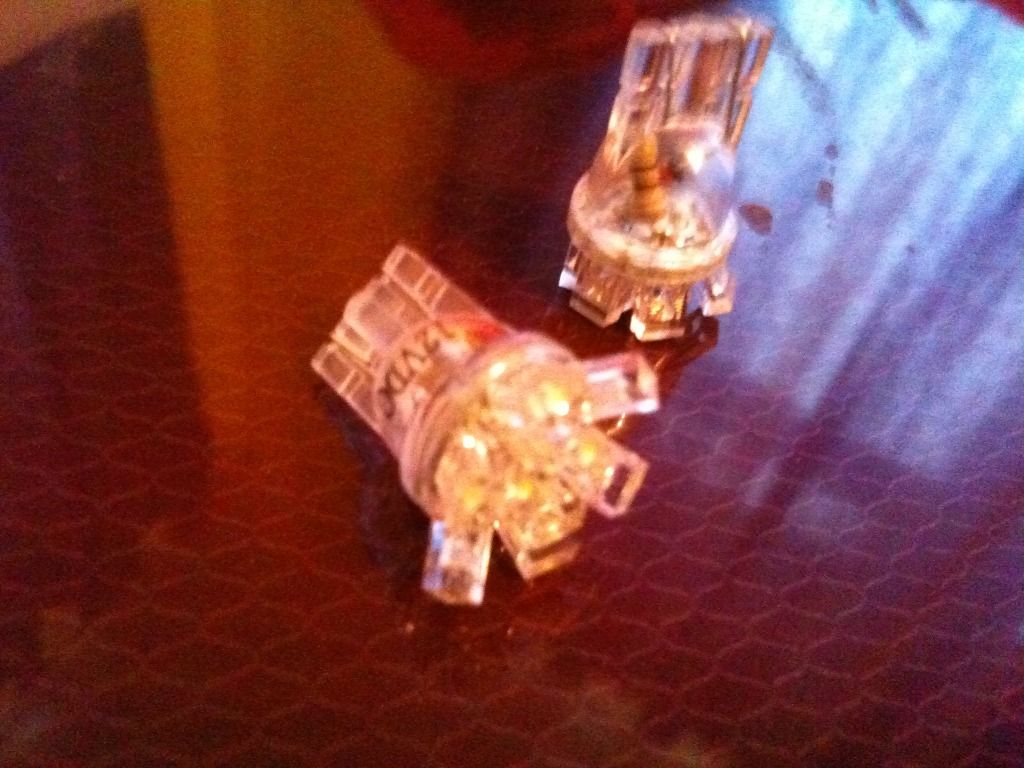
I've also been going a little mad with LED's recently.
I started by buying the LED dash upgrade
which came out like this untill I realised that leds had to be mounted the correct way around! :facepalm:
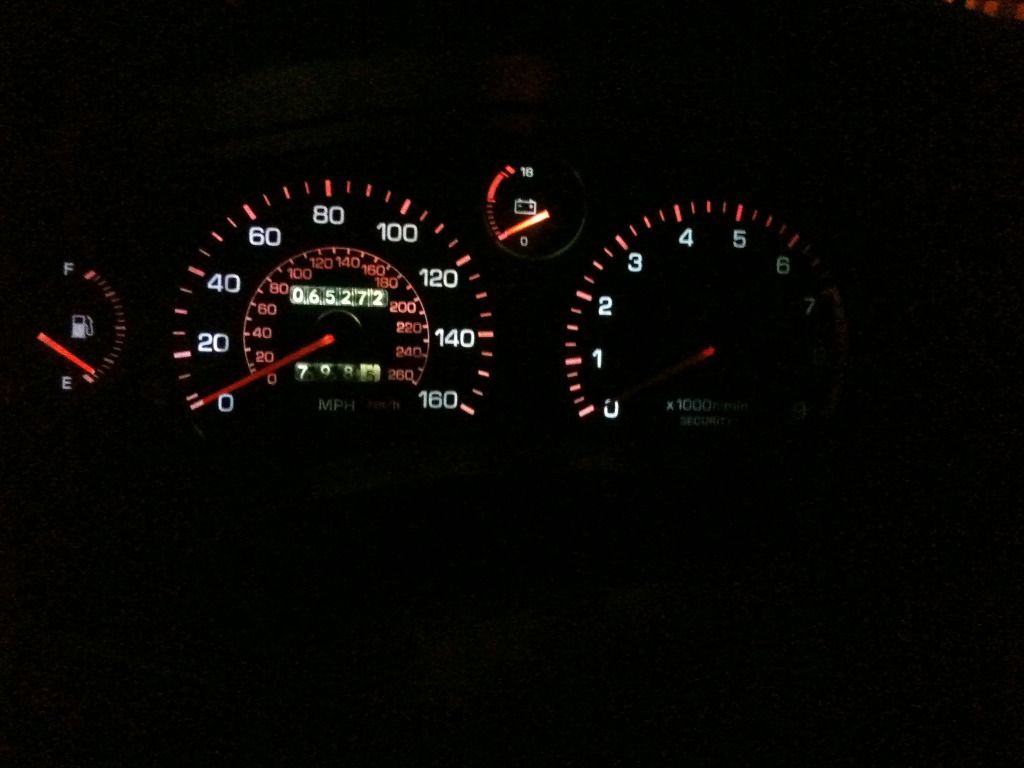
back off and ended up looking like this :cool1:
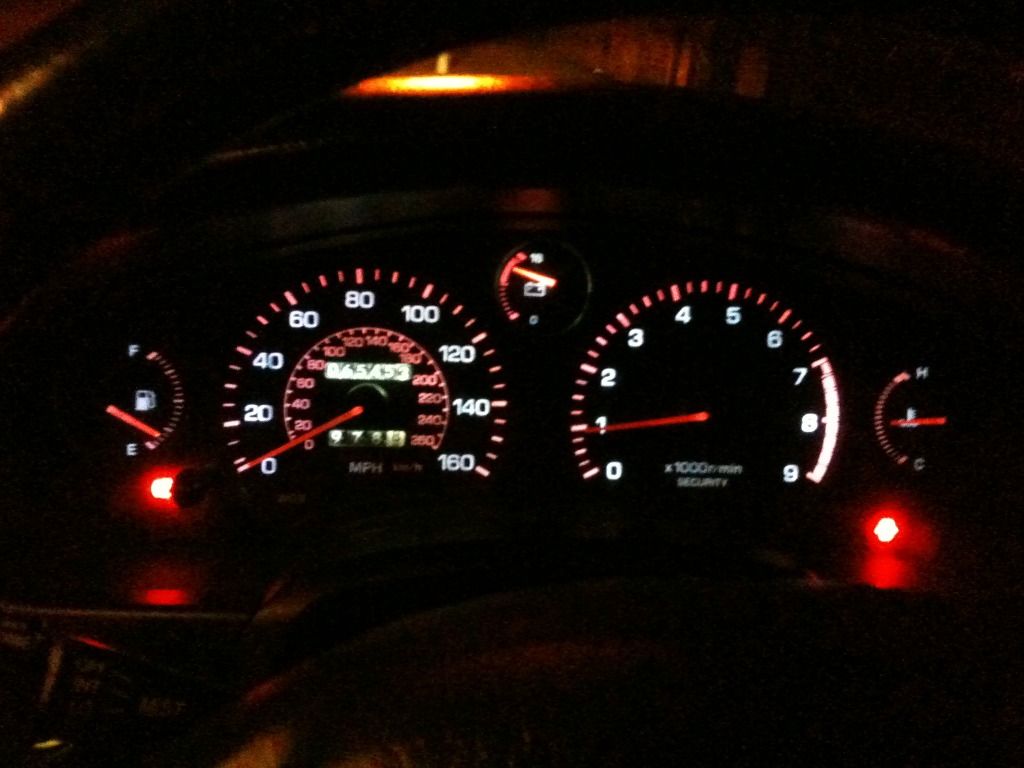
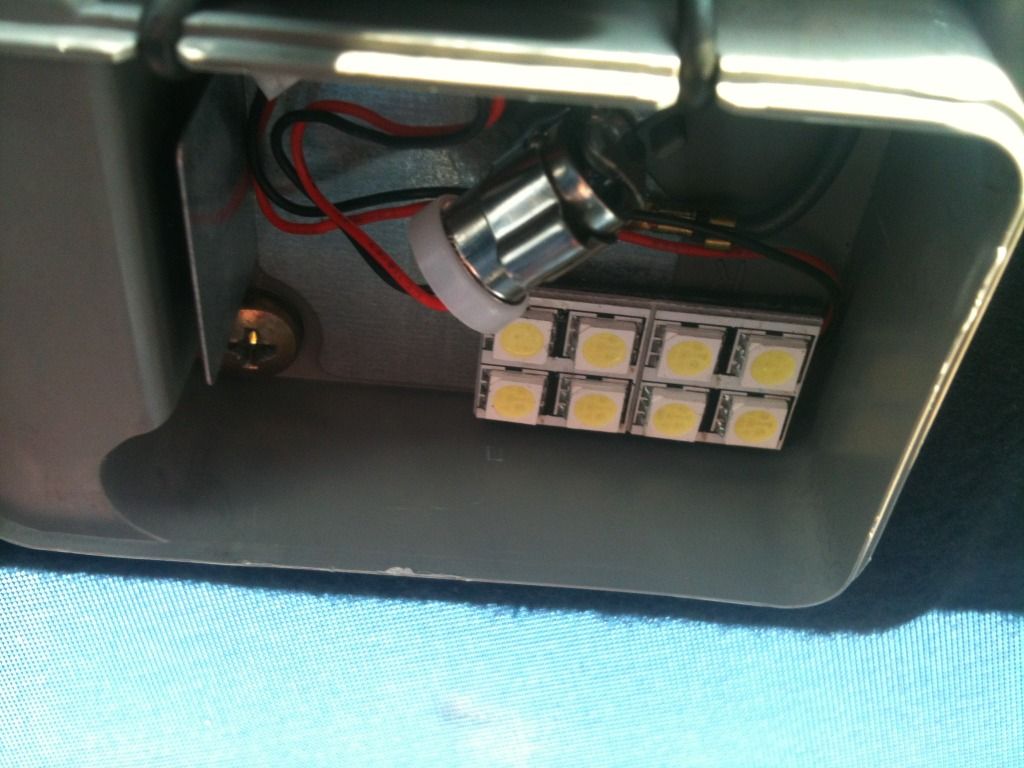
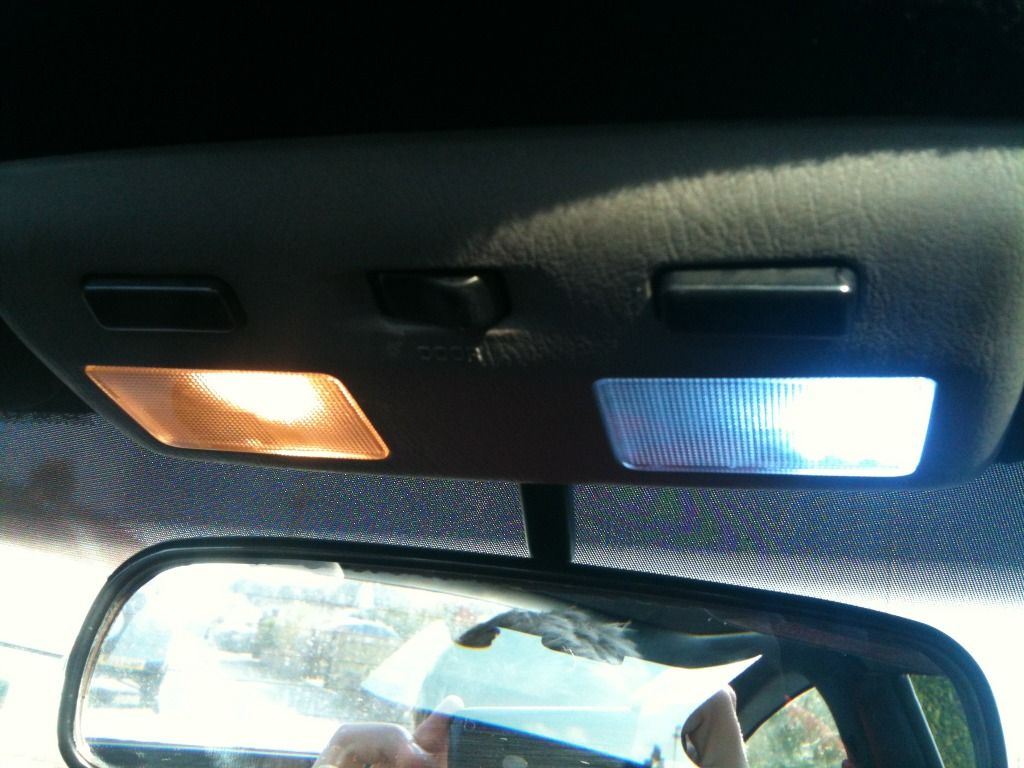
Next was the interior light:
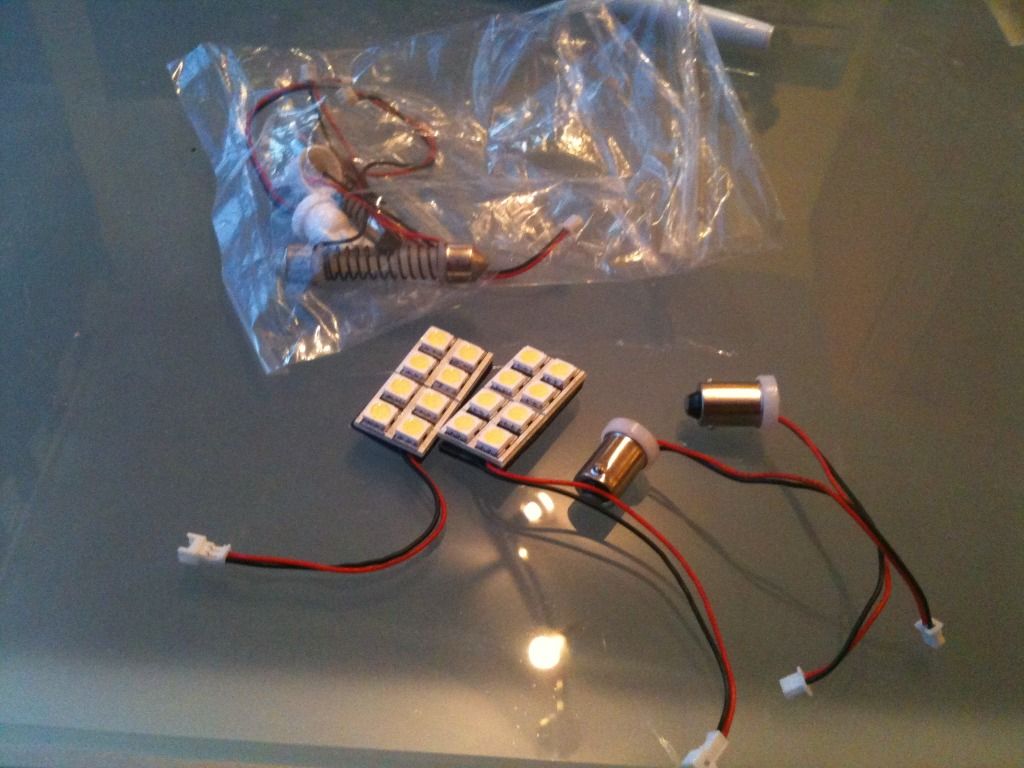
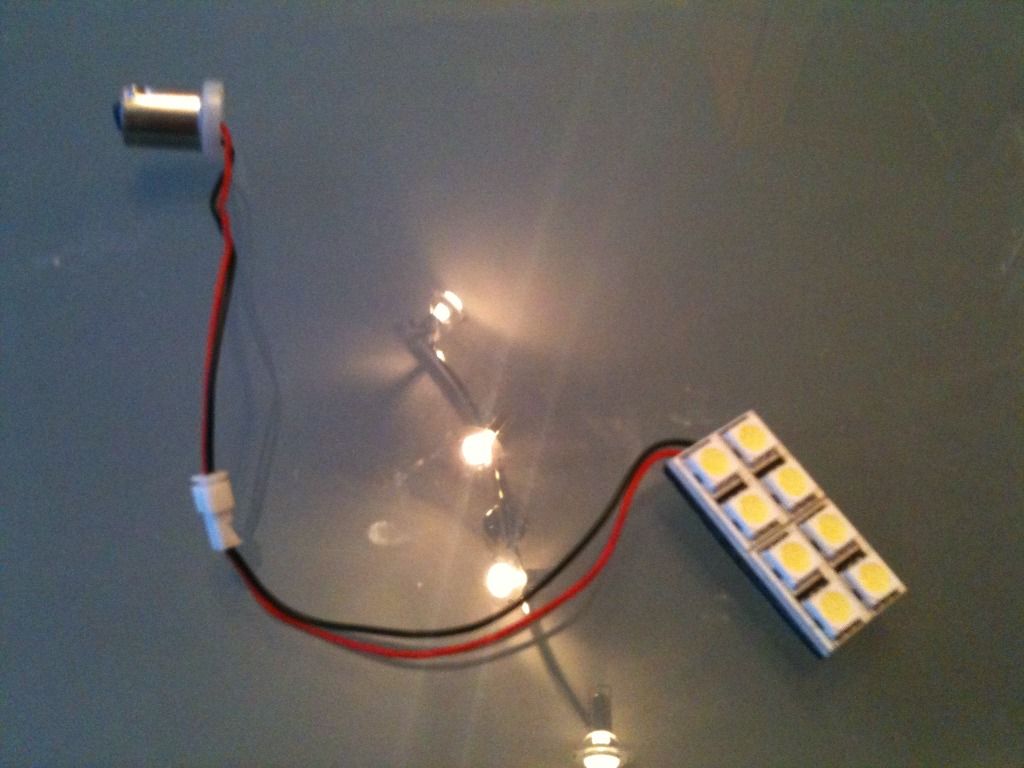
they're a good fit size wise with the small area of lense thats a different shade
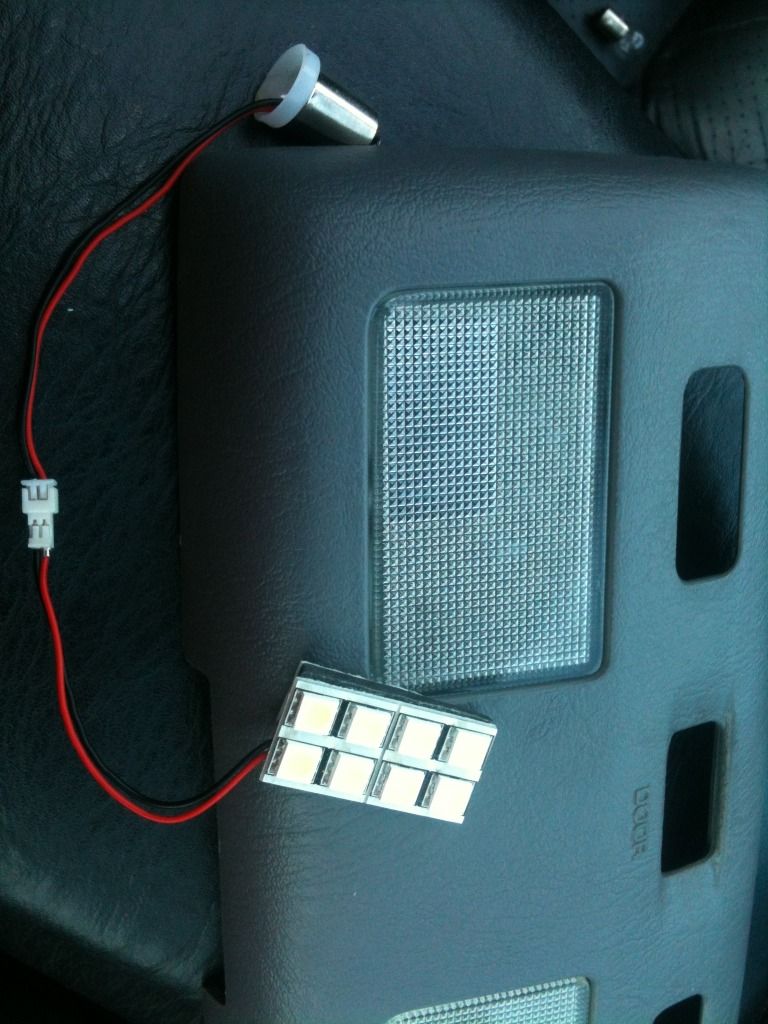
and 50/50
then the numberplate leds which look like this:
I also(with much help from Karlbristol, thanks buddy :th: ) fitted leds to the heater control. the light spread isn't even though so they're not perfect.
I need to get some more pics of the LED's, I've been a little blasé about it!
One thing that bugs me slightly about it is the way it ends at each corner, it just seem to come to a blunt end and ruins it from flowing with the lines of the car as well as if it came to more of a point, it's this way so that the boot can open though so I'm stuck on that one I'm afraid.
It was at this point I made the decision that this spoiler really didn't suit the body kit.
While I had the spoiler off the car the look really grew on me, at first it looked naked but the longer it was left that way the more my love for it grew.
The thing I liked most about spoilerless is it gives the car a more mature look.
So the Bomex sold and I bought a boot with the trd boot extention fitted to replace it.
Got it at an absolute steal and is carbon skinned too although I will be removing this and painting white to match
I removed the carbon skin from the bootlid which left behind quite a mess of old resin and not such a tidy finish
the old carbon skin
this shows the left over resin, quite a job sanding all that off!
half
At this stage I test fitted the boot and to be fair quite alot of work has been done to get it to fit nicely, never the less I manage to get it fitting pretty well
The boot was then sent off to have the holes welded and came back looking like this:
then first skim with filler
I've been driving the car around without a spoiler for a couple of weeks now and have got to say it's grown on me so much, the car seems to have a more mature look about it without such a big wing on the back.
Also, after alot of scare-mungerring from a friend about my car setting itself alight if I didnt add more earths I bought these:
They're purple because they were considerably cheaper than other kits on ebay not because I'm that way inclined! And they say HKS, wether or not HKS knows about this though I'm not sure!
Fitted:
barely noticeable in there
I've also been going a little mad with LED's recently.
I started by buying the LED dash upgrade
which came out like this untill I realised that leds had to be mounted the correct way around!
back off and ended up looking like this
Next was the interior light:
they're a good fit size wise with the small area of lense thats a different shade
and 50/50
then the numberplate leds which look like this:
I also
I need to get some more pics of the LED's, I've been a little blasé about it!
Re: Jacks' TRD rev5
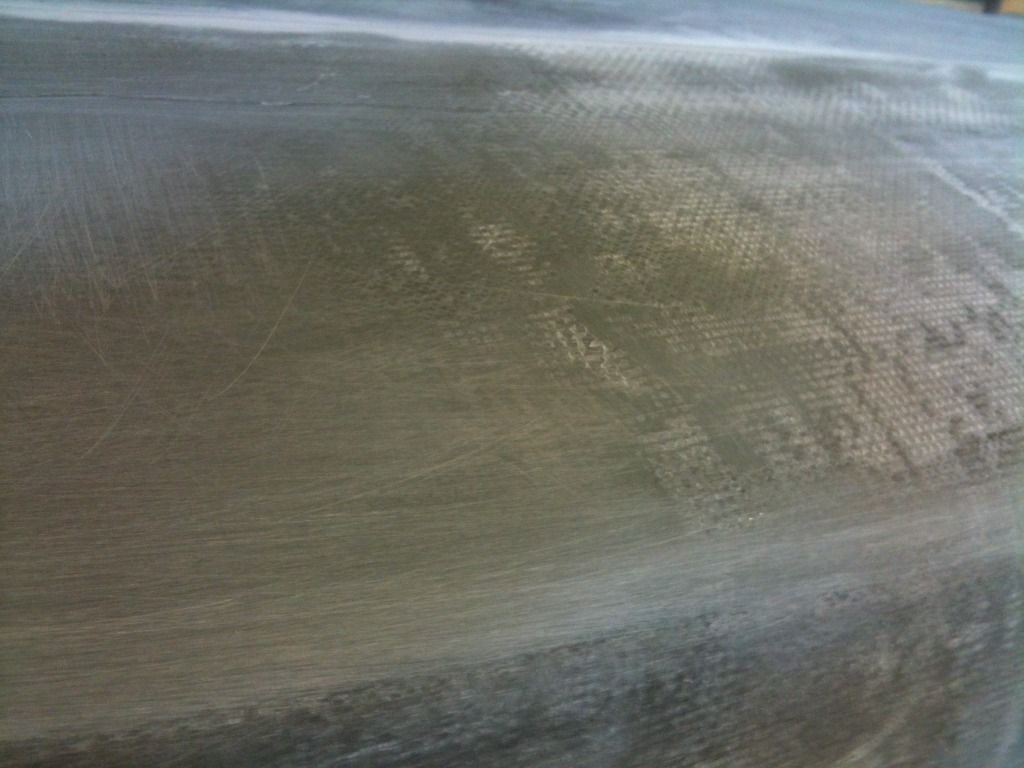
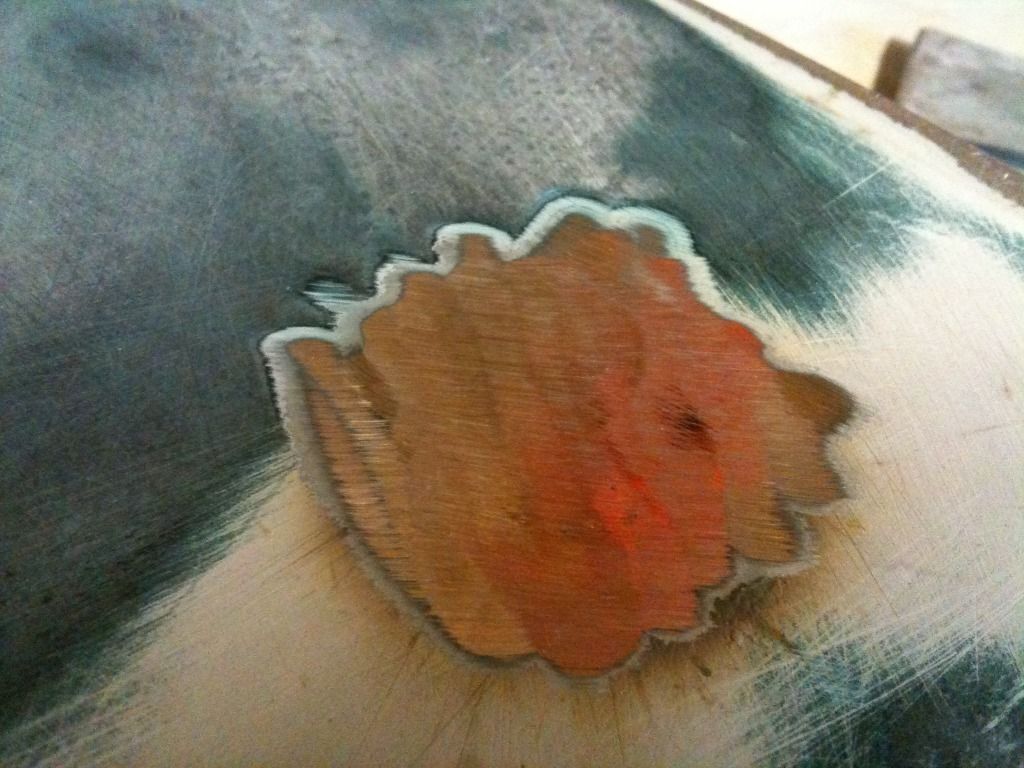
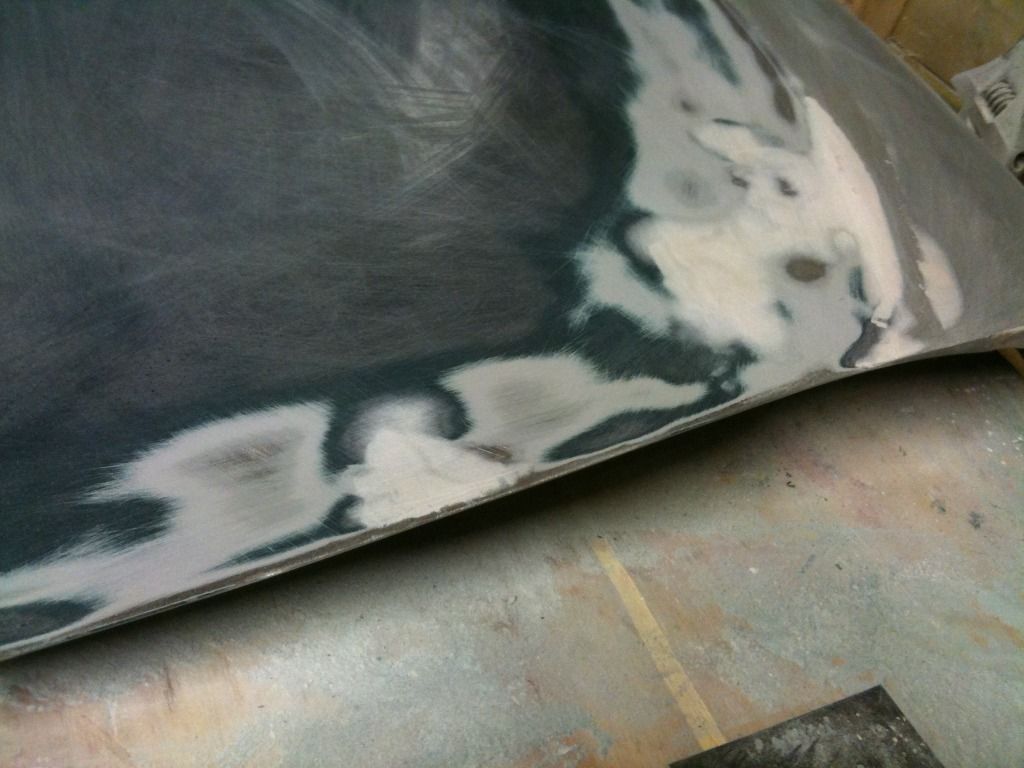
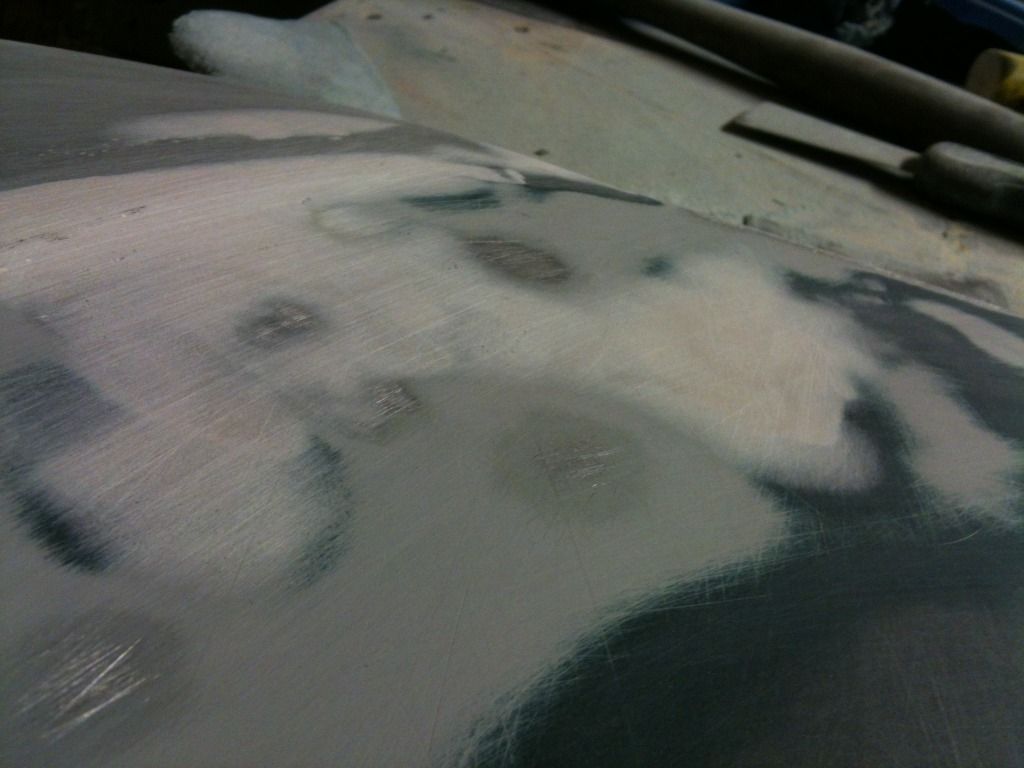
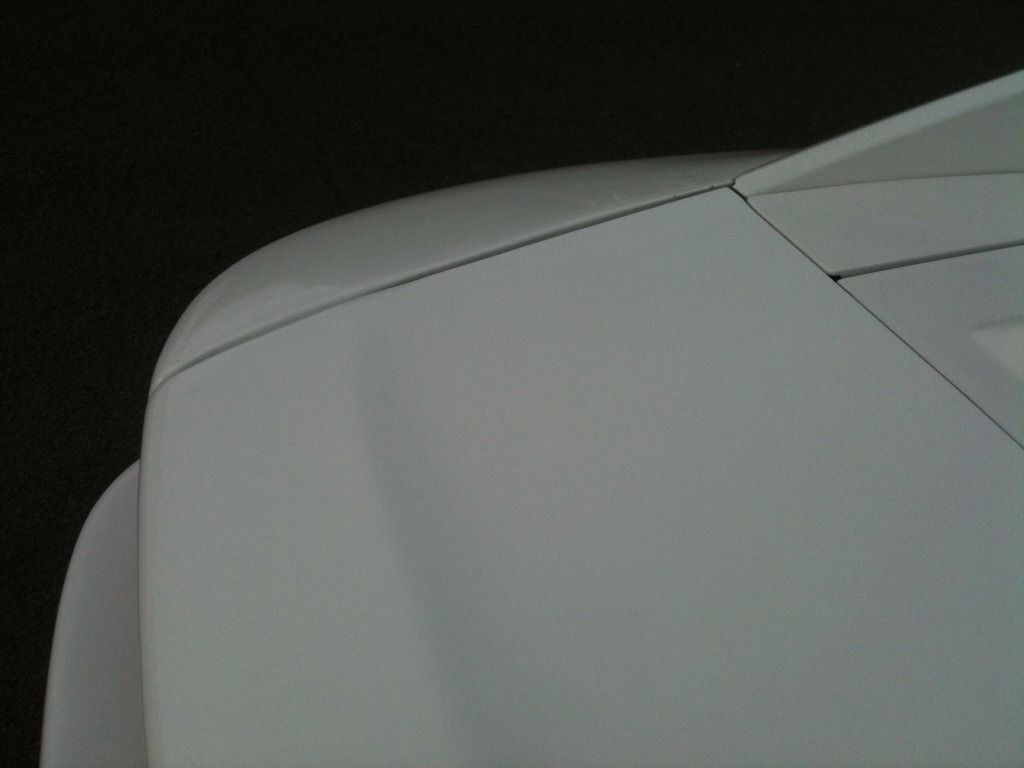
I sprayed it in black to highlight the high and low spots, this also showed up all the pinholes that needed filling so adressed those and flatted it back with a finer grit ready for paint.
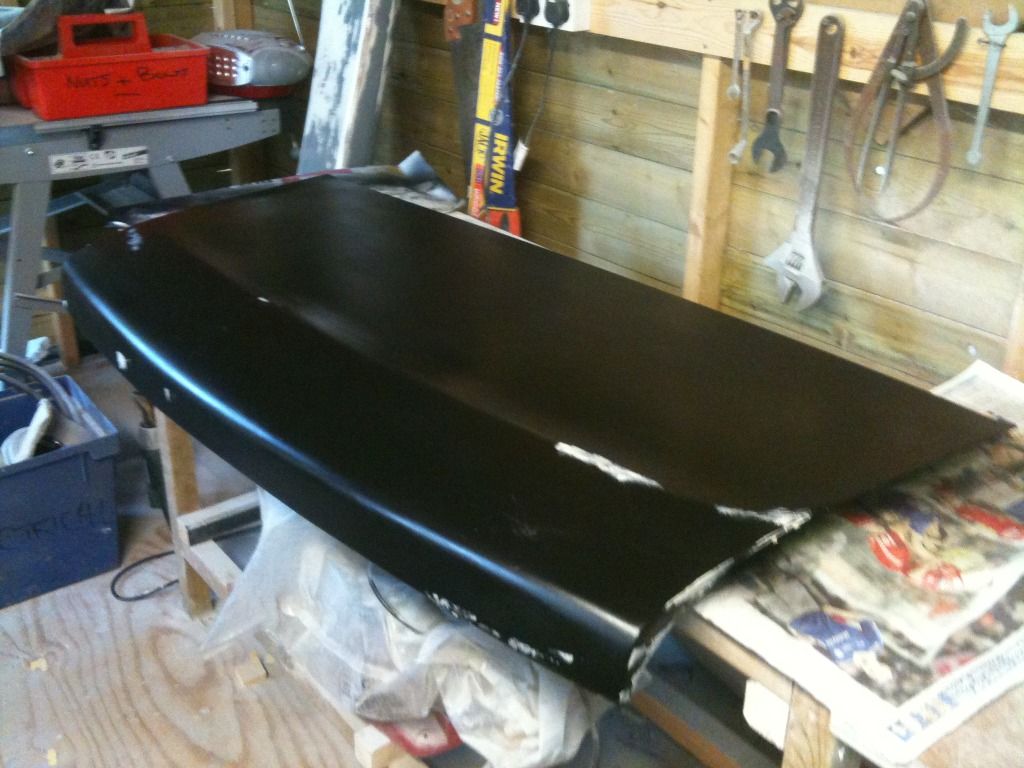
I then took it to the bodyshop to check it over and it's ready for paint! 
Unfortunately he's closed for easter and can't do it unitl the 13th, not too long a wait though
So now I'm driving around with a bit of a rat look going on! :blink:

Roll on the 13th!
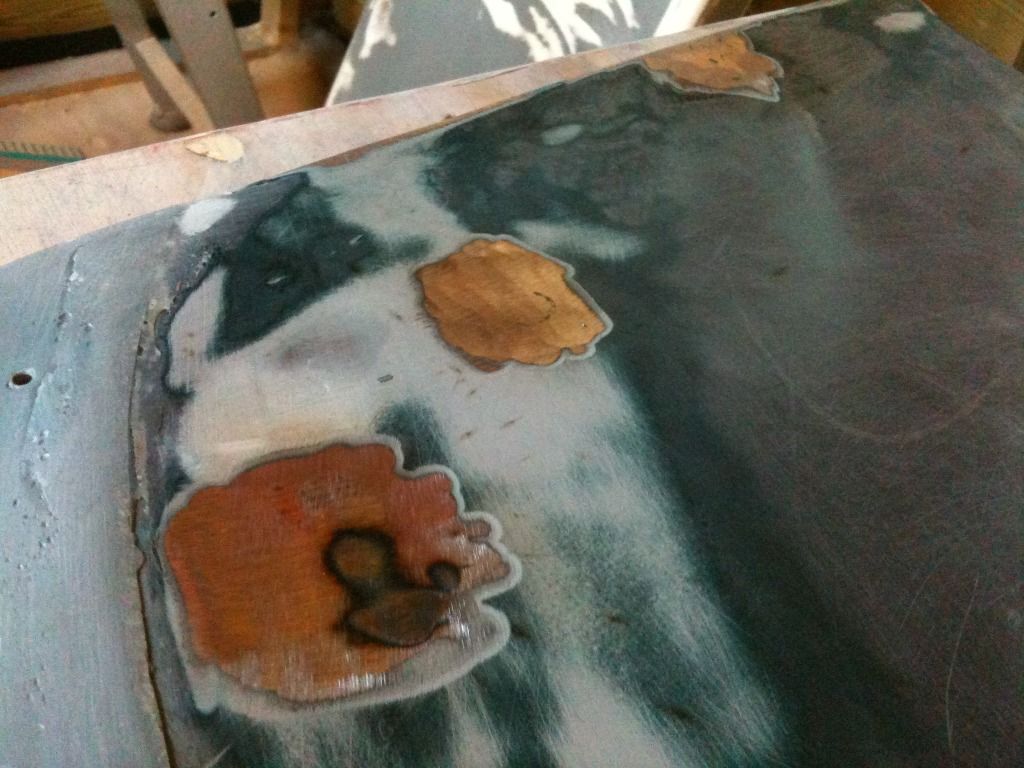
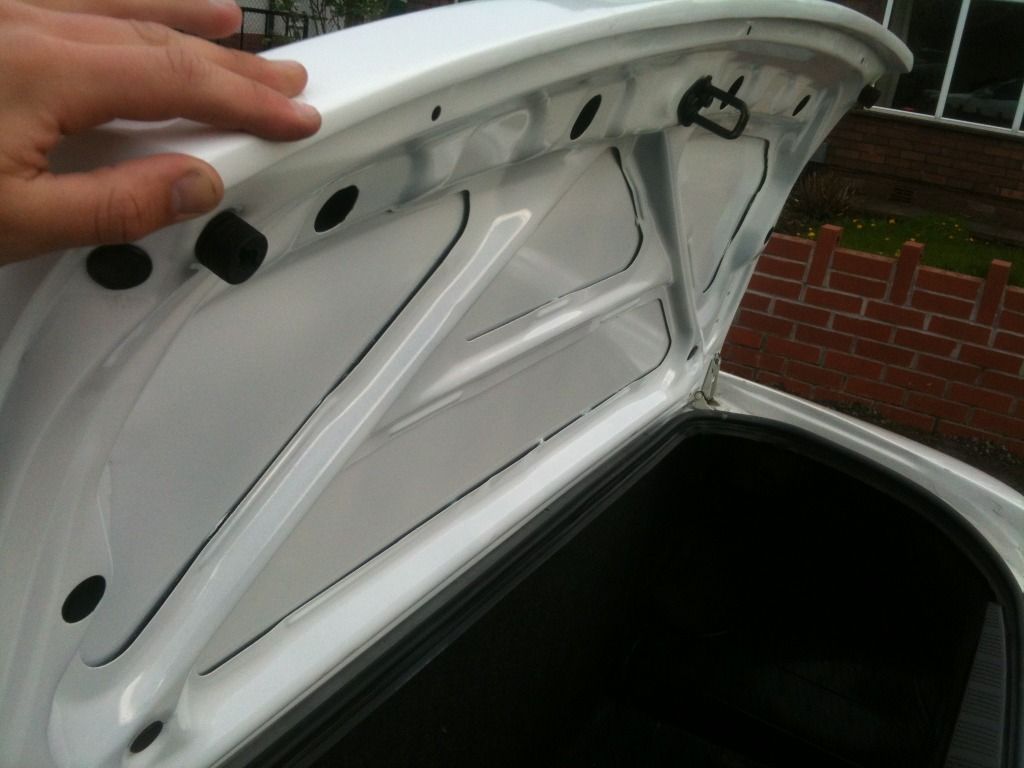
This boot really has taken quite alot of work to get it to this stage. I've:
Removed carbon skin.
Removed fibreglass residue.
Re-glassed the join along the middle of the boot.
Re-filed the join along the middle of the boot which involved alot of shaping as the shape had been lost somewhat.
The boot wouldn't shut because where the extension was added along the lower edge, the extra thickness was catching the center panel(had been mounted too low) so this was cut off and a completely new fibreglass lip made to meet with the original boot line.
Then filler built along each corner to make it sit in line with the lights(hard to explain why the original boot line doesnt do this on a trd kit).
Spoiler holes in boot welded, grinded and skimmed with filler(welding done professionally)
Underside of the filled holes grinded back, leaving a slight raise to avoid compromising strength and filled over to leave a nice finish.
A few cracks fixed.
The extention was actually mounted a mm or 2 too far on one side and so I had to shave the metal slightly to meet the Kit on one side and cut out and remount the other side closer in to meet the original lines of the boot(it wouldnt originally shut becuase this made it too wide!)
Dents on the underside filled.
And loads and loads of sanding!!!
I also gave all the rubber little trimmings a tidy up while they were sitting about the shed since there was some overspary on them.
Another little job I did was the weather strips on the side of the doors. They were looking a little tired (as they do on most mr2's so I decided to give them a bit of a revamp.
I decided not to remove them becuase in all honesty it's much easier to paint them on the car! 
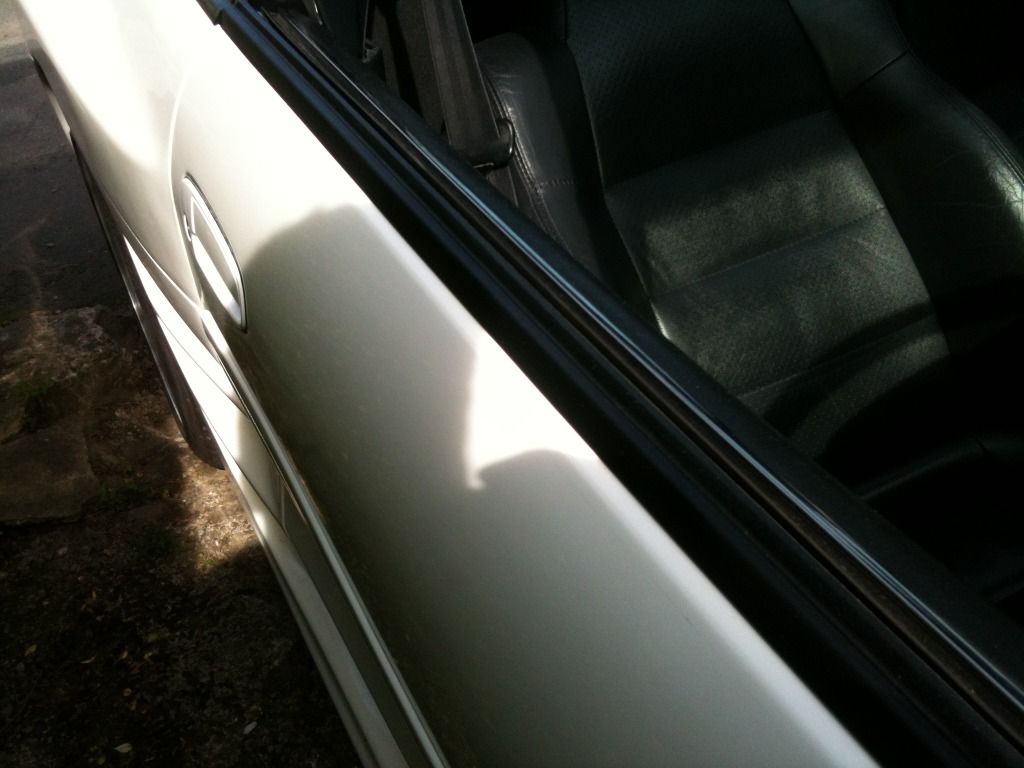
As sad as it is I'm actually really pleased with this! I managed to get a very oem finish so they look like new now. The paint I used was black bumper paint from halfords becuase its exactly the right colour and leaves the right texture too, perfect stuff for the job!
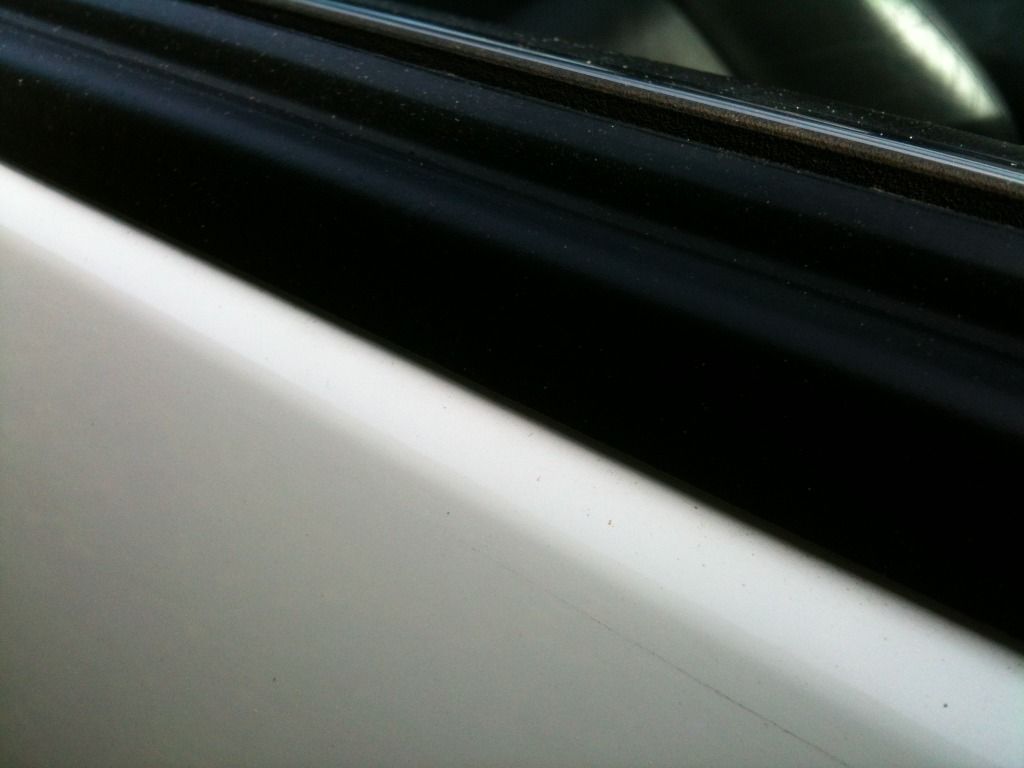
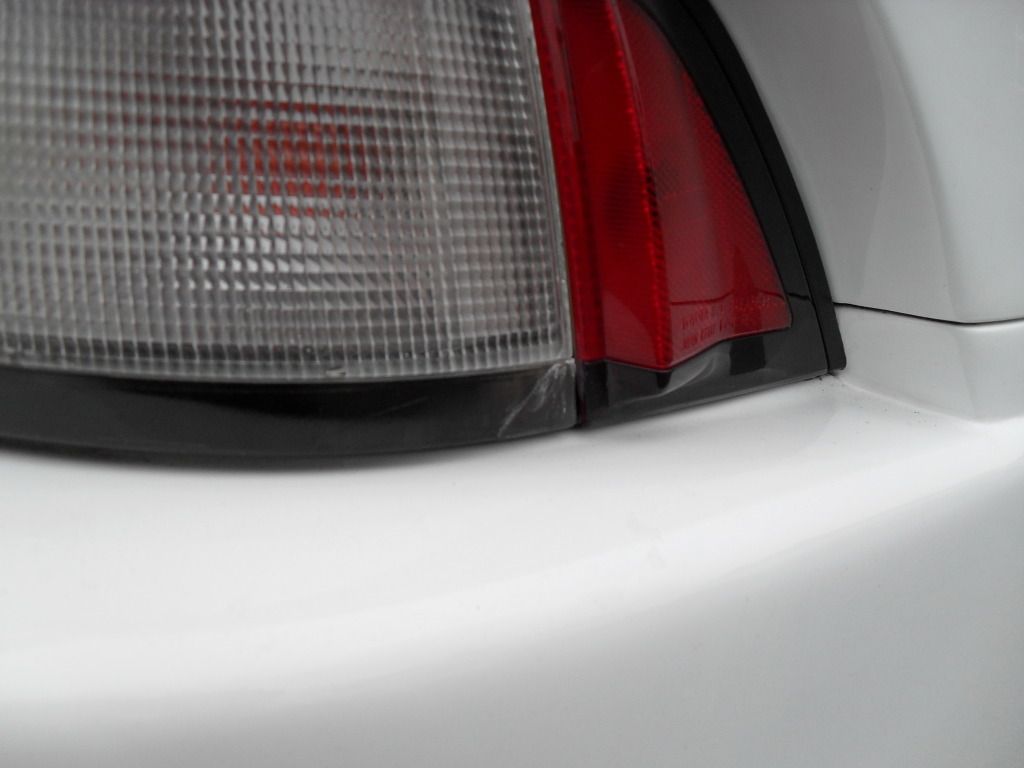
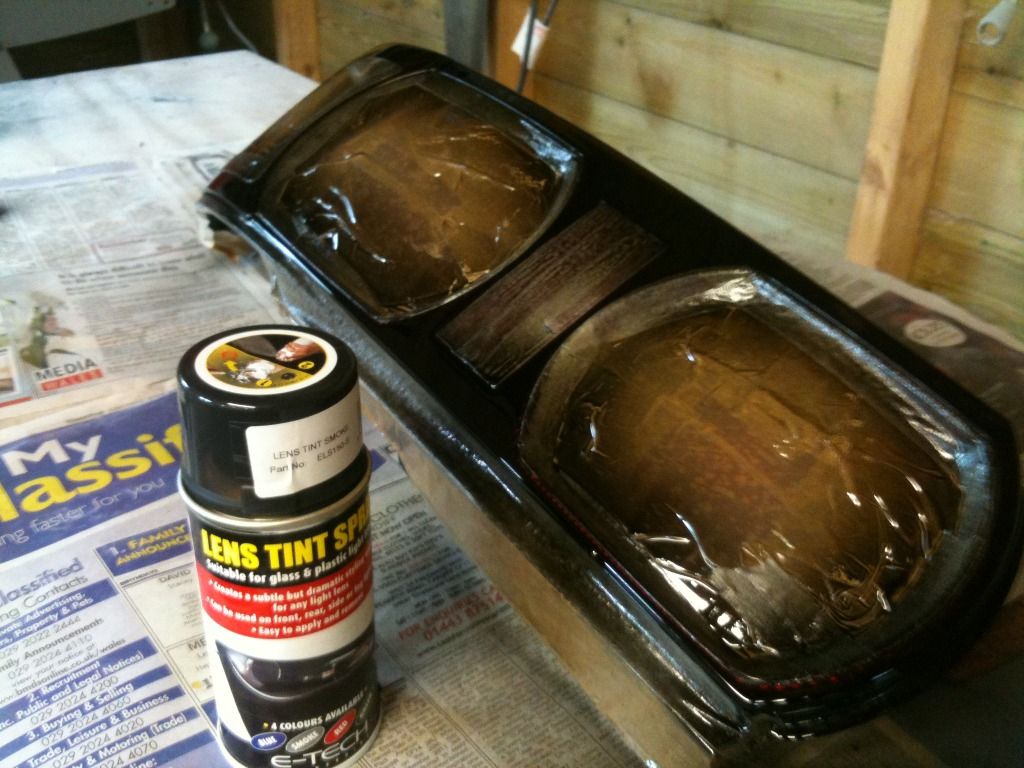
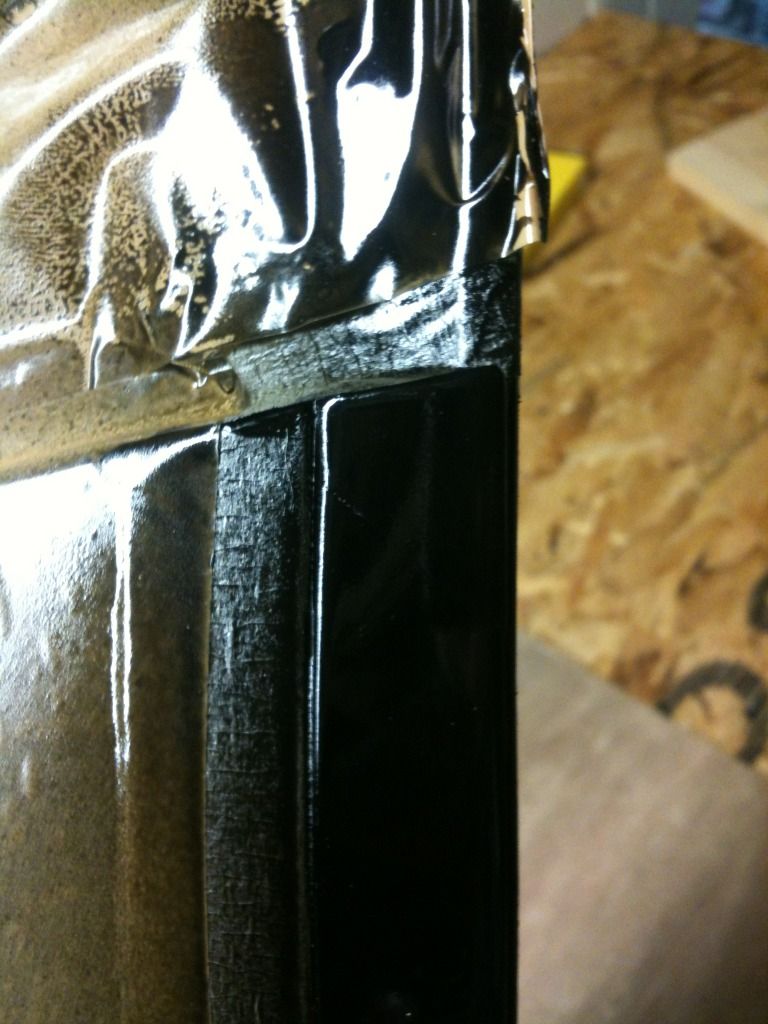
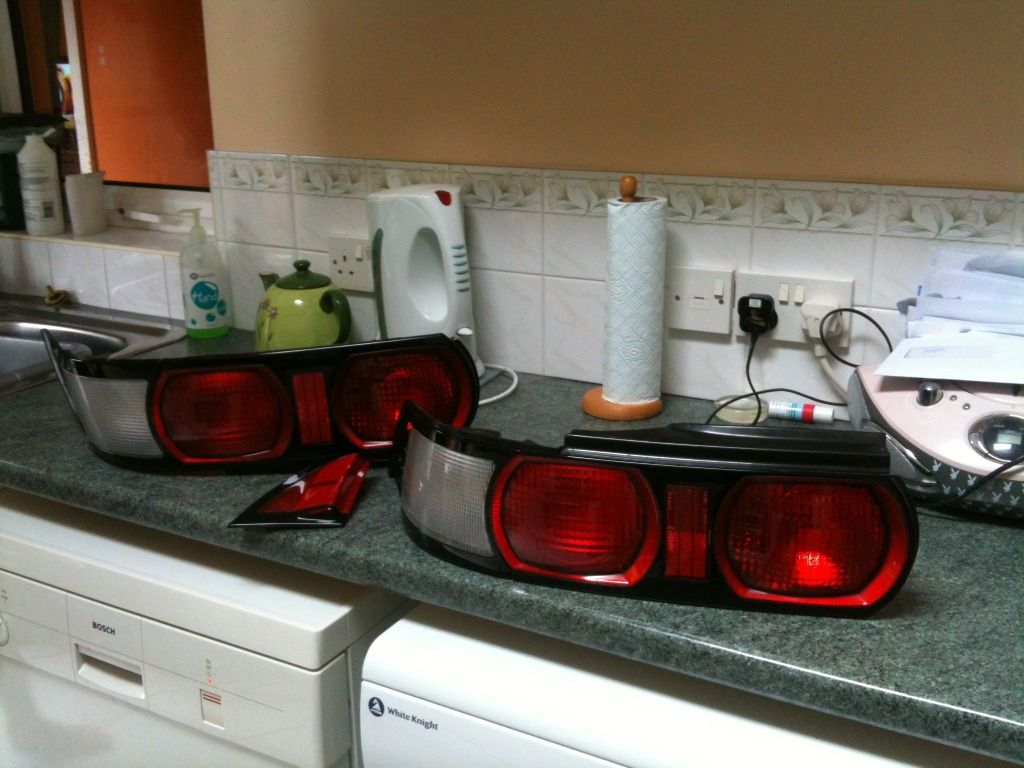
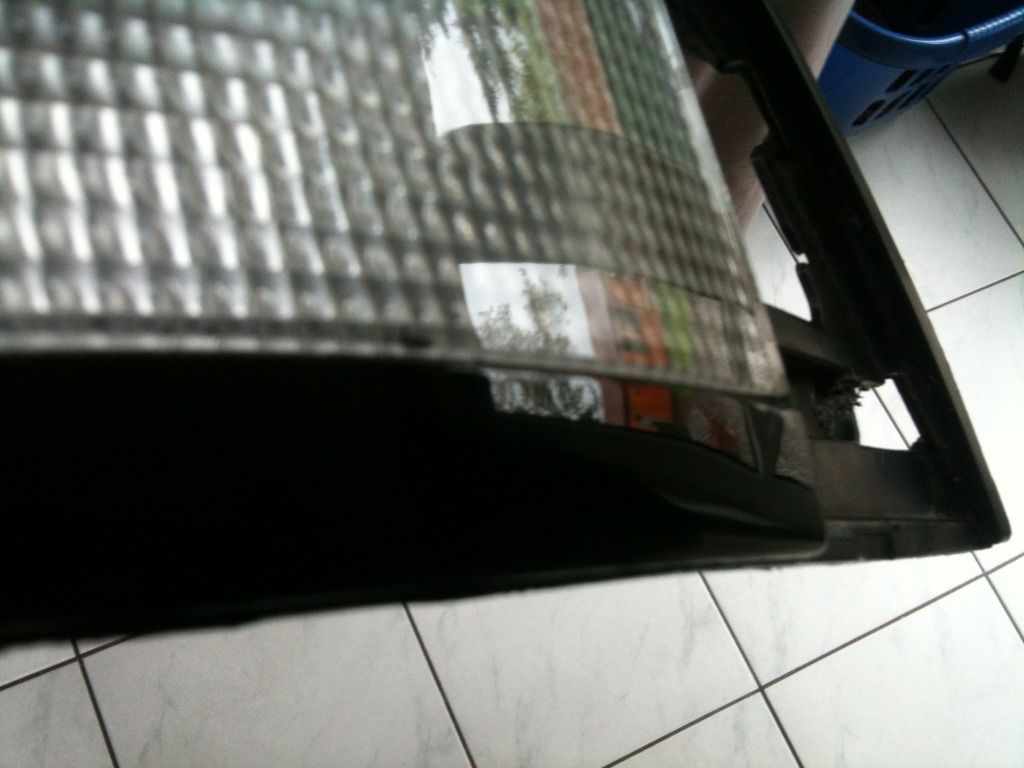
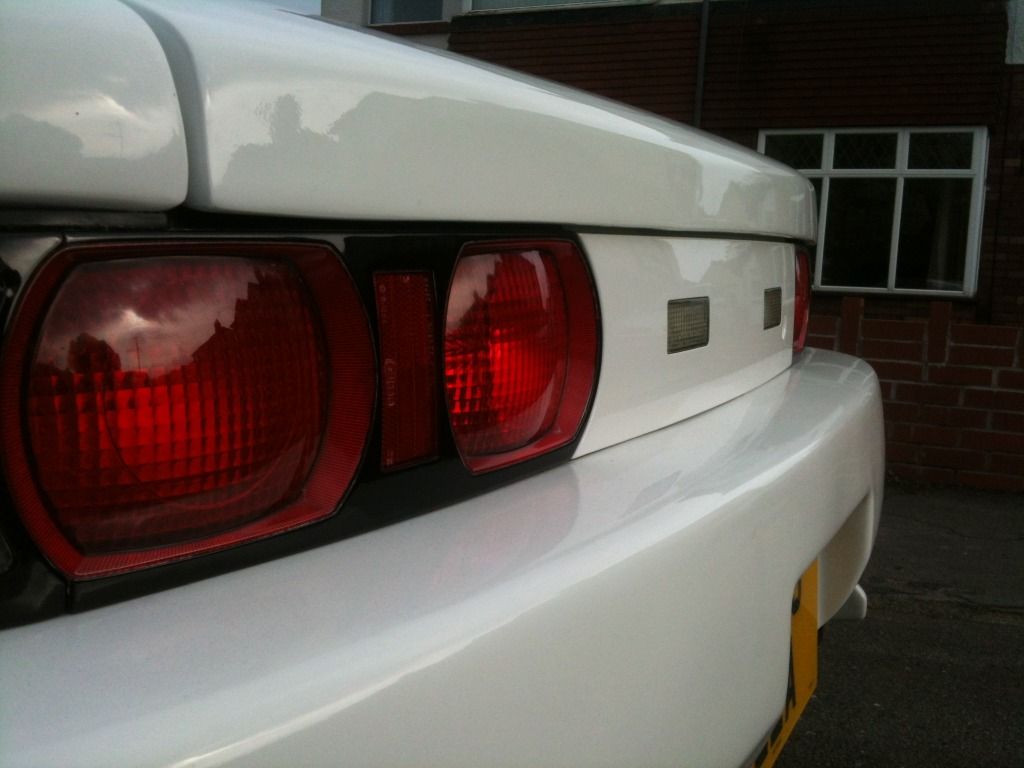
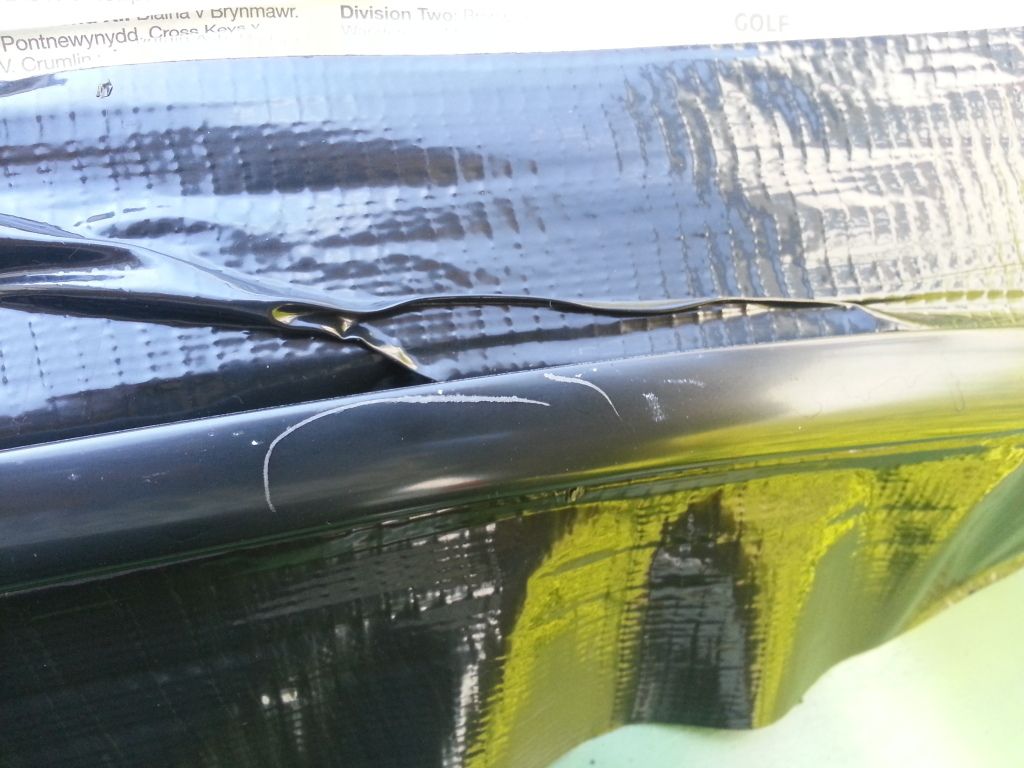
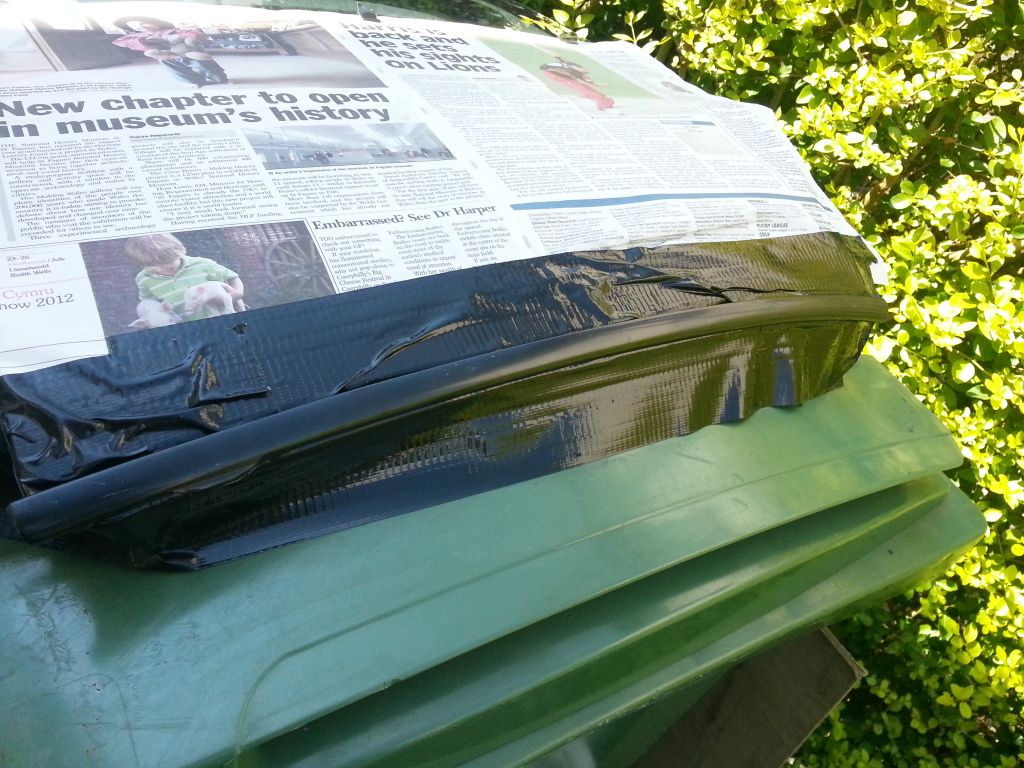
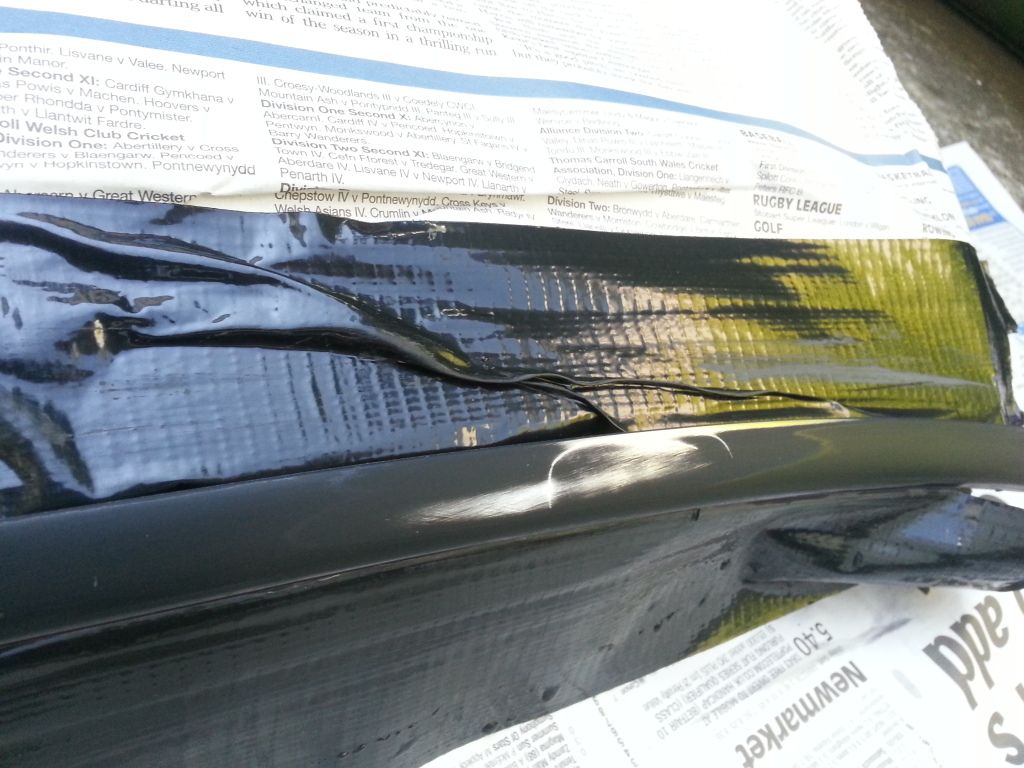
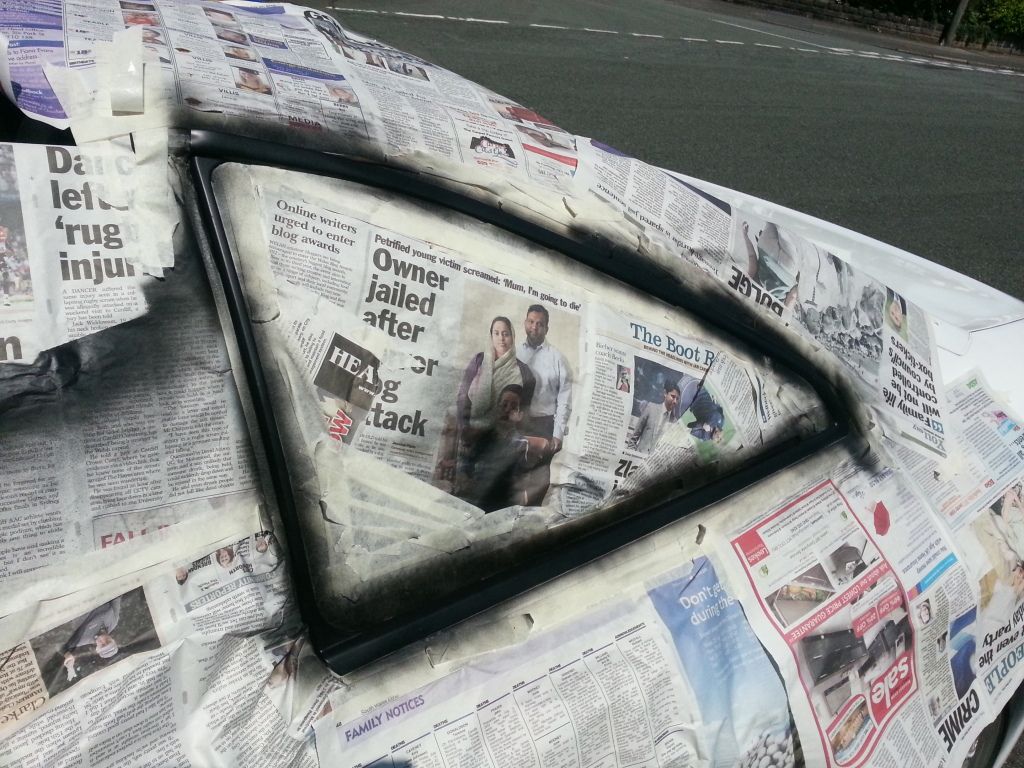
When I fitted my clear lenses I found out the hard way that the plastic is quite brittle and cracked a little ](./images/smilies/eusa_wall.gif "Brick wall") . After glueing it back together I was left with this:
. After glueing it back together I was left with this:
I obviously wasn't happy with this so decided to tackle the problem! While I was repairing this I also decided to re-tint the black border around the lights. This had faded over the years and as the tint around the new lenses was black it stood out... well it stood out a little!
First things first I masked them off(probably shouldnt have uysed parcel tape because it's a pain in the "censored" to get back off again!)
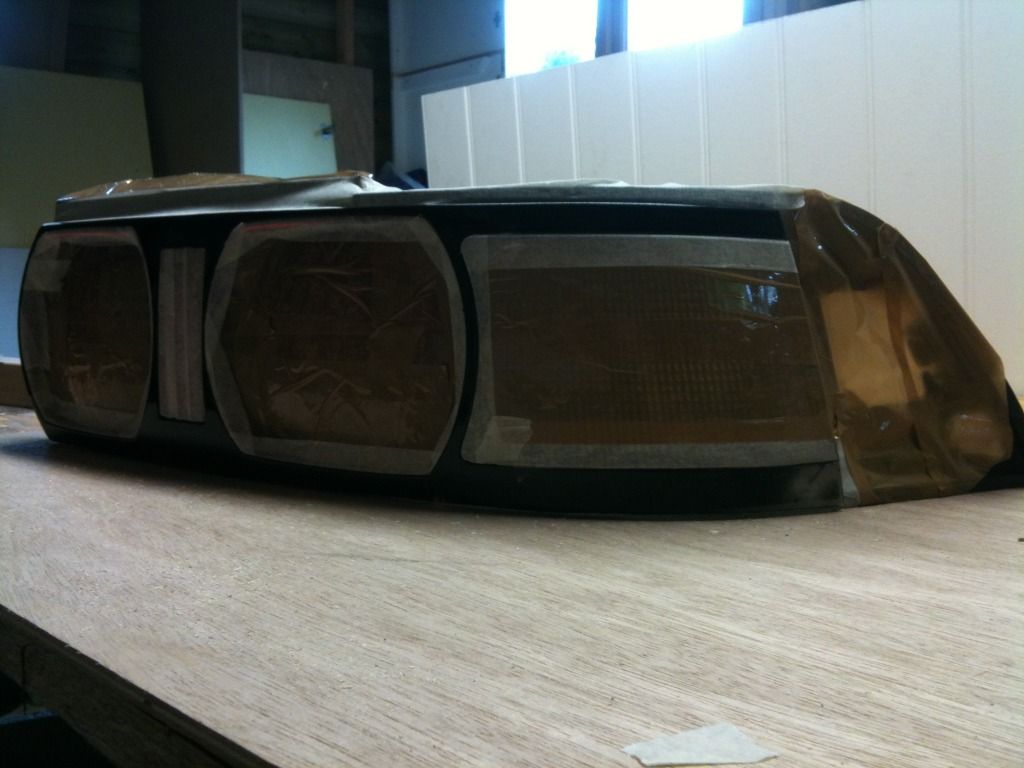
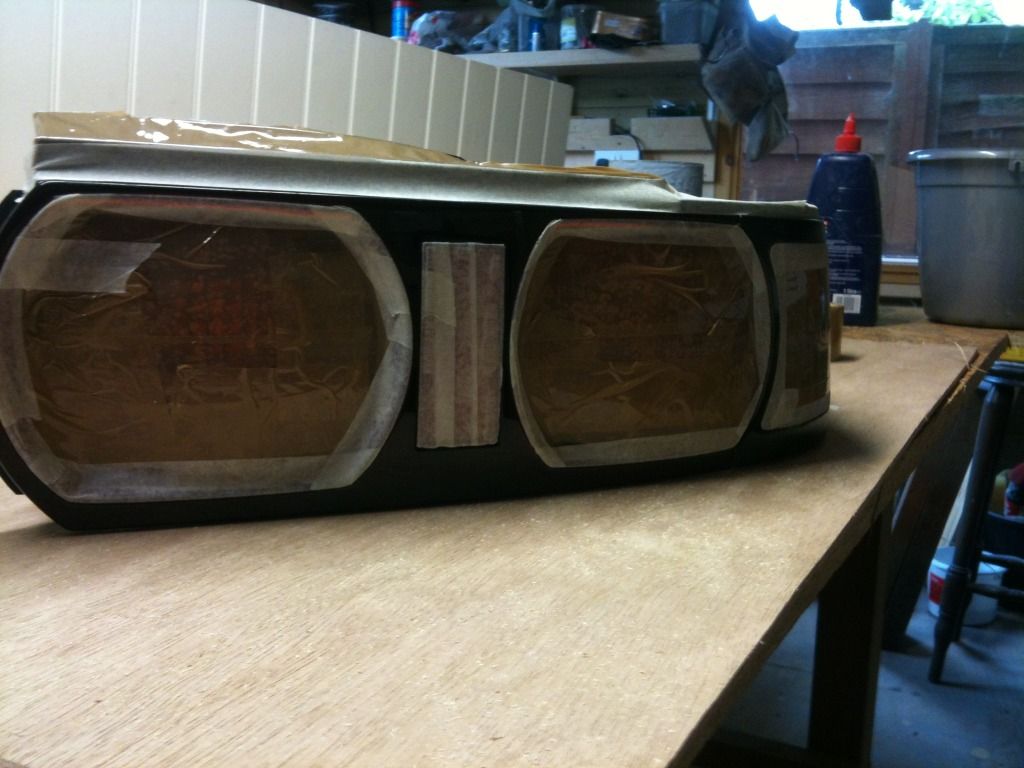
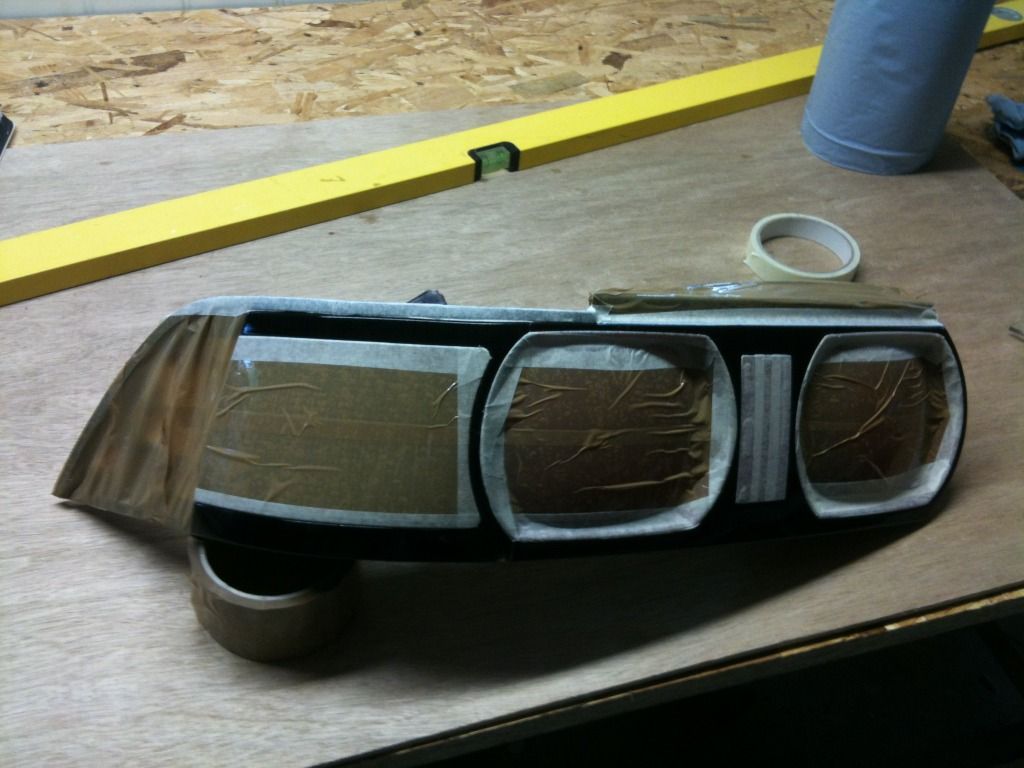
After masking the lights off I started by sanding the crack back with wet'n' dry (wet with soapy water).
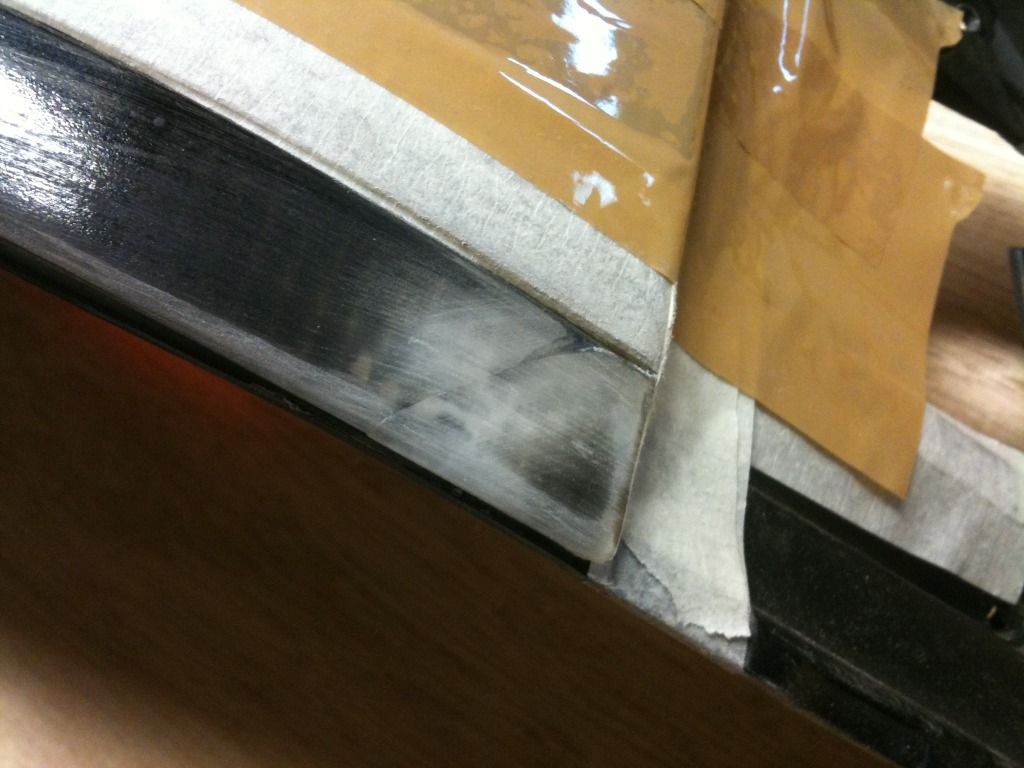
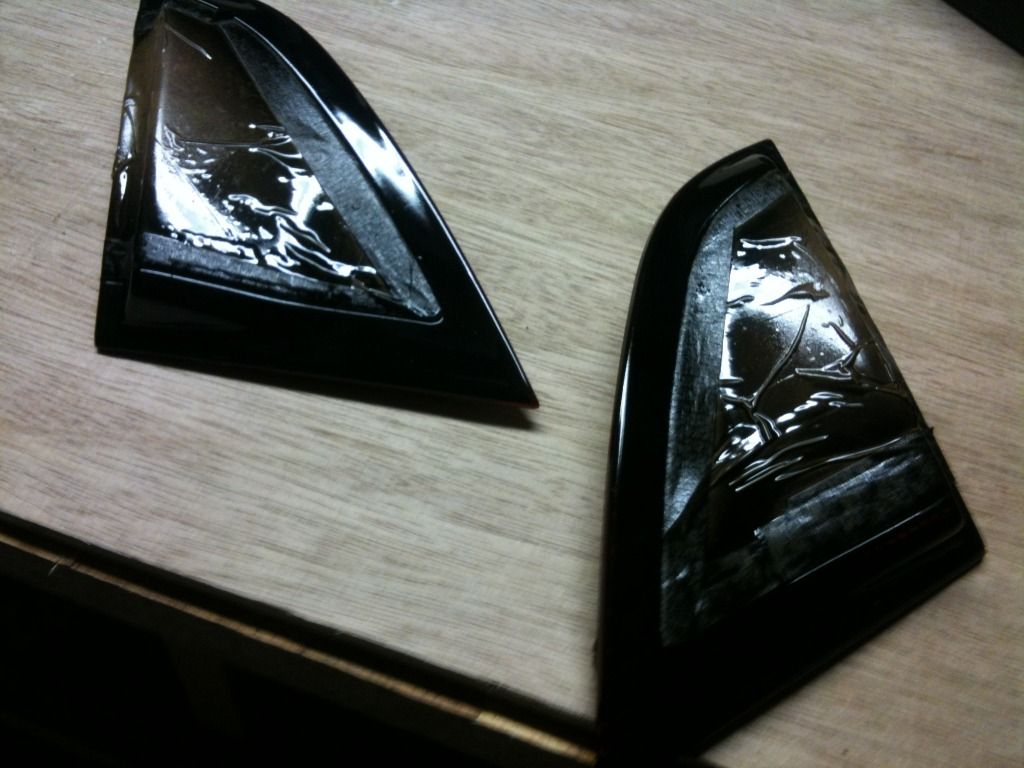
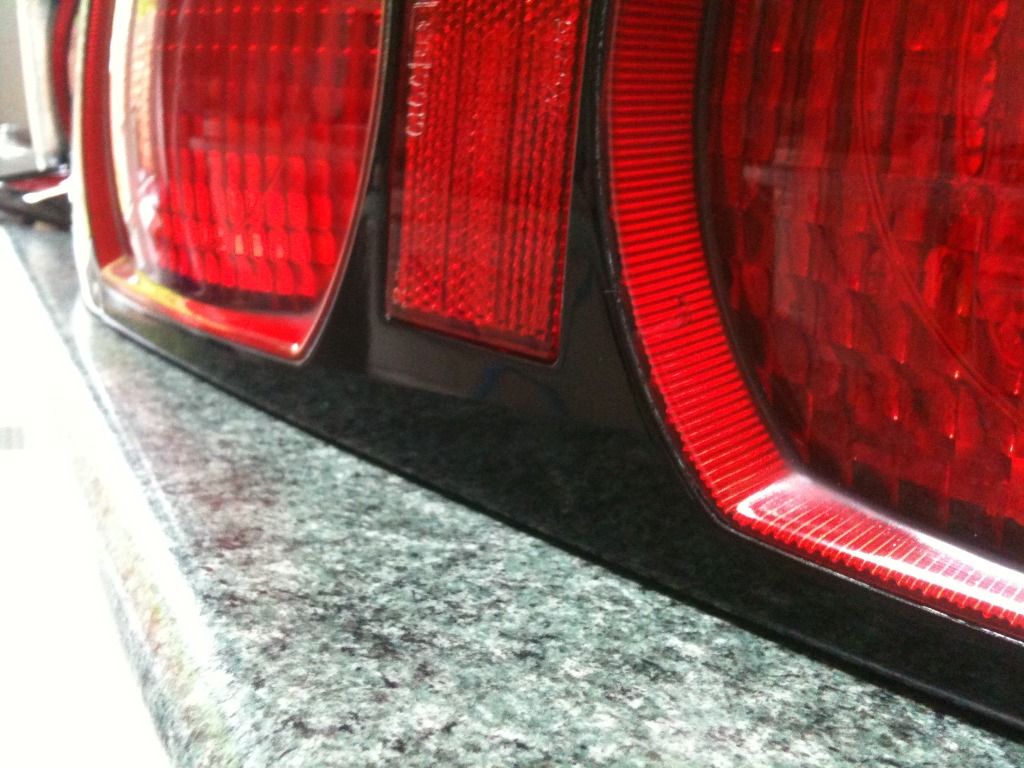
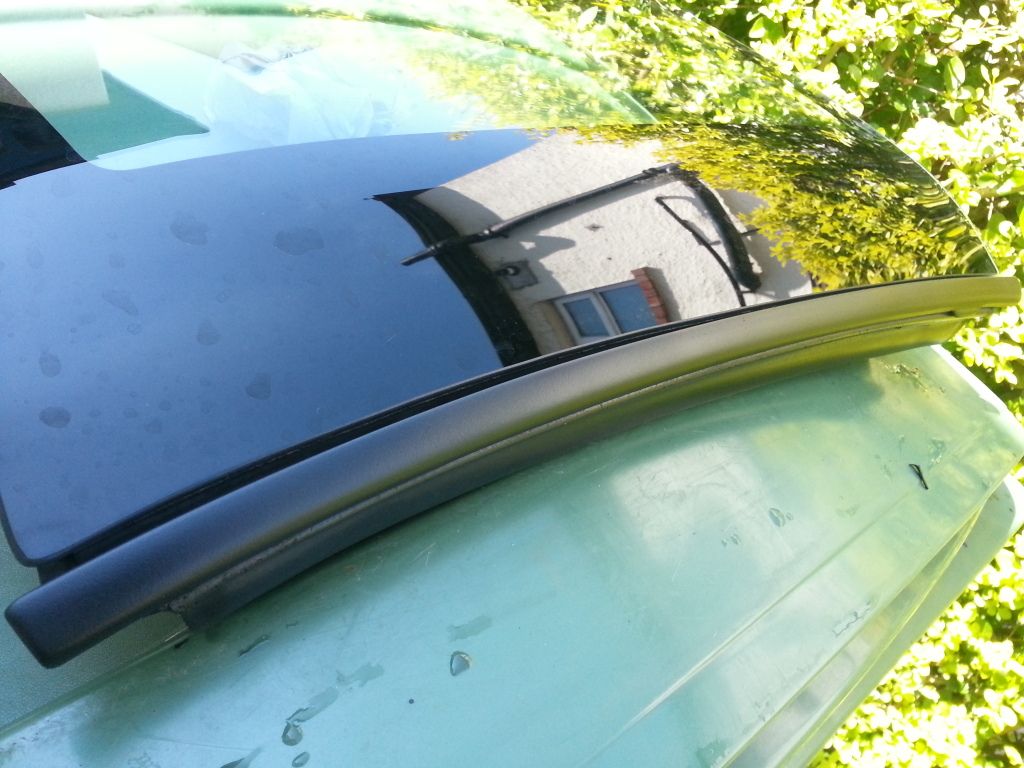
This shows the difference between the standard black border and the clear lenses' border.
and the slightly faded corner pieces
I then used 1500 wet'n' dry to flat back the whole border (corner peices included) to key it ready for paint. (forgot to take a pic of this stage sorry :facepalm: )
After that it was on with several coats of the tint spray.
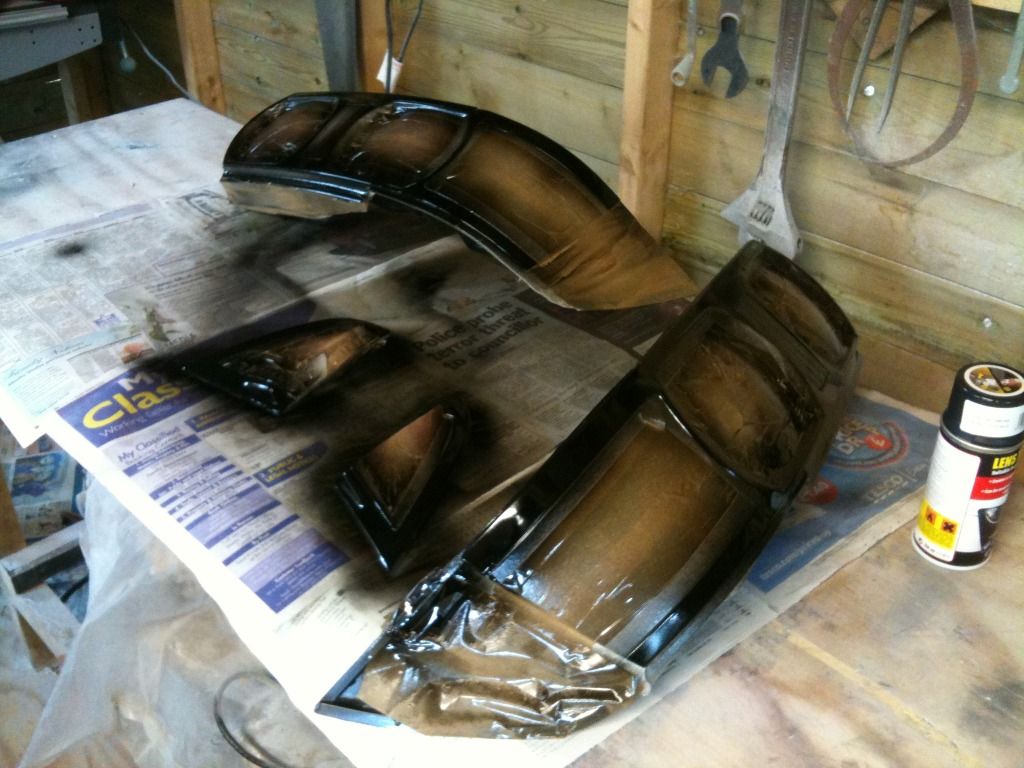
I left it to dry and came back to a few imperfections such as orange peel, dust particles and a couple of very slight runs(in honesty it was nothing too bad).
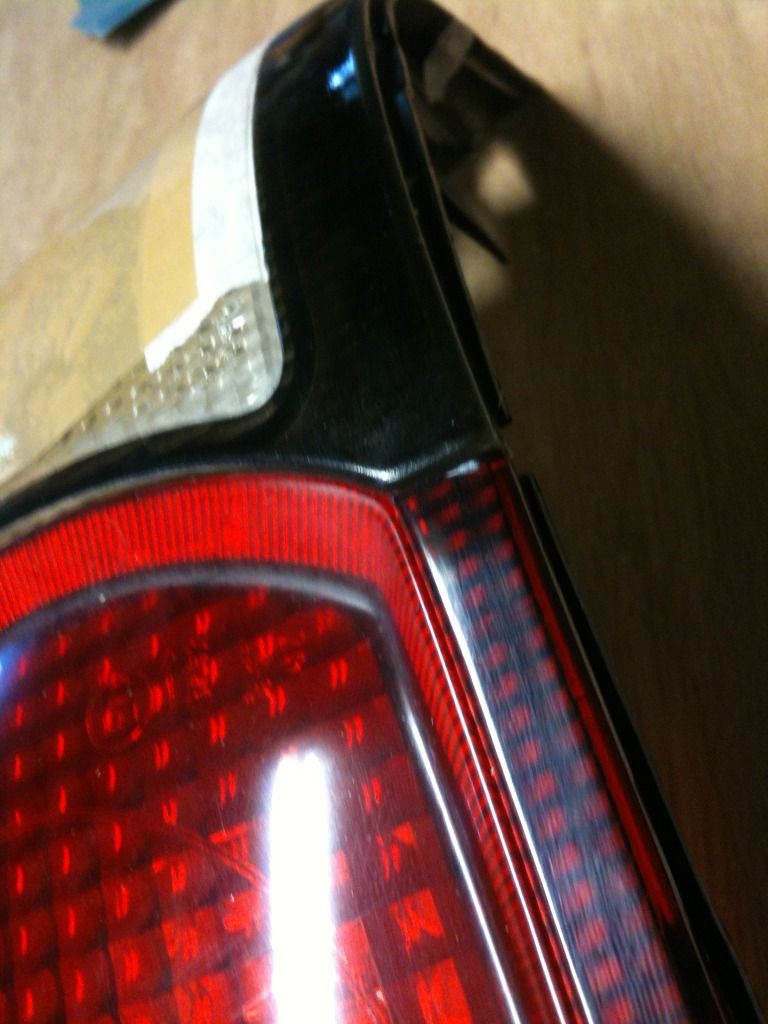
and this is what the crack was looking like
So I set about flatting the paint back. I only had the 1500 to hand and having no lights on the car meant I was stuck with it!! so working very carefully I wet 'n' dry'd it (again, wet with soapy water).
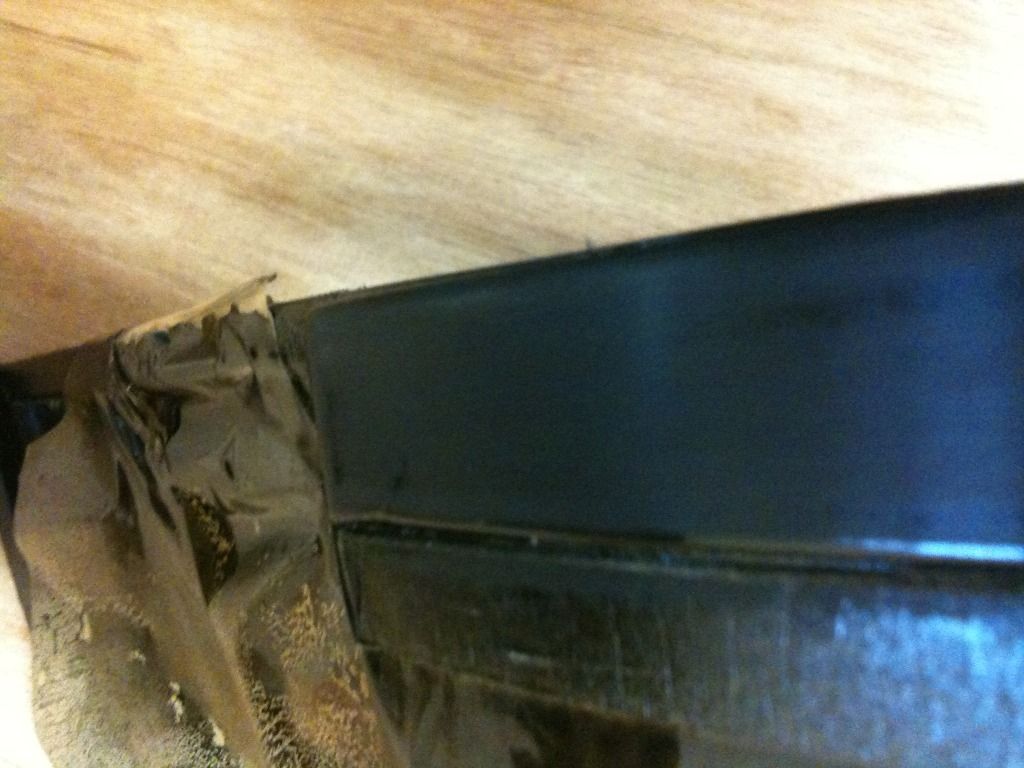
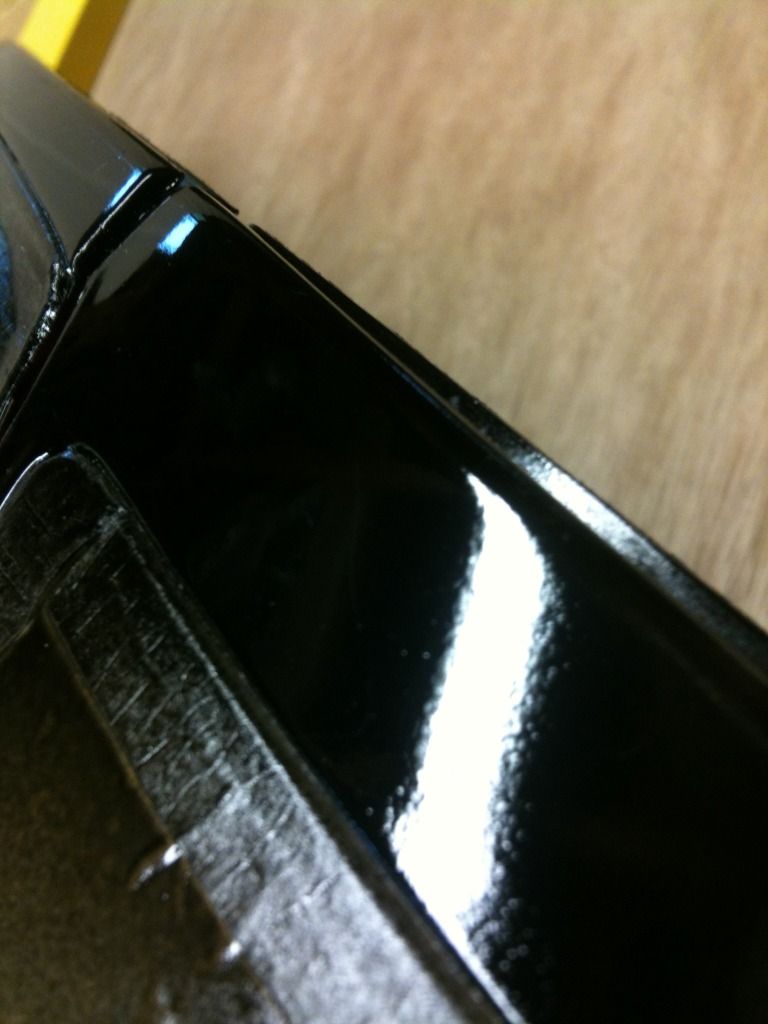
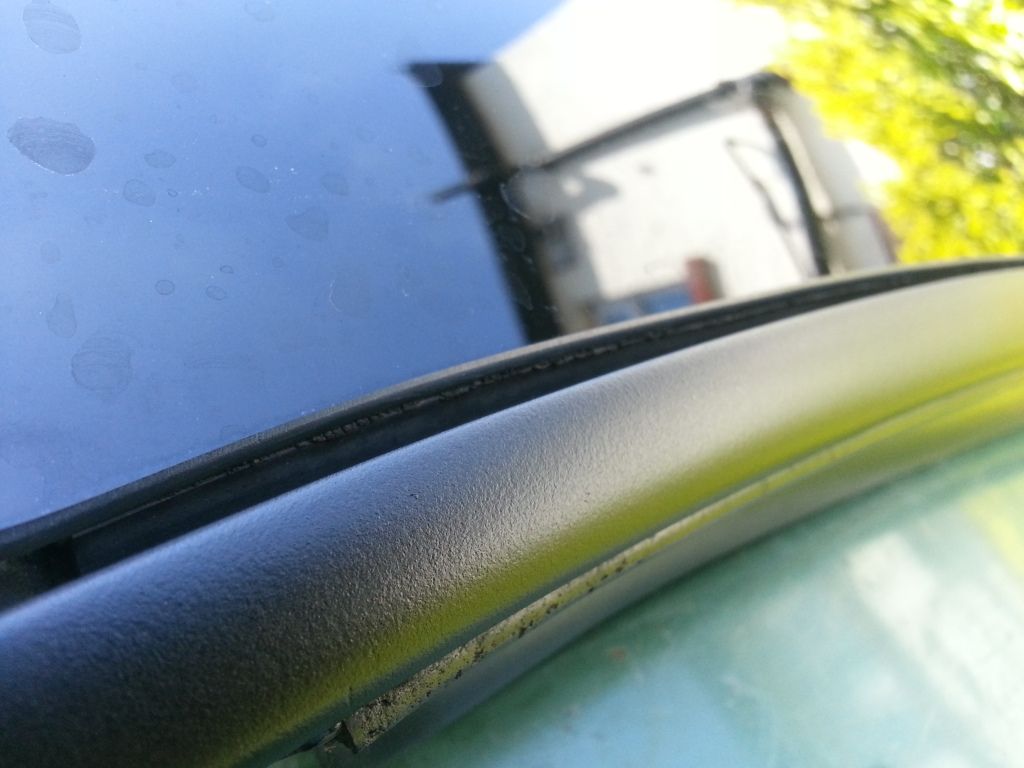
Crack's almost dssapeared now the paint's all at the same level.
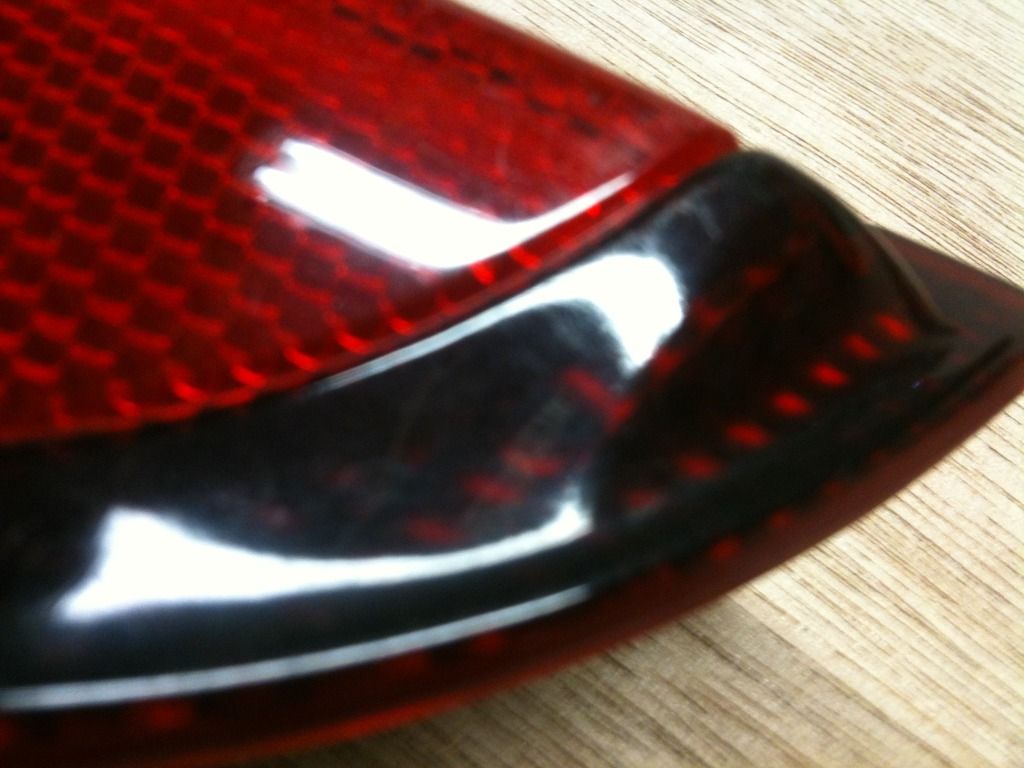
Then I removed the tape(bloody packing tape! :ranting1: ) and polished them to finish off. (well I actually waxed them too becuase I'm sad!)
and here's what's left of the crack, crack... what crack!
The lenses when bought were finished with more of a satin finish than gloss which didn't quite match up with the standard border and were quite orange peely so this is a vast improvement in my eyes. You would also never know that they had a crack (I got a little lucky that it didn't crack into the actual lens admittedly) so I'm very happy with how that turned out. And although they look really dark in the pics like I've just used gloss black paint, you can still tell it's tinted in real life so looks oem... just newer
I didn't take a picture of them fitted becuase I had to refit them in the wind and rain!

I then took it to the bodyshop to check it over and it's ready for paint!
Unfortunately he's closed for easter and can't do it unitl the 13th, not too long a wait though
So now I'm driving around with a bit of a rat look going on!
Roll on the 13th!
This boot really has taken quite alot of work to get it to this stage.
Removed carbon skin.
Removed fibreglass residue.
Re-glassed the join along the middle of the boot.
Re-filed the join along the middle of the boot which involved alot of shaping as the shape had been lost somewhat.
The boot wouldn't shut because where the extension was added along the lower edge, the extra thickness was catching the center panel
Then filler built along each corner to make it sit in line with the lights
Spoiler holes in boot welded, grinded and skimmed with filler
Underside of the filled holes grinded back, leaving a slight raise to avoid compromising strength and filled over to leave a nice finish.
A few cracks fixed.
The extention was actually mounted a mm or 2 too far on one side and so I had to shave the metal slightly to meet the Kit on one side and cut out and remount the other side closer in to meet the original lines of the boot
Dents on the underside filled.
And loads and loads of sanding!!!
I also gave all the rubber little trimmings a tidy up while they were sitting about the shed since there was some overspary on them.
Another little job I did was the weather strips on the side of the doors.
I decided not to remove them becuase in all honesty it's much easier to paint them on the car!

As sad as it is I'm actually really pleased with this! I managed to get a very oem finish so they look like new now.
When I fitted my clear lenses I found out the hard way that the plastic is quite brittle and cracked a little
I obviously wasn't happy with this so decided to tackle the problem! While I was repairing this I also decided to re-tint the black border around the lights.
First things first I masked them off
After masking the lights off I started by sanding the crack back with wet
This shows the difference between the standard black border and the clear lenses' border.
and the slightly faded corner pieces
I then used 1500 wet
After that it was on with several coats of the tint spray.
I left it to dry and came back to a few imperfections such as orange peel, dust particles and a couple of very slight runs
and this is what the crack was looking like
So I set about flatting the paint back.
Crack's almost dssapeared now the paint's all at the same level.
Then I removed the tape
and here's what's left of the crack, crack.
The lenses when bought were finished with more of a satin finish than gloss which didn't quite match up with the standard border and were quite orange peely so this is a vast improvement in my eyes.
I didn't take a picture of them fitted becuase I had to refit them in the wind and rain!
Re: Jacks' TRD rev5
Then after several missed agreed dates I finally got my boot back from the bodyshop!!! (to be fair I was just a tad impatient!)

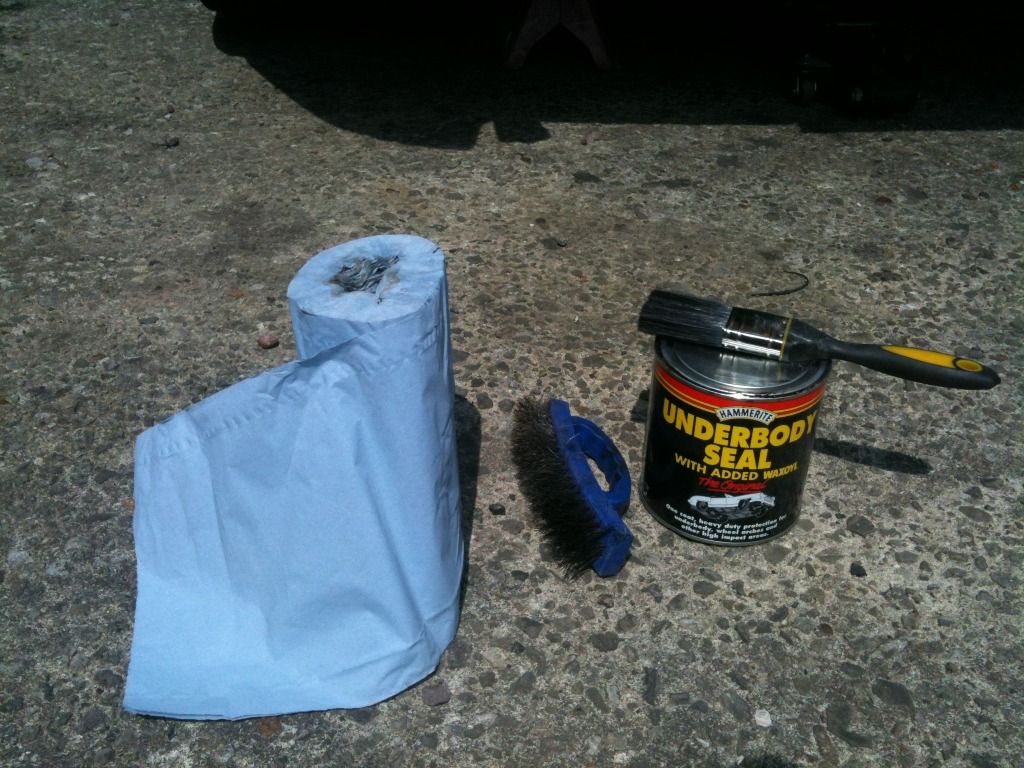
With the nice weather aroun I had to do something on the car. I started undersealing the car at a friends house a couple weeks ago which resulted in only the arches being done... still a good car day none the less Anyway, I made a little more progress and undersealed the underneath.
I was happy to find next to no rust under there, I always get comments at garages about how nice a condition it is under there so its a bit of a shame it now looks like I've just covered up rust with underseal but it's a job worth doing!
Anyway... pics
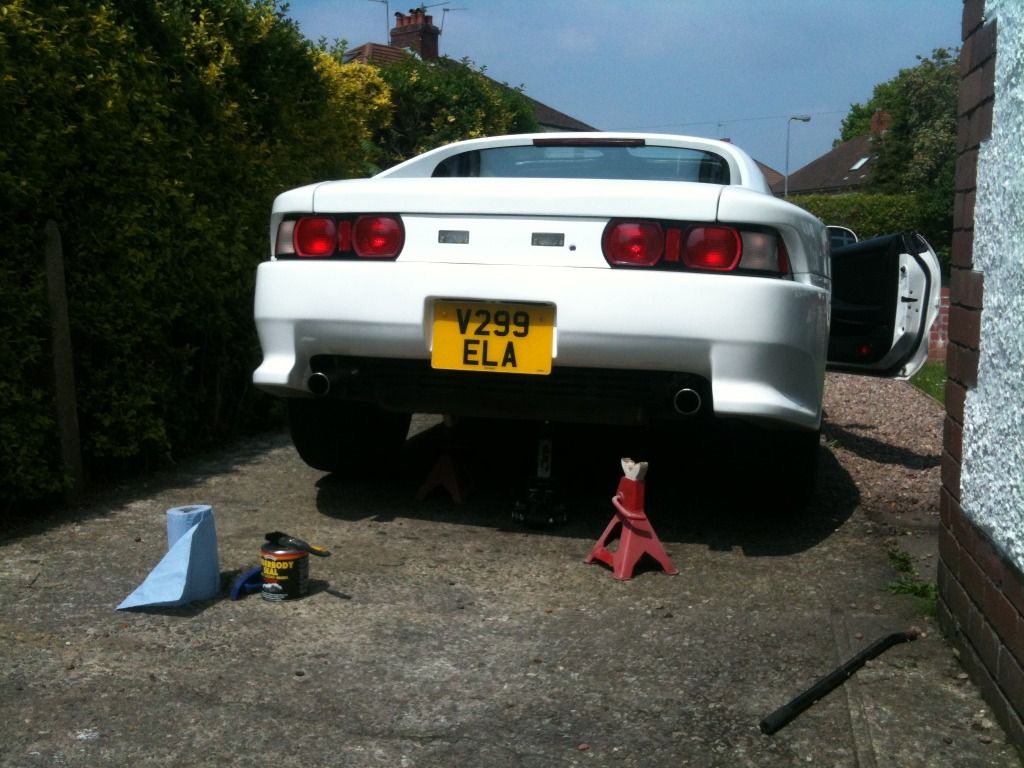
The small bracket in this pic(one on either side of the car) was happily the extent of the rust I found
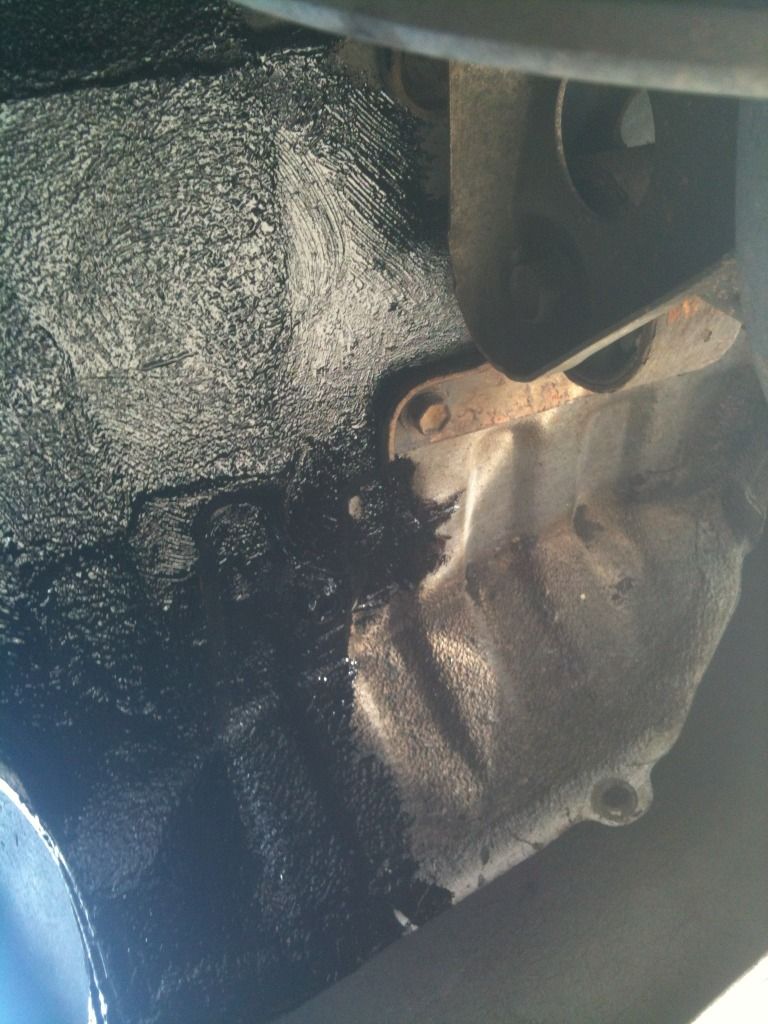
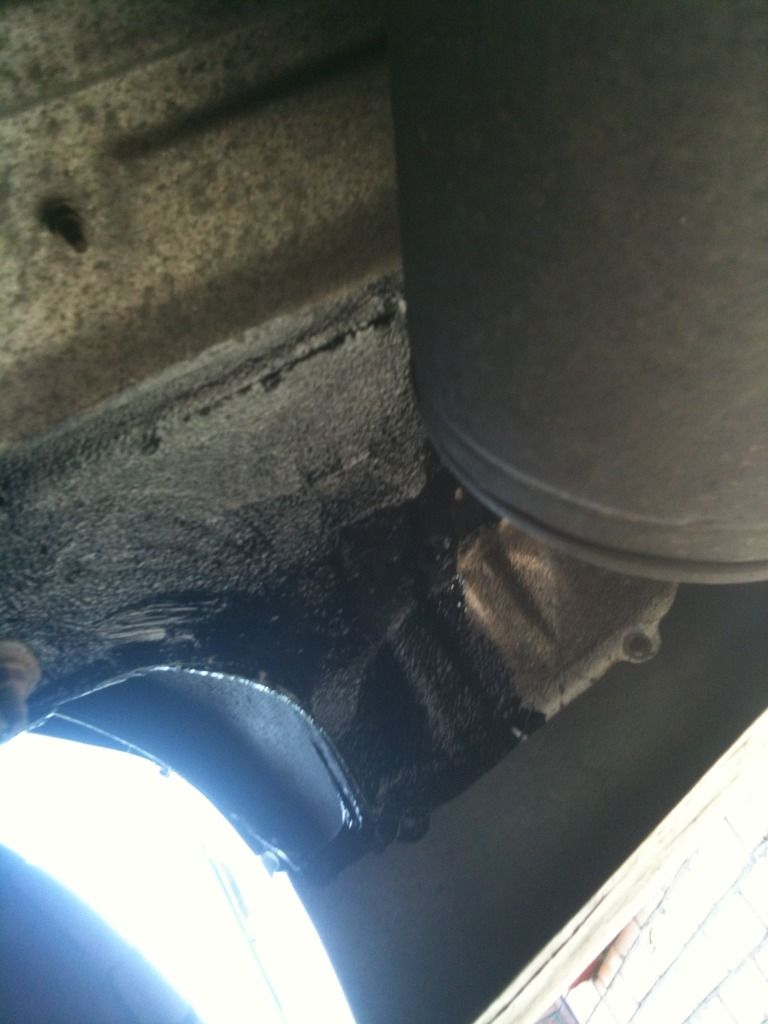
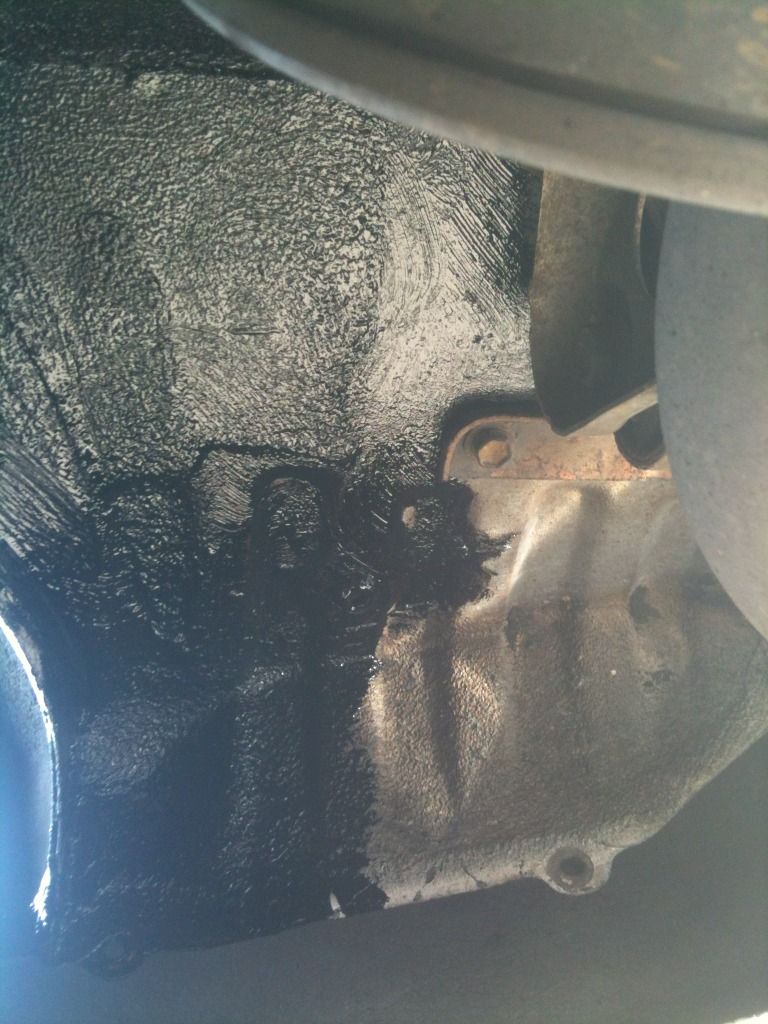
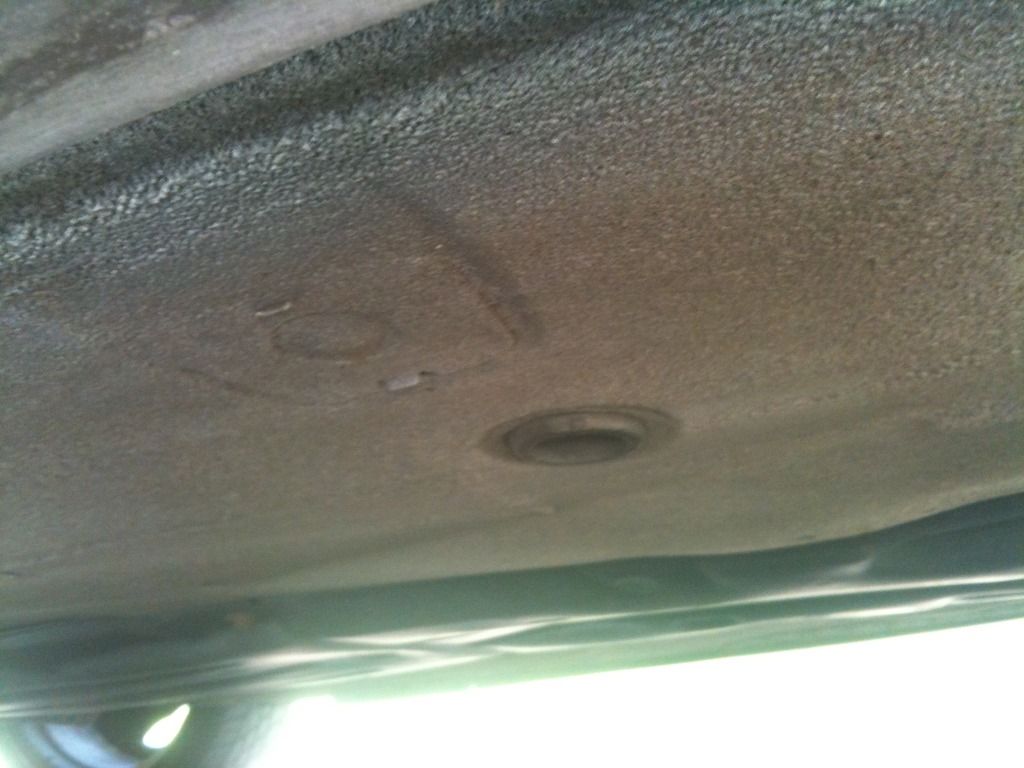
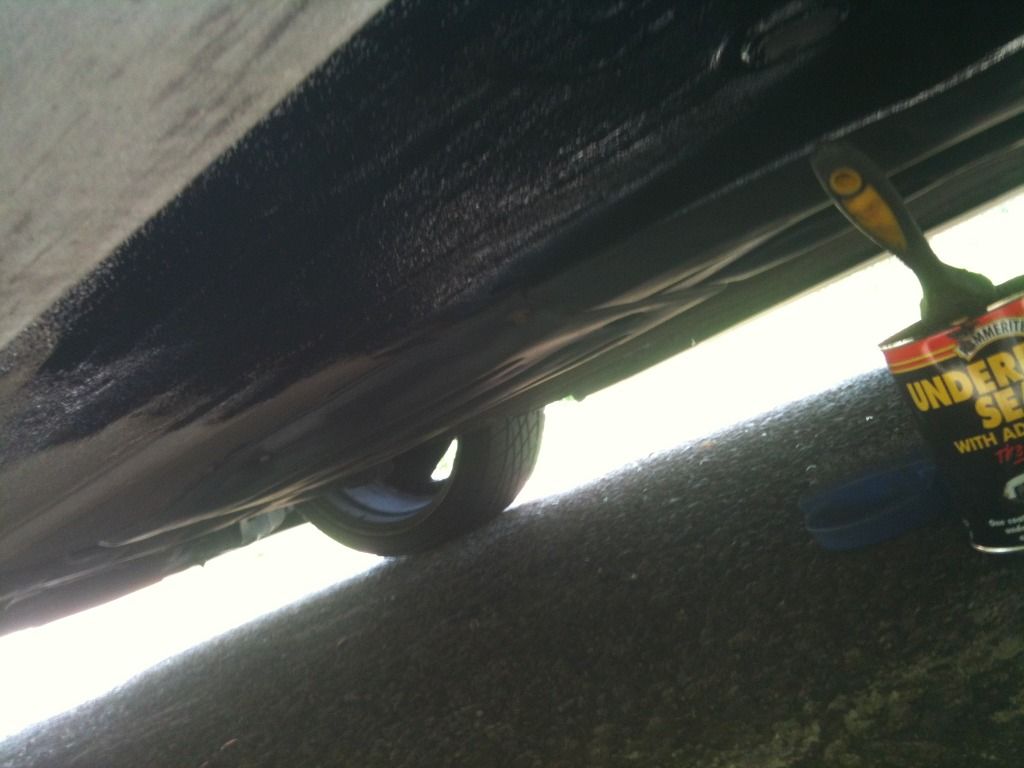
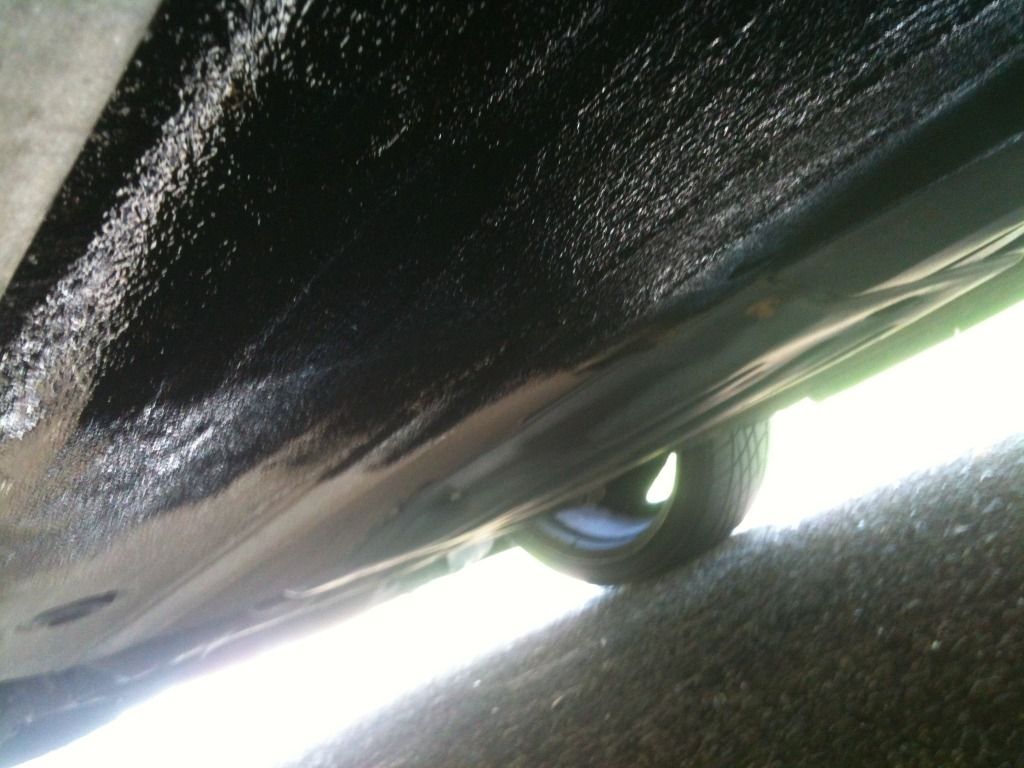
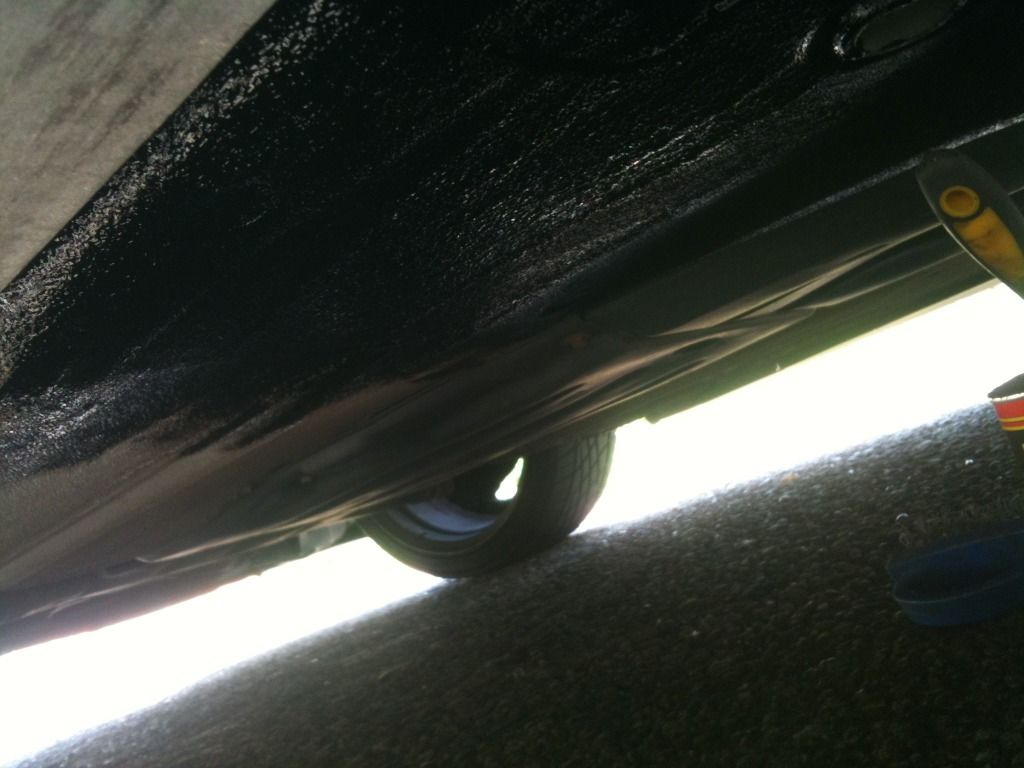
Sorry for the crap pics too, I was struggling not to get my phoned covered in underseal.
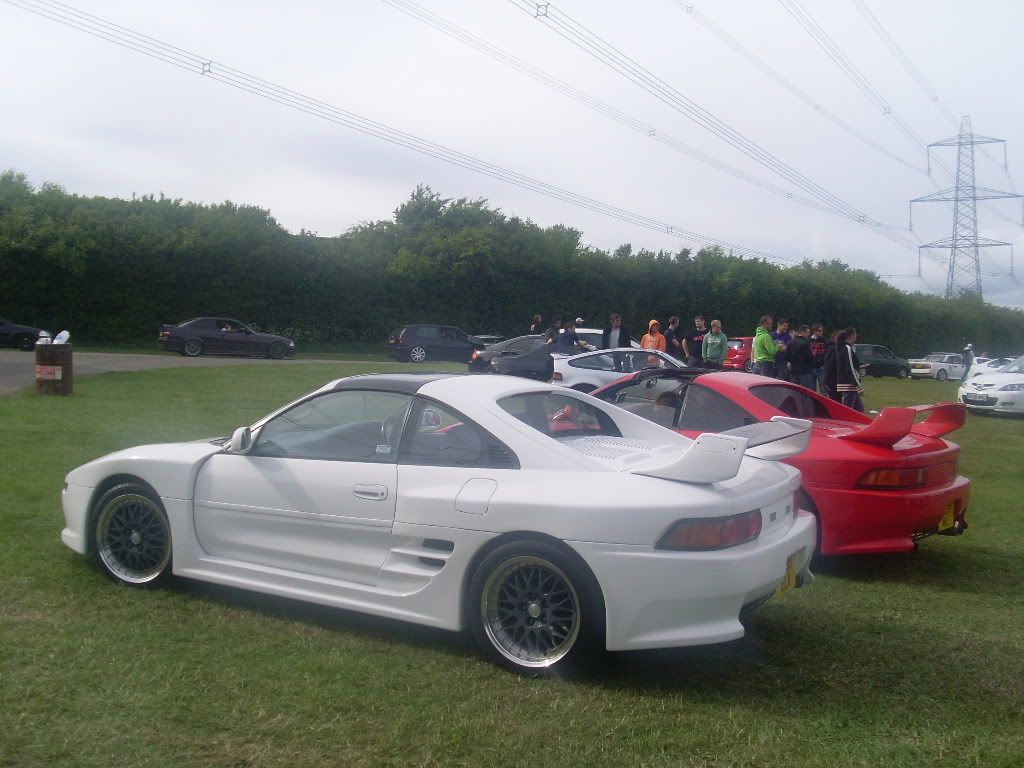
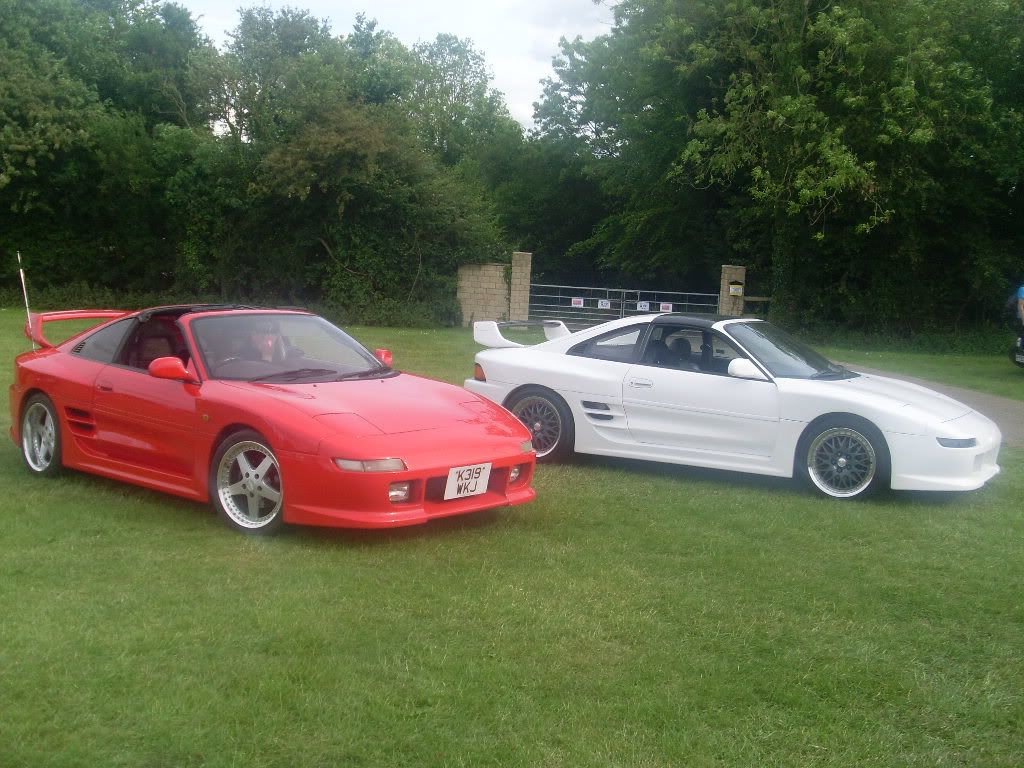
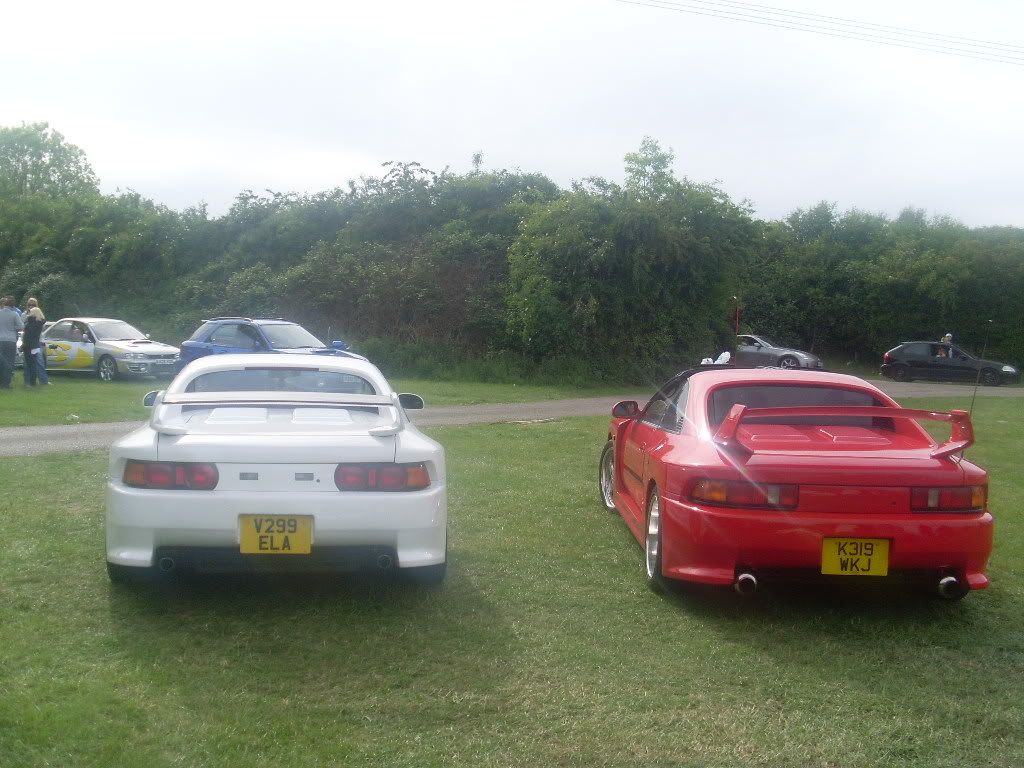
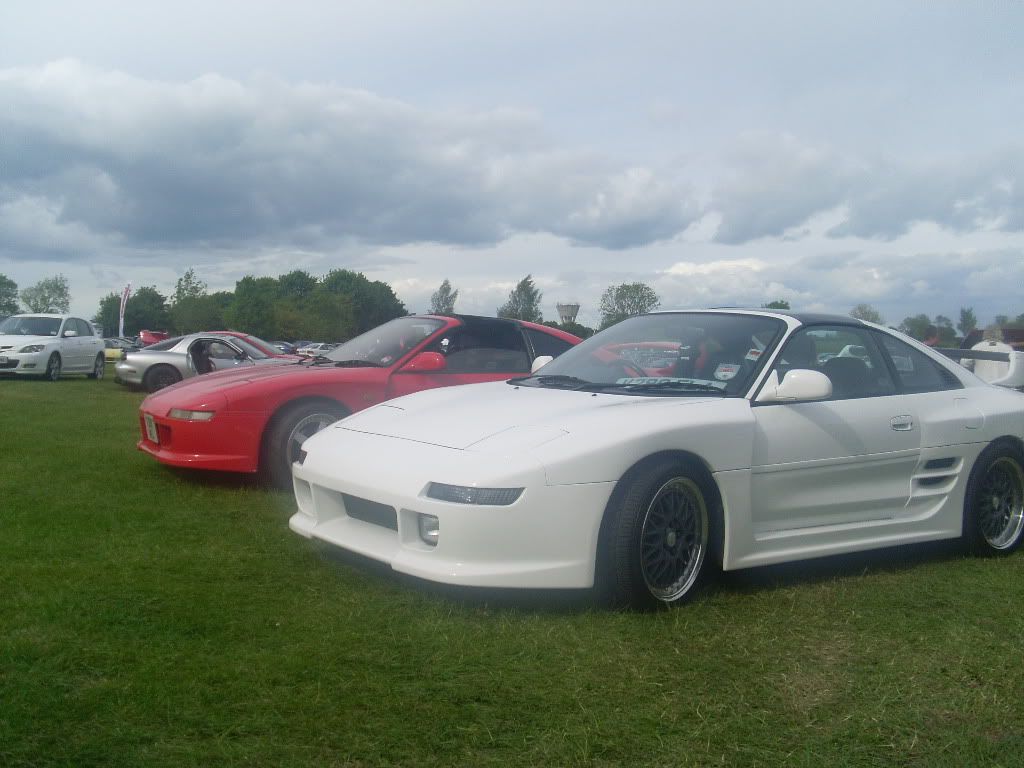
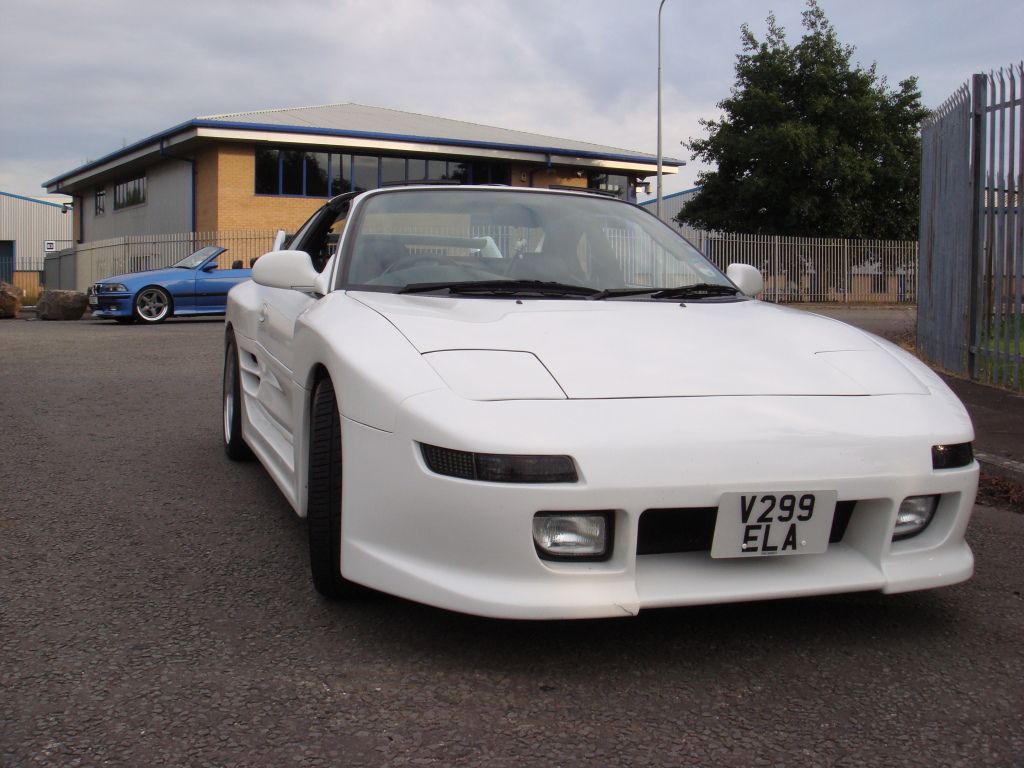
While visiting the family in Cornwall I saw this while out for a drive with the girlfriend (don't ask why the t-bars weren't out if we were out for a drive!! :ranting1: ). Anyway, I thought I'd grab a pic of the cars together.
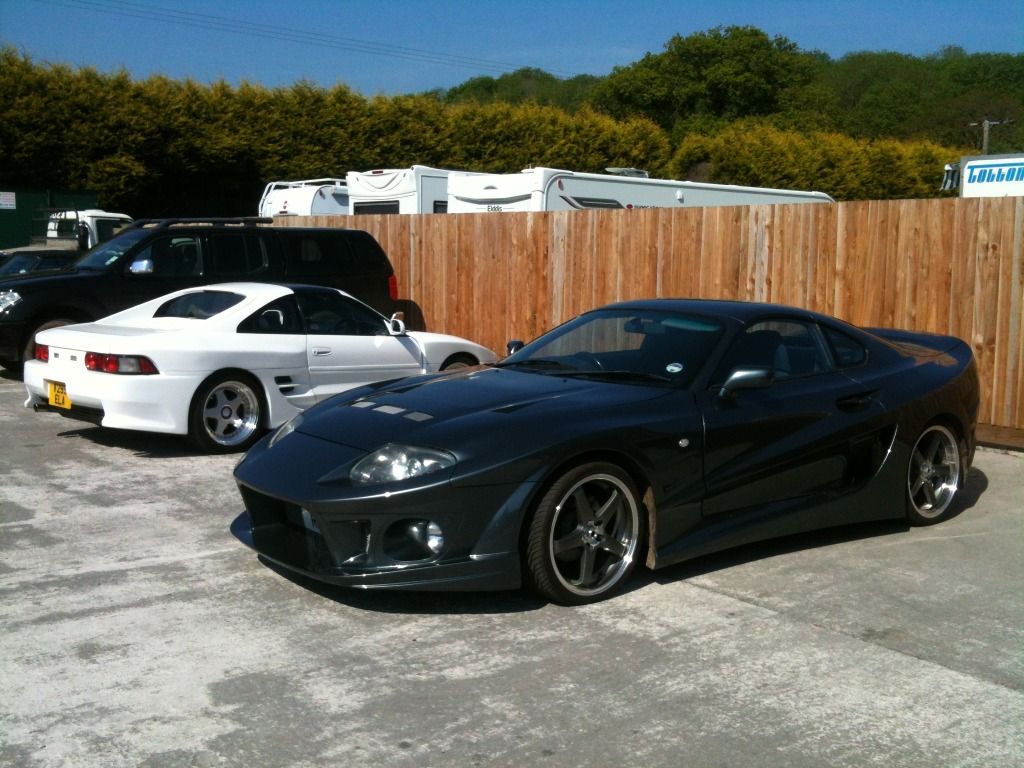
I saw another car with this kit at japfest but the fitment of the kit was way off, this one was actually pretty good with the only exception being massive gaps between the front wings and doors. Still, it looked really nice and a good choice of paint too. The wheels needed like 100mm spacers though so could definately be improved on! :laughing It did however shadow my car somewhat.
On that note I also took some pictures with my brothers car an extremeley rare ac schnitzer e36 m3 convertible. It has the ac schnittzer wide body kit which is just a tad more upmarket than the humble TRD as it's mae from carbonfiber.
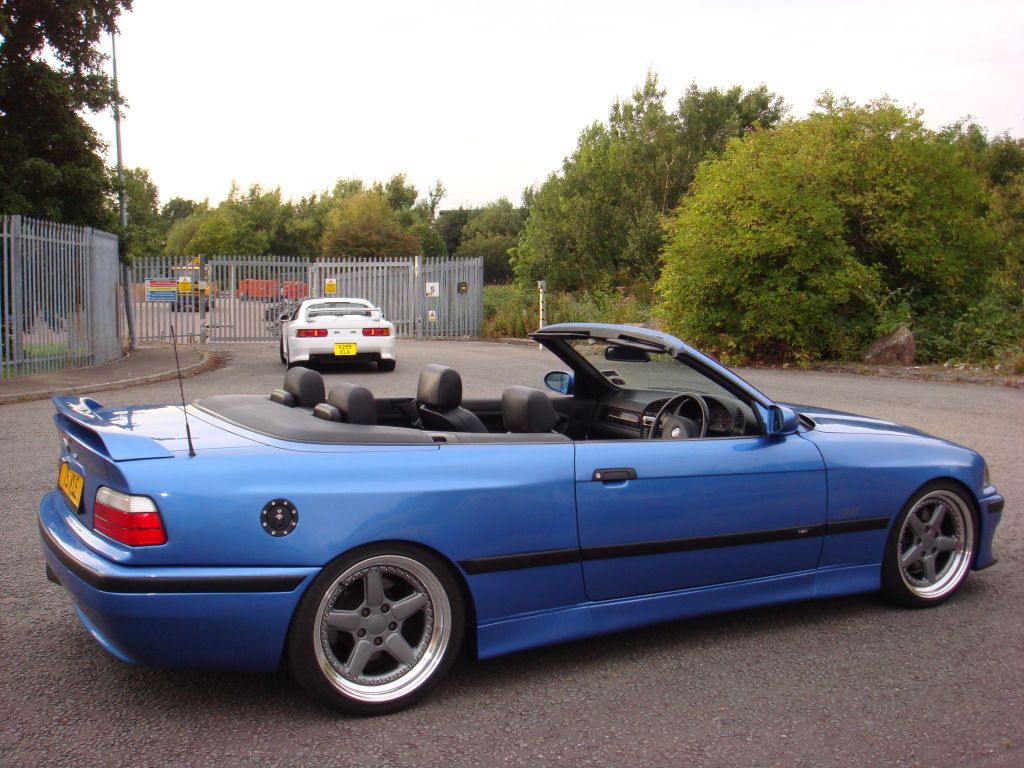
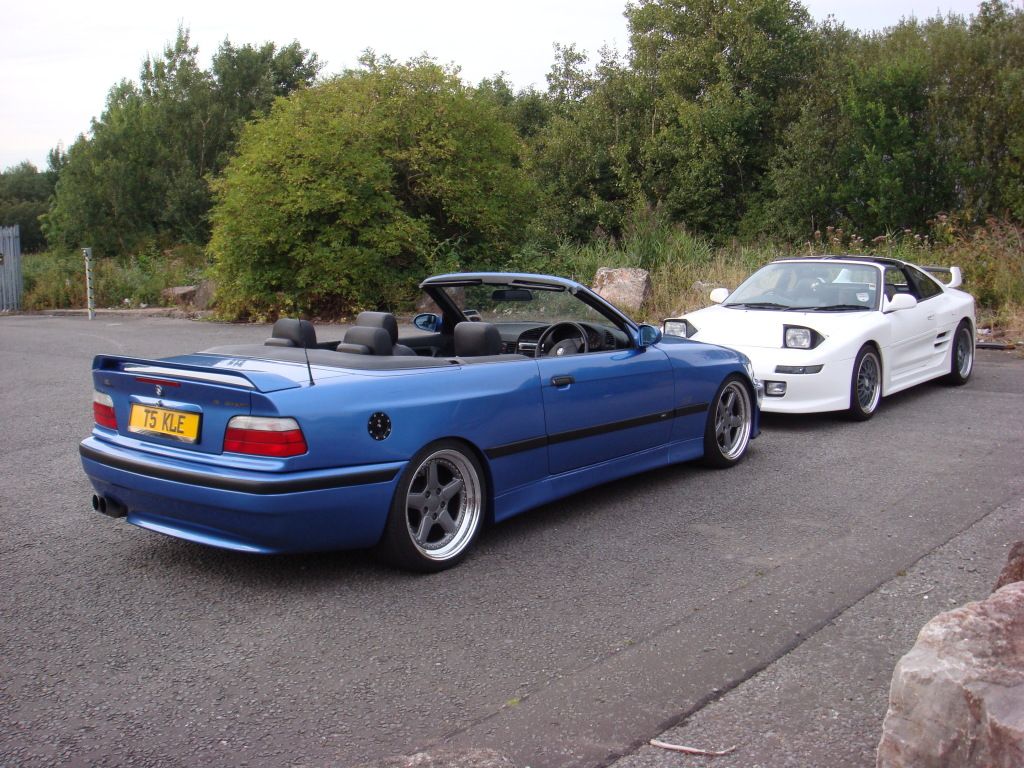
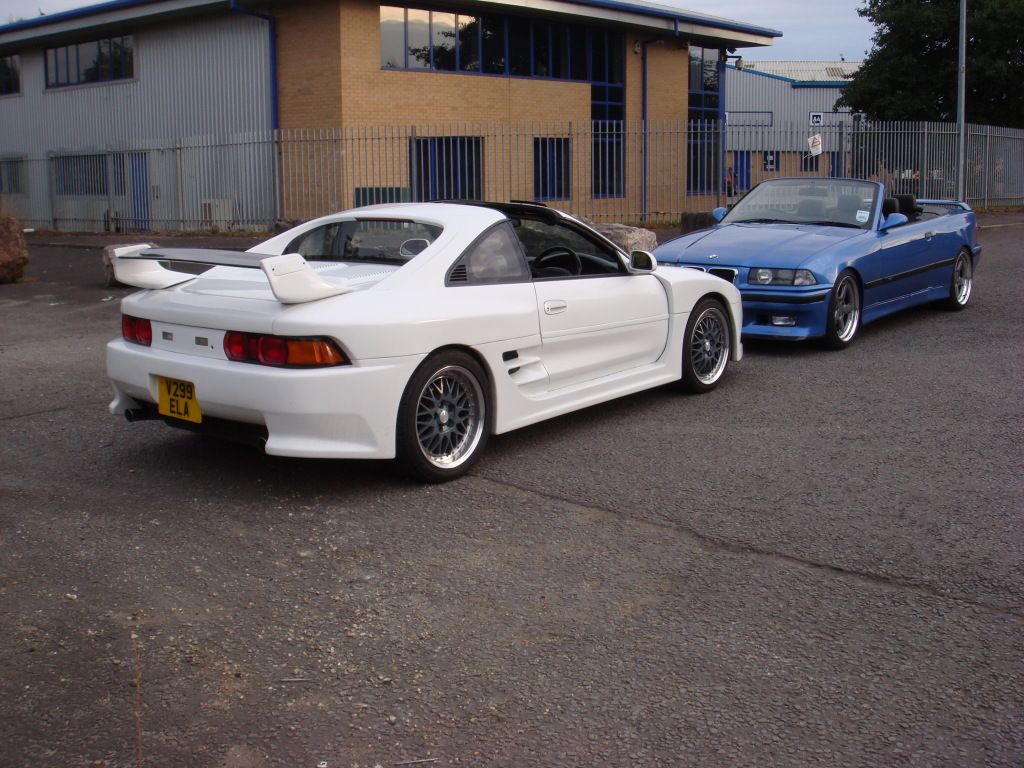
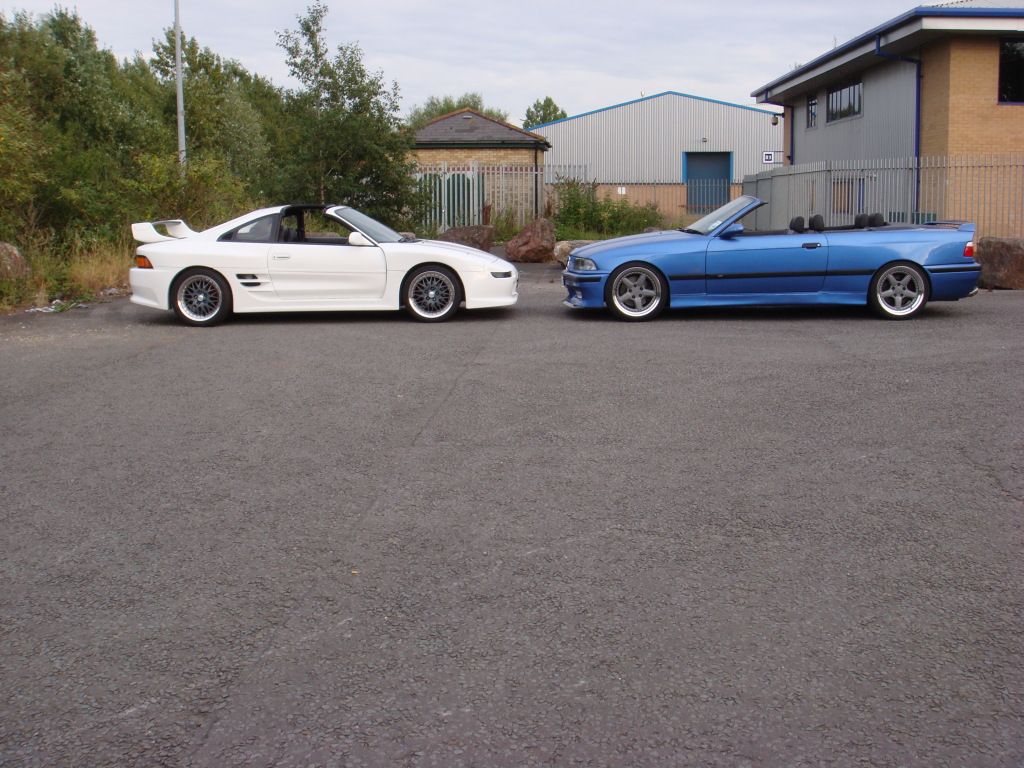
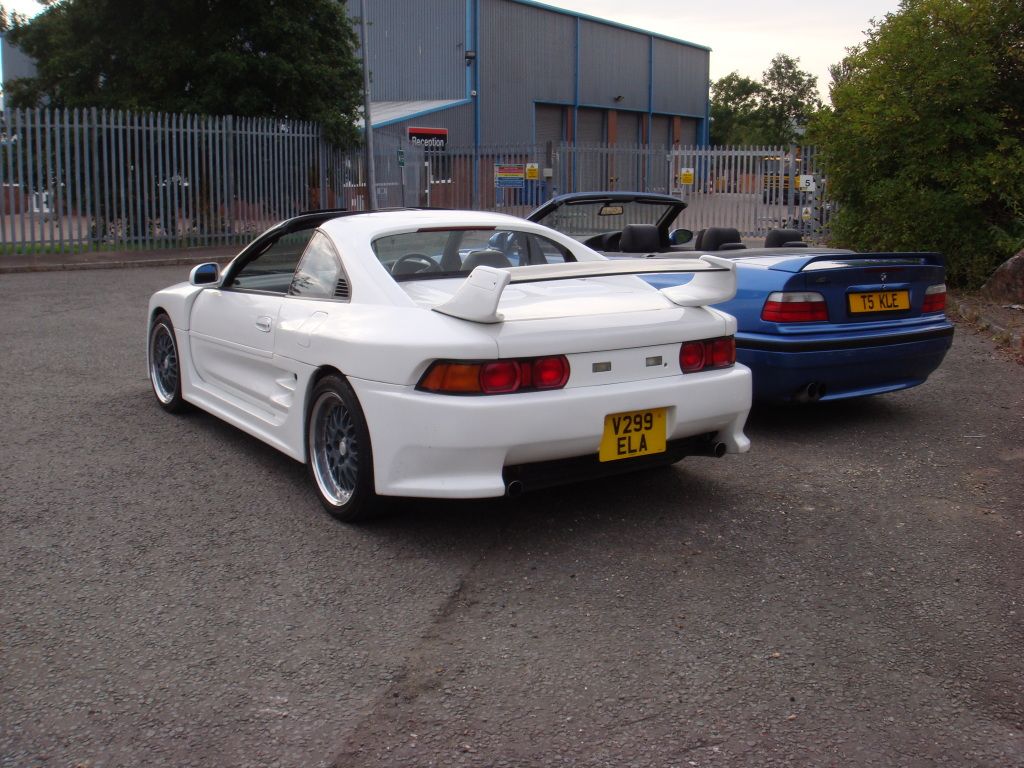
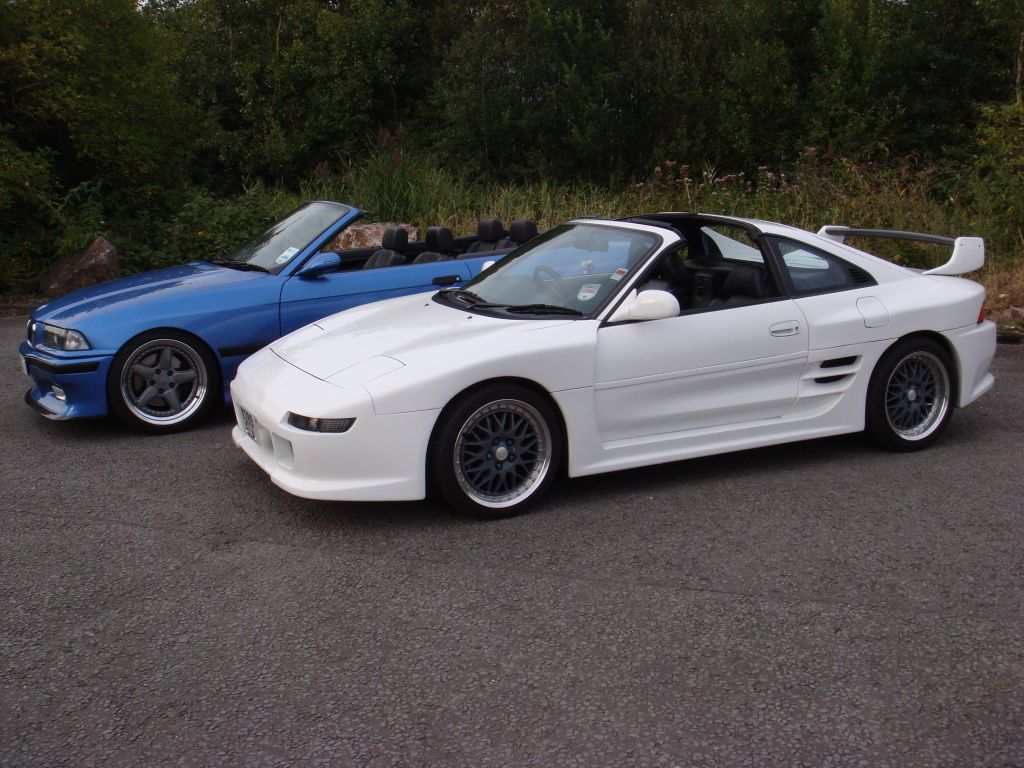
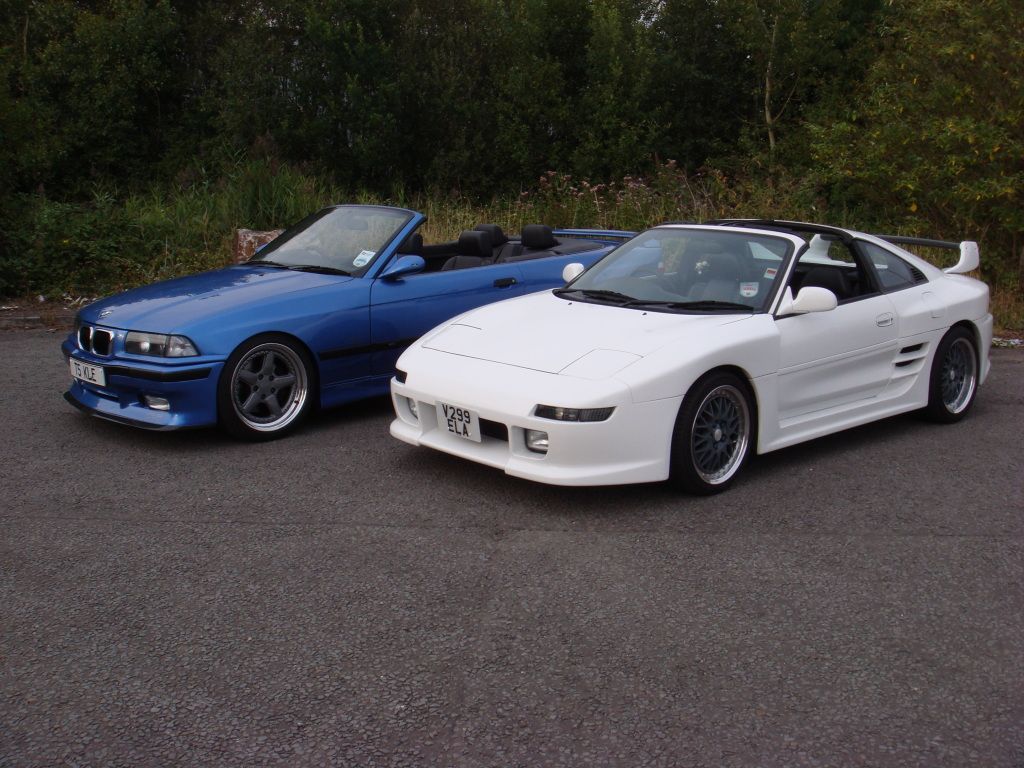
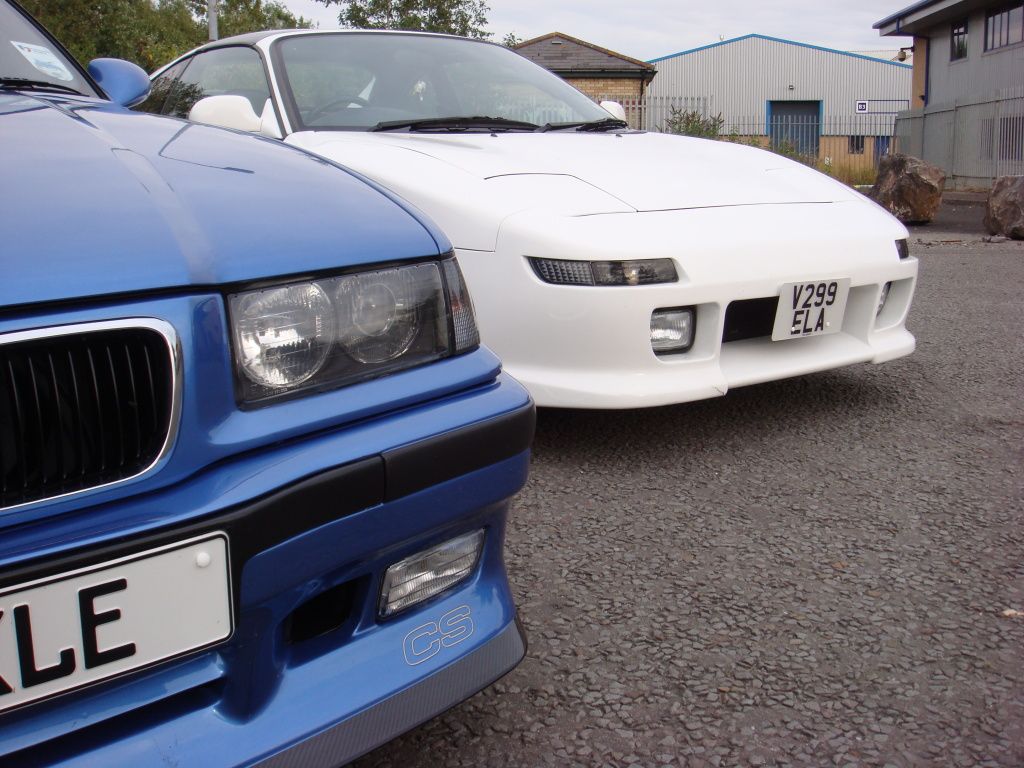
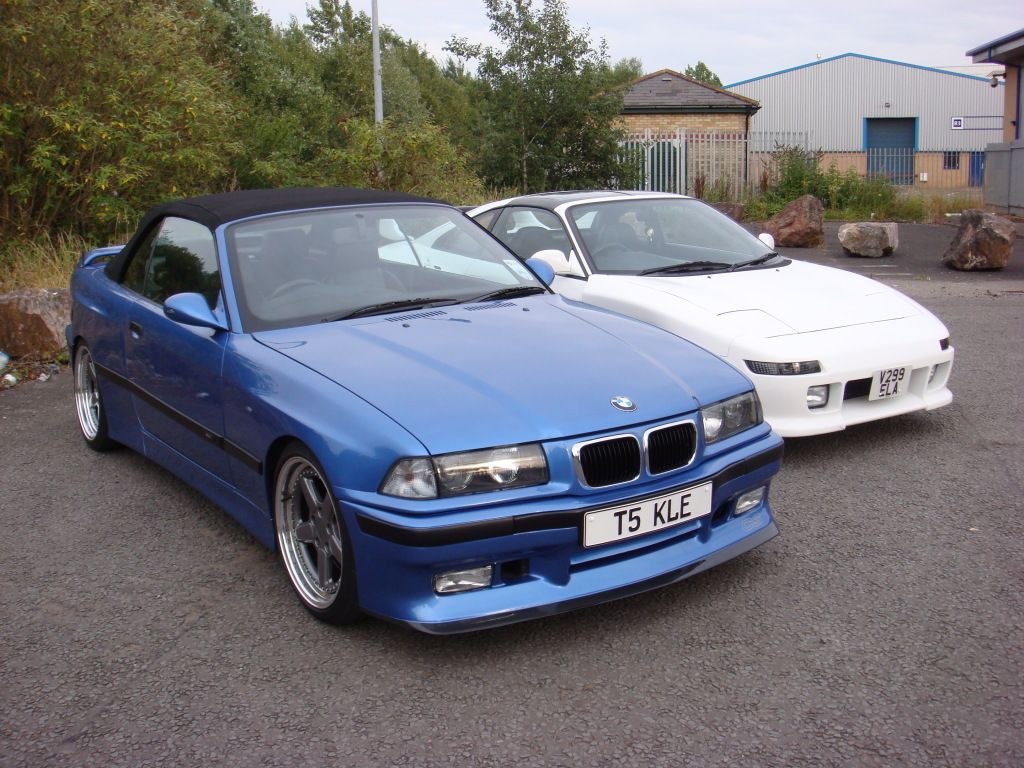
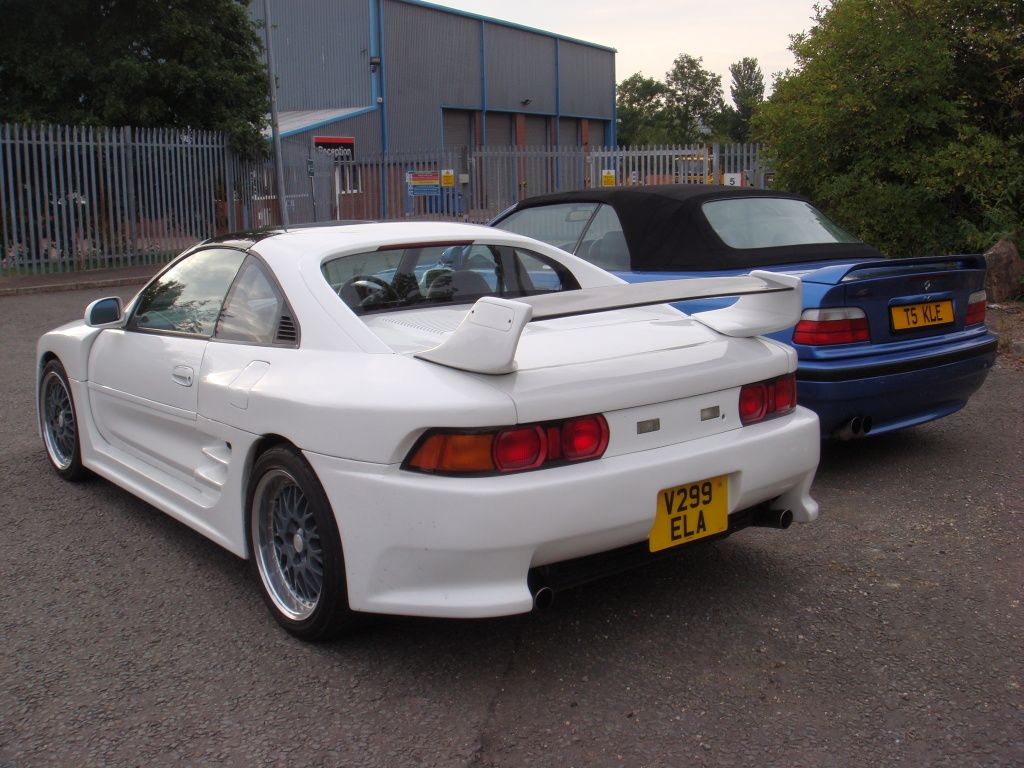

It's a shame at the time my car had made the lengthy trip from Cornwall to Cardiff and his had just been pulled out of the garage where it is kept clean and polished!
Here's a link to his old thread, it was a little while ago now and he doesn't own the car anymore. Sadly I believe it was crashed by the new owner shortly after he sold it. How bad the damage was though I'm unsure.
http://forums.bimmerforums.com/forum/sh ... 606&page=2
With the nice weather aroun I had to do something on the car.
Anyway, I made a little more progress and undersealed the underneath.I was happy to find next to no rust under there, I always get comments at garages about how nice a condition it is under there so its a bit of a shame it now looks like I've just covered up rust with underseal but it's a job worth doing!
Anyway.
The small bracket in this pic
Sorry for the crap pics too, I was struggling not to get my phoned covered in underseal.
While visiting the family in Cornwall
I saw another car with this kit at japfest but the fitment of the kit was way off, this one was actually pretty good with the only exception being massive gaps between the front wings and doors.
On that note I also took some pictures with my brothers car an extremeley rare ac schnitzer e36 m3 convertible.
It's a shame at the time my car had made the lengthy trip from Cornwall to Cardiff and his had just been pulled out of the garage where it is kept clean and polished!
Here's a link to his old thread, it was a little while ago now and he doesn't own the car anymore.
http://forums.bimmerforums.com/forum/sh ... 606&page=2
Re: Jacks' TRD rev5
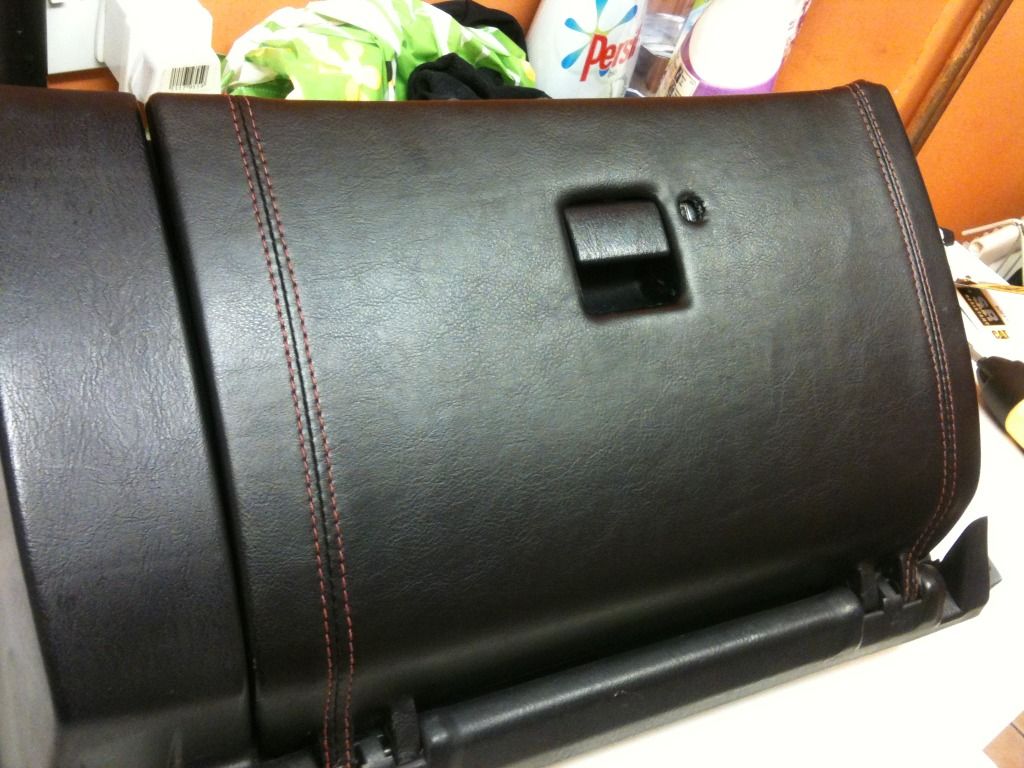
I bought a black center panel what do you all think? I'm not 100% but think I'll stick with it, it definately doesnt look worse IMO and really ties in with the lights.
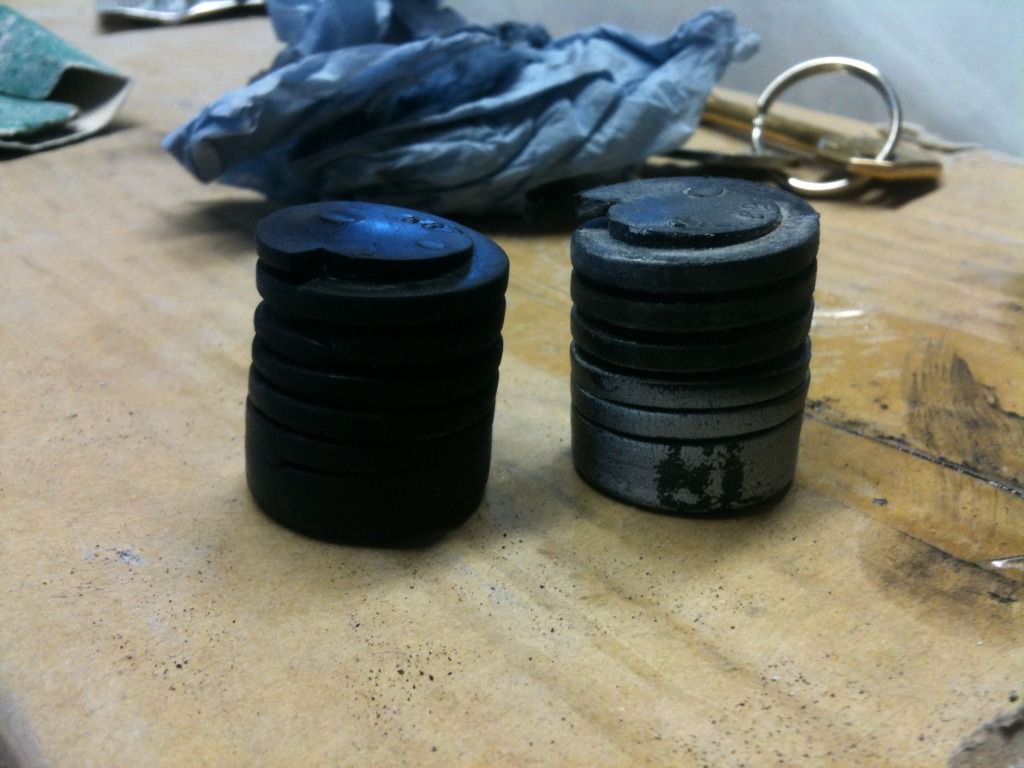
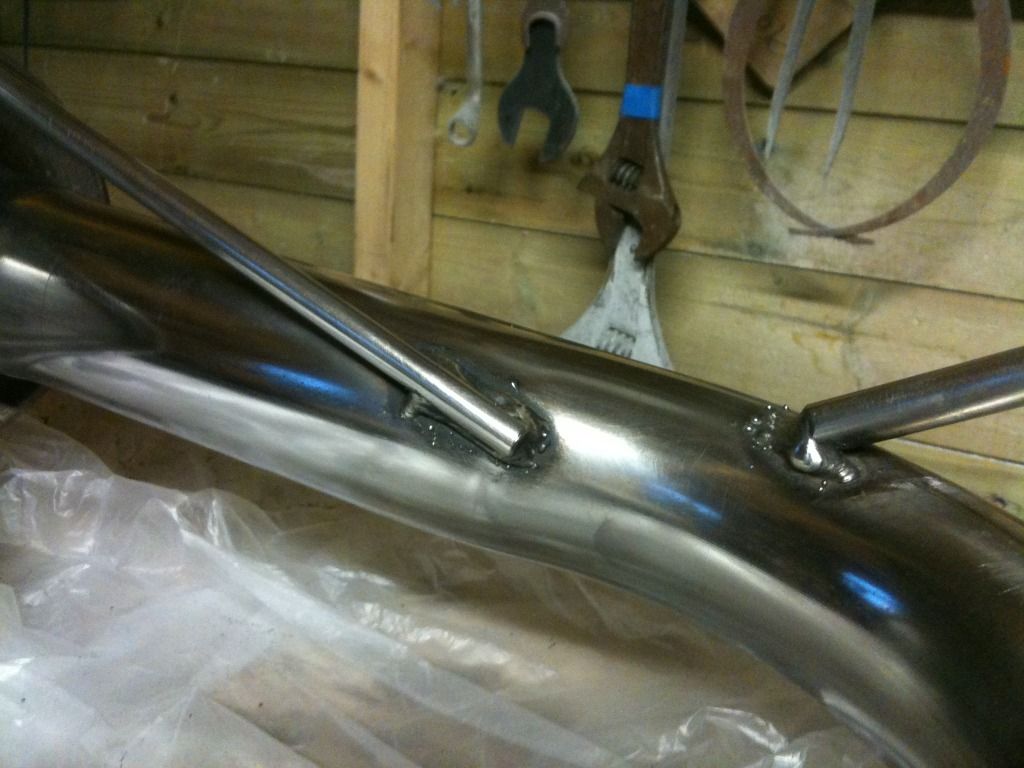
I also got a new exhaust. The reason I went for this one was because a friend has the same and the sound is perfect. Not too loud but a nicer noise than standard. I had planned on buying some smaller tips for it but before I make the purchase I think I'll fit it to the car and see how it looks. I don't want anything too chav but the TRD kind of dwarfs the current tips.
It needs a little welding so I'll be taking it in to get that done but in the meantime I'm polishing it up :cool1:
heres some progress(I'm not going for perfection)
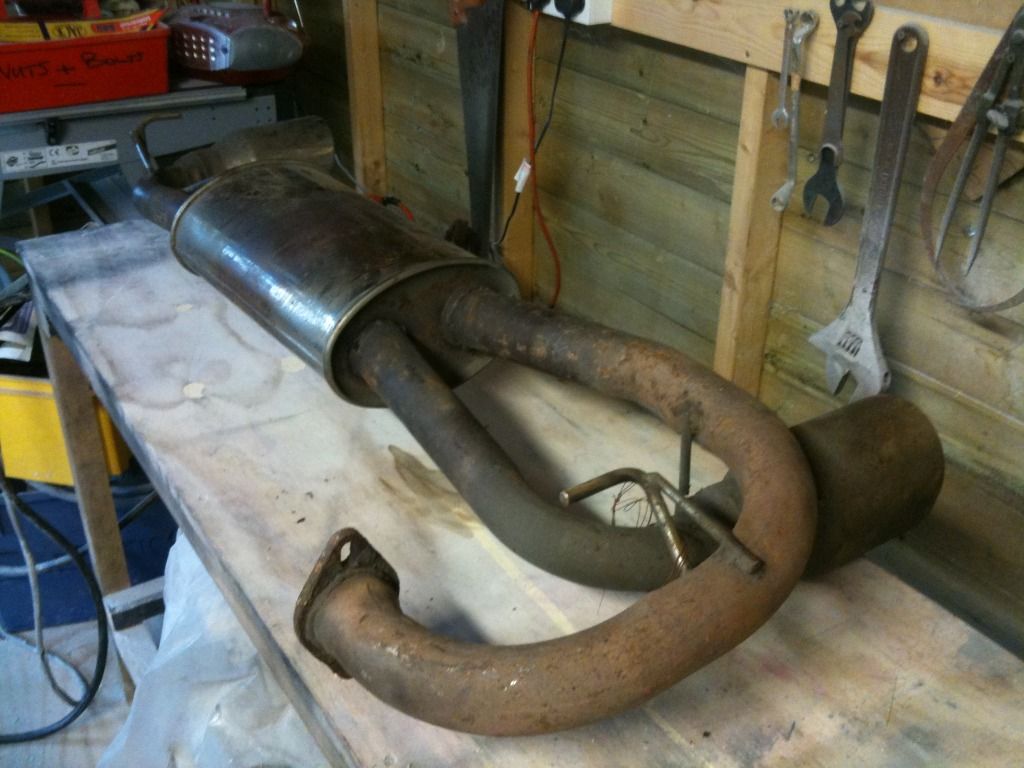
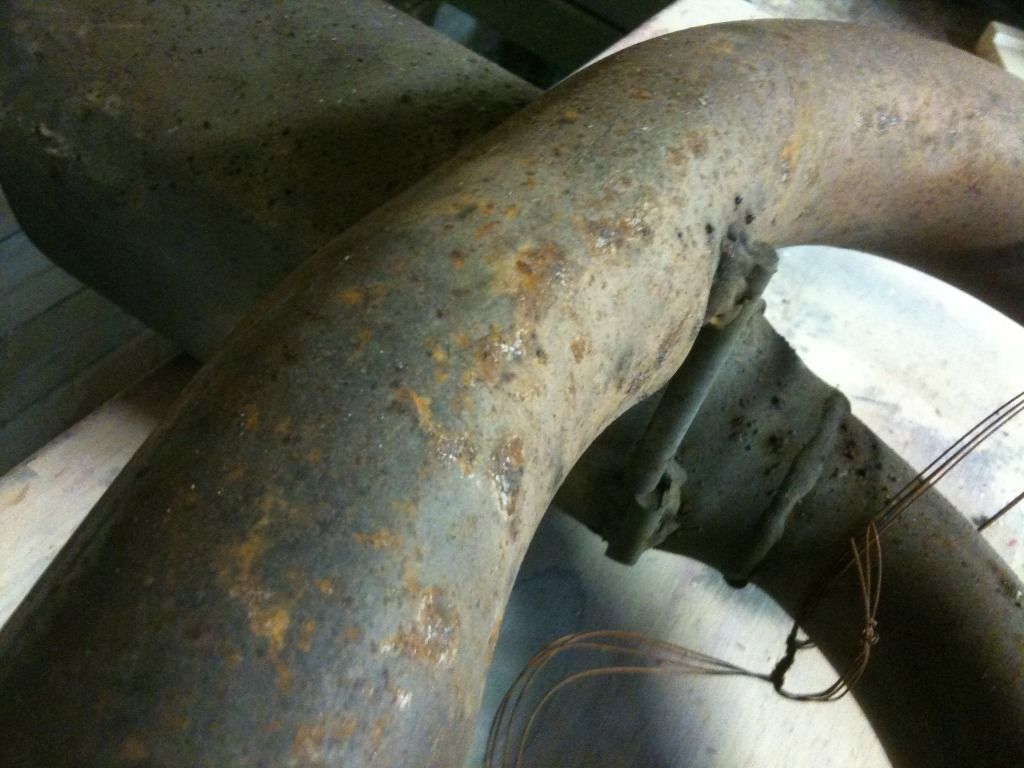
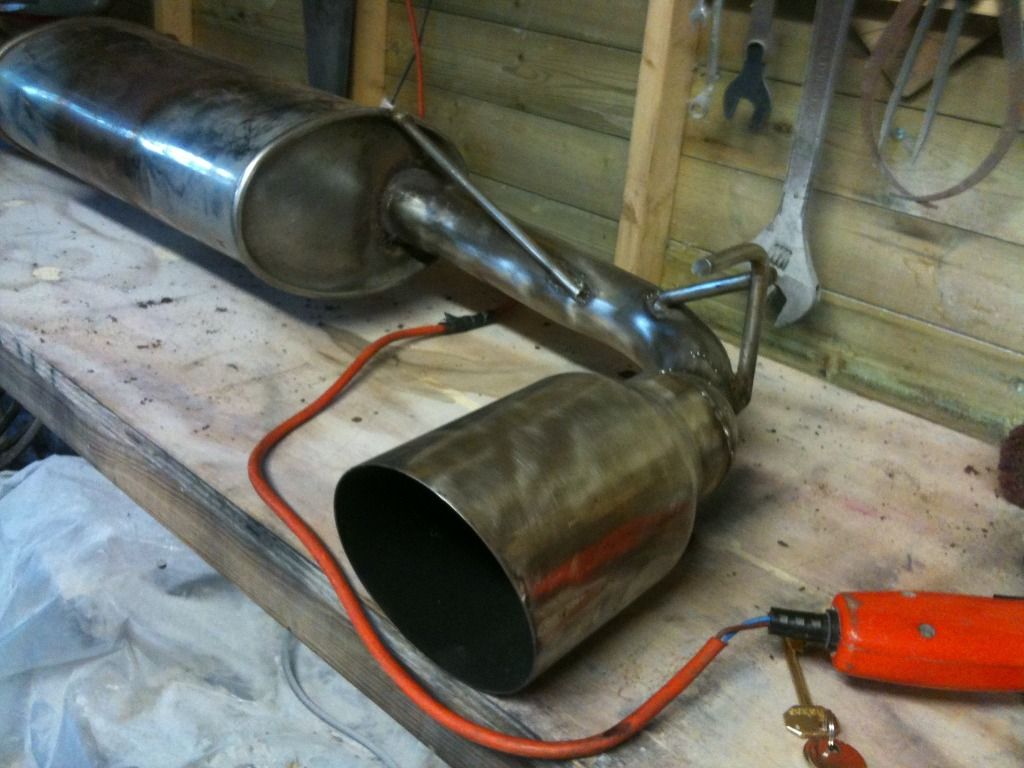

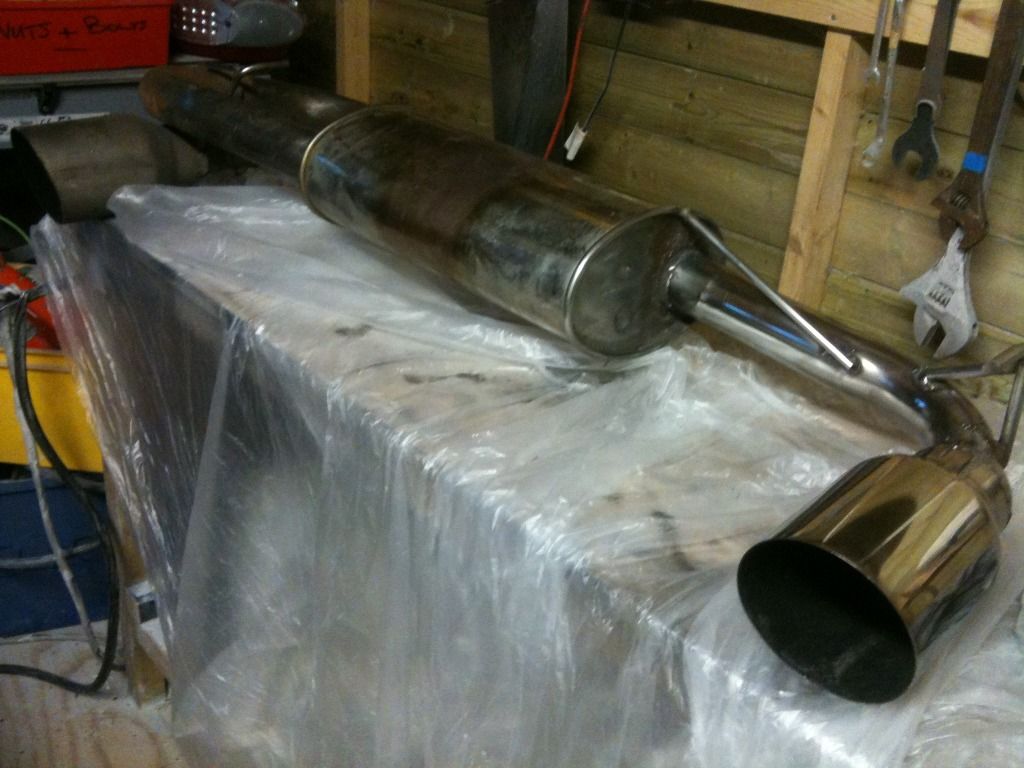

I've barley scratched the surface with the massively time consuming job of cleaning it up but Should look good at the end
(please ignore the dodgy drill, I've already been told off for that one! )
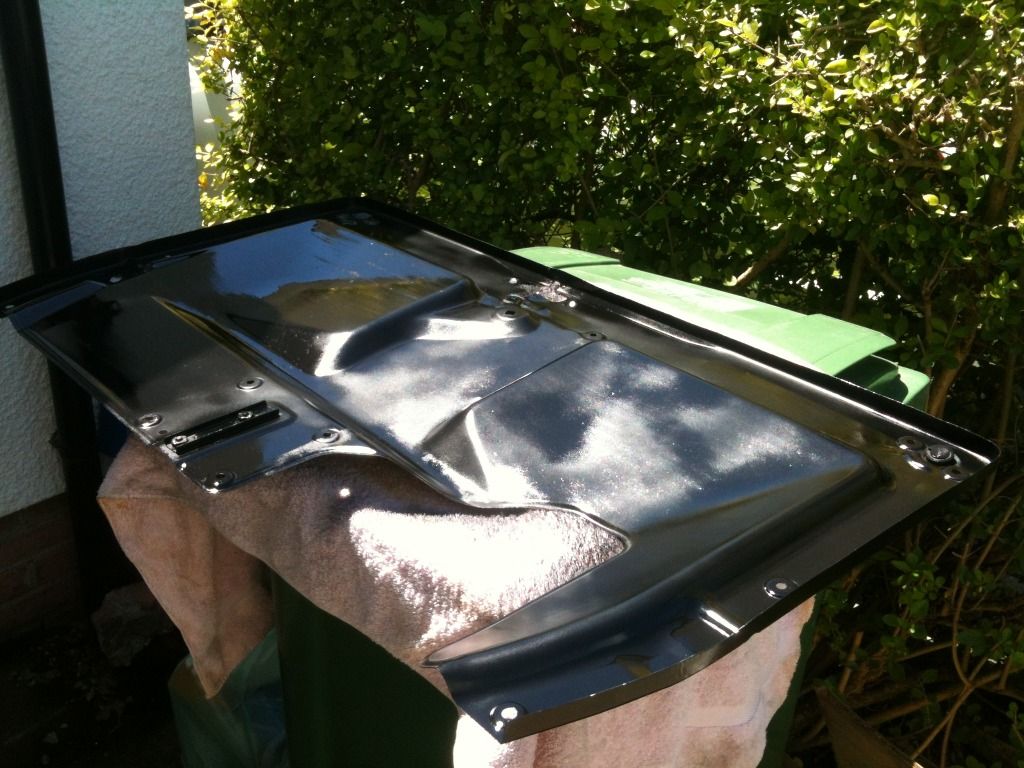
When the car was resprayed I made the error of leaving the rain tray on, must have been tired that day! a quick spray of gloss black later and it's looking much tidier (I rubbed the surfce down and cleaned it properly so the paint will take properly of course though so wasn't THAT quick!)
before:
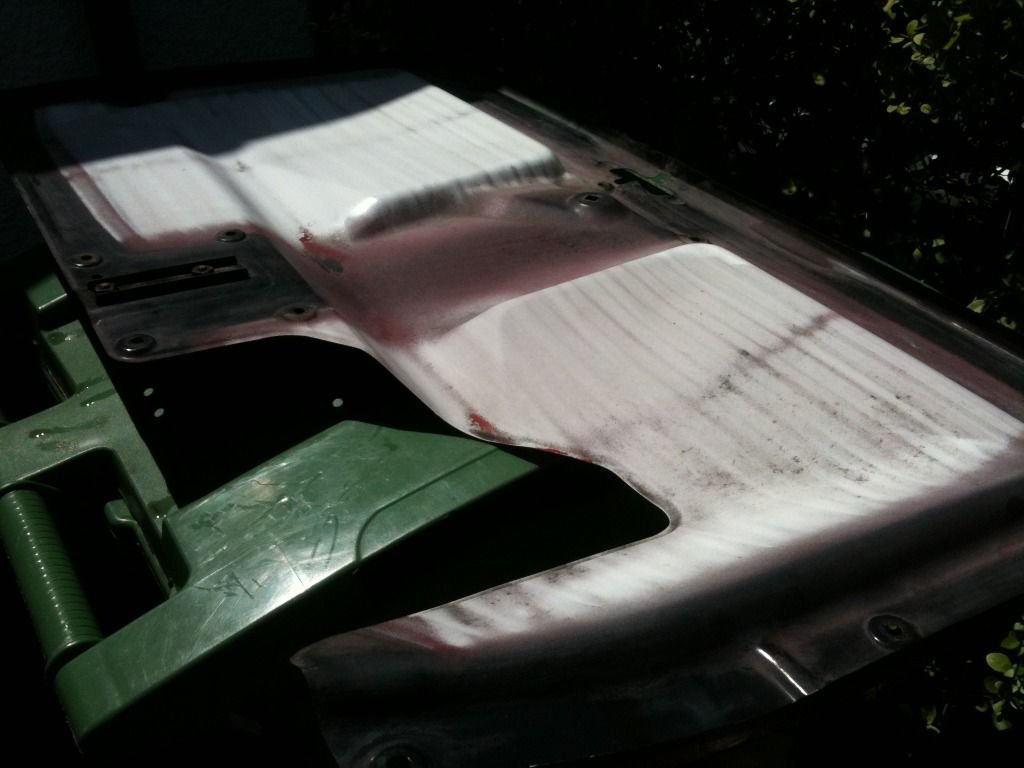
after:
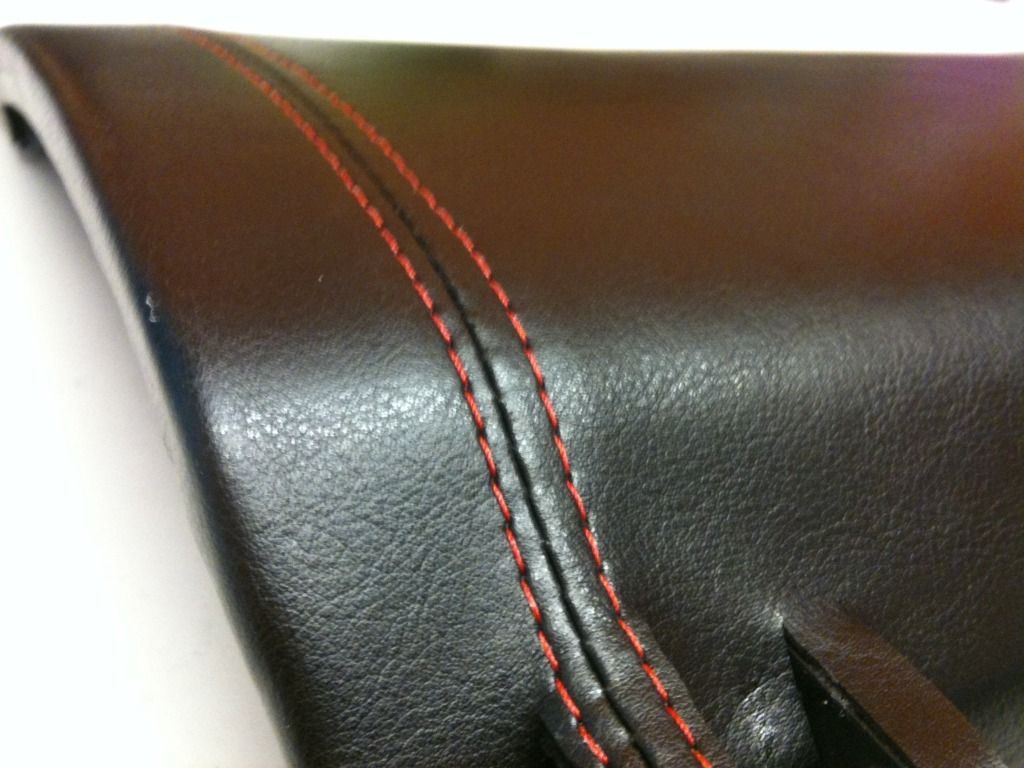
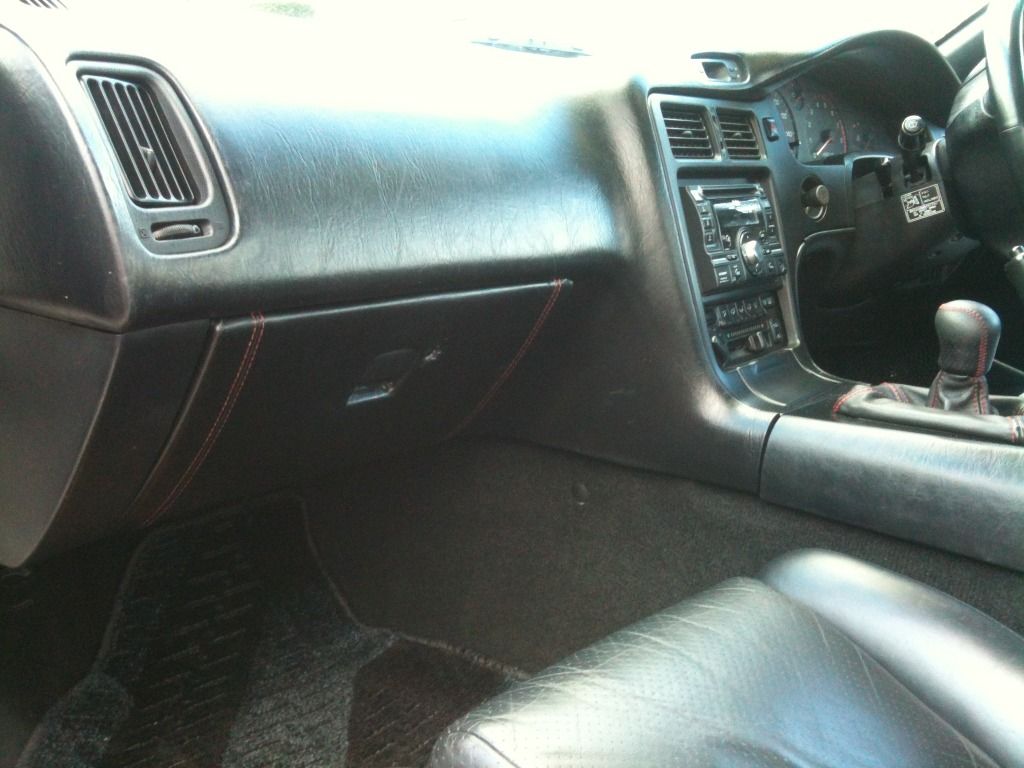
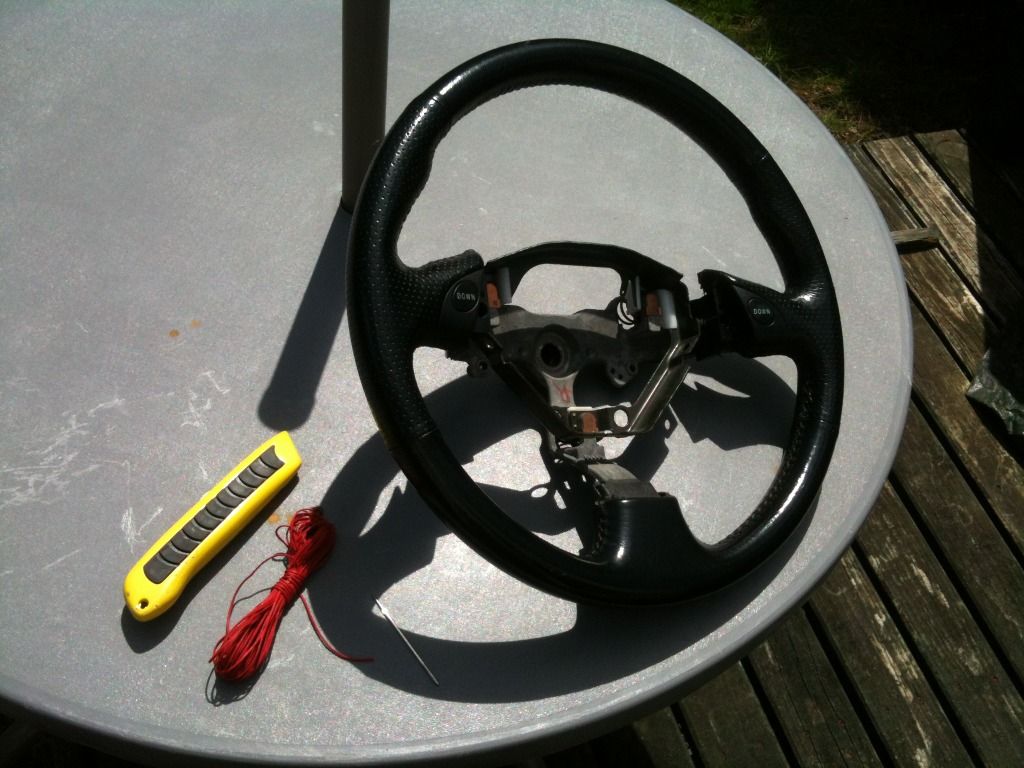
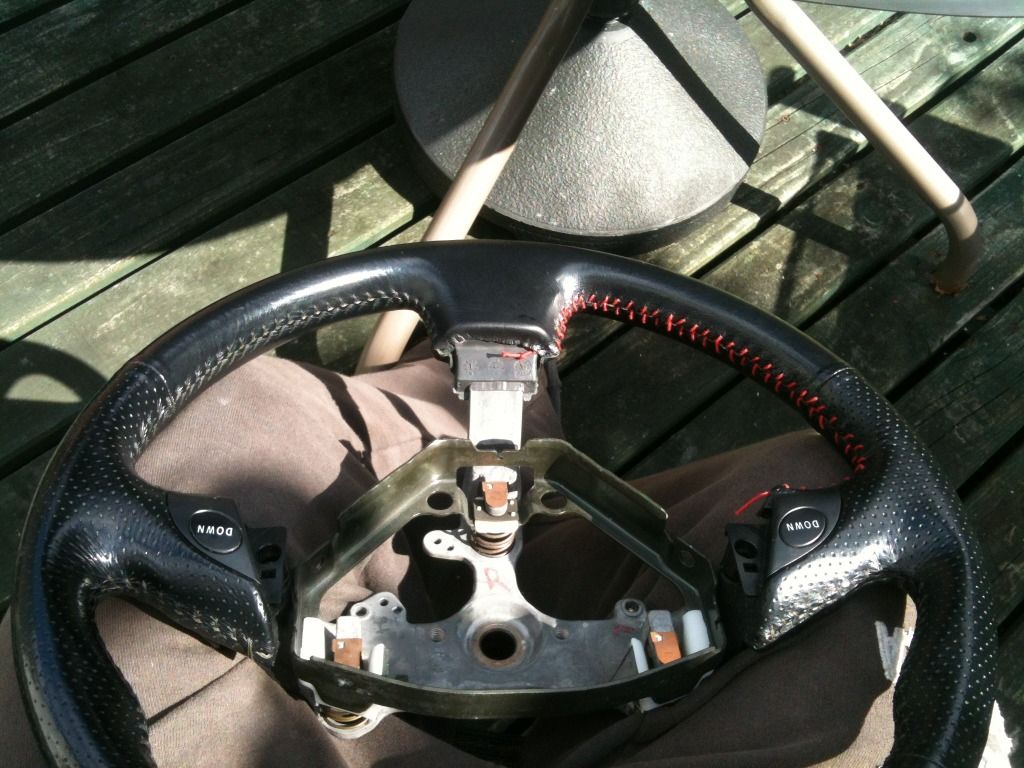
And on to the more intersting part. I bought a mk3 steering wheel a while back becuase I think the current wheel looks a little dated. I opted for one with the SMT controls with the plan to convert them to steering wheel volume controls... well I'm yet to master that! So anyway as my car is a rev5 I really didn't want to lose the red stitched theme so bought some red waxed thread and got stitching!
Stitching before
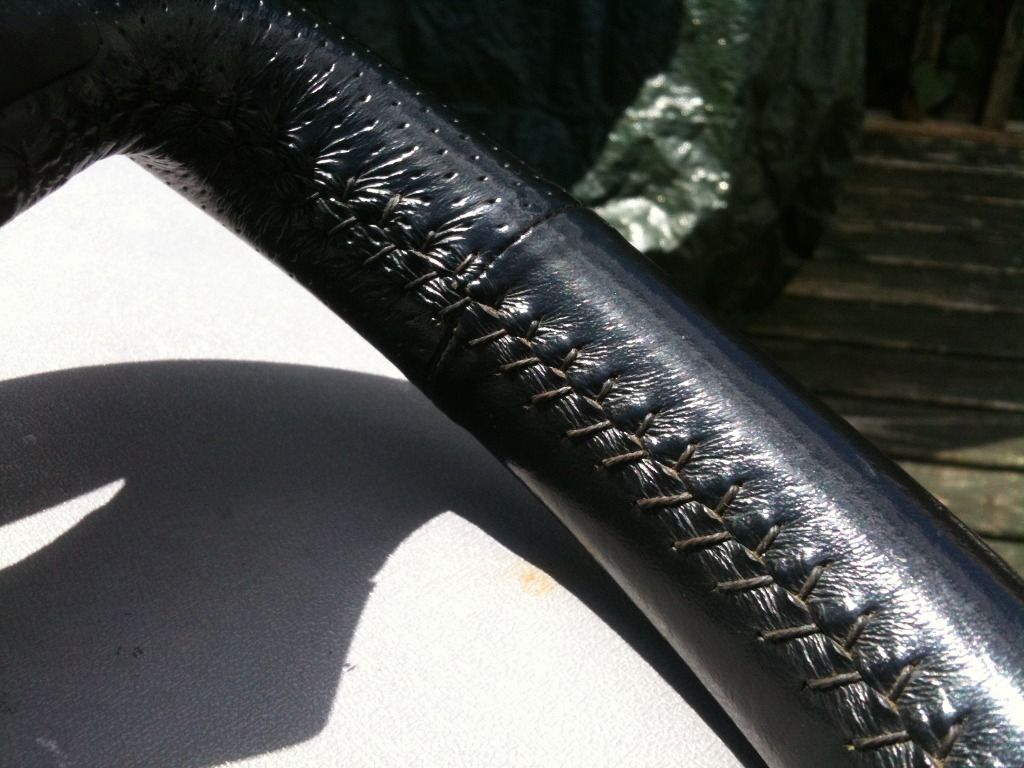
my first attempt at one of the smaller section. I had to go back over it with tweesers to tighten the threads on this one.
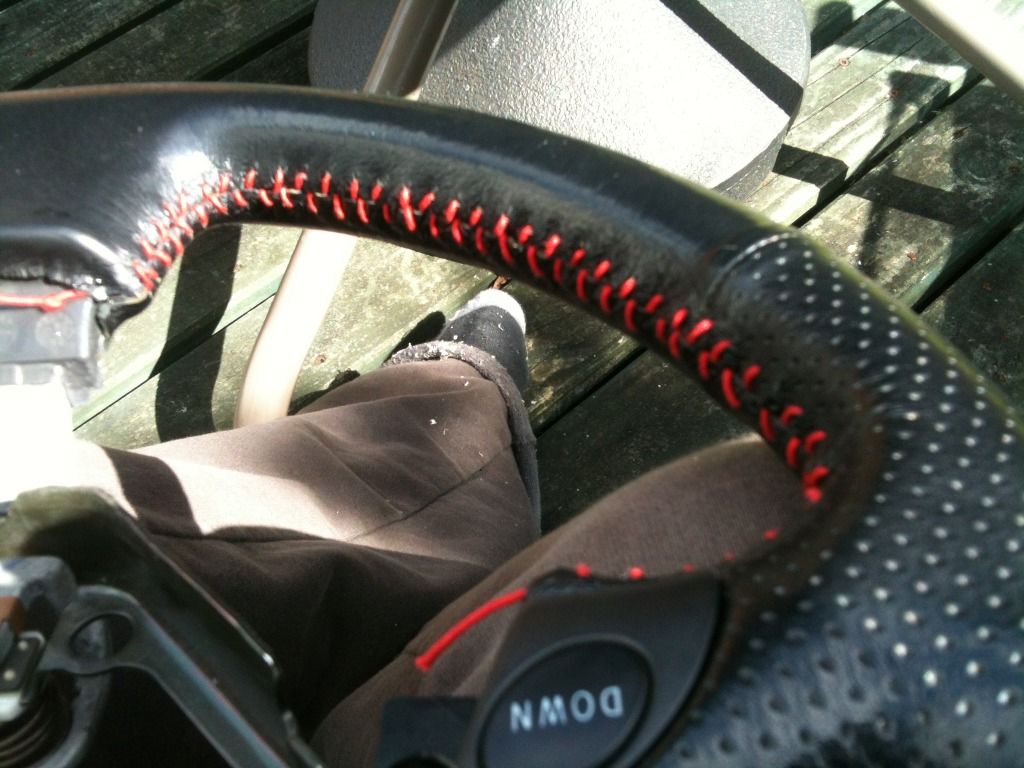
and the rest
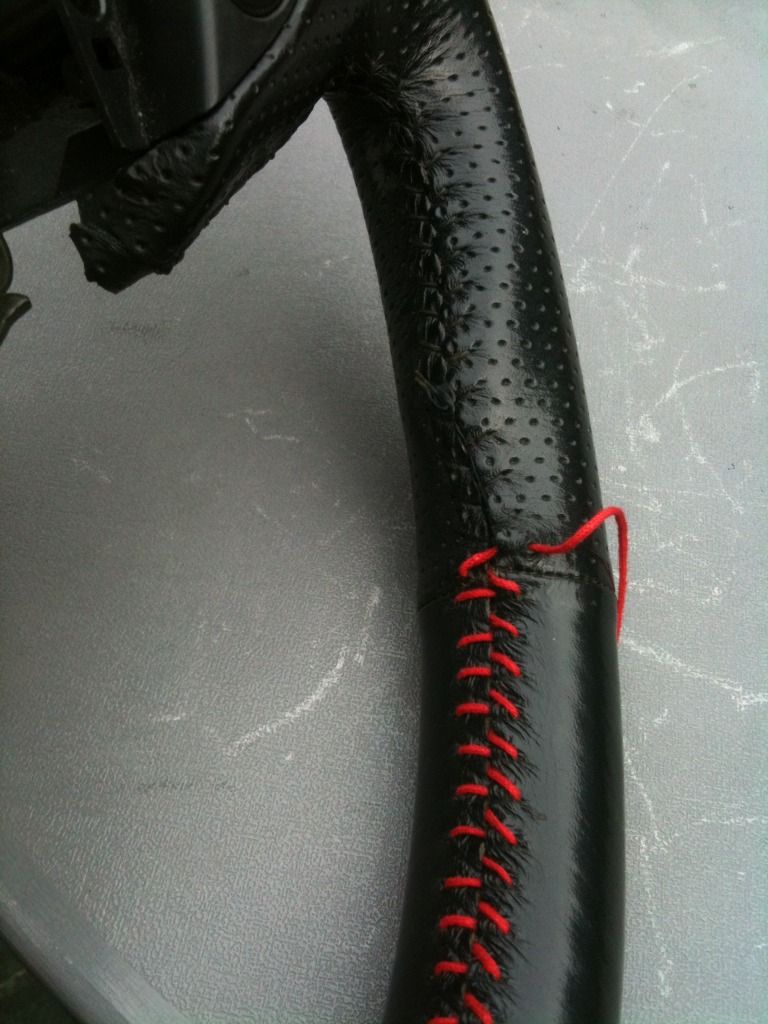
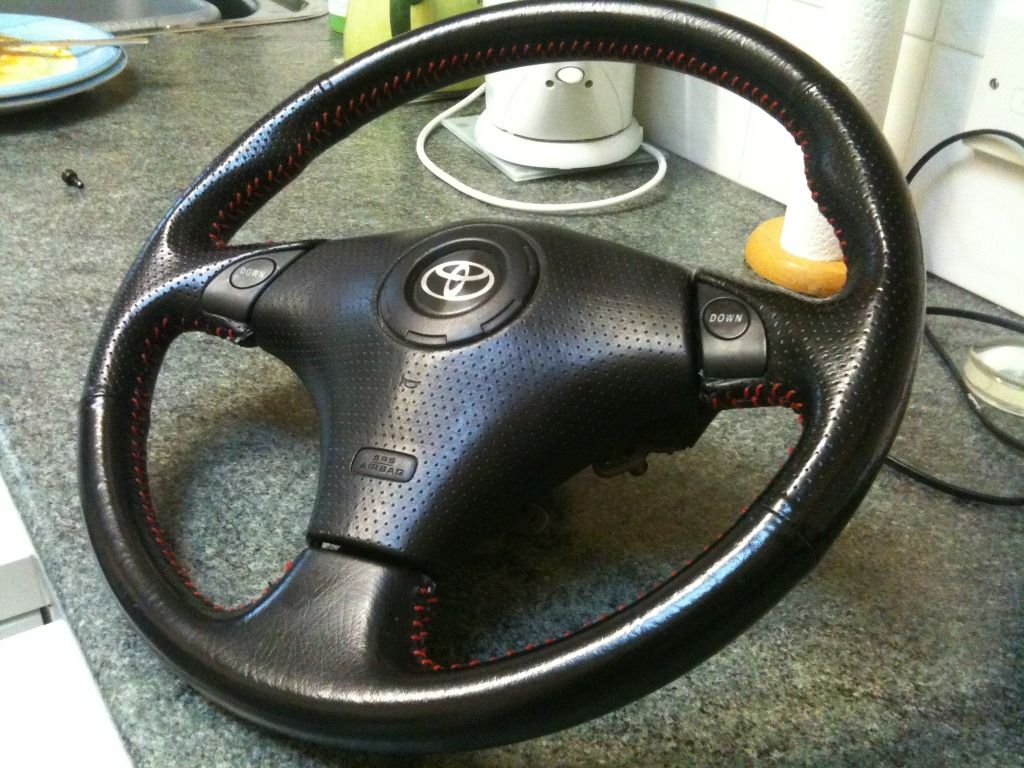
I was really please with how this came out, even if I o say so myself!
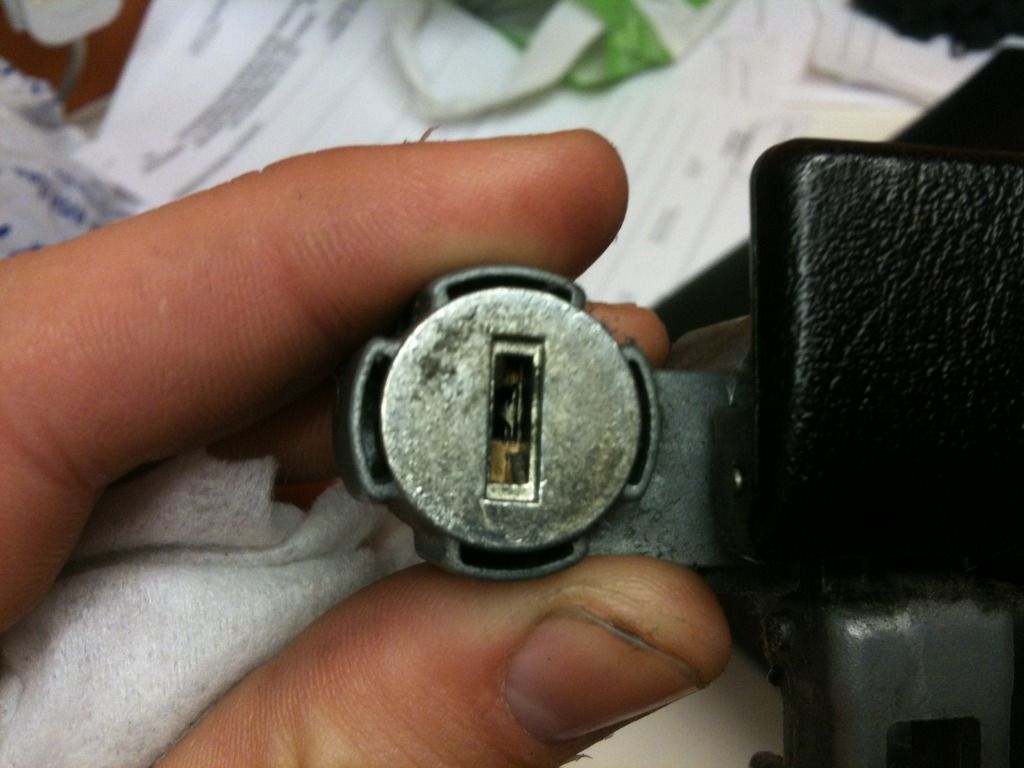
I've been having some trouble wiring up the airbag and so after asking some for some help bought this from toyota.
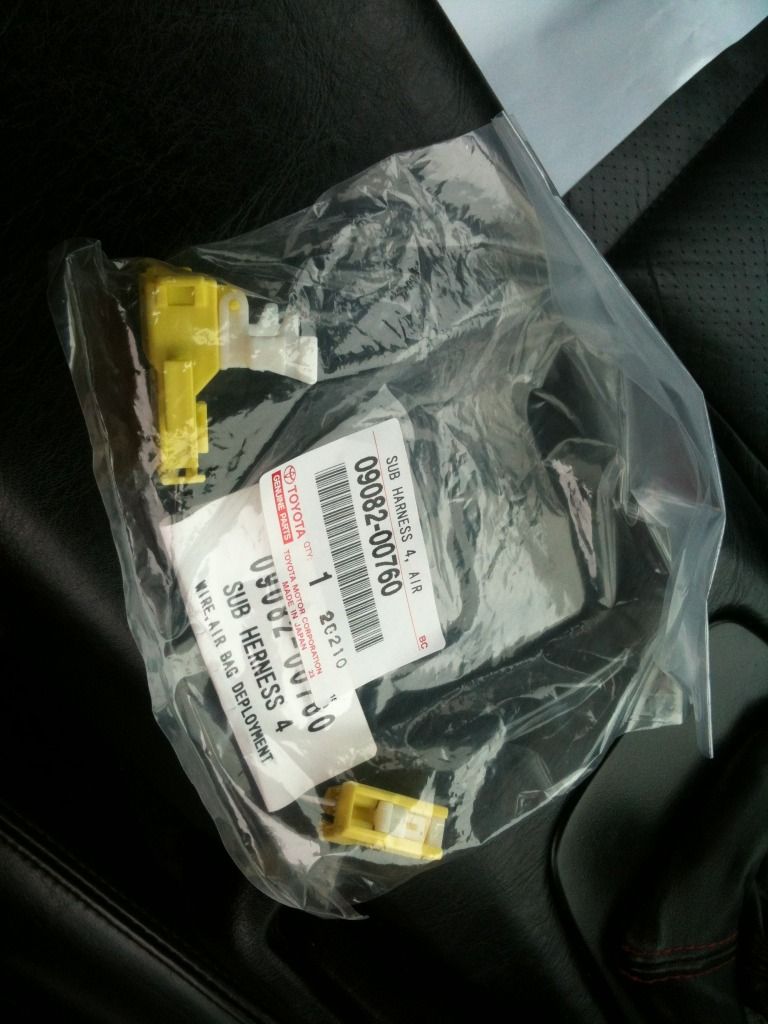
Only problem is it still doesn't work with the connection on the car! :facepalm:
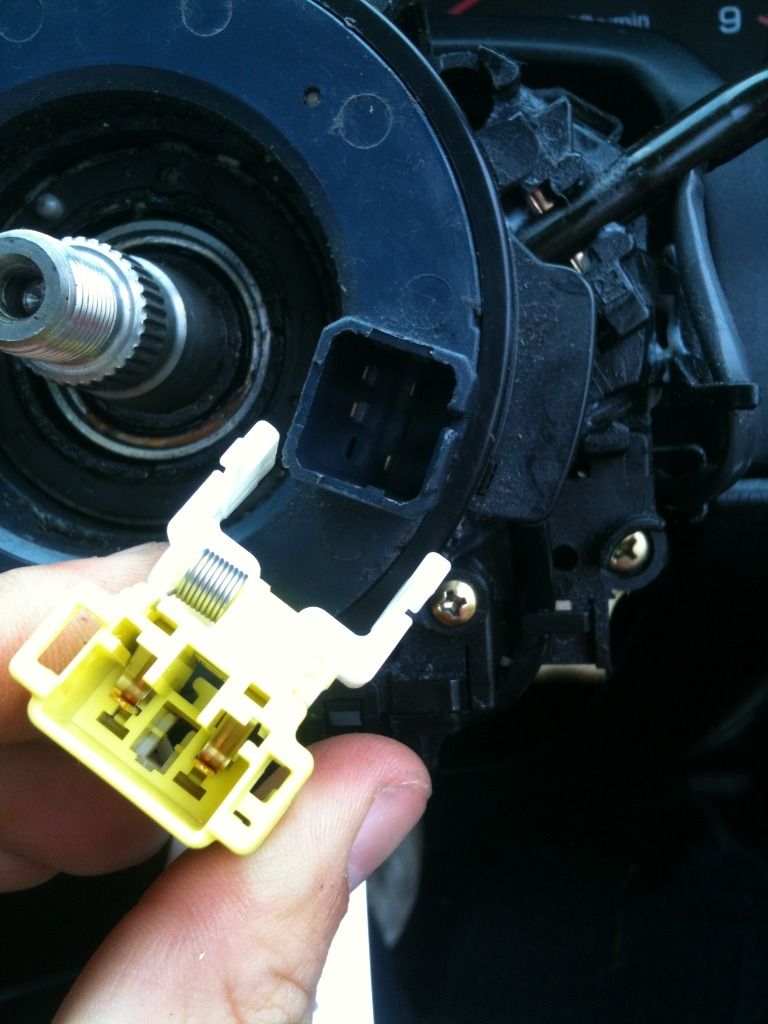
If anyone knows the solution to this, don't be shy!
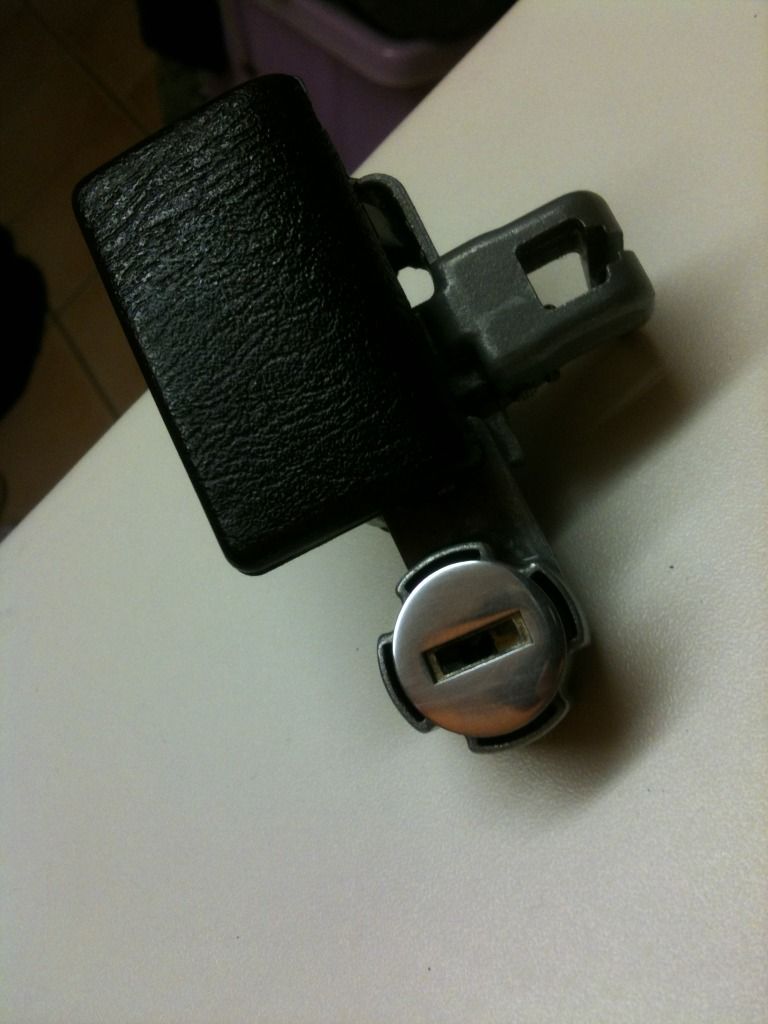
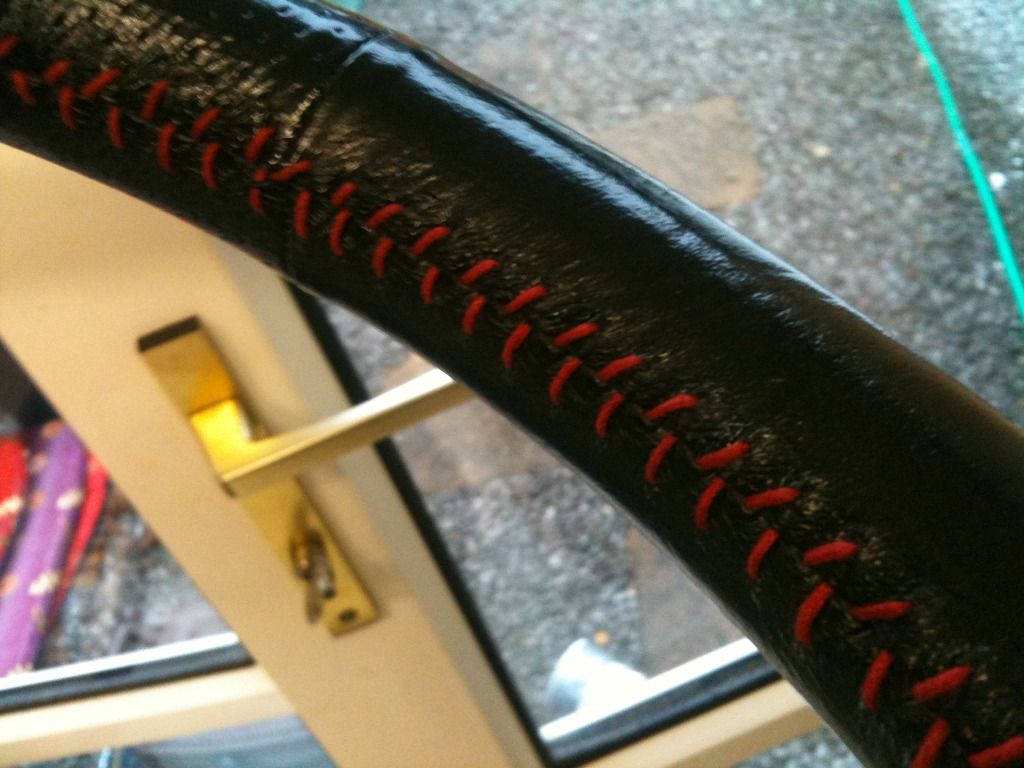
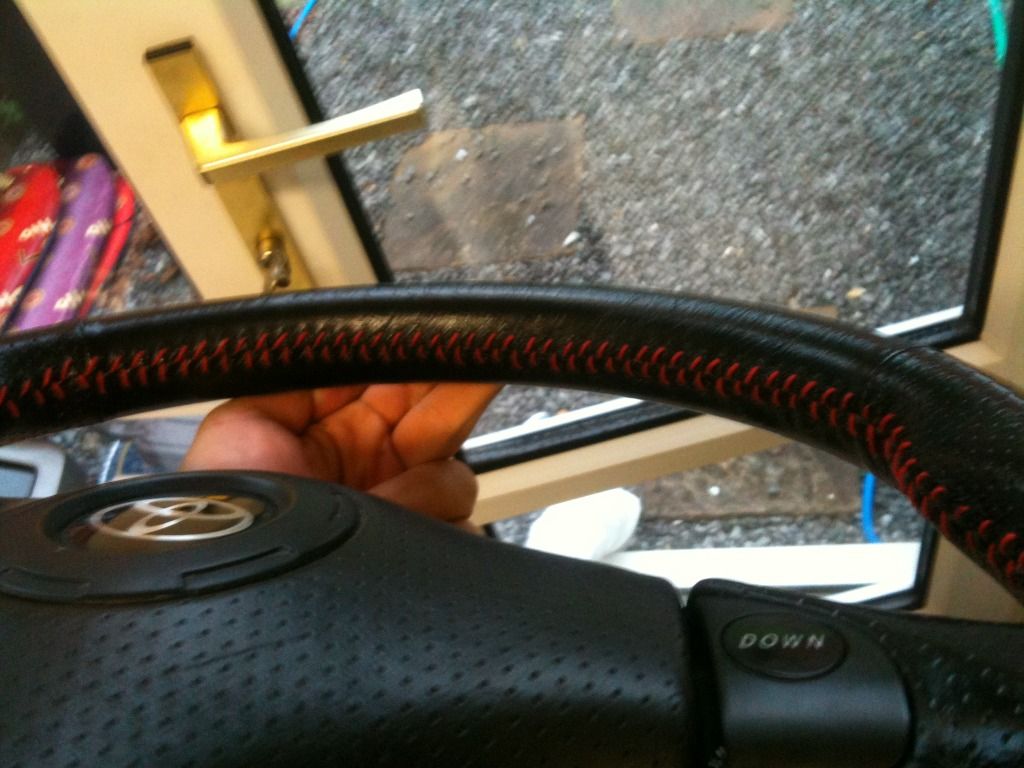
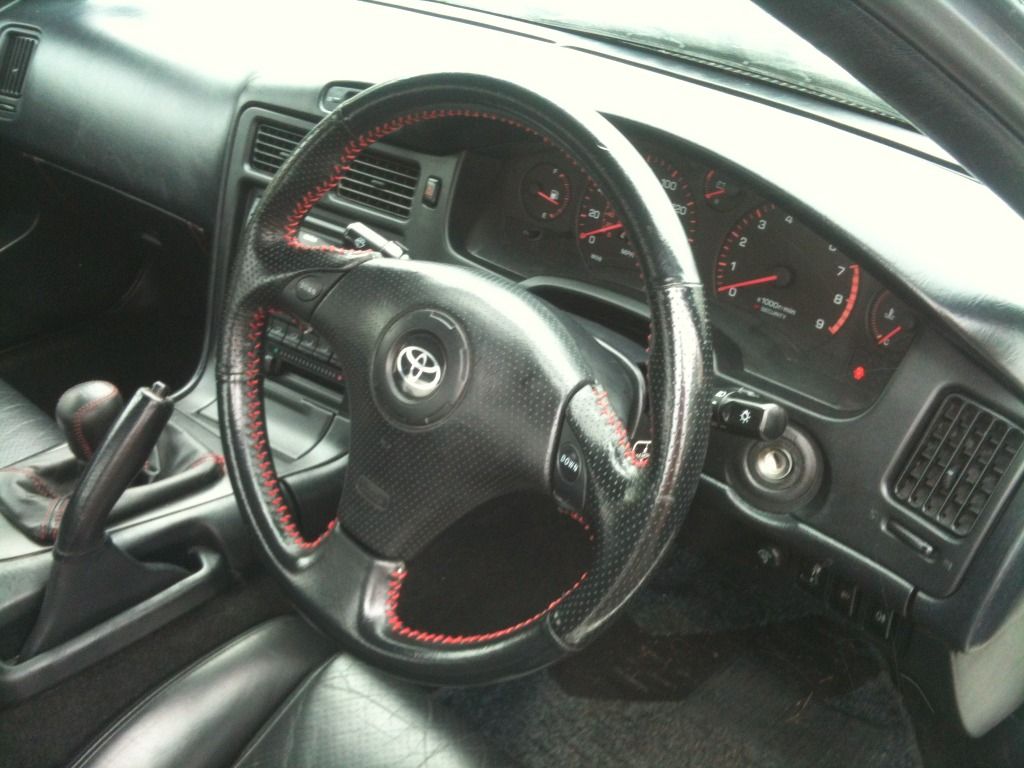
While I was out there I grabbed a pic of the wheel fitted too
 [/quote]
Becuase I was unable to connect the aribag with the parts I have I'm currently using the car without the airbag connected. If anyboy has the correct clockspring to match the plug above please pm me
I foun an ad for someone breaking a lexus on ebay and worked out a deal for these
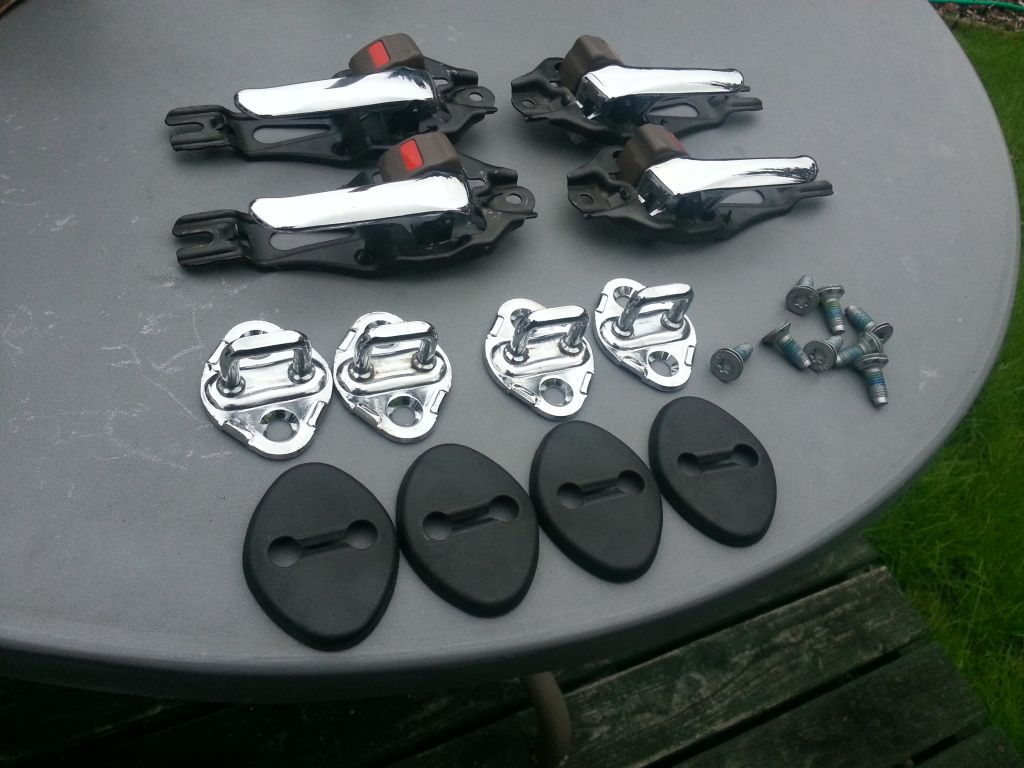
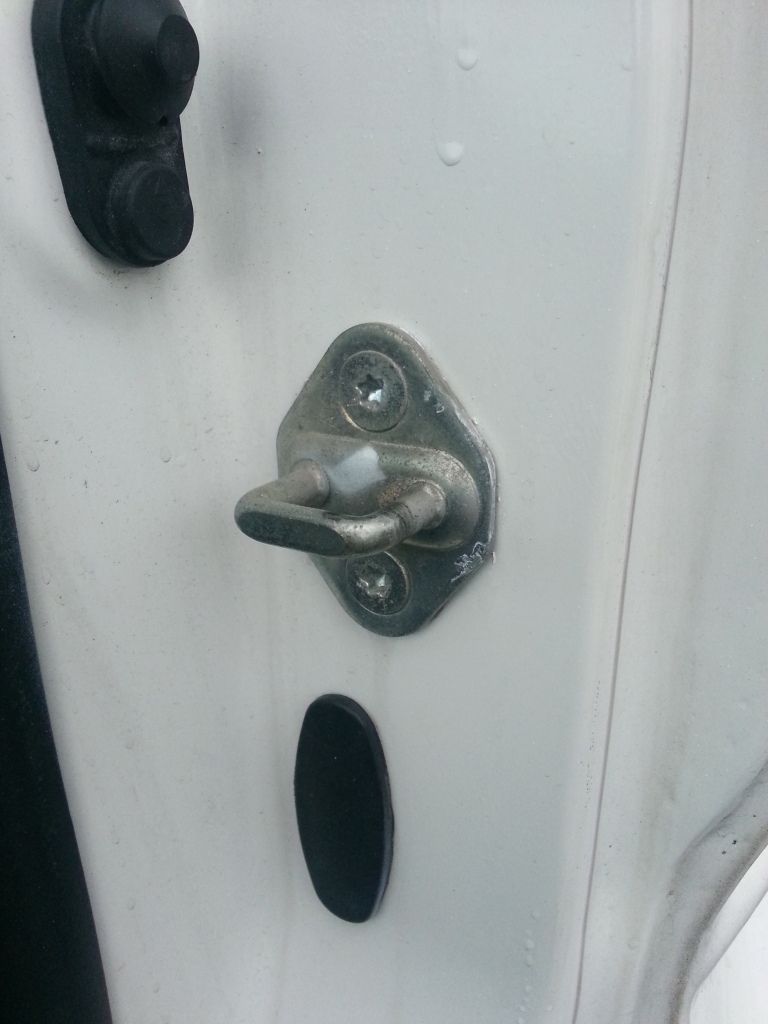
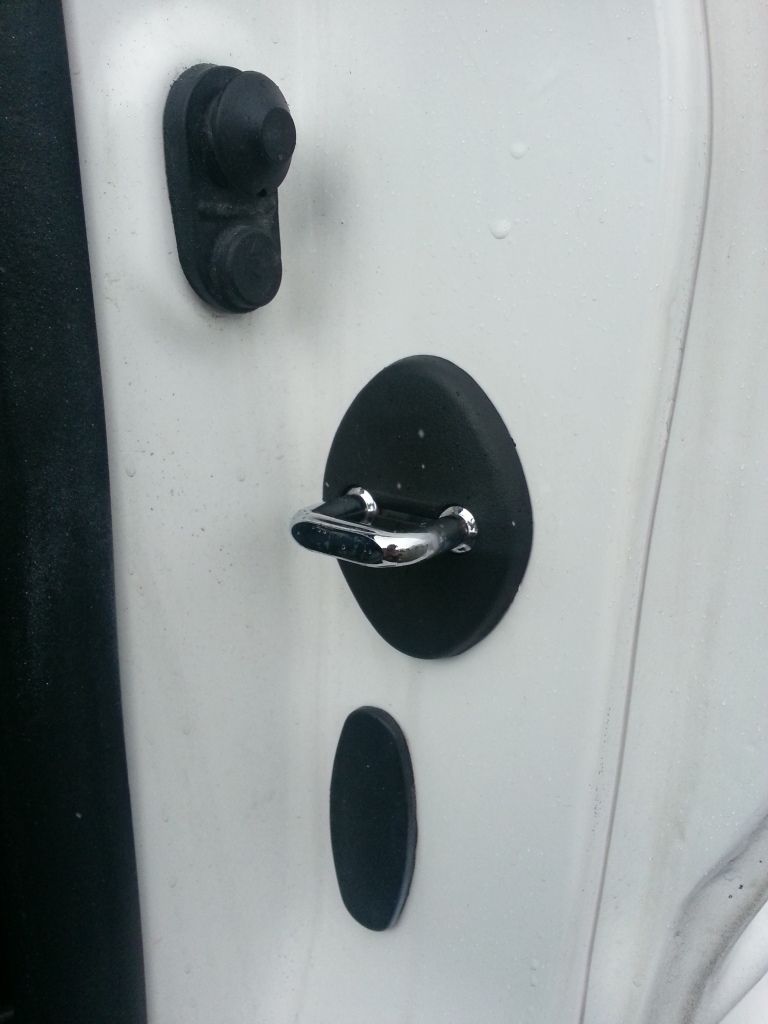
The door shuts were very simple, just unbolt the old ones and bolt on the new then slip over the platic cover
before:
after:
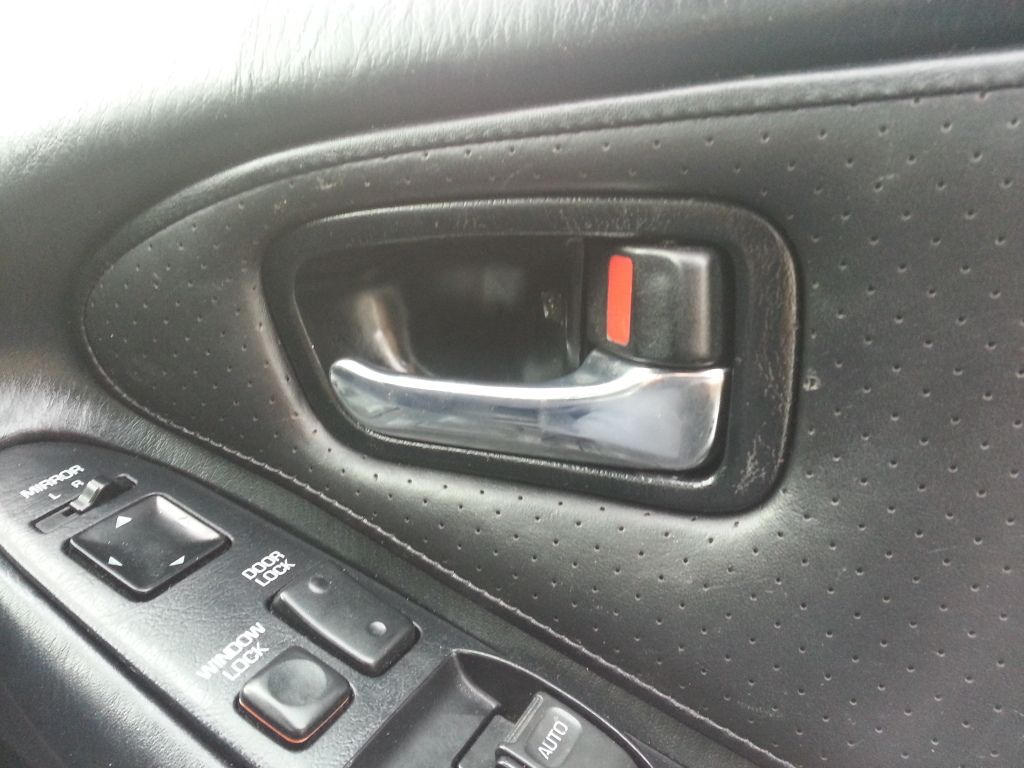
The door handles were a little trickier but a bit of fildling with a small screw driver and they look like this:

You'll notice I have two sets of the lexus bits, well I gave the other set to a friend in exchange for a rear tinting kit.
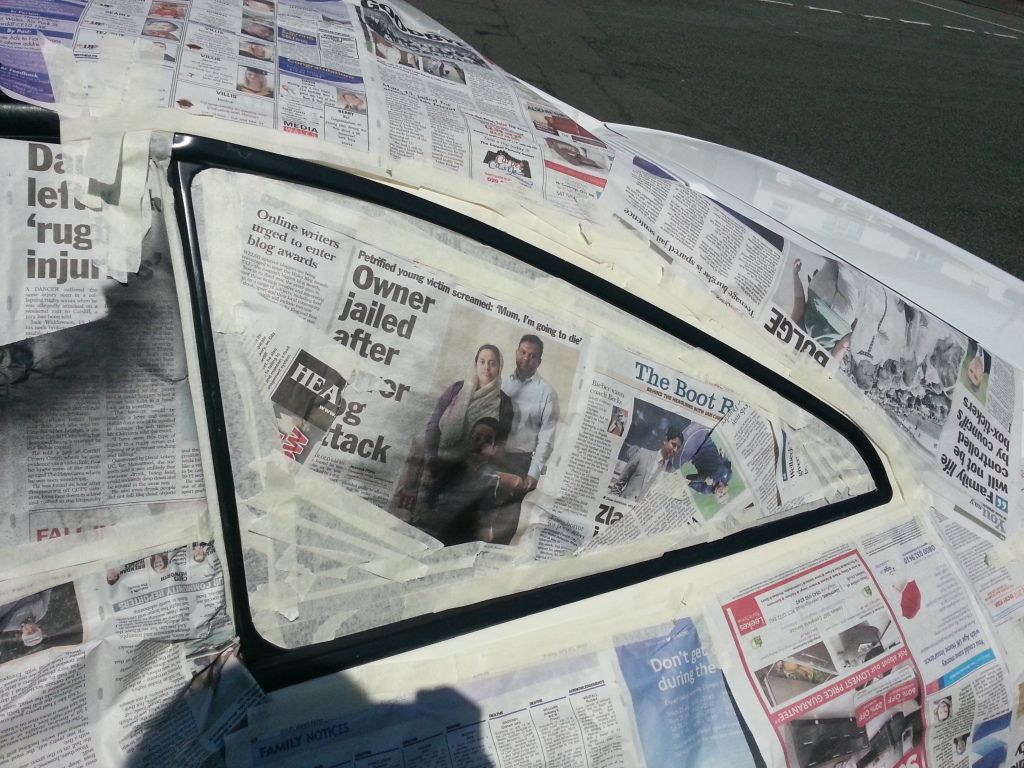
I managed to get a resonable finish on the quarters but the rear winow got the better of me. :ranting1:
At this point I'd usually replace the tint an have another crack at it but the tint on the sie windows is to light you don't even notice it there... honestly it's applied in this pic!
And finally with the recent weather being so nice I decided I'd paint the side winow surrounds. I already did the one that runs along the bottom of the side windows so proceeded with the rest :th:
There were a few marks dotted all around. Just scratches and use I guess.
I started with the trim on the t-bar glass
rubbed back
and painted
and then the rear window surround
and all done. Sorry I didnt get more pics, I think I'd lost interest in the photography side by this point
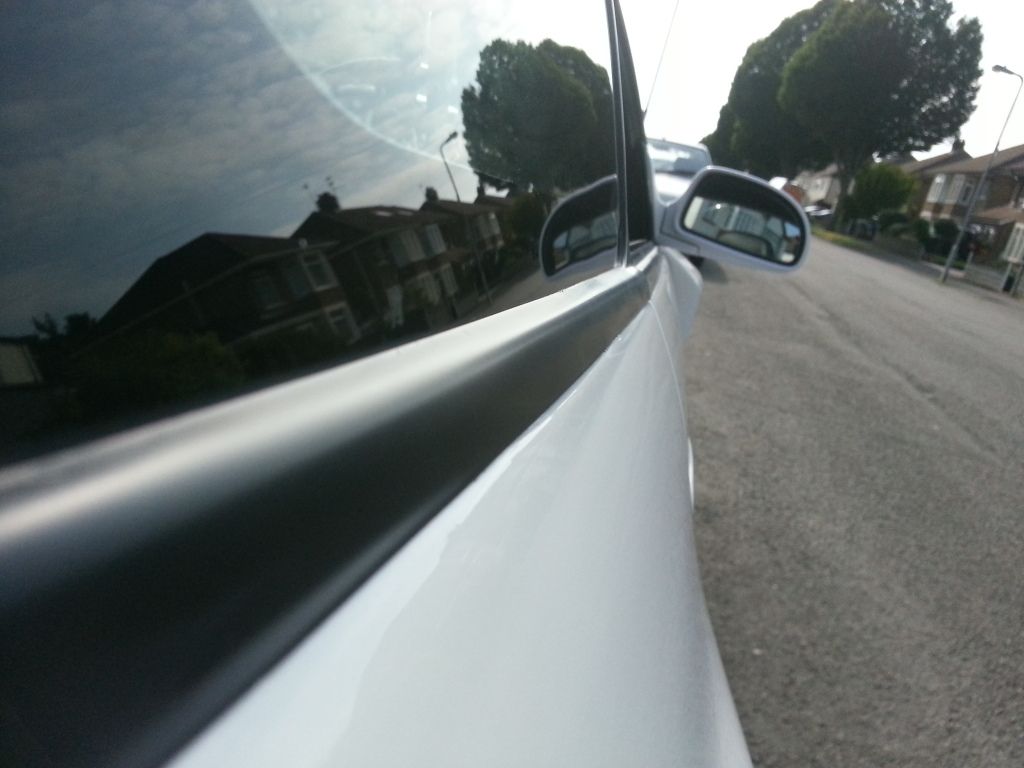
They actually look really good in person. I opted for the bumper paint at halfords to match the bits I'd already done on the bottom of the side windows. Unlike those though, the rest is usually more of a gloss finish... I juest preferred this, it looks more factory than it was from factory! 
and here we are, current day
All opions are welcome(could regret that one ) an I'll try to update a little more regularly from now on
I also got a new exhaust.
It needs a little welding so I'll be taking it in to get that done but in the meantime I'm polishing it up
heres some progress
I've barley scratched the surface with the massively time consuming job of cleaning it up but Should look good at the end
When the car was resprayed I made the error of leaving the rain tray on, must have been tired that day!
before:
after:
And on to the more intersting part.
Stitching before
my first attempt at one of the smaller section.
and the rest
I was really please with how this came out, even if I o say so myself!
I've been having some trouble wiring up the airbag and so after asking some for some help bought this from toyota.
Only problem is it still doesn't work with the connection on the car!
If anyone knows the solution to this, don't be shy!
While I was out there I grabbed a pic of the wheel fitted too
Becuase I was unable to connect the aribag with the parts I have I'm currently using the car without the airbag connected.
I foun an ad for someone breaking a lexus on ebay and worked out a deal for these
The door shuts were very simple, just unbolt the old ones and bolt on the new then slip over the platic cover
before:
after:
The door handles were a little trickier but a bit of fildling with a small screw driver and they look like this:
You'll notice I have two sets of the lexus bits, well I gave the other set to a friend in exchange for a rear tinting kit.
I managed to get a resonable finish on the quarters but the rear winow got the better of me.
At this point I'd usually replace the tint an have another crack at it but the tint on the sie windows is to light you don't even notice it there.
And finally with the recent weather being so nice I decided I'd paint the side winow surrounds.
There were a few marks dotted all around.
I started with the trim on the t-bar glass
rubbed back
and painted
and then the rear window surround
and all done.
They actually look really good in person.
and here we are, current day
All opions are welcome
-
slipping clutch
- Posts: 1844
- Joined: Sun Jan 30, 2005 1:22 pm
Re: Jacks' TRD rev5
Good update on this car Jack- as you know I've followed your build from day one and was starting to think that you had stopped work on it. How wrong was I ??????
Nice work, great car,keep up the hard work- your attention to detail really shows.
Nice work, great car,keep up the hard work
Re: Jacks' TRD rev5
Looking good :-)
That halfords bumper paint is great and is really handy for interior plastics too
That halfords bumper paint is great and is really handy for interior plastics too
Re: Jacks' TRD rev5
Very nice mate, cracking car. I did exactly the same as you on my lights. Surrounds had faded big time, and the tint spray brings them back looking as they should.
Very time consuming masking them up though!
Very time consuming masking them up though!
-
Magic Beans
- Posts: 4789
- Joined: Thu Nov 24, 2011 1:01 pm
Re: Jacks' TRD rev5
Great work Jack, the car's looking really good
You and Karl are a bad influence on each other
You and Karl are a bad influence on each other
Re: Jacks' TRD rev5
looks excelent! glas someones elses car is getting alot of time/effort/money spent on it!
-
KarlBristol
- Posts: 2962
- Joined: Fri Aug 02, 2013 2:08 am
- Location: Bristol
Re: Jacks' TRD rev5
Magic Beans wrote:Great work Jack, the car's looking really good
You and Karl are a bad influence on each other
Looking good mate
Still a massive fan of your re-stitched steering wheel
http://www.imoc.co.uk/forums/viewtopic.php?t=176156