My Rev3 total refresh project

Create a post with details about your car.

Moderators: IMOC Moderators, IMOC Committee Members

jem
Posts: 375
Joined: Fri Apr 21, 2006 11:31 pm
Location: Wisbech, Cambridgeshire

Re: My Rev3 total refresh project

Post by jem »

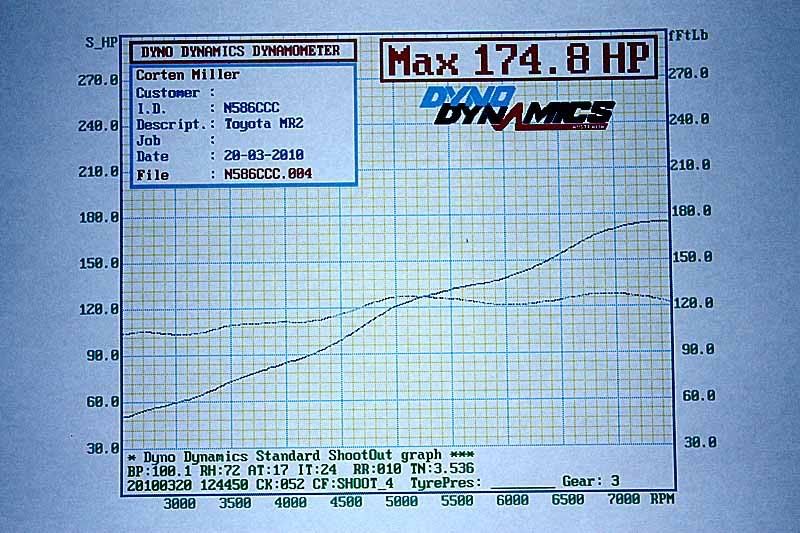
Took the car to a dyno a couple of weeks ago and was pleased with the result :mrgreen:

Image


Been off work this week, so had a chance to get some bits done.

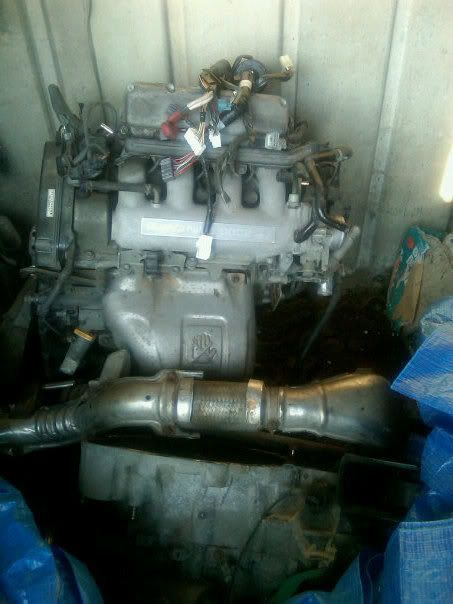
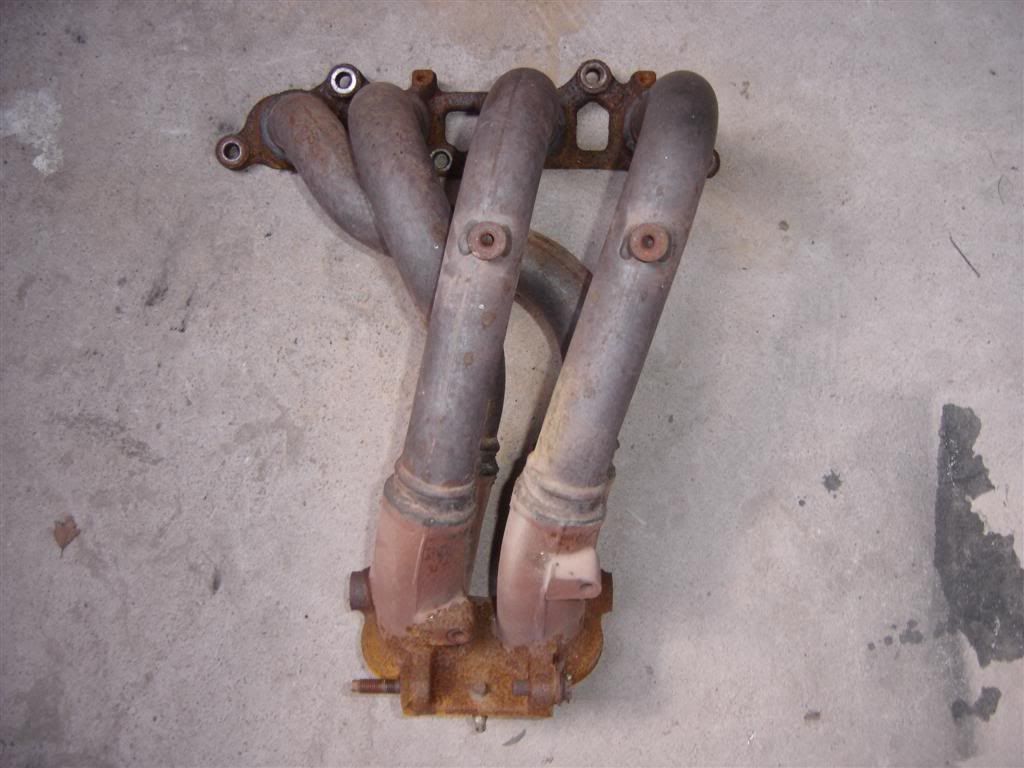
Firstly I've replaced the exhaust manifold as two of the three downpipe studs were missing. One of the stud holes did have enough thread to hold a bolt, but the other one as missing totally. It wasn't blowing, but I wanted it to be right, so I got hold of a used manifold, fitted new studs and also tidied the gas flow into the manifold at the head end with a dremel (there was a slight lip at the end of the tubular pipe inside the cast flange). I was considering getting a stainless manifold made, until I saw the standard one. Ok it's not stainless, but I doubt I could better it performance wise, it's a really nicely designed manifold. I also changed the downpipe because mine had a small hole in it that was sealed with exhaust paste and a tango can :D So now the exhaust is all sealed and sorted:)

Image

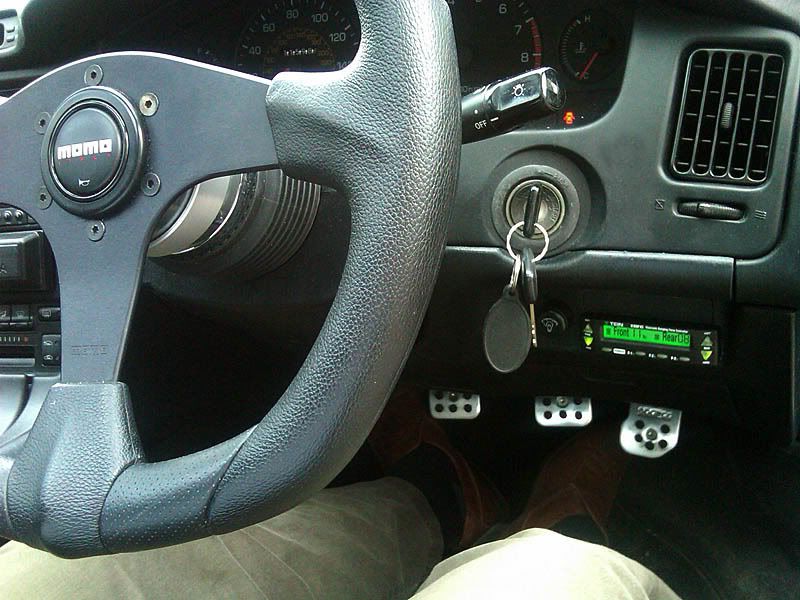
Then came the fun bit of fitting the TEIN EDFC wish has been sitting in a box since November! Part of the reason, other than finding the time, I hadn't fitted it was because I couldn't decide where to but the control box. I'm a fussy fecker, and didn't want it obviously on display such as on the dash, but I didn't want it hidden away out of easy reach. I also wanted it to look as factory fitted as possible. I couldn't put it in the unused half of the double din hole, as I have a double din satnav/dvd. 
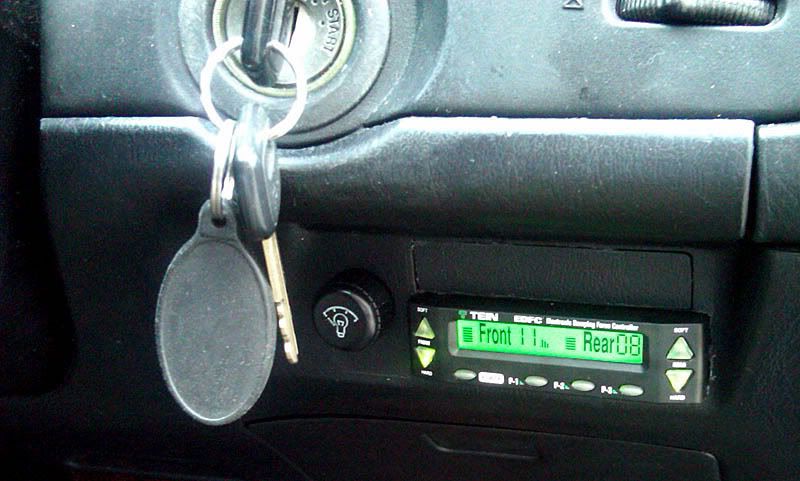
So with a bit of thought, I removed the foglight switches and the headlamp height control, cut the three switch holes into a hole big enough to accept the EDFC and made a blanking plate to cover the hole left at the top. Then with the aid of some metal strips and hotglue, held the EDFC in place.

Wiring was easy, with an unused grommet in the front firewall, and one either side in the rear into the engine bay :)

My missus has already told me off for playing with it because the noise the motors make is cool :oops:

Image

Image

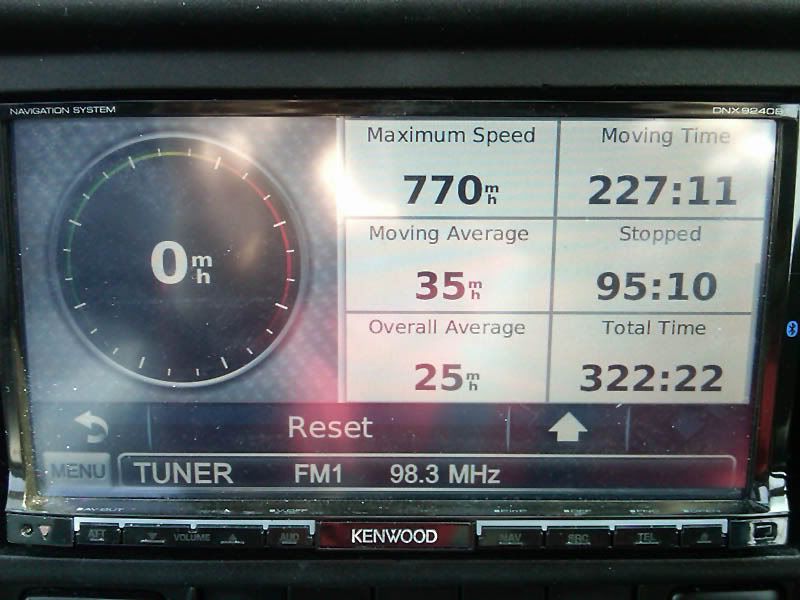
Also somehow I achieved 770mph according to the Satnav :shock:

Image
Mike 'MR2' McHugh
Posts: 3426
Joined: Wed Dec 15, 2004 1:53 am
Location: Warwickshire

Re: My Rev3 total refresh project

Post by Mike 'MR2' McHugh »

Thats one quick Na !!! Nice.....what does the Tein thing do ? ....and im sure i have those shoes :thumleft:
It goes..Uhn tiss Uhn tiss Uhn tiss
jem
Posts: 375
Joined: Fri Apr 21, 2006 11:31 pm
Location: Wisbech, Cambridgeshire

Re: My Rev3 total refresh project

Post by jem »

It adjusts the suspension damping at the touch of a button :thumleft:
jem
Posts: 375
Joined: Fri Apr 21, 2006 11:31 pm
Location: Wisbech, Cambridgeshire

Re: My Rev3 total refresh project

Post by jem »

It got a clean today, so some shameless picture whoring

Excuse the crappy phone pics:

Image

Image

Image :mrgreen:
jem
Posts: 375
Joined: Fri Apr 21, 2006 11:31 pm
Location: Wisbech, Cambridgeshire

Re: My Rev3 total refresh project

Post by jem »

Next job is the quad stop/tail light mod :thumleft:
reddev1ll09
Posts: 833
Joined: Sat Dec 12, 2009 2:59 am
Location: Scotland

Re: My Rev3 total refresh project

Post by reddev1ll09 »

Looking very nice indeed m8 =P~

I think a nice set of c/f side ducts would look lovely on your 2 :-k

CarBren Fibre Creations ones...

Image

RobBrookes ones...

Image

My 2p worth :lol:
Image
jem
Posts: 375
Joined: Fri Apr 21, 2006 11:31 pm
Location: Wisbech, Cambridgeshire

Re: My Rev3 total refresh project

Post by jem »

I have to admit, I've been considering the CarBen Fibre Creations ones.
reddev1ll09
Posts: 833
Joined: Sat Dec 12, 2009 2:59 am
Location: Scotland

Re: My Rev3 total refresh project

Post by reddev1ll09 »

There will be another group buy stating soon for them :thumleft:

I personally can vouch for his set, as i was the one who set up the GB for them & recieved my set last week....very nice indeed =P~
Image
jem
Posts: 375
Joined: Fri Apr 21, 2006 11:31 pm
Location: Wisbech, Cambridgeshire

Re: My Rev3 total refresh project

Post by jem »

I'll keep an eye out :thumleft:
jem
Posts: 375
Joined: Fri Apr 21, 2006 11:31 pm
Location: Wisbech, Cambridgeshire

Re: My Rev3 total refresh project

Post by jem »

I couldn't wait, just ordered a pair :thumleft:
reddev1ll09
Posts: 833
Joined: Sat Dec 12, 2009 2:59 am
Location: Scotland

Re: My Rev3 total refresh project

Post by reddev1ll09 »

:lol:

you wont be disappointed they are ace =P~ & will look lovely on your 2
Image
jem
Posts: 375
Joined: Fri Apr 21, 2006 11:31 pm
Location: Wisbech, Cambridgeshire

Re: My Rev3 total refresh project

Post by jem »

And they're on :mrgreen:

The quality is just stunning!

Image

Image
jem
Posts: 375
Joined: Fri Apr 21, 2006 11:31 pm
Location: Wisbech, Cambridgeshire

Re: My Rev3 total refresh project

Post by jem »

This is how my car looked at 1pm today :shock:

Image

Image

Image

Image
jem
Posts: 375
Joined: Fri Apr 21, 2006 11:31 pm
Location: Wisbech, Cambridgeshire

Re: My Rev3 total refresh project

Post by jem »

More from today:

Image

Image

Image
toxo
IMOC Committee
Posts: 11345
Joined: Tue May 30, 2006 5:41 pm
Location: The Toast Aisle
Contact:

Re: My Rev3 total refresh project

Post by toxo »

Blimey! It was already clean enough to put mine to shame, and I get quite a lot of comments about my paintwork!
IMOC-UK - the only club to win 'Best Club Stand' at JAE more than once, and twice in a row!
jem
Posts: 375
Joined: Fri Apr 21, 2006 11:31 pm
Location: Wisbech, Cambridgeshire

Re: My Rev3 total refresh project

Post by jem »

I am very picky about my paint :)
jem
Posts: 375
Joined: Fri Apr 21, 2006 11:31 pm
Location: Wisbech, Cambridgeshire

Re: My Rev3 total refresh project

Post by jem »

Nearly finished :mrgreen:

Image

Image

Image

Image
jem
Posts: 375
Joined: Fri Apr 21, 2006 11:31 pm
Location: Wisbech, Cambridgeshire

Re: My Rev3 total refresh project

Post by jem »

Drove a total of 400 miles today to pick this up (thanks James) :thumleft:

Engine, ECU, flywheel, gearbox and driveshafts, and only done 35k miles :thumleft:

There is nothing at all wrong with the engine in mine, it's still making 175bhp, but it has done 120k.

I plan on taking the head off, port matching and flowing it, maybe a skim to raise the compression and some higher lift/duration cams, then rebuilding with new oil seals, cambelt and tensioners and clutch. Then dropping it in :thumleft:

I can then use my old inlet manifold to fabricate my Independent Throttle Body idea :D

Image
jem
Posts: 375
Joined: Fri Apr 21, 2006 11:31 pm
Location: Wisbech, Cambridgeshire

Re: My Rev3 total refresh project

Post by jem »

It's back from the bodyshop :thumleft:

Changed a few bits too, had the side moulding painted the same colour as the wheels, and changed the front indicators and side repeaters to black smoked ones.

Not taking any proper pictures until the Carbon fibre spoiler is fitted.

Image
jem
Posts: 375
Joined: Fri Apr 21, 2006 11:31 pm
Location: Wisbech, Cambridgeshire

Re: My Rev3 total refresh project

Post by jem »

The new spoiler arrived today, Rev5 with carbon blade and side plates :mrgreen:

Image
Post Reply

Return to “Member Profiles”